

前言:在前面初步了解GLKitx的相关原理,今天利用GLK实现正方体旋转动画。
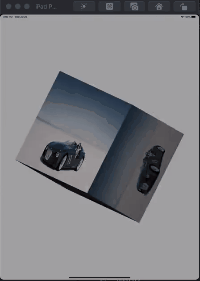
先看下效果
Step Frist
在ViewController导入GLKit库
#import "CharlesCubImageViewController.h"
#import <GLKit/GLKit.h>
Step second
- 定义一个包括顶点坐标、纹理坐标、法线的结构体及设置顶点数
typedef struct {
    GLKVector3 positionCoord;   //顶点坐标
    GLKVector2 textureCoord;    //纹理坐标
    GLKVector3 normal;          //法线
} CharlesVertex;

// 设置顶点数static NSInteger const kCoordCount = 36;遵循GLK代理:GLKViewDelegate
Step third
- 设置相关属性
@property (nonatomic, strong) GLKView *glkView;

@property (nonatomic, strong) GLKBaseEffect *baseEffect;

/*顶点*/
@property (nonatomic, assign) CharlesVertex *vertices;

/*定时器*/
@property (nonatomic, strong) CADisplayLink *displayLink;

@property (nonatomic, assign) NSInteger angle;

@property (nonatomic, assign) GLuint vertexBuffer;
Step fourth
- OpenGL ES 相关初始化
- (void)openglesCommonInit{

    //1.创建context
     EAGLContext *context = [[EAGLContext alloc] initWithAPI:kEAGLRenderingAPIOpenGLES2];
    //设置当前context
    [EAGLContext setCurrentContext:context];

    //2.创建GLKView并设置代理
    CGRect frame = CGRectMake(0, 170, self.view.frame.size.width, self.view.frame.size.width);
    self.glkView = [[GLKView alloc] initWithFrame:frame context:context];
    self.glkView.backgroundColor = [UIColor clearColor];
    self.glkView.delegate = self;

    //3.使用深度缓存
    self.glkView.drawableDepthFormat = GLKViewDrawableDepthFormat24;
    //默认是(0, 1),这里用于翻转 z 轴,使正方形朝屏幕外
    glDepthRangef(1, 0);

    //4.将GLKView 添加self.view 上
    [self.view addSubview:self.glkView];

    //5.获取纹理图片
    NSString *imagePath = [[[NSBundle mainBundle] resourcePath] stringByAppendingPathComponent:@"car.jpg"];
    UIImage *image = [UIImage imageWithContentsOfFile:imagePath];

    //6.设置纹理参数
    NSDictionary *options = @{GLKTextureLoaderOriginBottomLeft : @(YES)};
    GLKTextureInfo *textureInfo = [GLKTextureLoader textureWithCGImage:[image CGImage]
                                                               options:options
                                                                 error:NULL];
    //7.使用baseEffect
    self.baseEffect = [[GLKBaseEffect alloc] init];
    self.baseEffect.texture2d0.name = textureInfo.name;
    self.baseEffect.texture2d0.target = textureInfo.target;
    //开启光照效果
    self.baseEffect.light0.enabled = YES;
    //漫反射颜色
    self.baseEffect.light0.diffuseColor = GLKVector4Make(1, 1, 1, 1);
    //光源位置
    self.baseEffect.light0.position = GLKVector4Make(-0.5, -0.5, 5, 1);

    /*
     这里我们不复用顶点,使用每 3 个点画一个三角形的方式,需要 12 个三角形,则需要 36 个顶点
     以下的数据用来绘制以(0,0,0)为中心,边长为 1 的立方体
     */

    //8. 开辟顶点数据空间(数据结构SenceVertex 大小 * 顶点个数kCoordCount)
    self.vertices = malloc(sizeof(CharlesVertex) * kCoordCount);

    // 前面
    self.vertices[0] = (CharlesVertex){{-0.5, 0.5, 0.5}, {0, 1}, {0, 0, 1}};
    self.vertices[1] = (CharlesVertex){{-0.5, -0.5, 0.5}, {0, 0}, {0, 0, 1}};
    self.vertices[2] = (CharlesVertex){{0.5, 0.5, 0.5}, {1, 1}, {0, 0, 1}};
    self.vertices[3] = (CharlesVertex){{-0.5, -0.5, 0.5}, {0, 0}, {0, 0, 1}};
    self.vertices[4] = (CharlesVertex){{0.5, 0.5, 0.5}, {1, 1}, {0, 0, 1}};
    self.vertices[5] = (CharlesVertex){{0.5, -0.5, 0.5}, {1, 0}, {0, 0, 1}};

    // 上面
    self.vertices[6] = (CharlesVertex){{0.5, 0.5, 0.5}, {1, 1}, {0, 1, 0}};
    self.vertices[7] = (CharlesVertex){{-0.5, 0.5, 0.5}, {0, 1}, {0, 1, 0}};
    self.vertices[8] = (CharlesVertex){{0.5, 0.5, -0.5}, {1, 0}, {0, 1, 0}};
    self.vertices[9] = (CharlesVertex){{-0.5, 0.5, 0.5}, {0, 1}, {0, 1, 0}};
    self.vertices[10] = (CharlesVertex){{0.5, 0.5, -0.5}, {1, 0}, {0, 1, 0}};
    self.vertices[11] = (CharlesVertex){{-0.5, 0.5, -0.5}, {0, 0}, {0, 1, 0}};

    // 下面
    self.vertices[12] = (CharlesVertex){{0.5, -0.5, 0.5}, {1, 1}, {0, -1, 0}};
    self.vertices[13] = (CharlesVertex){{-0.5, -0.5, 0.5}, {0, 1}, {0, -1, 0}};
    self.vertices[14] = (CharlesVertex){{0.5, -0.5, -0.5}, {1, 0}, {0, -1, 0}};
    self.vertices[15] = (CharlesVertex){{-0.5, -0.5, 0.5}, {0, 1}, {0, -1, 0}};
    self.vertices[16] = (CharlesVertex){{0.5, -0.5, -0.5}, {1, 0}, {0, -1, 0}};
    self.vertices[17] = (CharlesVertex){{-0.5, -0.5, -0.5}, {0, 0}, {0, -1, 0}};

    // 左面
    self.vertices[18] = (CharlesVertex){{-0.5, 0.5, 0.5}, {1, 1}, {-1, 0, 0}};
    self.vertices[19] = (CharlesVertex){{-0.5, -0.5, 0.5}, {0, 1}, {-1, 0, 0}};
    self.vertices[20] = (CharlesVertex){{-0.5, 0.5, -0.5}, {1, 0}, {-1, 0, 0}};
    self.vertices[21] = (CharlesVertex){{-0.5, -0.5, 0.5}, {0, 1}, {-1, 0, 0}};
    self.vertices[22] = (CharlesVertex){{-0.5, 0.5, -0.5}, {1, 0}, {-1, 0, 0}};
    self.vertices[23] = (CharlesVertex){{-0.5, -0.5, -0.5}, {0, 0}, {-1, 0, 0}};

    // 右面
    self.vertices[24] = (CharlesVertex){{0.5, 0.5, 0.5}, {1, 1}, {1, 0, 0}};
    self.vertices[25] = (CharlesVertex){{0.5, -0.5, 0.5}, {0, 1}, {1, 0, 0}};
    self.vertices[26] = (CharlesVertex){{0.5, 0.5, -0.5}, {1, 0}, {1, 0, 0}};
    self.vertices[27] = (CharlesVertex){{0.5, -0.5, 0.5}, {0, 1}, {1, 0, 0}};
    self.vertices[28] = (CharlesVertex){{0.5, 0.5, -0.5}, {1, 0}, {1, 0, 0}};
    self.vertices[29] = (CharlesVertex){{0.5, -0.5, -0.5}, {0, 0}, {1, 0, 0}};

    // 后面
    self.vertices[30] = (CharlesVertex){{-0.5, 0.5, -0.5}, {0, 1}, {0, 0, -1}};
    self.vertices[31] = (CharlesVertex){{-0.5, -0.5, -0.5}, {0, 0}, {0, 0, -1}};
    self.vertices[32] = (CharlesVertex){{0.5, 0.5, -0.5}, {1, 1}, {0, 0, -1}};
    self.vertices[33] = (CharlesVertex){{-0.5, -0.5, -0.5}, {0, 0}, {0, 0, -1}};
    self.vertices[34] = (CharlesVertex){{0.5, 0.5, -0.5}, {1, 1}, {0, 0, -1}};
    self.vertices[35] = (CharlesVertex){{0.5, -0.5, -0.5}, {1, 0}, {0, 0, -1}};

    //开辟顶点缓存区
    glGenBuffers(1, &_vertexBuffer);
    glBindBuffer(GL_ARRAY_BUFFER, _vertexBuffer);
    GLsizeiptr bufferSizeBytes = sizeof(CharlesVertex) * kCoordCount;
    glBufferData(GL_ARRAY_BUFFER, bufferSizeBytes, self.vertices, GL_STATIC_DRAW);

    //顶点数据
    glEnableVertexAttribArray(GLKVertexAttribPosition);
    glVertexAttribPointer(GLKVertexAttribPosition, 3, GL_FLOAT, GL_FALSE, sizeof(CharlesVertex), NULL + offsetof(CharlesVertex, positionCoord));

    //纹理数据
    glEnableVertexAttribArray(GLKVertexAttribTexCoord0);
    glVertexAttribPointer(GLKVertexAttribTexCoord0, 2, GL_FLOAT, GL_FALSE, sizeof(CharlesVertex), NULL + offsetof(CharlesVertex, textureCoord));

    //法线数据
    glEnableVertexAttribArray(GLKVertexAttribNormal);
    glVertexAttribPointer(GLKVertexAttribNormal, 3, GL_FLOAT, GL_FALSE, sizeof(CharlesVertex), NULL + offsetof(CharlesVertex, normal));

}

#pragma mark - GLKViewDelegate
- (void)glkView:(GLKView *)view drawInRect:(CGRect)rect {

    //1.开启深度测试
    glEnable(GL_DEPTH_TEST);
    //2.清除颜色缓存区&深度缓存区
    glClear(GL_COLOR_BUFFER_BIT | GL_DEPTH_BUFFER_BIT);
    //3.准备绘制
    [self.baseEffect prepareToDraw];
    //4.绘图
    glDrawArrays(GL_TRIANGLES, 0, kCoordCount);

}
Step Fiveth
添加定时器CADisplayLink
-(void)addCADisplayLink{
   //CADisplayLink 类似定时器,提供一个周期性调用.属于QuartzCore.framework中.
    //具体可以参考该博客 https://www.cnblogs.com/panyangjun/p/4421904.html
    self.angle = 0;
    self.displayLink = [CADisplayLink displayLinkWithTarget:self selector:@selector(update)];
    [self.displayLink addToRunLoop:[NSRunLoop mainRunLoop] forMode:NSRunLoopCommonModes];
}

#pragma mark - 旋转角度计算
- (void)update {

    //1.计算旋转度数
    self.angle = (self.angle + 5) % 360;
    //2.修改baseEffect.transform.modelviewMatrix
    self.baseEffect.transform.modelviewMatrix = GLKMatrix4MakeRotation(GLKMathDegreesToRadians(self.angle), 0.3, 1, 0.7);
    //3.重新渲染
    [self.glkView display];
}
Step Sixth
在viewDidLoad调用
- (void)viewDidLoad {
    [super viewDidLoad];
    //View背景色
    self.view.backgroundColor = [UIColor lightGrayColor];

    //2. OpenGL ES 相关初始化
    [self openglesCommonInit];

    //3. 添加CADisplayLink
    [self addCADisplayLink];

}
Demo地址
