

百分比很好理解,就是摆放的 view 占父 view 宽的百分之几,高占父 view 的百分之几。假定父 view 的宽高跟屏幕大小一致,比如 1080 * 1920 分辨率的手机屏幕, 有一个子 view 的高占屏幕高的50% ,即 1920 * 0.5 = 960px, 宽占屏幕宽的30%,即 1080 * 0.3 = 324px。
什么场景下会使用
笔者在开发中曾经遇到设计师将一张图片作为背景,在背景图片上某些位置需要摆放控件,又不能写死,因为控件内容会改变。这种恶心的布局如果通过写死 dp, 基本上适配其他机型绝对 gg。所以这种场景就非常适合用百分比适配。其思想也是非常简单,首先我们必须保证背景图片的缩放比例一定不能改变,然后得到每个摆放控件与图片背景的比例,这样我们就可以通过计算得出。那如果改变了缩放比例会怎样? 答案就是再怎么计算都没*用。
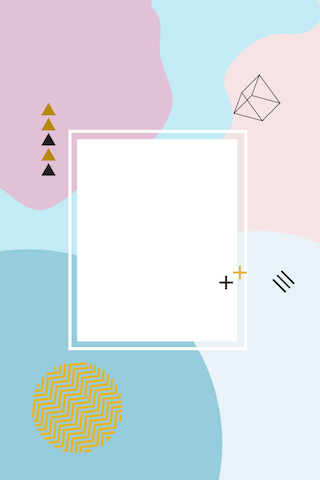
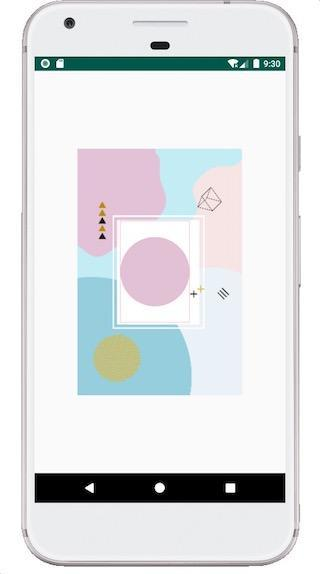
举个例子,现在我们看下如下背景图片,如果现在告诉你需要在白色的填写内容,注意:白色区域并非在布局居中对齐,并且内部还有 “+” 符号,要求如图 1-2 所示,我们只在可编辑区域(填充粉红色的区域)填写内容。

适配计算
首先需要找到可编辑区域在原图(即背景图)的到左上角的绝对位置,由于这张背景图从网上找来的,因此它的点是我通过尺子测量而来。这里大致测量得到: mOldLeft = 282; mOldTop = 476; mOldRight = 736; mOldBottom = 1140; mOldWidth = 1080; mOldHeight = 1619; 这几个值依次是左上右下以及宽高的值。得到这几个值后那就很简单了,我们只需要在不同设备的设备上,按着比例缩放图片,然后根据公式: mOldLeft / mOldWidth = mLleft / mBitmapWidth。 其中 mBitmapWidth 为缩放后的图片宽度, mLleft 为所求真实屏幕的left 的值。其代码如下:
private Bitmap mBackgroundImage;

    /**
     *  背景图片的宽度
     */
    private int mBitmapWidth;

    /**
     * 背景图片的高度
     */
    private int mBitmapHeight;

    /**
     *  原始图片,白色输入框在原图的绝对位置
     */
    private int mOldTop = 476;

    /**
     *  原始图片,白色输入框在原图的绝对位置
     */
    private int mOldLeft = 282;

    /**
     *  原始图片,白色输入框在原图的绝对位置
     */
    private int mOldRight = 736;

    /**
     *  原始图片,白色输入框在原图的绝对位置
     */
    private int mOldBottom = 1140;

    /**
     *  原始图片的宽
     */
    private int mOldWidth = 1080;

    /**
     *  原始图片的高
     */
    private int mOldHeight = 1619;

    private int mleft;

    private int mTop;

    private int mRight;

    private int mBottom;

    private Paint mPaint;

    public PercentView(Context context) {
        this(context, null);
    }

    public PercentView(Context context, AttributeSet attrs) {
        this(context, attrs, 0);
    }

    public PercentView(Context context, AttributeSet attrs, int defStyleAttr) {
        super(context, attrs, defStyleAttr);
        init();
    }

    private void init() {
        // 对图片缩放处理.
        BitmapFactory.Options options = new BitmapFactory.Options();
        options.inJustDecodeBounds = true;
        BitmapFactory.decodeResource(getResources(), R.drawable.background, options);

        options.inSampleSize = 4;
        options.inJustDecodeBounds = false;
        mBackgroundImage = BitmapFactory.decodeResource(getResources(), R.drawable.background, options);
        mBitmapWidth = mBackgroundImage.getWidth();
        mBitmapHeight = mBackgroundImage.getHeight();

        // 根据背景图片空白框的比列计算位置.
        mleft = mBitmapWidth * mOldLeft / mOldWidth;
        mTop = mBitmapHeight * mOldTop / mOldHeight;
        mRight = mBitmapWidth * mOldRight / mOldWidth;
        mBottom = mBitmapHeight * mOldBottom / mOldHeight;


        // 初始化画笔.
        mPaint = new Paint(Paint.ANTI_ALIAS_FLAG | Paint.DITHER_FLAG);
        mPaint.setColor(Color.RED);
        mPaint.setStyle(Paint.Style.STROKE);
    }

    @Override
    protected void onMeasure(int widthMeasureSpec, int heightMeasureSpec) {
        setMeasuredDimension(mBitmapWidth, mBitmapHeight);
    }

    @Override
    protected void onDraw(Canvas canvas) {
        super.onDraw(canvas);

        // 绘制背景图片.
        canvas.drawBitmap(mBackgroundImage, 0, 0, null);

        // 绘制红色输入框边界.
        canvas.drawRect(mleft, mTop, mRight, mBottom, mPaint);

        // 绘制白色输入框中的圆
        mPaint.setColor(Color.parseColor("#E2C0D6"));
        mPaint.setStyle(Paint.Style.FILL);
        canvas.drawCircle( (float) (mRight - mleft) / 2 + mleft,
                (float) (mBottom - mTop) / 2 + mTop,
                (float) (mRight - mleft) / 2,
                mPaint);
    }
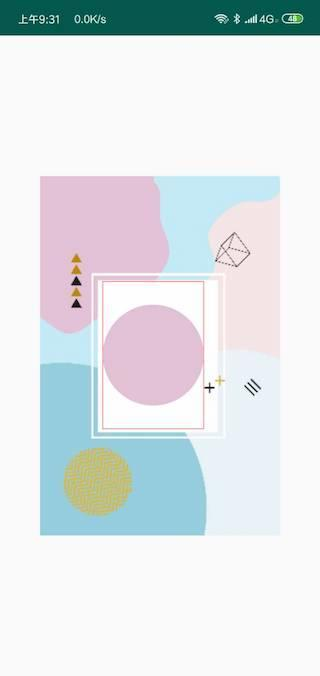
效果图如下:
布局中写比例
上面是针对手写代码来进行适配,一般场景下如果我们可以在布局中愉快的编写,就不要通过计算来适配。下面我将通过继承自 RelativeLayout 来实现,其原理就是在 onMeasure 测量的时候注入我们的比例设置,所谓比例是根据屏幕的实际宽高尺寸进行比例计算得到。代码如下:
当然最合适的方式肯定是在 attrs 中进行配置,这样用起来也就爽了
<?xml version="1.0" encoding="utf-8"?>
<resources>

    <declare-styleable name="PercentRelativeLayout">
        <!--  宽的比例 -->
        <attr name="layout_widthPercent" format="float"/>

        <!--  高的比例-->
        <attr name="layout_heightPercent" format="float"/>

       <!-- 距离父控件左边距离比例  -->
        <attr name="layout_marginLeftPercent" format="float"/>

         <!-- 距离父控件上边距离比例  -->
        <attr name="layout_marginTopPercent" format="float"/>

         <!-- 距离父控件右边距离比例  -->
        <attr name="layout_marginRightPercent" format="float"/>

        <!-- 距离父控件下边距离比例  -->
        <attr name="layout_marginBottomPercent" format="float"/>
    </declare-styleable>

</resources>

// 继承自 RelativeLayout, 在 onMeasure 注入计算过程.
public class PercentRelativeLayout extends RelativeLayout {

    public PercentRelativeLayout(Context context) {
        super(context);
    }

    public PercentRelativeLayout(Context context, AttributeSet attrs) {
        super(context, attrs);
    }

    public PercentRelativeLayout(Context context, AttributeSet attrs, int defStyleAttr) {
        super(context, attrs, defStyleAttr);
    }

    @Override
    protected void onMeasure(int widthMeasureSpec, int heightMeasureSpec) {
        int widthSize = MeasureSpec.getSize(widthMeasureSpec);
        int heightSize = MeasureSpec.getSize(heightMeasureSpec);
        int childCount = getChildCount();
        for (int i = 0; i < childCount; i++) {
            View child = getChildAt(i);
            ViewGroup.LayoutParams childLayoutParams = child.getLayoutParams();
            // 检查当前控件的 layoutParams 是否是  PercentRelativeLayoutParams 或者其子类
            if (checkLayoutParams(childLayoutParams)) {
                float widthPercent = ((PercentRelativeLayoutParams) childLayoutParams).mWidthPercent;
               // 在布局中填写的宽度占屏幕宽的比例. 比如 0.5 占屏幕宽一半
                if (widthPercent > 0) {
                  // 屏幕的宽度按着指定的比例缩放得到控件的宽度.
                    childLayoutParams.width = (int) (widthSize * widthPercent);
                }

                // 余下的步骤原理同上
                float heightPercent = ((PercentRelativeLayoutParams) childLayoutParams).mHeightPercent;
                if (heightPercent > 0) {
                    childLayoutParams.height = (int) (heightSize * heightPercent);
                }

                float marginLeftPercent = ((PercentRelativeLayoutParams) childLayoutParams).mMarginLeftPercent;
                if (marginLeftPercent > 0) {
                    ((MarginLayoutParams)childLayoutParams).leftMargin = (int) (widthSize * marginLeftPercent);
                }

                float marginTopPercent = ((PercentRelativeLayoutParams) childLayoutParams).mMarginTopPercent;
                if (marginTopPercent > 0) {
                    ((MarginLayoutParams)childLayoutParams).topMargin = (int) (heightSize * marginTopPercent);
                }

                float marginRightPercent = ((PercentRelativeLayoutParams) childLayoutParams).mMarginRightPercent;
                if (marginRightPercent > 0) {
                    ((MarginLayoutParams)childLayoutParams).rightMargin = (int) (widthSize * marginRightPercent);
                }

                float marginBottomPercent = ((PercentRelativeLayoutParams) childLayoutParams).mMarginBottomPercent;
                if (marginBottomPercent > 0) {
                    ((MarginLayoutParams)childLayoutParams).bottomMargin = (int) (heightSize * marginBottomPercent);
                }
            }
        }

        super.onMeasure(widthMeasureSpec, heightMeasureSpec);
    }

    @Override
    protected boolean checkLayoutParams(ViewGroup.LayoutParams p) {
        return p instanceof PercentRelativeLayoutParams;
    }

    @Override
    public PercentRelativeLayoutParams generateLayoutParams(AttributeSet attrs) {
        return new PercentRelativeLayoutParams(getContext(), attrs);
    }

    public static class PercentRelativeLayoutParams extends LayoutParams {

        public float mWidthPercent;
        public float mHeightPercent;
        public float mMarginLeftPercent;
        public float mMarginTopPercent;
        public float mMarginRightPercent;
        public float mMarginBottomPercent;

        public PercentRelativeLayoutParams(Context c, AttributeSet attrs) {
            super(c, attrs);

  //  获取自定义属性.
            TypedArray a = c.obtainStyledAttributes(attrs, R.styleable.PercentRelativeLayout);

            try {
                mWidthPercent = a.getFloat(R.styleable.PercentRelativeLayout_layout_widthPercent, 0.0f);
                mHeightPercent = a.getFloat(R.styleable.PercentRelativeLayout_layout_heightPercent, 0.0f);
                mMarginLeftPercent = a.getFloat(R.styleable.PercentRelativeLayout_layout_marginLeftPercent, 0.0f);
                mMarginTopPercent = a.getFloat(R.styleable.PercentRelativeLayout_layout_marginTopPercent, 0.0f);
                mMarginRightPercent = a.getFloat(R.styleable.PercentRelativeLayout_layout_marginRightPercent, 0.0f);
                mMarginBottomPercent = a.getFloat(R.styleable.PercentRelativeLayout_layout_marginBottomPercent, 0.0f);
            } finally {
                a.recycle();
            }
        }
    }
}
使用如下,将根布局设置为我们自定义的布局 PercentRelativeLayout。
<?xml version="1.0" encoding="utf-8"?>
<com.hxj.enjoyandroid.ui.PercentRelativeLayout xmlns:android="http://schemas.android.com/apk/res/android"
    xmlns:app="http://schemas.android.com/apk/res-auto"
    xmlns:tools="http://schemas.android.com/tools"
    android:layout_width="match_parent"
    android:layout_height="match_parent"
    tools:context=".UIAdapter2Activity">

    <!-- 为屏幕宽高的 80%,-->
    <com.hxj.enjoyandroid.ui.PercentRelativeLayout
        app:layout_widthPercent="0.8"
        app:layout_heightPercent="0.8"
        android:background="#ff22ff"
        android:layout_width="wrap_content"
        android:layout_height="wrap_content">

    <!--  为父控件宽高的 100%,但是有外边距,为父控件的 20%  -->
        <TextView
            android:textColor="#ffffff"
            android:gravity="center"
            android:text="百分比适配"
            app:layout_widthPercent="1.0"
            app:layout_heightPercent="1.0"
            app:layout_marginTopPercent="0.2"
            app:layout_marginRightPercent="0.2"
            app:layout_marginLeftPercent="0.2"
            app:layout_marginBottomPercent="0.2"
            android:background="@color/colorAccent"
            android:layout_width="wrap_content"
            android:layout_height="wrap_content" />


    </com.hxj.enjoyandroid.ui.PercentRelativeLayout>

</com.hxj.enjoyandroid.ui.PercentRelativeLayout>
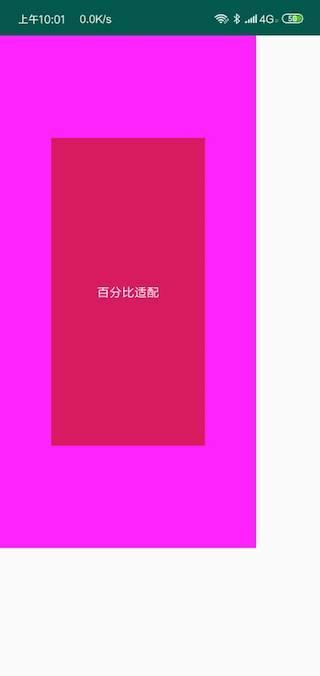
效果如下:
如果有疑惑为什么继承自 RelativeLayout ? 为什么要继承 LayoutParams 来加载我们的自定义属性?请看源码分析篇 Android 布局属性加载过程
