

一、上手IPython
原文:Chapter 1. Winding Along with IPython
译者:飞龙
感谢一译的支持
在本章中,我们将介绍以下秘籍:
- 安装IPython
- 使用IPython作为shell
- 阅读手册页
- 安装matplotlib
- 运行IPython笔记本
- 导出IPython笔记本
- 导入Web笔记本
- 配置笔记本服务器
- 探索SymPy配置文件
简介
IPython可以在ipython.org/上找到,是一个免费的开源项目,可用于Linux,Unix,Mac OS X和Windows。 IPython作者只要求你在任何使用IPython的科学工作中引用IPython。 IPython提供了交互式计算的架构。 这个项目最值得注意的部分是IPython shell。 IPython提供以下组件,其中包括:
- 交互式Python shell(基于终端和Qt应用程序)
- 一个Web笔记本(在IPython 0.12和更高版本中可用),支持富媒体和绘图
IPython与Python版本2.5,2.6,2.7,3.1,3.2,3.3和3.4兼容。 兼容性取决于IPython版本。 例如,IPython 2.3.0需要Python 2.7或3.3+。
您可以通过访问www.pythonanywhere.com/try-ipython…在云中尝试IPython而无需在系统上安装它。 与本地安装的软件相比,有一点延迟,所以这不如真实的东西好。 但是, IPython交互式shell中提供的大多数功能似乎都可用。 PythonAnywhere也有一个Vi(m)编辑器,如果你喜欢vi,它显然很棒。 您可以保存和编辑IPython会话中的文件。
安装IPython
IPython可以通过各种方式安装,具体取决于您的操作系统。 对于基于终端的shell,依赖于readline。 Web笔记本需要tornado和zmq。
除了安装IPython之外,我们还将安装setuptools,它将为您提供easy_install命令。 easy_install命令是Python的流行??包管理器。 一旦有easy_install,就可以安装pip。 pip命令类似于easy_install,并添加了卸载等选项。
操作步骤
本节介绍如何在Windows,Mac OS X和Linux上安装IPython。 它还描述了如何使用easy_install和pip或从源安装IPython及其依赖项:
-
在 Windows 上安装 IPython 和
setuptools:在IPython网站上可以获得Python 2或Python 3的二进制Windows安装程序 。 另请参阅ipython.org/ipython-doc…。使用pypi.python.org/pypi/setupt…中的安装程序安装
setuptools。 然后安装pip,如下所示:cd C:\Python27\scripts python .\easy_install-27-script.py pip -
在 Mac OS X 上安装 IPython:如果需要,请安装Apple Developer Tools(Xcode)。Xcode 可以在developer.apple.com/xcode/找到。 按照
easy_install/pip说明,或本节后面提供的安装说明进行操作。 -
Installing IPython on Linux:由于有很多Linux发行版,本节不会详尽无遗:
-
在Debian上,键入以下命令:
$ su – aptitude install ipython python-setuptools -
在Fedora上,魔术命令如下:
$ su – yum install ipython python-setuptools-devel -
以下命令将在Gentoo上安装IPython:
$ su – emerge ipython -
对于Ubuntu,安装命令如下:
$ sudo apt-get install ipython python-setuptools
-
-
**使用
easy_install或pip安装 IPython **:使用easy_install安装本章中秘籍所需的IPython和所有依赖项。使用以下命令:$ sudo easy_install ipython pyzmq tornado readline或者,您可以通过在终端中键入此命令,首先使用
easy_install安装pip:$ sudo easy_install pip之后,使用
pip安装IPython:$ sudo pip install ipython pyzmq tornado readline -
从源码安装:如果您想使用最前沿的开发版本,那么从源代码安装适合您:
-
从github.com/ipython/ipy…下载最新的源存档。
-
从存档中解压缩源代码:
$ tar xzf ipython-<version>.tar.gz -
相反,如果你安装了Git,你可以克隆Git仓库:
$ git clone https://github.com/ipython/ipython.git -
访问已下载的源中的根目录:
$ cd ipython -
运行安装脚本。 这可能需要您使用
sudo运行命令,如下所示:$ sudo python setup.py install
-
工作原理
我们使用几种方法安装了IPython。 大多数这些方法都安装了最新的稳定版本,除非您从源代码安装,这将安装开发版本。
另见
- 来自官方IPython网站ipython.org/install.htm…的说明
使用IPython作为shell
科学家和工程师习惯于进行实验。 IPython是由科学家创建的。 许多人将IPython提供的交互式环境视为对MATLAB,Mathematica,Maple和R的直接回答。
以下是IPython shell的功能列表:
- TAB 补全
- 历史机制
- 内联编辑
- 能够使用
%run调用外部Python脚本 - 能够调用与操作系统shell交互的魔术函数
- 访问系统命令
-
pylab开关 - 访问Python调试器和分析器
操作步骤
本节描述了如何使用IPython shell:
-
pylab:pylab开关自动导入所有SciPy,NumPy和matplotlib包。 没有这个开关,我们必须自己导入这些包。我们需要做的就是在命令行中输入以下指令:
$ ipython --pylab Type "copyright", "credits" or "license" for more information. IPython 2.4.1 -- An enhanced Interactive Python. ? -> Introduction and overview of IPython's features. %quickref -> Quick reference. help -> Python's own help system. object? -> Details about 'object', use 'object??' for extra details. Welcome to pylab, a matplotlib-based Python environment [backend: MacOSX]. For more information, type 'help(pylab)'. In [1]: quit() quit() or Ctrl + D quits the IPython shell. -
保存会话:我们可能希望能够返回我们的实验。 在IPython中,很容易保存会话以供以后使用。 这是通过以下命令完成的:
In [1]: %logstart
Activating auto-logging. Current session state plus future input saved.
Filename       : ipython_log.py
Mode           : rotate
Output logging : False
Raw input log  : False
Timestamping   : False
State          : active
可以使用以下命令关闭日志记录:
In [9]: %logoff Switching logging OFF -
执行系统 shell 命令:您可以通过在命令前加上
!来执行IPython默认配置文件中的系统shell命令。 例如,以下输入将获取当前日期:In [1]: !date实际上,任何前缀为
!的行 被发送到系统shell。 我们还可以存储命令输出,如下所示:In [2]: thedate = !date In [3]: thedate -
显示历史:我们可以使用
%hist命令显示命令的历史记录,如下所示:In [1]: a = 2 + 2 In [2]: a Out[2]: 4 In [3]: %hist a = 2 + 2 a %hist这是命令行界面(CLI)环境中的常见功能。 我们还可以使用
-g开关查找历史记录:In [5]: %hist -g a = 2 1: a = 2 + 2
工作原理
我们看到了许多所谓的魔术函数。 这些函数以%字符开头。 如果在一行中单独使用魔术函数,则%前缀是可选的。
另见
- 作为系统 shell 的 IPython:来自IPython官方网站
阅读手册页
我们可以使用help命令打开NumPy函数的文档。 没有必要知道函数的名称。 我们可以键入几个字符,然后让tab补全它。 例如,让我们浏览arange()函数的可用信息。
操作步骤
我们可以通过以下任一方式浏览可用信息:
-
调用
help函数:调用help命令。 键入函数的几个字符,然后按Tab键(请参见下面的截图):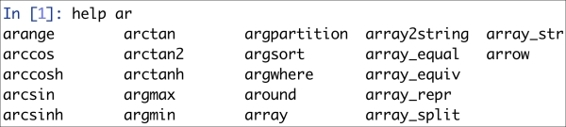
-
使用问号来查询:另一种选择是在功能名称后面添加问号。 当然,您将需要知道函数名称,但您不必键入
help命令:In [3]: arange?
工作原理
TAB 补全取决于readline,因此您需要确保它已安装。 问号为您提供来自docstrings的信息。
安装matplotlib
matplotlib(按惯例全部小写)是一个非常有用的Python绘图库,我们将需要将它用于以下秘籍以及稍后的秘籍。 它依赖NumPy,但很可能已经安装了NumPy。
操作步骤
我们将看到如何在Windows,Linux和Mac OS X上安装matplotlib,以及如何从源代码安装它:
-
在 Windows 上安装 matplotlib:您可以使用Enthought发行版安装它,也可以称为Canopy。
可能需要将
msvcp71.dll文件放在C:\Windows\system32目录中。 您可以从www.dll-files.com/dllindex/dl…获取它。 -
在 Linux 上安装 matplotlib:让我们看看如何在各种Linux发行版中安装matplotlib:
这是Debian和Ubuntu上的安装命令:
$ sudo apt-get install python-matplotlib-
Fedora / Redhat上的安装命令如下:
$ su - yum install python-matplotlib
-
-
从源码安装:您可以从Sourceforge的
tar.gz发布下载最新的源代码,或使用以下命令从Git仓库获取:$ git clone git://github.com/matplotlib/matplotlib.git一旦下载,就像往常一样使用以下命令构建和安装matplotlib:
$ cd matplotlib $ sudo python setup.py install -
在 Mac OS X 上安装 matplotlib:从sourceforge.net/projects/ma…获取最新的DMG文件并进行安装。 您还可以使用Mac端口,Fink或 Homebrew包管理器。
另见
- matplotlib官方文档中的说明位于matplotlib.org/users/insta…
- 安装 SciPy 技术栈的解释在www.scipy.org/install.htm…
运行IPython笔记本
IPython有一个令人兴奋的功能 - 网络笔记本。 所谓的 笔记本服务器 可以通过Web为笔记本提供服务。 我们现在可以启动笔记本服务器并获得基于Web的IPython环境。 此环境具有常规IPython环境具有的大多数功能。 IPython笔记本的功能包括:
- 显示图像和内联图
- 在文本单元格中使用HTML和Markdown(这是一种简化的类似HTML的语言,请参阅en.wikipedia.org/wiki/Markdo…)
- 导入和导出笔记本
做好准备
在开始之前,我们应该确保安装了所有必需的软件。 依赖tornado和zmq。 详细信息请参阅本章中的“安装 IPython”秘籍。
操作步骤
-
运行笔记本:我们可以使用以下命令启动笔记本:
$ ipython notebook

[NotebookApp] Using existing profile dir: u'/Users/ivanidris/.ipython/profile_default'
[NotebookApp] The IPython Notebook is running at: http://127.0.0.1:8888
[NotebookApp] Use Control-C to stop this server and shut down all kernels.
如您所见,我们使用的是默认配置文件。 服务器在本地计算机上的端口8888上启动。 稍后您将在本章的中学习如何配置这些设置。 笔记本在默认浏览器中打开;这也是可配置的(参见下面的截图):

IPython列出了启动笔记本的目录中的所有笔记本。 在此示例中,未找到任何笔记本。 按
Ctrl + C可以停止服务器。 -
**在 pylab 模式下运行笔记本:使用以下命令在pylab 模式下运行Web笔记本:
$ ipython notebook --pylab这将加载
SciPy,NumPy和matplotlib模块。 -
使用内联图运行笔记本:我们可以使用以下命令,使用
inline指令显示 matplotlib 内联图:$ ipython notebook --pylab inline以下步骤演示了IPython笔记本功能:
- 单击
New Notebook按钮来创建新笔记本。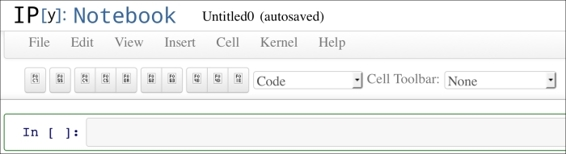
- 使用
arange()函数创建一个数组。 键入以下截图中显示的命令,然后单击Cell / Run:
- 然后输入以下命令并按
Enter。 您将在Out [2]中看到输出,如以下截图所示:
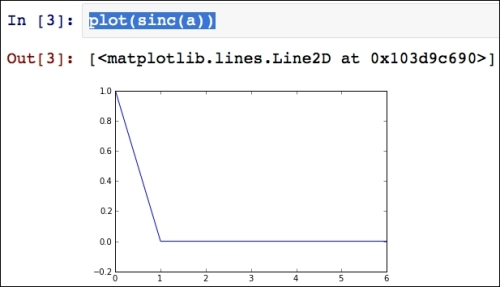
- 将
sinc()函数应用于数组并绘制结果,如此截图所示:
- 单击
工作原理
内联选项能够显示matplotlib内联图。 与pylab模式结合使用时,无需导入NumPy,SciPy和matplotlib软件包。
另见
- 本章中的“安装 IPython”秘籍
- 示例笔记本位于nbviewer.ipython.org/github/ipyt…
sinc()函数的文档plot()函数的文档
导出IPython笔记本
有时,您会想要与朋友或同事交换笔记本。 Web笔记本提供了几种导出数据的方法。
操作步骤
可以使用以下选项导出Web笔记本:
-
Print选项:Print按钮实际上不打印笔记本,但允许您将笔记本导出为PDF或HTML文档。 -
下载笔记本:使用
Download按钮将笔记本下载到您选择的位置。 我们可以指定是否要将笔记本下载为.py文件,这只是一个普通的Python程序,或者以JSON格式下载为.ipynb文件。 我们在上一个秘籍中创建的笔记本在导出后如下所示:{ "metadata": { "name": "Untitled1" }, "nbformat": 2, "worksheets": [ { "cells": [ { "cell_type": "code", "collapsed": false, "input": [ "plot(sinc(a))" ], "language": "python", "outputs": [ { "output_type": "pyout", "prompt_number": 3, "text": [ "[<matplotlib.lines.Line2D at 0x103d9c690>]" ] }, { "output_type": "display_data", "png": "iVBORw0KGgoAAAANSUhEUgAAAXkAAAD9CAYAAABZVQdHAAAABHNCSVQICAgIf... mgkAAAAASUVORK5CYII=\n" } ], "prompt_number": 3 } ] } ] }注意
为简洁起见,省略了一些文本。 此文件不用于编辑甚至阅读,但如果忽略图像表示部分,则该文件非常易读。 JSON的更多信息请参阅en.wikipedia.org/wiki/JSON。
-
保存笔记本:使用
Save按钮保存笔记本。 这将自动以原生JSON 格式,.ipynb导出笔记本。 该文件将存储在最初启动IPython的目录中。
导入Web笔记本
Python 脚本可以作为Web笔记本导入。 显然,我们还可以导入以前导出的笔记本。
操作步骤
此秘籍向您展示如何将Python脚本导入为Web笔记本。
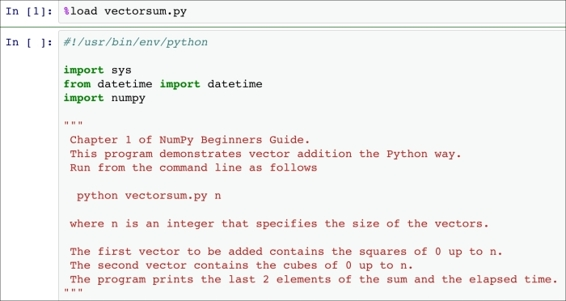
使用以下命令加载Python脚本:
% load vectorsum.py
以下截图显示了将vectorsum.py加载到笔记本页面后所看到的示例,来自《NumPy Beginner's Guide》:
配置笔记本服务器
公共笔记本服务器需要是安全的。 您应该设置密码并使用SSL证书连接它。 我们需要证书通过HTTPS提供安全通信(更多信息请参阅en.wikipedia.org/wiki/Transp…)。 HTTPS在Internet上广泛使用的标准HTTP协议之上添加了一个安全层。 HTTPS还会加密从客户端发送到服务器和返回的数据。 证书机构通常是为网站颁发证书的商业组织。 Web浏览器具有证书机构的知识,可以识别证书。 网站管理员需要创建证书并由证书机构签名。
操作步骤
以下步骤描述了如何配置安全的笔记本服务器:
-
我们可以从IPython生成密码。 启动一个新的IPython会话并输入以下命令:
In [1]: from IPython.lib import passwd

In [2]: passwd()
Enter password:
Verify password:
Out[2]: 'sha1:0e422dfccef2:84cfbcbb3ef95872fb8e23be3999c123f862d856'
在输入的第二行,系统将提示您输入密码。 你需要记住这个密码。 生成一个长字符串。 复制此字符串,因为稍后您将需要它。
-
要创建SSL 证书,您需要在路径中使用
openssl命令。设置
openssl命令不是火箭科学,但它可能很棘手。 不幸的是,它超出了本书的范围。 但有个好消息,有大量的在线教程可以帮助您进一步。执行以下命令来创建名为
mycert.pem的证书:$ openssl req -x509 -nodes -days 365 -newkey rsa:1024 -keyout mycert.pem -out mycert.pem Generating a 1024 bit RSA private key ......++++++ ........................++++++ writing new private key to 'mycert.pem' ----- You are about to be asked to enter information that will be incorporated into your certificate request. What you are about to enter is what is called a Distinguished Name or a DN. There are quite a few fields but you can leave some blank For some fields there will be a default value, If you enter '.', the field will be left blank. ----- Country Name (2 letter code) [AU]: State or Province Name (full name) [Some-State]: Locality Name (eg, city) []: Organization Name (eg, company) [Internet Widgits Pty Ltd]: Organizational Unit Name (eg, section) []: Common Name (eg, YOUR name) []: Email Address []:openssl工具会提示您填写一些字段。 更多信息请查看相关的手册页,如下所示:$ man openssl -
使用以下命令为服务器创建特殊配置文件:
$ ipython profile create nbserver -
编辑配置文件。 在此示例中,可以在
~/ .ipython / profile_nbserver / ipython_notebook_config.py中找到它。配置文件非常大,因此我们将省略其中的大部分行。 我们需要更改的行如下:
c.NotebookApp.certfile = u'/absolute/path/to/your/certificate'
c.NotebookApp.password = u'sha1:b...your password'
c.NotebookApp.port = 9999
请注意,我们指向我们创建的SSL证书。 我们设置了密码并将端口更改为9999。
-
使用以下命令,启动服务器来检查更改是否有效:
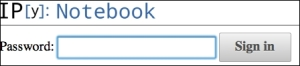
$ ipython notebook --profile=nbserver
[NotebookApp] Using existing profile dir: u'/Users/ivanidris/.ipython/profile_nbserver'
[NotebookApp] The IPython Notebook is running at: https://127.0.0.1:9999
[NotebookApp] Use Control-C to stop this server and shut down all kernels.
服务器在端口9999上运行,您需要通过https连接它。 如果一切顺利,您应该看到一个登录页面。 此外,您可能需要在浏览器中接受安全例外。
工作原理
我们为公共服务器创建了一个特殊的配置文件。有一些已存在的示例配置文件,例如默认配置文件。 创建配置文件会将profile_<profilename>文件夹,配置文件以及其他,添加到.ipython目录中。 然后可以使用 - profile =<profile_name>命令行选项加载配置文件。 我们可以使用以下命令列出配置文件:
$ ipython profile list

Available profiles in IPython:
 cluster
 math
 pysh
 python3

 The first request for a bundled profile will copy it
 into your IPython directory (/Users/ivanidris/.ipython),
 where you can customize it.

Available profiles in /Users/ivanidris/.ipython:
 default
 nbserver
 sh
另见
探索SymPy配置文件
IPython有SymPy示例配置文件。 SymPy是Python符号数学库。 我们可以简化代数表达式或微分函数,类似于Mathematica和Maple。 SymPy显然是一款有趣的软件,但对于NumPy的旅程来说并不是必需的。 将此视为可选或奖励秘籍。 像甜点一样,随意跳过它,尽管你可能会错过本章最甜蜜的部分。
做好准备
使用easy_install或pip安装SymPy:
$ sudo easy_install sympy
$ sudo pip install sympy
操作步骤
以下步骤将帮助您浏览SymPy配置文件:
-
查看配置文件,该文件位于
~/.ipython/profile_sympy/ipython_config.py。 内容如下:c = get_config() app = c.InteractiveShellApp # This can be used at any point in a config file to load a sub config # and merge it into the current one. load_subconfig('ipython_config.py', profile='default') lines = """ from __future__ import division from sympy import * x, y, z, t = symbols('x y z t') k, m, n = symbols('k m n', integer=True) f, g, h = symbols('f g h', cls=Function) """ # You have to make sure that attributes that are containers already # exist before using them. Simple assigning a new list will override # all previous values. if hasattr(app, 'exec_lines'): app.exec_lines.append(lines) else: app.exec_lines = [lines] # Load the sympy_printing extension to enable nice printing of sympy expr's. if hasattr(app, 'extensions'): app.extensions.append('sympyprinting') else: app.extensions = ['sympyprinting']此代码完成以下操作:
- 加载默认配置文件
- 导入SymPy包
- 定义符号
-
使用此命令来使用SymPy配置文件启动IPython:
$ ipython --profile=sympy -
使用以下截图中显示的命令,展开代数表达式:

