

OpenAI 最近推出了一种接口,用于创建模型响应。该接口支持文本或图像输入,生成文本或图像输出。用户可以让模型调用自定义代码或使用内置工具(如网页搜索或文件搜索),以利用自己的数据作为模型响应的输入。
本文将主要描述 OpenAI Responses API 的使用过程,帮助开发者轻松利用 OpenAI 官方模型的响应创建功能。
背景
Ace Data Cloud 是一个支持多种数据处理和分析的平台,特别是在机器学习和人工智能领域。利用 OpenAI Responses API,开发者可以构建智能化应用,例如智能客服、内容生成、数据分析等场景。
应用流程
要使用 OpenAI Responses API,首先访问 OpenAI Responses API 页面,点击“获取”按钮以获取请求所需的凭据:

如果尚未登录或注册,将自动跳转到登录页面,邀请您注册或登录。登录或注册后,您将自动返回当前页面。
在首次申请时,会提供免费配额,您可以免费使用该 API。
基础用法
接下来,您可以在接口上填写相应内容,如下图所示:
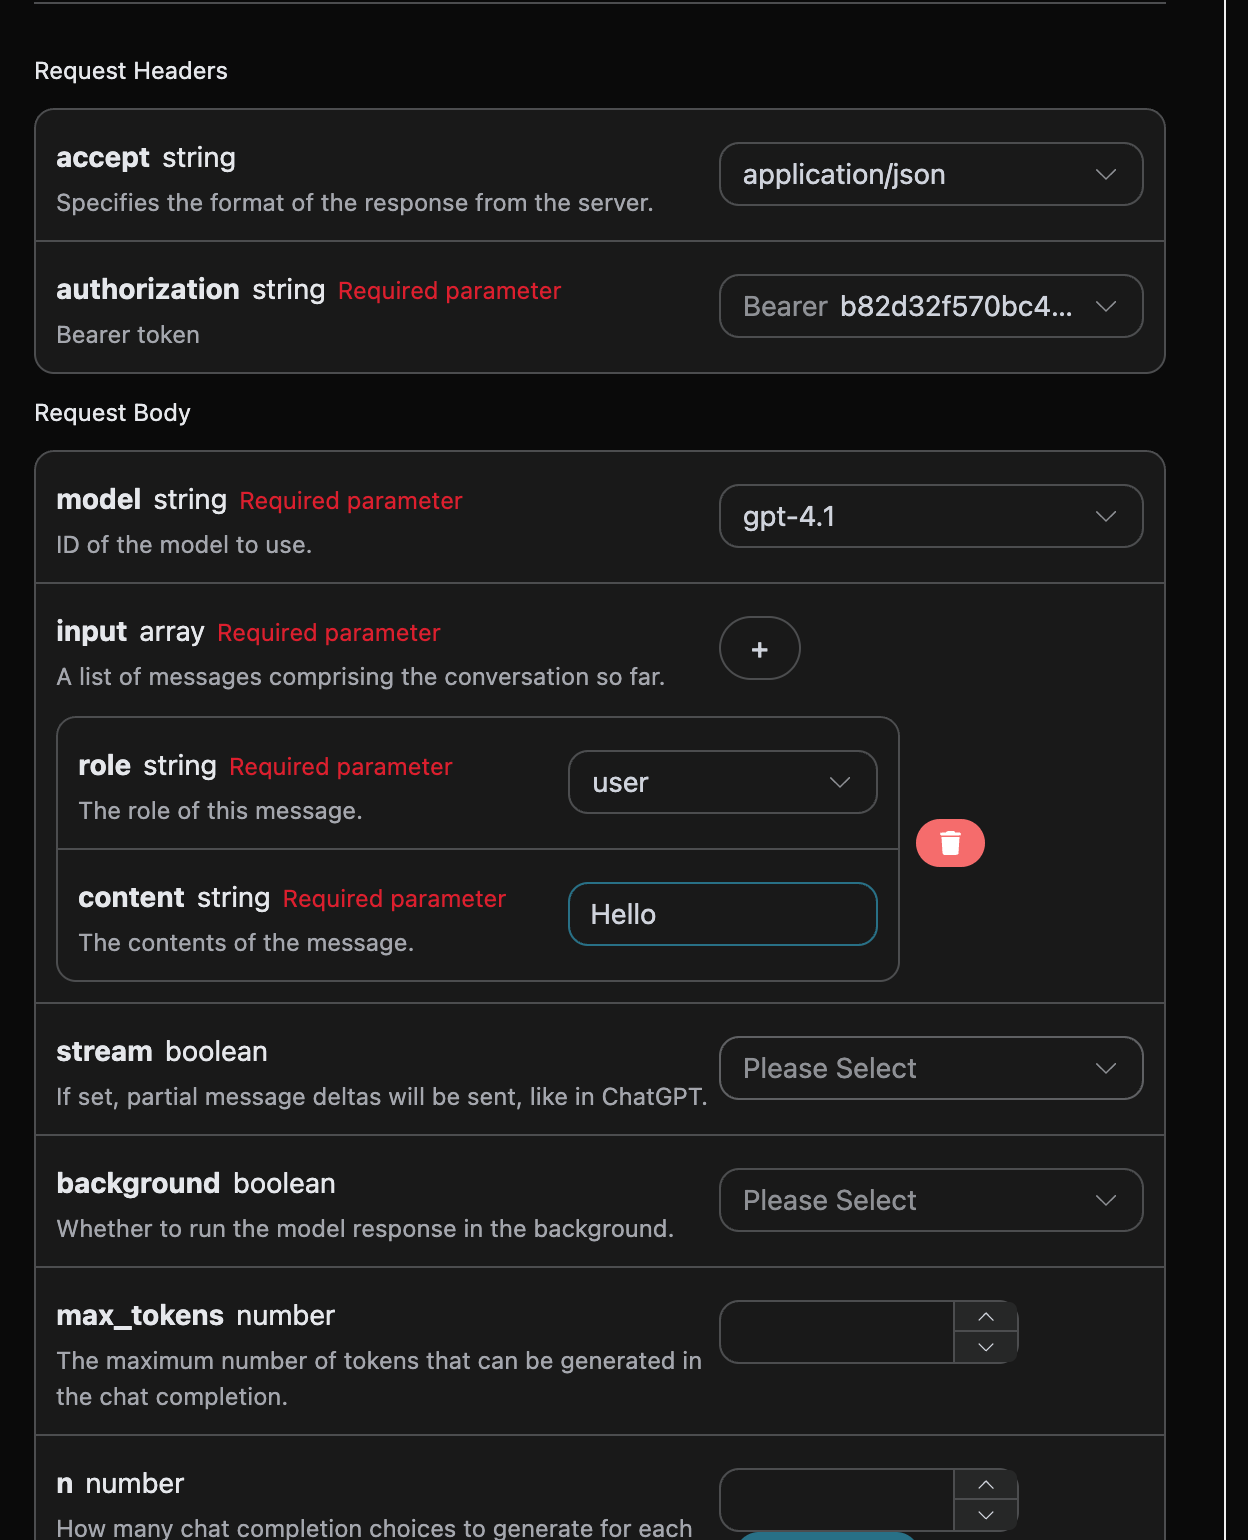
首次使用该接口时,需要填写至少三项信息:第一个是 authorization,可直接从下拉列表中选择。另一个参数是 model,即我们选择使用的 OpenAI ChatGPT 模型类别。这里主要有 20 种模型,详细信息可以参考我们提供的模型文档。最后一个参数是 input,这是我们输入问题的数组,允许同时上传多个问题,每个问题包含 role 和 content。role 表示提问者的角色,我们提供 user、assistant 和 system 三种身份。content 是我们问题的具体内容。
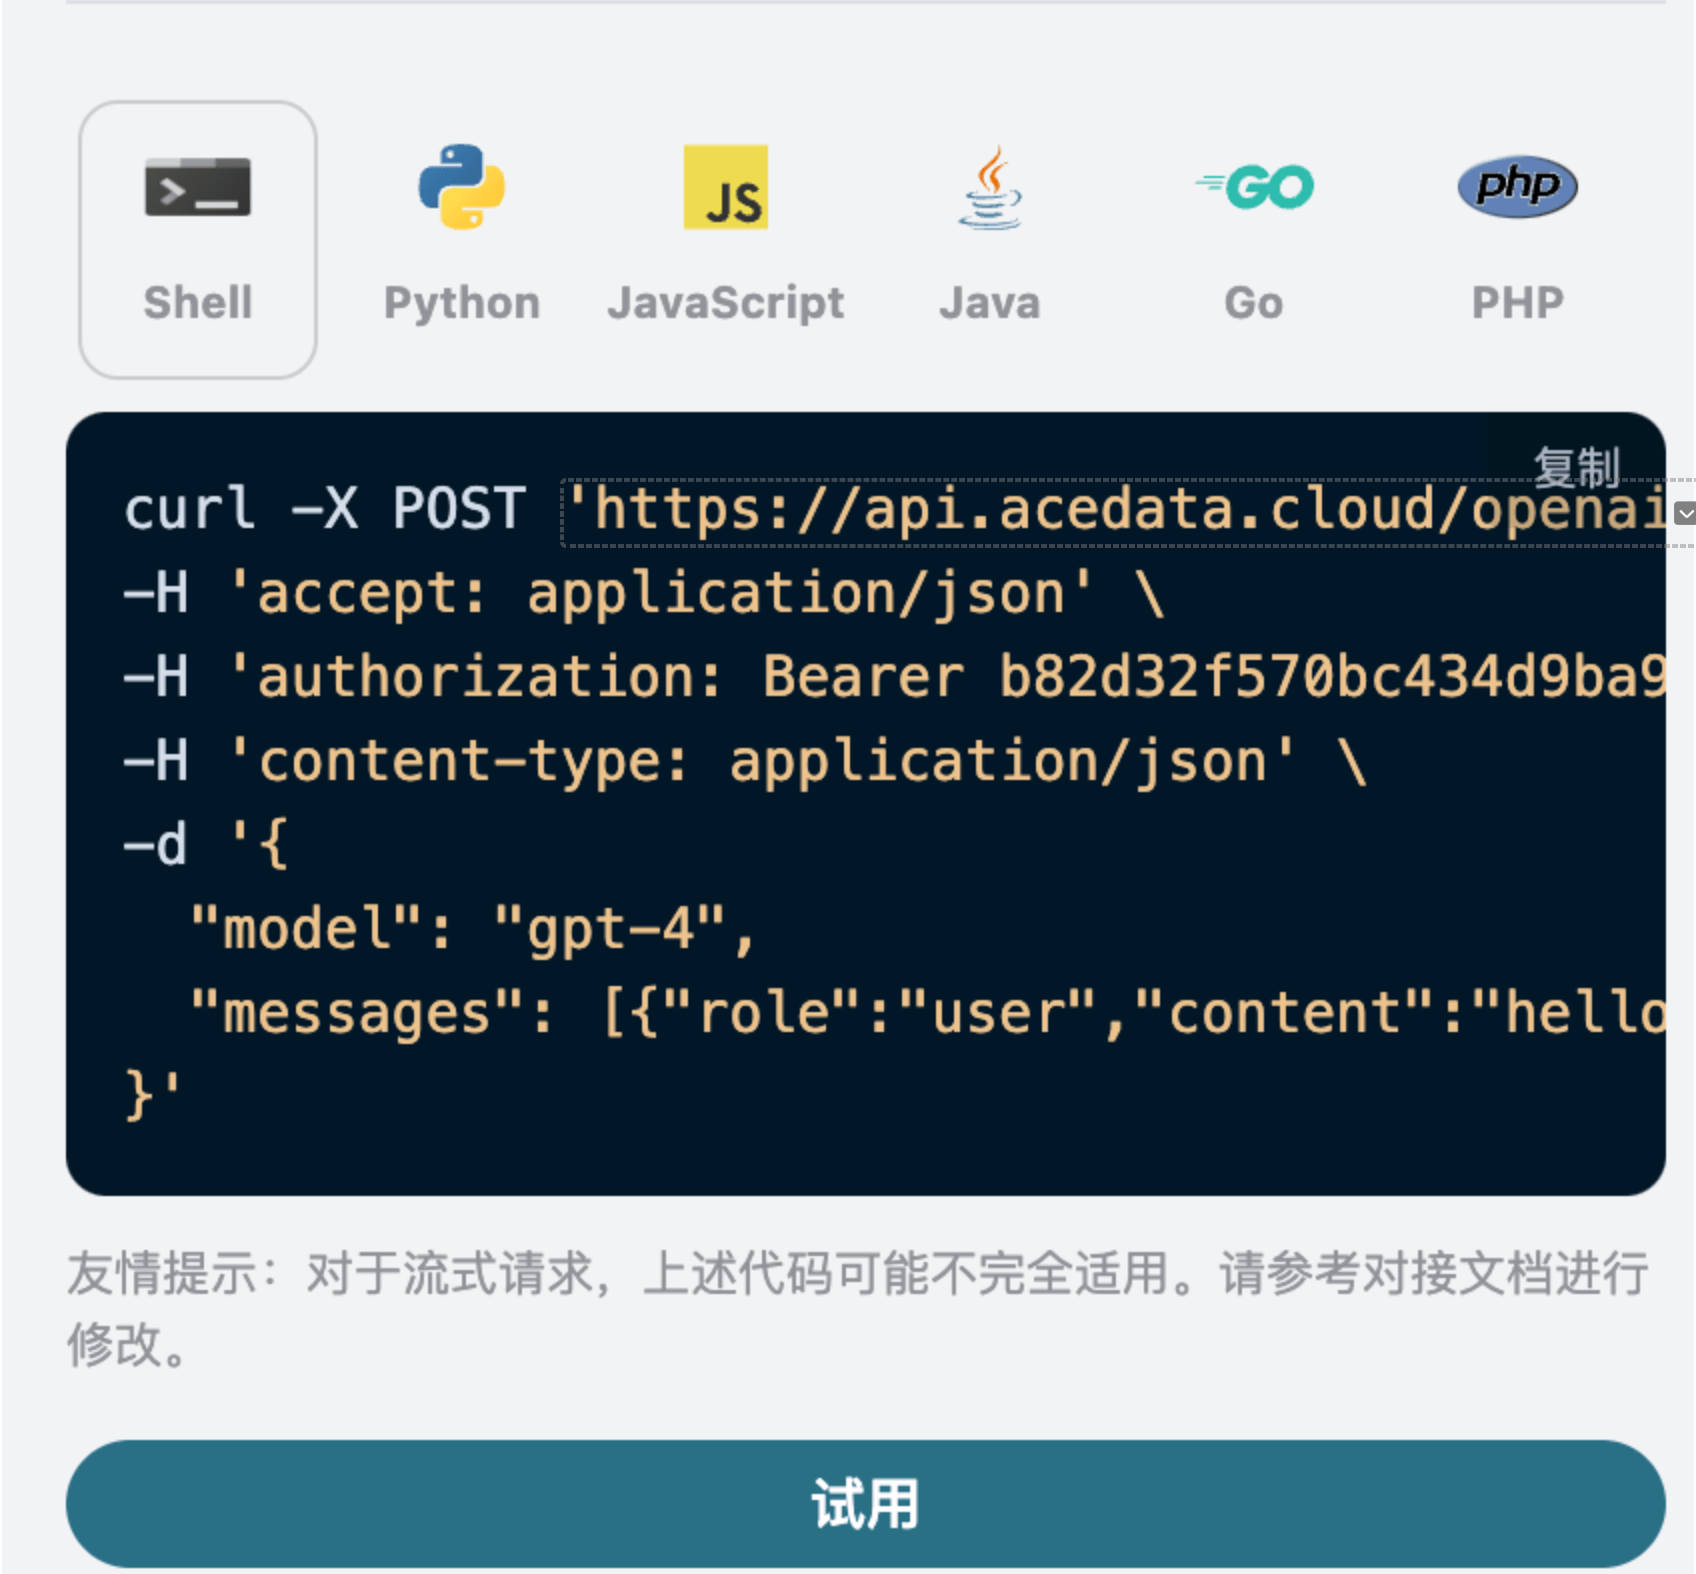
您还可以注意到右侧有相应的代码生成,可以直接复制代码运行,或点击“尝试”按钮进行测试。
常用可选参数:
max_tokens: 限制单次响应的最大 token 数。temperature: 生成随机性,范围为 0-2,值越大,结果越多样。n: 一次生成多少个候选响应。response_format: 设置返回格式。tools: 函数/工具调用定义。background: 是否在后台异步运行。
调用后返回的结果如下所示:
{
  "id": "resp_68a98322e3c88191a027de2711a02a490554cad0b36c0400",
  "object": "response",
  "created_at": 1755939618,
  "status": "completed",
  "background": false,
  "content_filters": null,
  "error": null,
  "incomplete_details": null,
  "instructions": null,
  "max_output_tokens": null,
  "max_tool_calls": null,
  "model": "gpt-4.1",
  "output": [
    {
      "id": "msg_68a98323422c8191a7f383eea48ba5160554cad0b36c0400",
      "type": "message",
      "status": "completed",
      "content": [
        {
          "type": "output_text",
          "annotations": [],
          "text": "Hello! How can I assist you today?"
        }
      ],
      "role": "assistant"
    }
  ],
  "parallel_tool_calls": true,
  "previous_response_id": null,
  "prompt_cache_key": null,
  "reasoning": {
    "effort": null,
    "summary": null
  },
  "safety_identifier": null,
  "service_tier": "default",
  "store": true,
  "temperature": 1,
  "text": {
    "format": {
      "type": "text"
    }
  },
  "tool_choice": "auto",
  "tools": [],
  "top_p": 1,
  "truncation": "disabled",
  "usage": {
    "input_tokens": 8,
    "input_tokens_details": {
      "cached_tokens": 0
    },
    "output_tokens": 10,
    "output_tokens_details": {
      "reasoning_tokens": 0
    },
    "total_tokens": 18
  },
  "user": null,
  "metadata": {}
}
返回结果包含多个字段,具体描述如下:
id: 为此对话任务生成的 ID,用于唯一标识该对话任务。model: 选择的 OpenAI ChatGPT 模型。output: ChatGPT 对输入问题提供的响应信息。usage: 该问答的 token 统计信息。
其中,output 包含 ChatGPT 的响应信息,output 中的内容由 ChatGPT 提供,如下图所示。
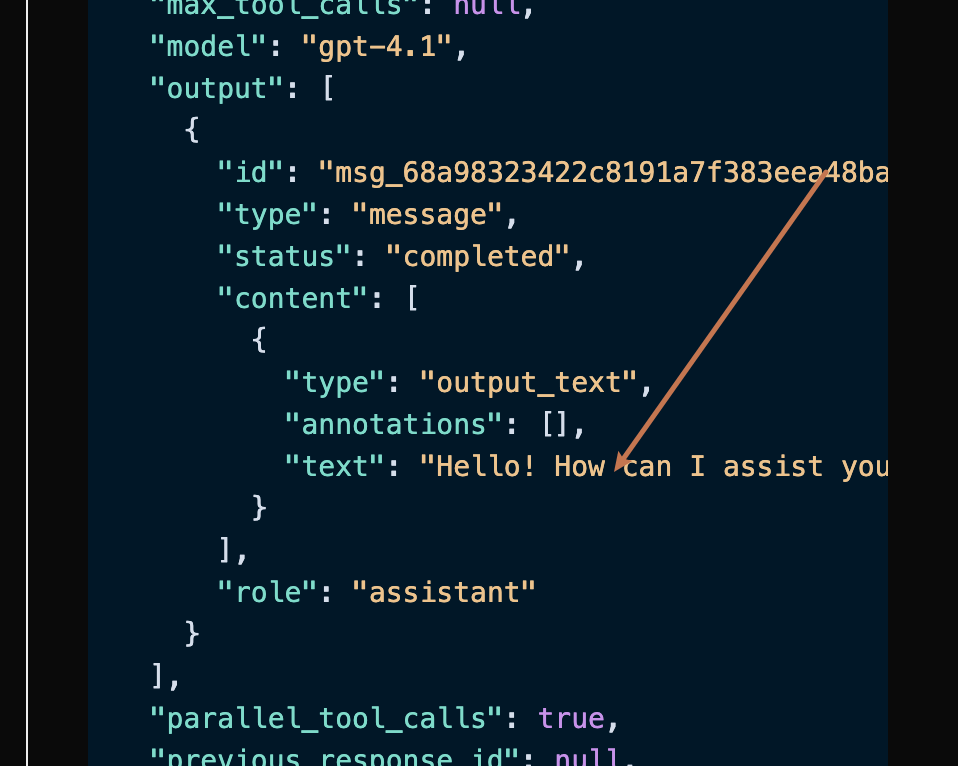
可以看到,output 中的 content 字段包含了 ChatGPT 的具体回复内容。
流式响应
该接口还支持流式响应,非常适合网页集成,允许网页逐字展示结果。
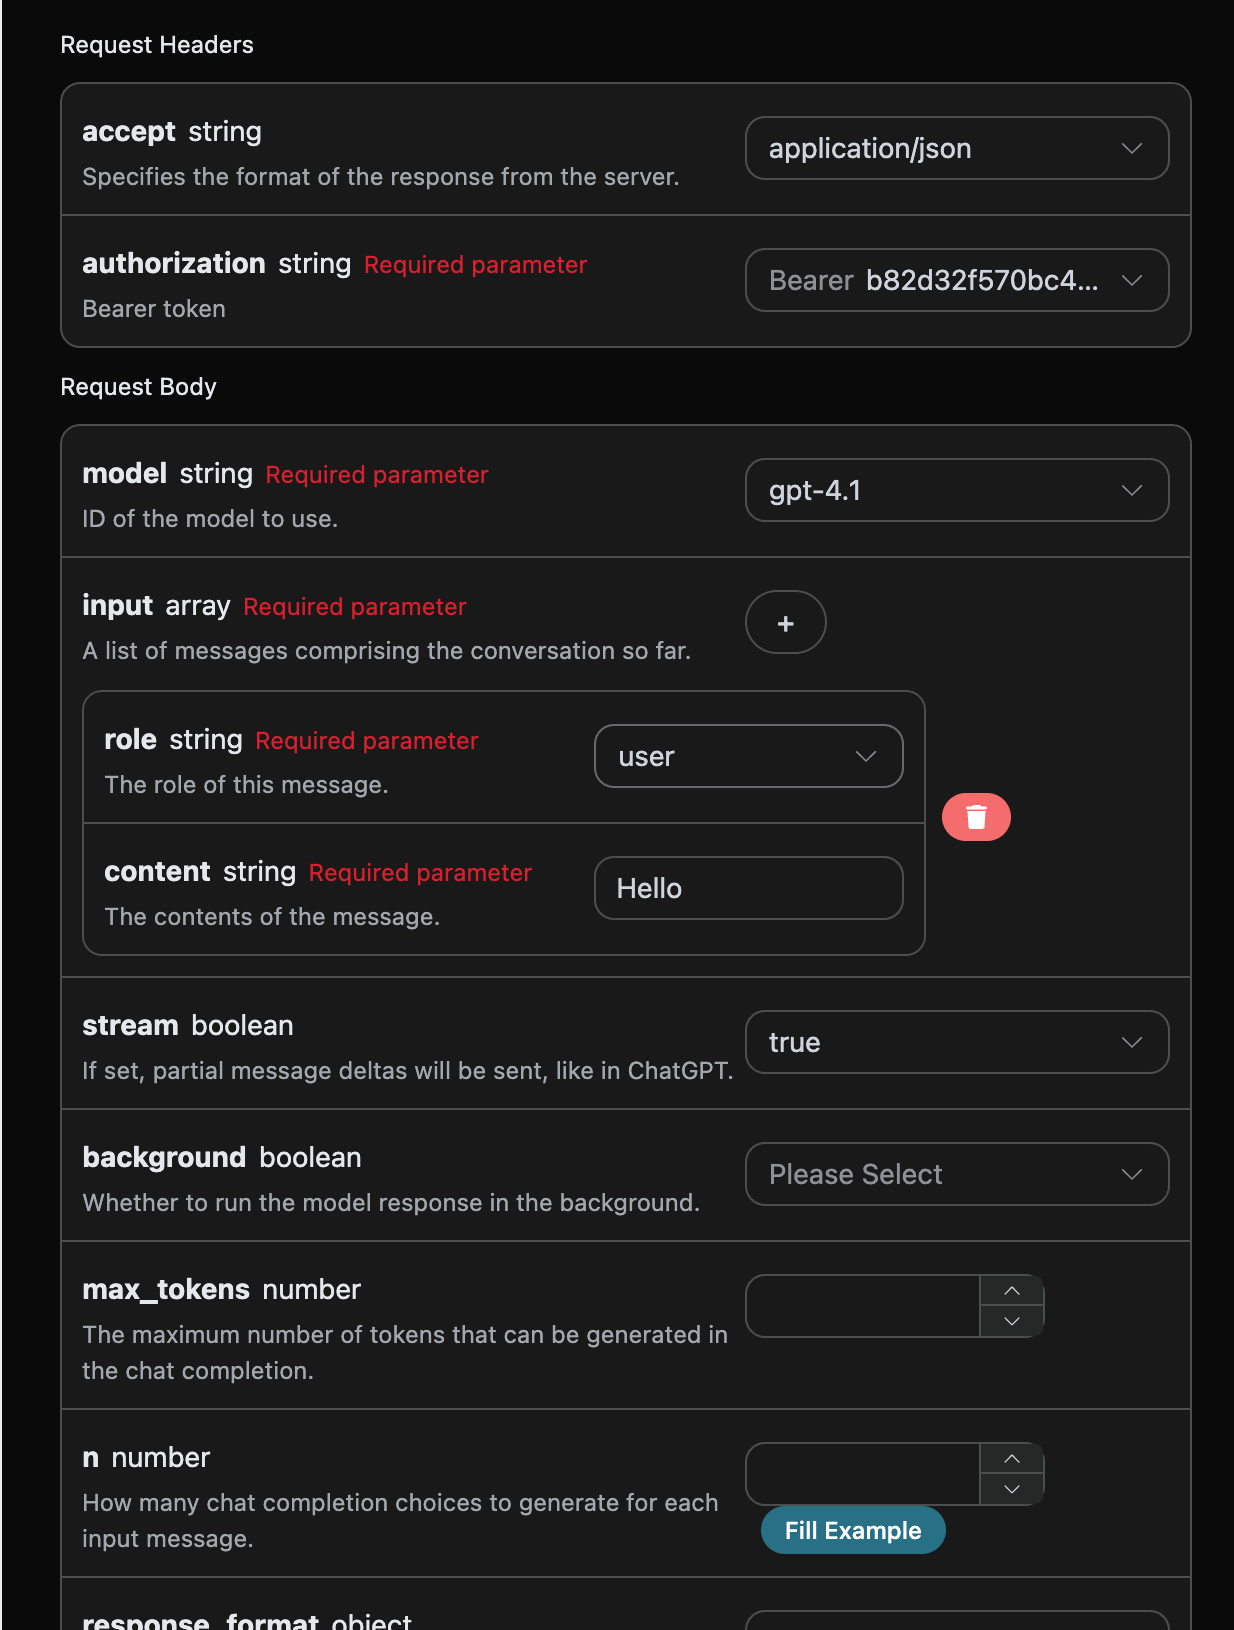
如果希望以流式方式返回响应,可以将请求头中的 stream 参数修改为 true。
如图所示进行修改,但调用代码需要相应的更改以支持流式响应。
将 stream 修改为 true 后,API 将逐行返回相应的 JSON 数据,我们需要在代码中进行相应修改以获取逐行结果。
Python 示例调用代码:
import requests

url = "https://api.acedata.cloud/openai/responses"

headers = {
    "accept": "application/json",
    "authorization": "Bearer {token}",
    "content-type": "application/json"
}

payload = {
    "model": "gpt-4.1",
    "input": [{"role":"user","content":"Hello"}],
    "stream": True
}

response = requests.post(url, json=payload, headers=headers)
print(response.text)
输出效果如下:
data: {"type": "response.created", "sequence_number": 0, "response": {"id": "resp_68a9837bb9bc8190b403947311db6faa0721186e8fbb89d0", "object": "response", "created_at": 1755939707, "status": "in_progress", "background": false, "content_filters": null, "error": null, "incomplete_details": null, "instructions": null, "max_output_tokens": null, "max_tool_calls": null, "model": "gpt-4.1-data", "output": [], "parallel_tool_calls": true, "previous_response_id": null, "prompt_cache_key": null, "reasoning": {"effort": null, "summary": null}, "safety_identifier": null, "service_tier": "auto", "store": true, "temperature": 1.0, "text": {"format": {"type": "text"}}, "tool_choice": "auto", "tools": [], "top_p": 1.0, "truncation": "disabled", "usage": null, "user": null, "metadata": {}}}
错误处理
在调用 API 时,如果发生错误,API 将返回相应的错误代码和消息。例如:
400 token_mismatched: 错误请求,可能由于缺少或无效的参数。401 invalid_token: 未授权,令牌无效或缺失。429 too_many_requests: 请求过多,超过速率限制。500 api_error: 服务器内部错误,服务器发生了问题。
结论
通过本文,您已了解如何轻松实现 OpenAI 的响应创建功能。希望本文能帮助您更好地集成和使用 API。如您有任何问题,请随时联系技术支持团队。
标签
#OpenAI #API #机器学习 #数据处理 #流式响应
