学习Three.js--轨道+火车自动行进
前置核心说明
开发目标
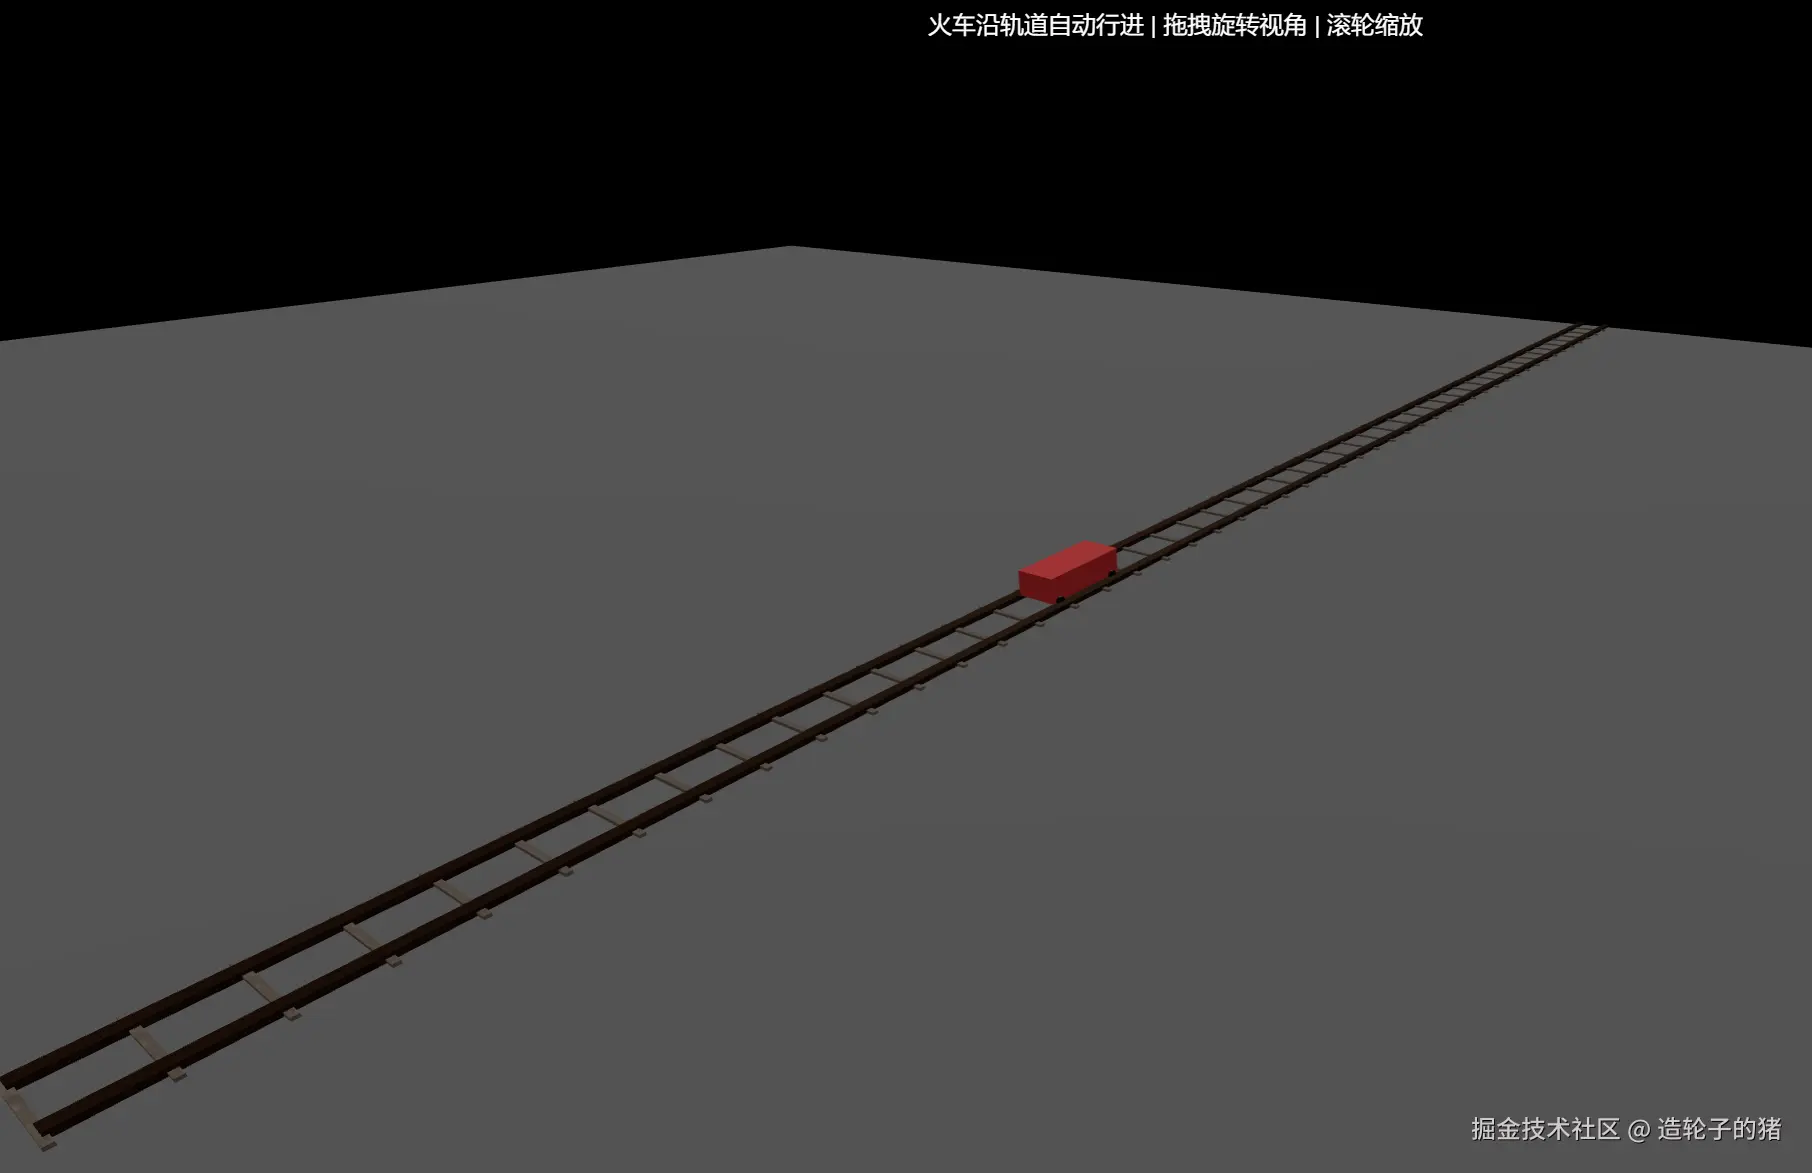
基于Three.js实现带真实纹理的火车轨道 + 沿轨道自动循环行进的简易火车,核心能力包括:
- 轨道模块化构建(钢轨分段创建+枕木间隔排布,支持参数化配置);
- 简易火车模型搭建(车身+4个车轮,车轮精准贴合钢轨);
- 火车沿Z轴自动行进,到达轨道末端后循环重置;
- 自然光照系统+纹理贴图(金属钢轨、木质枕木);
- 基础交互(拖拽旋转视角、滚轮缩放)。
核心技术栈(关键知识点)
| 技术点 | 作用 |
|---|
THREE.Group | 分组管理轨道/火车的子组件(钢轨/枕木/车身/车轮),方便整体控制 |
BoxGeometry/CylinderGeometry | 分别创建轨道(立方体)、车轮(圆柱体)的基础几何形状 |
MeshStandardMaterial | PBR物理材质,支持纹理、金属度、粗糙度,模拟真实钢轨/车轮质感 |
纹理重复配置(wrapS/wrapT/repeat) | 避免纹理拉伸,适配轨道分段尺寸,提升视觉真实度 |
动画循环(requestAnimationFrame) | 实时更新火车位置,实现自动行进+循环逻辑 |
OrbitControls | 基础视角交互(旋转/缩放/阻尼) |
| 几何体旋转/定位 | 车轮旋转适配钢轨方向、轨道/火车精准贴地/居中 |
核心开发流程
A[初始化场景/相机/渲染器/控制器] --> B[配置轨道+火车参数(可复用)]
B --> C[加载纹理并配置重复规则]
C --> D[创建轨道(钢轨分段+枕木间隔)]
D --> E[创建火车模型(车身+车轮精准定位)]
E --> F[创建地面+添加所有元素到场景]
F --> G[窗口适配+动画循环(火车行进+循环)]
分步开发详解
步骤1:基础环境搭建(场景/相机/渲染器/控制器/光照)
1.1 核心代码
const scene = new THREE.Scene();
const camera = new THREE.PerspectiveCamera(
60,
window.innerWidth / window.innerHeight,
1,
3000
);
camera.position.set(5, 3, 10);
const renderer = new THREE.WebGLRenderer({ antialias: true });
renderer.setSize(window.innerWidth, window.innerHeight);
renderer.setPixelRatio(window.devicePixelRatio);
document.body.appendChild(renderer.domElement);
const controls = new OrbitControls(camera, renderer.domElement);
controls.enableDamping = true;
controls.dampingFactor = 0.05;
const ambientLight = new THREE.AmbientLight(0xffffff, 0.4);
scene.add(ambientLight);
const dirLight = new THREE.DirectionalLight(0xffffff, 0.9);
dirLight.position.set(200, 400, 300);
dirLight.castShadow = false;
scene.add(dirLight);
1.2 关键说明
- 相机视角:
position.set(5, 3, 10) 采用俯视视角,既能看到轨道延伸,又能清晰观察火车行进;
- 光照组合:
AmbientLight + DirectionalLight 是Three.js基础光照方案,兼顾暗部细节和主体立体感;
- 控制器阻尼:启用阻尼后,视角拖拽/缩放有惯性,交互体验更自然。
步骤2:核心参数配置
2.1 核心代码
const TRACK_PARAMS = {
railWidth: 0.2,
railHeight: 0.1,
railSpacing: 1.0,
sleeperWidth: 0.1,
sleeperHeight: 0.05,
sleeperLength: 1.5,
sleeperGap: 1.0,
trackLength: 50,
segmentLength: 1.0
};
const TRAIN_PARAMS = {
speed: 0.01,
wheelRadius: 0.1,
wheelWidth: 0.1,
bodyLength: 2.0,
bodyWidth: 0.8,
bodyHeight: 0.5
};
2.2 关键设计思路
- 参数集中化:将轨道/火车的尺寸、间距、速度等参数集中定义,后续修改无需遍历代码,符合「高内聚低耦合」原则;
- 尺寸匹配:
wheelRadius = railHeight 保证车轮刚好贴合钢轨上表面,bodyWidth < railSpacing 保证车身居中在两条钢轨之间。
步骤3:纹理加载与配置(避免拉伸,提升真实度)
3.1 核心代码
const texLoader = new THREE.TextureLoader();
const railTexture = texLoader.load('./rusty_metal_05_diff_1k.jpg', () => {
renderer.render(scene, camera);
});
railTexture.colorSpace = THREE.SRGBColorSpace;
railTexture.wrapS = THREE.RepeatWrapping;
railTexture.wrapT = THREE.RepeatWrapping;
railTexture.repeat.set(2, 10);
railTexture.anisotropy = renderer.capabilities.getMaxAnisotropy();
const sleeperTexture = texLoader.load('./bark_willow_02_diff_1k.jpg');
sleeperTexture.colorSpace = THREE.SRGBColorSpace;
sleeperTexture.wrapS = THREE.RepeatWrapping;
sleeperTexture.wrapT = THREE.RepeatWrapping;
sleeperTexture.repeat.set(1, 1);
3.2 核心技术点
- 纹理重复(RepeatWrapping):默认纹理是
ClampToEdgeWrapping(拉伸),设置为RepeatWrapping后,纹理会按repeat值重复排列,避免长钢轨纹理拉伸模糊;
- 各向异性(anisotropy):提升纹理在斜向视角下的清晰度,尤其适合轨道这种长条状物体;
- 颜色空间:
SRGBColorSpace 是纹理的标准颜色空间,保证纹理颜色显示正确。
步骤4:轨道创建(核心逻辑:分段钢轨+间隔枕木)
4.1 核心代码
function createTrainTrack() {
const trackGroup = new THREE.Group();
const railMaterial = new THREE.MeshStandardMaterial({
map: railTexture,
metalness: 0.8,
roughness: 0.2
});
for (let z = 0; z < TRACK_PARAMS.trackLength; z += TRACK_PARAMS.segmentLength) {
const railGeometry = new THREE.BoxGeometry(
TRACK_PARAMS.railWidth,
TRACK_PARAMS.railHeight,
TRACK_PARAMS.segmentLength
);
const rail = new THREE.Mesh(railGeometry, railMaterial);
rail.position.set(
-TRACK_PARAMS.railSpacing / 2,
TRACK_PARAMS.railHeight / 2,
z + TRACK_PARAMS.segmentLength / 2
);
trackGroup.add(rail);
}
for (let z = 0; z < TRACK_PARAMS.trackLength; z += TRACK_PARAMS.segmentLength) {
const railGeometry = new THREE.BoxGeometry(
TRACK_PARAMS.railWidth,
TRACK_PARAMS.railHeight,
TRACK_PARAMS.segmentLength
);
const rail = new THREE.Mesh(railGeometry, railMaterial);
rail.position.set(
TRACK_PARAMS.railSpacing / 2,
TRACK_PARAMS.railHeight / 2,
z + TRACK_PARAMS.segmentLength / 2
);
trackGroup.add(rail);
}
const sleeperMaterial = new THREE.MeshStandardMaterial({ map: sleeperTexture });
for (let z = 0; z < TRACK_PARAMS.trackLength; z += TRACK_PARAMS.sleeperGap) {
const sleeperGeometry = new THREE.BoxGeometry(
TRACK_PARAMS.sleeperLength,
TRACK_PARAMS.sleeperHeight,
TRACK_PARAMS.sleeperWidth
);
const sleeper = new THREE.Mesh(sleeperGeometry, sleeperMaterial);
sleeper.position.set(
0,
TRACK_PARAMS.sleeperHeight / 2,
z
);
trackGroup.add(sleeper);
}
return trackGroup;
}
4.2 核心技术点解析
- 钢轨分段创建:若直接创建长度为50的钢轨几何体,顶点数过多且纹理拉伸严重;分段(
segmentLength=1.0)后,每个钢轨段尺寸小、纹理重复合理,性能更优;
- Group分组管理:将所有钢轨、枕木添加到
trackGroup,后续可通过操作trackGroup整体移动/旋转轨道,便于扩展;
- 定位逻辑:所有几何体的Y轴位置为「高度/2」,保证底部贴地(Y=0),避免悬浮/埋地。
步骤5:火车模型创建(车身+车轮,精准贴合轨道)
5.1 核心代码
function createTrain() {
const trainGroup = new THREE.Group();
const bodyMaterial = new THREE.MeshStandardMaterial({
color: 0xff4444,
metalness: 0.1,
roughness: 0.8
});
const bodyGeometry = new THREE.BoxGeometry(
TRAIN_PARAMS.bodyWidth,
TRAIN_PARAMS.bodyHeight,
TRAIN_PARAMS.bodyLength
);
const body = new THREE.Mesh(bodyGeometry, bodyMaterial);
body.position.set(
0,
TRAIN_PARAMS.wheelRadius + TRAIN_PARAMS.bodyHeight / 2,
0
);
trainGroup.add(body);
const wheelMaterial = new THREE.MeshStandardMaterial({
color: 0x333333,
metalness: 0.8,
roughness: 0.2
});
const wheelGeometry = new THREE.CylinderGeometry(
TRAIN_PARAMS.wheelRadius,
TRAIN_PARAMS.wheelRadius,
TRAIN_PARAMS.wheelWidth,
16
);
const frontLeftWheel = new THREE.Mesh(wheelGeometry, wheelMaterial);
frontLeftWheel.rotation.z = Math.PI / 2;
frontLeftWheel.position.set(
-TRACK_PARAMS.railSpacing / 2 + TRACK_PARAMS.railWidth / 2,
TRAIN_PARAMS.wheelRadius,
TRAIN_PARAMS.bodyLength / 2 - 0.2
);
trainGroup.add(frontLeftWheel);
const frontRightWheel = new THREE.Mesh(wheelGeometry, wheelMaterial);
frontRightWheel.rotation.z = Math.PI / 2;
frontRightWheel.position.set(
TRACK_PARAMS.railSpacing / 2 - TRACK_PARAMS.railWidth / 2,
TRAIN_PARAMS.wheelRadius,
TRAIN_PARAMS.bodyLength / 2 - 0.2
);
trainGroup.add(frontRightWheel);
const backLeftWheel = new THREE.Mesh(wheelGeometry, wheelMaterial);
backLeftWheel.rotation.z = Math.PI / 2;
backLeftWheel.position.set(
-TRACK_PARAMS.railSpacing / 2 + TRACK_PARAMS.railWidth / 2,
TRAIN_PARAMS.wheelRadius,
-TRAIN_PARAMS.bodyLength / 2 + 0.2
);
trainGroup.add(backLeftWheel);
const backRightWheel = new THREE.Mesh(wheelGeometry, wheelMaterial);
backRightWheel.rotation.z = Math.PI / 2;
backRightWheel.position.set(
TRACK_PARAMS.railSpacing / 2 - TRACK_PARAMS.railWidth / 2,
TRAIN_PARAMS.wheelRadius,
-TRAIN_PARAMS.bodyLength / 2 + 0.2
);
trainGroup.add(backRightWheel);
trainGroup.position.z = 0;
return trainGroup;
}
5.2 核心技术点解析
- 车轮旋转:
CylinderGeometry 默认是垂直方向(Y轴),通过rotation.z = Math.PI / 2 旋转为水平方向(X轴),贴合钢轨延伸方向;
- 车轮定位:
-TRACK_PARAMS.railSpacing / 2 + TRACK_PARAMS.railWidth / 2 精准对齐钢轨内侧,避免车轮偏移;
- 车身高度:
wheelRadius + bodyHeight / 2 保证车身底部与车轮顶部贴合,模拟真实火车结构。
步骤6:地面创建+元素组装
6.1 核心代码
const groundGeometry = new THREE.PlaneGeometry(100, 100);
const groundMaterial = new THREE.MeshStandardMaterial({ color: 0x888888 });
const ground = new THREE.Mesh(groundGeometry, groundMaterial);
ground.rotation.x = -Math.PI / 2;
ground.position.y = 0;
scene.add(ground);
const track = createTrainTrack();
const train = createTrain();
scene.add(track);
scene.add(train);
6.2 关键说明
- 地面旋转:
PlaneGeometry 默认是XY平面(垂直),rotation.x = -Math.PI / 2 旋转为XZ平面(水平),作为场景地面;
- 地面尺寸:
100x100 远大于轨道长度(50),保证轨道完全覆盖在地面上。
步骤7:窗口适配+动画循环(火车行进核心)
7.1 核心代码
window.addEventListener('resize', () => {
camera.aspect = window.innerWidth / window.innerHeight;
camera.updateProjectionMatrix();
renderer.setSize(window.innerWidth, window.innerHeight);
});
function animate() {
requestAnimationFrame(animate);
train.position.z += TRAIN_PARAMS.speed;
if (train.position.z > TRACK_PARAMS.trackLength) {
train.position.z = -TRAIN_PARAMS.bodyLength;
}
controls.update();
renderer.render(scene, camera);
}
animate();
7.2 核心技术点解析
- 火车行进逻辑:通过每帧修改
train.position.z 实现沿轨道(Z轴)行进,speed 控制行进速度;
- 循环重置:
train.position.z > TRACK_PARAMS.trackLength 时,重置为-TRAIN_PARAMS.bodyLength(车身长度负值),保证火车从轨道起点外进入,循环更自然;
- 窗口适配:相机宽高比修改后,必须调用
updateProjectionMatrix() 使修改生效。
核心技术点深度解析
1. 钢轨分段的必要性
- 性能层面:单个长度为50的钢轨几何体,顶点数=(宽度分段×高度分段×长度分段),远多于50个长度为1的分段几何体总和;
- 纹理层面:分段后每个钢轨段的纹理可通过
repeat 精准控制,避免长钢轨纹理拉伸模糊;
- 扩展层面:分段轨道更容易实现弯曲轨道(后续可通过修改每个分段的旋转/位置实现曲线)。
2. 车轮与钢轨的精准贴合
| 参数匹配 | 效果 |
|---|
wheelRadius = railHeight | 车轮半径等于钢轨高度,车轮底部刚好落在钢轨上表面 |
车轮X坐标 = ±railSpacing/2 ± railWidth/2 | 车轮内侧对齐钢轨外侧,避免偏移 |
车轮Y坐标 = wheelRadius | 车轮中心Y轴高度=半径,底部贴钢轨上表面 |
3. 动画循环的核心逻辑
A[每帧执行animate] --> B[train.position.z += speed]
B --> C{z > trackLength?}
C -- 是 --> D[z = -bodyLength(重置)]
C -- 否 --> E[继续行进]
D --> F[渲染场景]
E --> F[渲染场景]
完整优化代码
<!DOCTYPE html>
<html lang="zh-CN">
<head>
<meta charset="UTF-8" />
<title>Three.js 轨道+火车自动行进</title>
<style>
body { margin: 0; overflow: hidden; }
#info {
position: absolute;
top: 10px;
width: 100%;
text-align: center;
color: white;
font-family: Arial, sans-serif;
text-shadow: 0 0 5px rgba(0,0,0,0.8);
pointer-events: none;
z-index: 10;
}
</style>
</head>
<body>
<div id="info">火车沿轨道自动行进 | 拖拽旋转视角 | 滚轮缩放</div>
<script type="module">
import * as THREE from 'https://esm.sh/three@0.174.0';
import { OrbitControls } from 'https://esm.sh/three@0.174.0/examples/jsm/controls/OrbitControls.js';
const scene = new THREE.Scene();
const camera = new THREE.PerspectiveCamera(60, window.innerWidth / window.innerHeight, 1, 3000);
camera.position.set(5, 3, 10);
const renderer = new THREE.WebGLRenderer({ antialias: true });
renderer.setSize(window.innerWidth, window.innerHeight);
renderer.setPixelRatio(window.devicePixelRatio);
document.body.appendChild(renderer.domElement);
const controls = new OrbitControls(camera, renderer.domElement);
controls.enableDamping = true;
controls.dampingFactor = 0.05;
const ambientLight = new THREE.AmbientLight(0xffffff, 0.4);
scene.add(ambientLight);
const dirLight = new THREE.DirectionalLight(0xffffff, 0.9);
dirLight.position.set(200, 400, 300);
dirLight.castShadow = false;
scene.add(dirLight);
const TRACK_PARAMS = {
railWidth: 0.2,
railHeight: 0.1,
railSpacing: 1.0,
sleeperWidth: 0.1,
sleeperHeight: 0.05,
sleeperLength: 1.5,
sleeperGap: 1.0,
trackLength: 50,
segmentLength: 1.0
};
const TRAIN_PARAMS = {
speed: 0.01,
wheelRadius: 0.1,
wheelWidth: 0.1,
bodyLength: 2.0,
bodyWidth: 0.8,
bodyHeight: 0.5
};
const texLoader = new THREE.TextureLoader();
const railTexture = texLoader.load('./rusty_metal_05_diff_1k.jpg', () => {
renderer.render(scene, camera);
});
railTexture.colorSpace = THREE.SRGBColorSpace;
railTexture.wrapS = THREE.RepeatWrapping;
railTexture.wrapT = THREE.RepeatWrapping;
railTexture.repeat.set(2, 10);
railTexture.anisotropy = renderer.capabilities.getMaxAnisotropy();
const sleeperTexture = texLoader.load('./bark_willow_02_diff_1k.jpg');
sleeperTexture.colorSpace = THREE.SRGBColorSpace;
sleeperTexture.wrapS = THREE.RepeatWrapping;
sleeperTexture.wrapT = THREE.RepeatWrapping;
sleeperTexture.repeat.set(1, 1);
function createTrainTrack() {
const trackGroup = new THREE.Group();
const railMaterial = new THREE.MeshStandardMaterial({
map: railTexture,
metalness: 0.8,
roughness: 0.2
});
for (let z = 0; z < TRACK_PARAMS.trackLength; z += TRACK_PARAMS.segmentLength) {
const railGeometry = new THREE.BoxGeometry(
TRACK_PARAMS.railWidth,
TRACK_PARAMS.railHeight,
TRACK_PARAMS.segmentLength
);
const rail = new THREE.Mesh(railGeometry, railMaterial);
rail.position.set(
-TRACK_PARAMS.railSpacing / 2,
TRACK_PARAMS.railHeight / 2,
z + TRACK_PARAMS.segmentLength / 2
);
trackGroup.add(rail);
}
for (let z = 0; z < TRACK_PARAMS.trackLength; z += TRACK_PARAMS.segmentLength) {
const railGeometry = new THREE.BoxGeometry(
TRACK_PARAMS.railWidth,
TRACK_PARAMS.railHeight,
TRACK_PARAMS.segmentLength
);
const rail = new THREE.Mesh(railGeometry, railMaterial);
rail.position.set(
TRACK_PARAMS.railSpacing / 2,
TRACK_PARAMS.railHeight / 2,
z + TRACK_PARAMS.segmentLength / 2
);
trackGroup.add(rail);
}
const sleeperMaterial = new THREE.MeshStandardMaterial({ map: sleeperTexture });
for (let z = 0; z < TRACK_PARAMS.trackLength; z += TRACK_PARAMS.sleeperGap) {
const sleeperGeometry = new THREE.BoxGeometry(
TRACK_PARAMS.sleeperLength,
TRACK_PARAMS.sleeperHeight,
TRACK_PARAMS.sleeperWidth
);
const sleeper = new THREE.Mesh(sleeperGeometry, sleeperMaterial);
sleeper.position.set(
0,
TRACK_PARAMS.sleeperHeight / 2,
z
);
trackGroup.add(sleeper);
}
return trackGroup;
}
function createTrain() {
const trainGroup = new THREE.Group();
const bodyMaterial = new THREE.MeshStandardMaterial({
color: 0xff4444,
metalness: 0.1,
roughness: 0.8
});
const bodyGeometry = new THREE.BoxGeometry(
TRAIN_PARAMS.bodyWidth,
TRAIN_PARAMS.bodyHeight,
TRAIN_PARAMS.bodyLength
);
const body = new THREE.Mesh(bodyGeometry, bodyMaterial);
body.position.set(
0,
TRAIN_PARAMS.wheelRadius + TRAIN_PARAMS.bodyHeight / 2,
0
);
trainGroup.add(body);
const wheelMaterial = new THREE.MeshStandardMaterial({
color: 0x333333,
metalness: 0.8,
roughness: 0.2
});
const wheelGeometry = new THREE.CylinderGeometry(
TRAIN_PARAMS.wheelRadius,
TRAIN_PARAMS.wheelRadius,
TRAIN_PARAMS.wheelWidth,
16
);
const frontLeftWheel = new THREE.Mesh(wheelGeometry, wheelMaterial);
frontLeftWheel.rotation.z = Math.PI / 2;
frontLeftWheel.position.set(
-TRACK_PARAMS.railSpacing / 2 + TRACK_PARAMS.railWidth / 2,
TRAIN_PARAMS.wheelRadius,
TRAIN_PARAMS.bodyLength / 2 - 0.2
);
trainGroup.add(frontLeftWheel);
const frontRightWheel = new THREE.Mesh(wheelGeometry, wheelMaterial);
frontRightWheel.rotation.z = Math.PI / 2;
frontRightWheel.position.set(
TRACK_PARAMS.railSpacing / 2 - TRACK_PARAMS.railWidth / 2,
TRAIN_PARAMS.wheelRadius,
TRAIN_PARAMS.bodyLength / 2 - 0.2
);
trainGroup.add(frontRightWheel);
const backLeftWheel = new THREE.Mesh(wheelGeometry, wheelMaterial);
backLeftWheel.rotation.z = Math.PI / 2;
backLeftWheel.position.set(
-TRACK_PARAMS.railSpacing / 2 + TRACK_PARAMS.railWidth / 2,
TRAIN_PARAMS.wheelRadius,
-TRAIN_PARAMS.bodyLength / 2 + 0.2
);
trainGroup.add(backLeftWheel);
const backRightWheel = new THREE.Mesh(wheelGeometry, wheelMaterial);
backRightWheel.rotation.z = Math.PI / 2;
backRightWheel.position.set(
TRACK_PARAMS.railSpacing / 2 - TRACK_PARAMS.railWidth / 2,
TRAIN_PARAMS.wheelRadius,
-TRAIN_PARAMS.bodyLength / 2 + 0.2
);
trainGroup.add(backRightWheel);
trainGroup.position.z = 0;
return trainGroup;
}
const groundGeometry = new THREE.PlaneGeometry(100, 100);
const groundMaterial = new THREE.MeshStandardMaterial({ color: 0x888888 });
const ground = new THREE.Mesh(groundGeometry, groundMaterial);
ground.rotation.x = -Math.PI / 2;
ground.position.y = 0;
scene.add(ground);
const track = createTrainTrack();
const train = createTrain();
scene.add(track);
scene.add(train);
window.addEventListener('resize', () => {
camera.aspect = window.innerWidth / window.innerHeight;
camera.updateProjectionMatrix();
renderer.setSize(window.innerWidth, window.innerHeight);
});
function animate() {
requestAnimationFrame(animate);
train.position.z += TRAIN_PARAMS.speed;
if (train.position.z > TRACK_PARAMS.trackLength) {
train.position.z = -TRAIN_PARAMS.bodyLength;
}
controls.update();
renderer.render(scene, camera);
}
animate();
</script>
</body>
</html>
总结与扩展建议
核心总结
- 模块化设计:通过
Group分组管理轨道/火车的子组件,参数集中化配置,便于维护和扩展;
- 几何体精准定位:所有元素的Y轴位置为「高度/2」保证贴地,车轮通过旋转+坐标计算精准贴合钢轨;
- 纹理优化:使用
RepeatWrapping避免纹理拉伸,anisotropy提升斜向清晰度,PBR材质(MeshStandardMaterial)模拟真实质感;
- 动画核心:通过
requestAnimationFrame每帧更新火车position.z实现行进,结合边界判断实现循环逻辑。
扩展建议
- 车轮旋转动画:在
animate中添加wheel.rotation.x += 0.1,让车轮随行进旋转,更真实;
- 弯曲轨道:修改钢轨分段的
rotation.y和position,实现曲线轨道(需计算圆弧坐标);
- 火车细节增强:添加车窗、烟囱、车头等细节,或加载3D模型替代简易几何体;
- 轨道材质优化:启用阴影(
castShadow/receiveShadow),添加钢轨反光、枕木磨损效果;
- 交互增强:添加速度控制(滑块调整
TRAIN_PARAMS.speed)、轨道开关、火车启停按钮;
- 性能优化:使用
InstancedMesh替代重复创建的钢轨/枕木,减少DrawCall。


