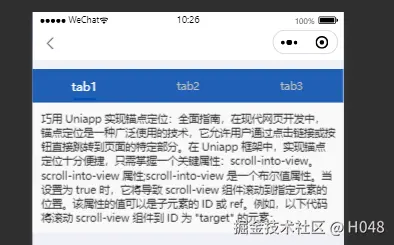
实现效果:
实现代码如下:
<script setup>
import { nextTick, ref } from 'vue';
import { onShow } from '@dcloudio/uni-app';
const animationData = ref({});
const animation = ref(null);
const current = ref(0);
const toView = ref('md1'); // 默认定位到第一个元素
const contentStyle = ref({
height: 'calc(100vh - 100px)', // 根据需要调整高度
});
const serviceInfo = ref({
cont: '巧用 Uniapp 实现锚点定位:全面指南,在现代网页开发中,锚点定位是一种广泛使用的技术,它允许用户通过点击链接或按钮直接跳转到页面的特定部分。在 Uniapp 框架中,实现锚点定位十分便捷,只需掌握一个关键属性:scroll-into-view。scroll-into-view 属性;scroll-into-view 是一个布尔值属性。当设置为 true 时,它将导致 scroll-view 组件滚动到指定元素的位置。该属性的值可以是子元素的 ID 或 ref。例如,以下代码将滚动 scroll-view 组件到 ID 为 "target" 的元素:<scroll-view scroll-into-view="target"></scroll-view>',
notice:
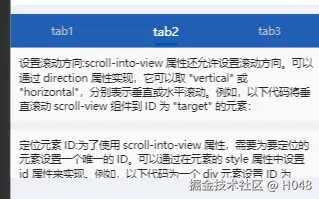
'设置滚动方向:scroll-into-view 属性还允许设置滚动方向。可以通过 direction 属性实现,它可以取 "vertical" 或 "horizontal",分别表示垂直或水平滚动。例如,以下代码将垂直滚动 scroll-view 组件到 ID 为 "target" 的元素:<scroll-view scroll-into-view="target" direction="vertical"></scroll-view>',
costExplain:
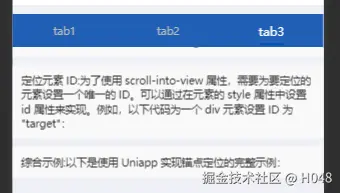
'定位元素 ID:为了使用 scroll-into-view 属性,需要为要定位的元素设置一个唯一的 ID。可以通过在元素的 style 属性中设置 id 属性来实现。例如,以下代码为一个 div 元素设置 ID 为 "target":<div id="target"></div>',
refundExplain: '综合示例:以下是使用 Uniapp 实现锚点定位的完整示例:',
});
const serviceList = [
{
name: 'tab1',
index: 0,
},
{
name: 'tab2',
index: 1,
},
{
name: 'tab3',
index: 2,
},
];
const changeTab = async (resIndex) => {
if (!animation.value) {
animation.value = uni.createAnimation({
duration: 1000,
timingFunction: 'ease',
});
}
current.value = resIndex.index;
toView.value = `md${resIndex.index + 1}`; // 根据 tab 索引更新 toView
rotateAndScale();
};
// 定义动画内容
function rotateAndScale() {
if (!animation.value) {
console.error('Animation is not initialized');
return;
}
animation.value.rotate(45).scale(2, 2).step();
animationData.value = animation.value.export();
}
function norotateAndScale() {
if (!animation.value) {
console.error('Animation is not initialized');
return;
}
animation.value.rotate(0).scale(1, 1).step();
animationData.value = animation.value.export();
}
const leftClick = () => {
uni.switchTab({
url: `/pages/index/index`,
});
};
onShow(() => {
animation.value = uni.createAnimation({
duration: 1000,
timingFunction: 'ease',
});
});
</script>
<template>
<view class="service_item_list">
<u-navbar
title=""
placeholder
:title-style="{
fontSize: '36rpx',
fontWeight: 'bold',
}"
@leftClick="leftClick"
/>
<u-tabs
ref="tabs"
:inactive-style="{ fontSize: '14px', color: '#bbbbbb' }"
:active-style="{ color: '#fff', fontSize: '16px' }"
:line-width="30"
line-color="#0050b3"
:list="serviceList"
:current="current"
:is-scroll="false"
swiper-width="750"
@change="changeTab"
/>
<scroll-view
:scroll-into-view="toView"
:style="contentStyle"
:show-bar="false"
:scroll-y="true"
:scroll-with-animation="true"
class="service_item_content"
>
<view id="md1" class="md" v-html="serviceInfo.cont" />
<view id="md2" class="md" v-html="serviceInfo.notice" />
<view id="md3" class="md" v-html="serviceInfo.costExplain" />
<view id="md4" class="md" v-html="serviceInfo.refundExplain" />
</scroll-view>
</view>
</template>
<style scoped lang="scss">
.service_item_list {
display: flex;
flex-direction: column;
height: 40vh;
}
.service_item_content {
flex: 1;
overflow-y: scroll;
}
.md {
padding: 20rpx;
margin-bottom: 20rpx;
background-color: #f9f9f9;
}
:deep(.u-tabs) {
margin-top: 12px;
background-color: #205fb5;
display: flex;
justify-content: space-between;
height: 45px;
font-size: 16px;
.u-tabs__wrapper__nav__item {
flex: 1;
}
}
</style>
参考:uni-app实现锚点定位功能_uniapp锚点定位-CSDN博客


