

大家好,我是walker 一个从文科自学转行的程序员~ 爱好编程,偶尔写写编程文章和生活 欢迎关注公众号【I am Walker】,回复“电子书”,就可以获得200多本编程相关电子书哈~ 我的gitee:gitee.com/shen-chuhao… 里面很多技术案例!
学习参考:zhuanlan.zhihu.com/p/259833884
概览
可以高效的安装虚拟机
安装
1、下载vagranthttps://www.vagrantup.com/downloads2、下载box镜像 若是镜像下载较慢,可以使用清华大学镜像网mirror.tuna.tsinghua.edu.cn/可以选择centos,… 3、安装box
#1、 先使用指令查询是否安装镜像
C:\Users\plan>vagrant box list
There are no installed boxes! Use `vagrant box add` to add some.


# 2、使用vagrant box add   --name  指定名称
$ vagrant box add e:\Downloads\CentOS-7.box --name centos-7
==> box: Box file was not detected as metadata. Adding it directly...
==> box: Adding box 'centos-7' (v0) for provider:
    box: Unpacking necessary files from: file:///e:/Downloads/CentOS-7.box
    box:
==> box: Successfully added box 'centos-7' (v0) for 'virtualbox'!

#3、查看安装列表
C:\Users\plan>vagrant box list
centos/7 (virtualbox, 2004.01)


#4、初始化  这里的centos/7是config.vm.box的配置,主要用于识别虚拟机
C:\Users\walker>vagrant init centos/7

#5、启动虚拟机,之后就可以使用virtualbox进行启动,当然也可以使用xshell
#不过使用xshell连接默认需要ssh,使用步骤可以查看后面的问题系列
vagrant up
指令
启动虚拟机 vagrant up
查看虚拟机 vagrant status
C:\Users\plan>vagrant status
Current machine states:

default                   running (virtualbox)

The VM is running. To stop this VM, you can run `vagrant halt` to
shut it down forcefully, or you can run `vagrant suspend` to simply
suspend the virtual machine. In either case, to restart it again,
simply run `vagrant up`.
连接虚拟机 vagrant ssh
停止虚拟机 vagrant halt
要确保相关的应用已经关掉,否则会出现关闭不了的情况
C:\Users\plan>vagrant halt
An action 'halt' was attempted on the machine 'default',
but another process is already executing an action on the machine.
Vagrant locks each machine for access by only one process at a time.
Please wait until the other Vagrant process finishes modifying this
machine, then try again.

If you believe this message is in error, please check the process
listing for any "ruby" or "vagrant" processes and kill them. Then
try again.
要将vagrant up的那个界面关掉,然后再使用指令
C:\Users\plan>vagrant halt
==> default: Attempting graceful shutdown of VM...

C:\Users\plan>vagrant status
Current machine states:

default                   poweroff (virtualbox)

The VM is powered off. To restart the VM, simply run `vagrant up`
暂停虚拟机 vagrant suspend
C:\Users\plan>vagrant suspend
==> default: Saving VM state and suspending execution...

C:\Users\plan>vagrant status
Current machine states:

default                   saved (virtualbox)

To resume this VM, simply run `vagrant up`.
恢复虚拟机 vagrant resume
将暂停的恢复
C:\Users\plan>vagrant resume
==> default: Resuming suspended VM...
==> default: Booting VM...
==> default: Waiting for machine to boot. This may take a few minutes...
    default: SSH address: 127.0.0.1:2200
    default: SSH username: vagrant
    default: SSH auth method: private key
注意: 不管虚机是关闭还是暂停状态,甚至是 error 状态,都可以执行 vagrant up 来让虚机恢复运行。
重载虚拟机 vagrant reload
执行下面的命令会重启虚机,并且重新加载 Vagrantfile 中的配置信息:
删除虚拟机 vagrant destroy
Vagrantfile
位置C:\Users\用户\Vagrantfile配置文件
Vagrant.configure("2") do |config|
# 虚拟机镜像
config.vm.box = "centos/7"
#
config.vm.network "private_network", ip: "192.168.56.10"

end
自定义配置vagrantfile
配置端口转发
端口转发(Port forward)又叫端口映射,就是把虚机的某个端口,映射到宿主机的端口上。这样就能在宿主机上访问到虚拟机中的服务
 # Create a forwarded port mapping which allows access to a specific port
  # within the machine from a port on the host machine and only allow access
  # via 127.0.0.1 to disable public access
  #  这里代表了使用客户端的80去映射虚拟机的8080
  # config.vm.network "forwarded_port", guest: 80, host: 8080, host_ip: "127.0.0.1"
实际上设置端口转发这个功能并不实用,一个很明显的问题就是如果启动多个虚机,很容易就出现宿主机上端口冲突的问题。即使没有端口冲突,使用起来也不方便,我个人不推荐使用的,可以把这部分配置直接删掉。直接使用下面的私有网络。还有个地方需要注意,默认的 SSH 端口映射在这里没法直接修改。比如像我这样,2222 端口出现莫名问题,如果想要把 22 端口转发到其它端口如 22222,直接添加下面这样的配置是没用的:
config.vm.network "forwarded_port", guest: 22, host: 22222
它会在原来的基础上新加一个端口转发规则,而不是替代原来的,必须要先强制关闭掉默认的那条规则:
config.vm.network "forwarded_port", guest: 22, host: 2222, id: "ssh", disabled: "true" config.vm.network "forwarded_port", guest: 22, host: 22222
配置私有网络
# 配置私有网络
 # Create a private network, which allows host-only access to the machine
  # using a specific IP.
  # config.vm.network "private_network", ip: "192.168.33.10"
配置共有网络
 # Create a public network, which generally matched to bridged network.
  # Bridged networks make the machine appear as another physical device on
  # your network.
  # config.vm.network "public_network"
正如注释所说,这里通常对应的就是桥接网络。实际开发场景下,我们极少会需要把虚机暴露到公共网络上,这样既不安全,也没有必要。 默认所起的第 1 个 NAT 网络已经保证了虚机可以上互联网,而私有网络保证了宿主机和虚机,以及虚机和虚机之间的通信。如果有对外暴露服务的需求,还可以使用端口转发。我实在想不出什么情况下是必须要用桥接网络的。 所以这部分配置可以直接删除,如确有使用的,可以参考 官方文档。
配置同步文件夹
配置项
config.vm.synced_folder
   "your_folder"(必须)   //物理机目录,可以是绝对地址或相对地址,相对地址是指相对与vagrant配置文件所在目录
  ,"vm_folder(必须)"    // 挂载到虚拟机上的目录地址
  ,create(boolean)--可选     //默认为false,若配置为true,挂载到虚拟机上的目录若不存在则自动创建
  ,disabled(boolean):--可选   //默认为false,若为true,则禁用该项挂载
  ,owner(string):'www'--可选   //虚拟机系统下文件所有者(确保系统下有该用户,否则会报错),默认为vagrant
  ,group(string):'www'--可选   //虚拟机系统下文件所有组( (确保系统下有该用户组,否则会报错),默认为vagrant
  ,mount_options(array):["dmode=775","fmode=664"]--可选  dmode配置目录权限,fmode配置文件权限  //默认权限777
  ,type(string):--可选     //指定文件共享方式,例如:'nfs',vagrant默认根据系统环境选择最佳的文件共享方式
# Share an additional folder to the guest VM. The first argument is # the path on the host to the actual folder. The second argument is # the path on the guest to mount the folder. And the optional third # argument is a set of non-required options. # 第一个参数是宿主机的参数 是vagrantfile所在目录 # 第二个参数是虚拟机内部的路径 # config.vm.synced_folder "../data", "/vagrant_data"
在vagrant up的时候,就可以看到已经配置的同步文件夹
C:\Users\plan>vagrant up Bringing machine 'default' up with 'virtualbox' provider... ==> default: Checking if box 'centos/7' version '2004.01' is up to date... ==> default: Clearing any previously set forwarded ports... ==> default: Clearing any previously set network interfaces... ==> default: Preparing network interfaces based on configuration... default: Adapter 1: nat default: Adapter 2: hostonly ==> default: Forwarding ports... default: 22 (guest) => 2222 (host) (adapter 1) ==> default: Booting VM... ==> default: Waiting for machine to boot. This may take a few minutes... default: SSH address: 127.0.0.1:2222 default: SSH username: vagrant default: SSH auth method: private key ==> default: Machine booted and ready! ==> default: Checking for guest additions in VM... default: No guest additions were detected on the base box for this VM! Guest default: additions are required for forwarded ports, shared folders, host only default: networking, and more. If SSH fails on this machine, please install default: the guest additions and repackage the box to continue. default: default: This is not an error message; everything may continue to work properly, default: in which case you may ignore this message. ==> default: Configuring and enabling network interfaces...
# 将/cygdrive/c/Users/plan/ 映射到vagrantfile ==> default: Rsyncing folder: /cygdrive/c/Users/plan/ => /vagrant
**测试**1、现在虚拟机中建立一个/vagrant\_data文件夹 2、添加映射配置
# 新建新的共享方式 config.vm.synced_folder "D:/enviroment/vagrant", # 宿主机的文件路径 需要先配置 "/vagrant_data", create:true, mount_options:["dmode=775","fmode=664"]
# 取消默认配置 config.vm.synced_folder ".", "/vagrant", type: "rsync", disabled:true
3、执行vagrant reload4、测试
不足之处:
* 同步是一次性的,即只有启动虚机的时候执行,也就是说改了代码必须要重启一次虚机
* 单向的,即只能从宿主机同步到虚拟机,也就是说在虚机内的改动不会同步到外面
* 需要拷贝文件,如果要同步的文件数量较多,会占用更多的磁盘空间
#### 更改虚拟机规格
VirtualBox 等虚拟机软件在 Vagrant 中被称为 Provider,虚机的规格等配置是和 Provider 相关的。因为 VirtualBox 用的最多,所以默认的配置提示是以 VirtualBox 举例。 如果想要了解其它 Provider 的配置,请参考 文档
# Provider-specific configuration so you can fine-tune various # backing providers for Vagrant. These expose provider-specific options. # Example for VirtualBox: # # config.vm.provider "virtualbox" do |vb| # # Display the VirtualBox GUI when booting the machine # vb.gui = true # # # Customize the amount of memory on the VM: # vb.memory = "1024" # end # # View the documentation for the provider you are using for more # information on available options.
#### config.vm.box

疑问
==

问题
==

#### 第一次使用xshell账号密码无法登录

账号密码都是vagrant

**获取秘钥**使用vagrant ssh-config指令,可以获取vagrant的配置
C:\Users\plan>vagrant ssh-config Host default HostName 127.0.0.1 User vagrant Port 2222 UserKnownHostsFile /dev/null StrictHostKeyChecking no PasswordAuthentication no
找到下列的地址,就是秘钥的文件了
IdentityFile C:/Users/plan/.vagrant/machines/default/virtualbox/private_key IdentitiesOnly yes LogLevel FATAL
秘钥所在位置:C:/Users/plan/.vagrant/machines/default/virtualbox/private\_key
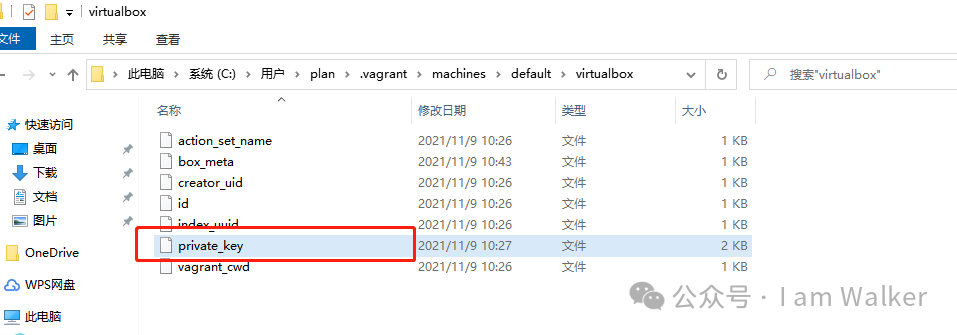
image.png
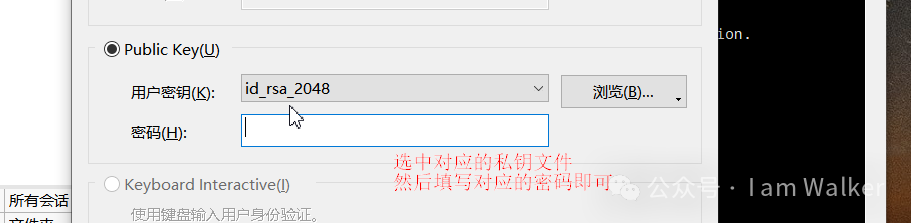
image.png
