

使用vite构建vue项目:
npm init vite@latest
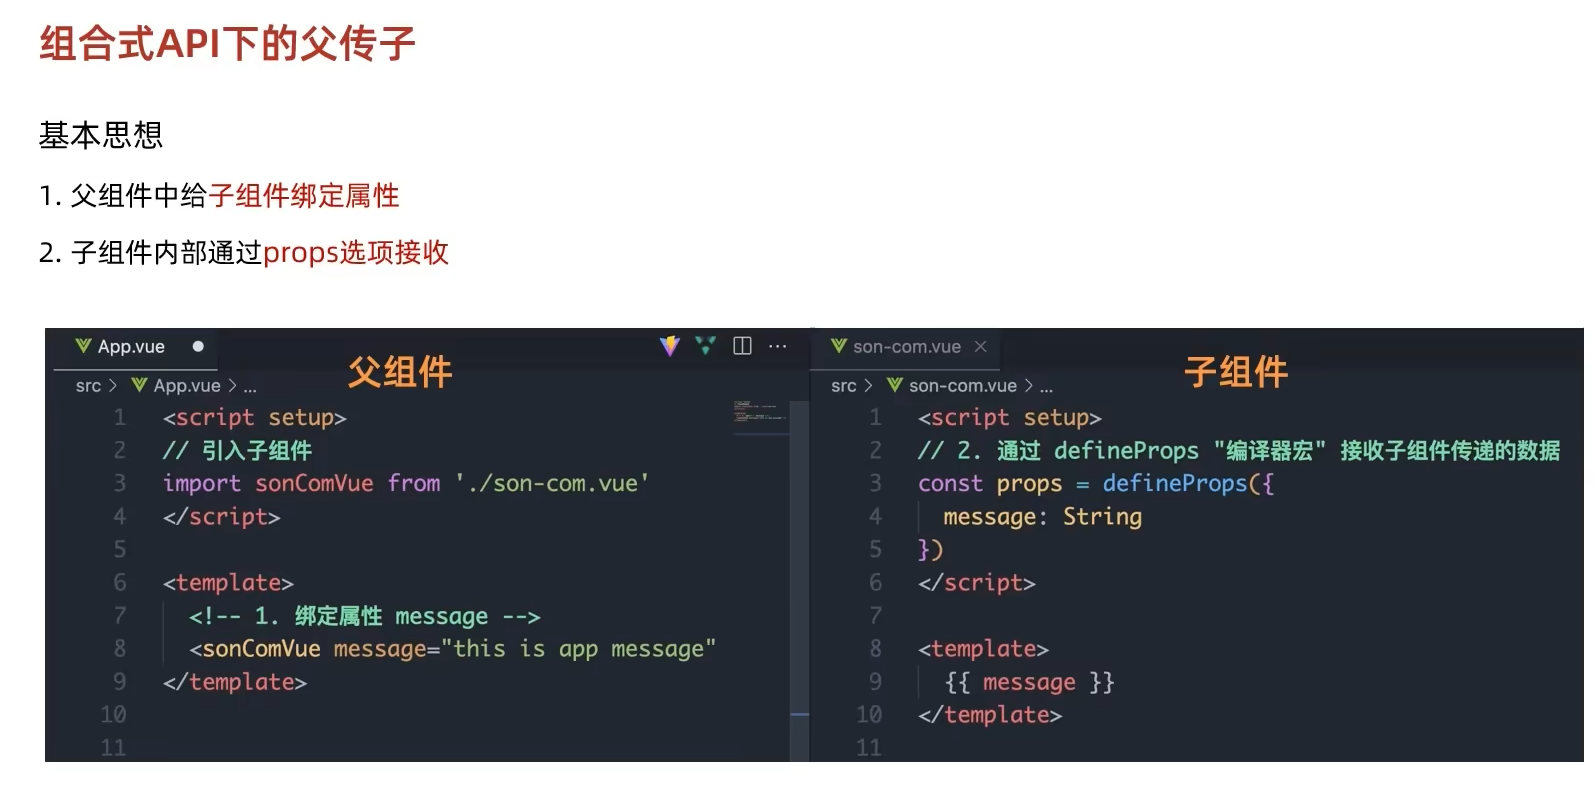
组合式API下的父传子和子传父

插值语法中可以使用三元表达式,以及JavaScript语句
vue中动态参数用[]包裹,属性名要小写
<template></template>标签不会被渲染,用于过渡
v-for支持输出index索引
对于字典,使用name表示key
导入vue组件
自定义插槽
具名插槽的用法:
作用域插槽使用的一些对应关系:
使用v-model实时传值
v-router路由配置
main.js:
把app.vue内template内的内容改为
在main.js中配置二级路由
$emit的用法: 子组件:
<template>
  <button @click="sendEvent">Click me</button>
</template>

<script>
export default {
  methods: {
    sendEvent() {
      this.$emit('custom-event', 'Hello from ChildComponent!');
    }
  }
}
//this.$emit('custom-event', 'Hello from ChildComponent!') 触发了一个名为 custom-event 的事件
//,并传递了一个字符串参数 'Hello from ChildComponent!'。
</script>
父组件:
<template>
  <div>
    <ChildComponent @custom-event="handleEvent" />
  </div>
</template>

<script>
import ChildComponent from './ChildComponent.vue';

export default {
  components: {
    ChildComponent
  },
  methods: {
    handleEvent(message) {
      console.log(message); // 输出 'Hello from ChildComponent!'
    }
  }
}
//使用 @custom-event="handleEvent" 监听子组件的 custom-event 事件,
//并调用 handleEvent 方法处理传递过来的数据
</script>
总结 $emit(eventName, payload): 用于在子组件中触发一个事件。eventName 是事件的名称,payload 是可选的参数,用于传递数据给父组件。 父组件通过 @event-name="handlerMethod" 来监听子组件的事件。
vue中响应式处理,ref和reactive的区别
// 使用 ref 创建一个响应式的单一值
    const count = ref(0);

    // 使用 reactive 创建一个响应式对象
    const state = reactive({
      count: 0,
      todos: []
    });

    function incrementCount() {
      count.value++; // 对 ref 值进行操作(需要.value)
      state.count++; // 对 reactive 对象的属性进行操作(不需要.value)
    }
组合式api生命周期 生命周期钩子的执行顺序 在Vue 3中,生命周期钩子的执行顺序与Vue 2类似。以组合式API为例:
- 创建阶段:
- setup() 函数执行
- onBeforeMount 钩子触发
- onMounted 钩子触发
- 更新阶段:
- 数据更新
- onBeforeUpdate 钩子触发
- DOM更新
- onUpdated 钩子触发
- 卸载阶段:
- onBeforeUnmount 钩子触发
- onUnmounted 钩子触发
store中使用storeToRefs保证响应式 let {message,book,testCount} = storeToRefs(counter);
使用vite初始化vue项目
在指定目录下使用npm init vite@latest命令
vue项目中如果需要设置背景图片的话,背景图片要设置在index.html内
vue中需要实时更新的数据(比如登录验证码),在data中返回的地方使用ref()包裹
vue中引用外部css文件的方法:
pinia
pinia写在js文件中,
其中state()相当于data()
actions()相当于method()
getter()则相当于compute()
