Vue2 的生命周期是指 Vue 实例在创建、更新和销毁期间会自动执行的一系列函数。了解 Vue2 的生命周期可以帮助开发者更好地理解 Vue 组件的运作原理,并优化代码以提高应用性能和稳定性。
Vue2 的生命周期分为 8 个阶段,分别是:
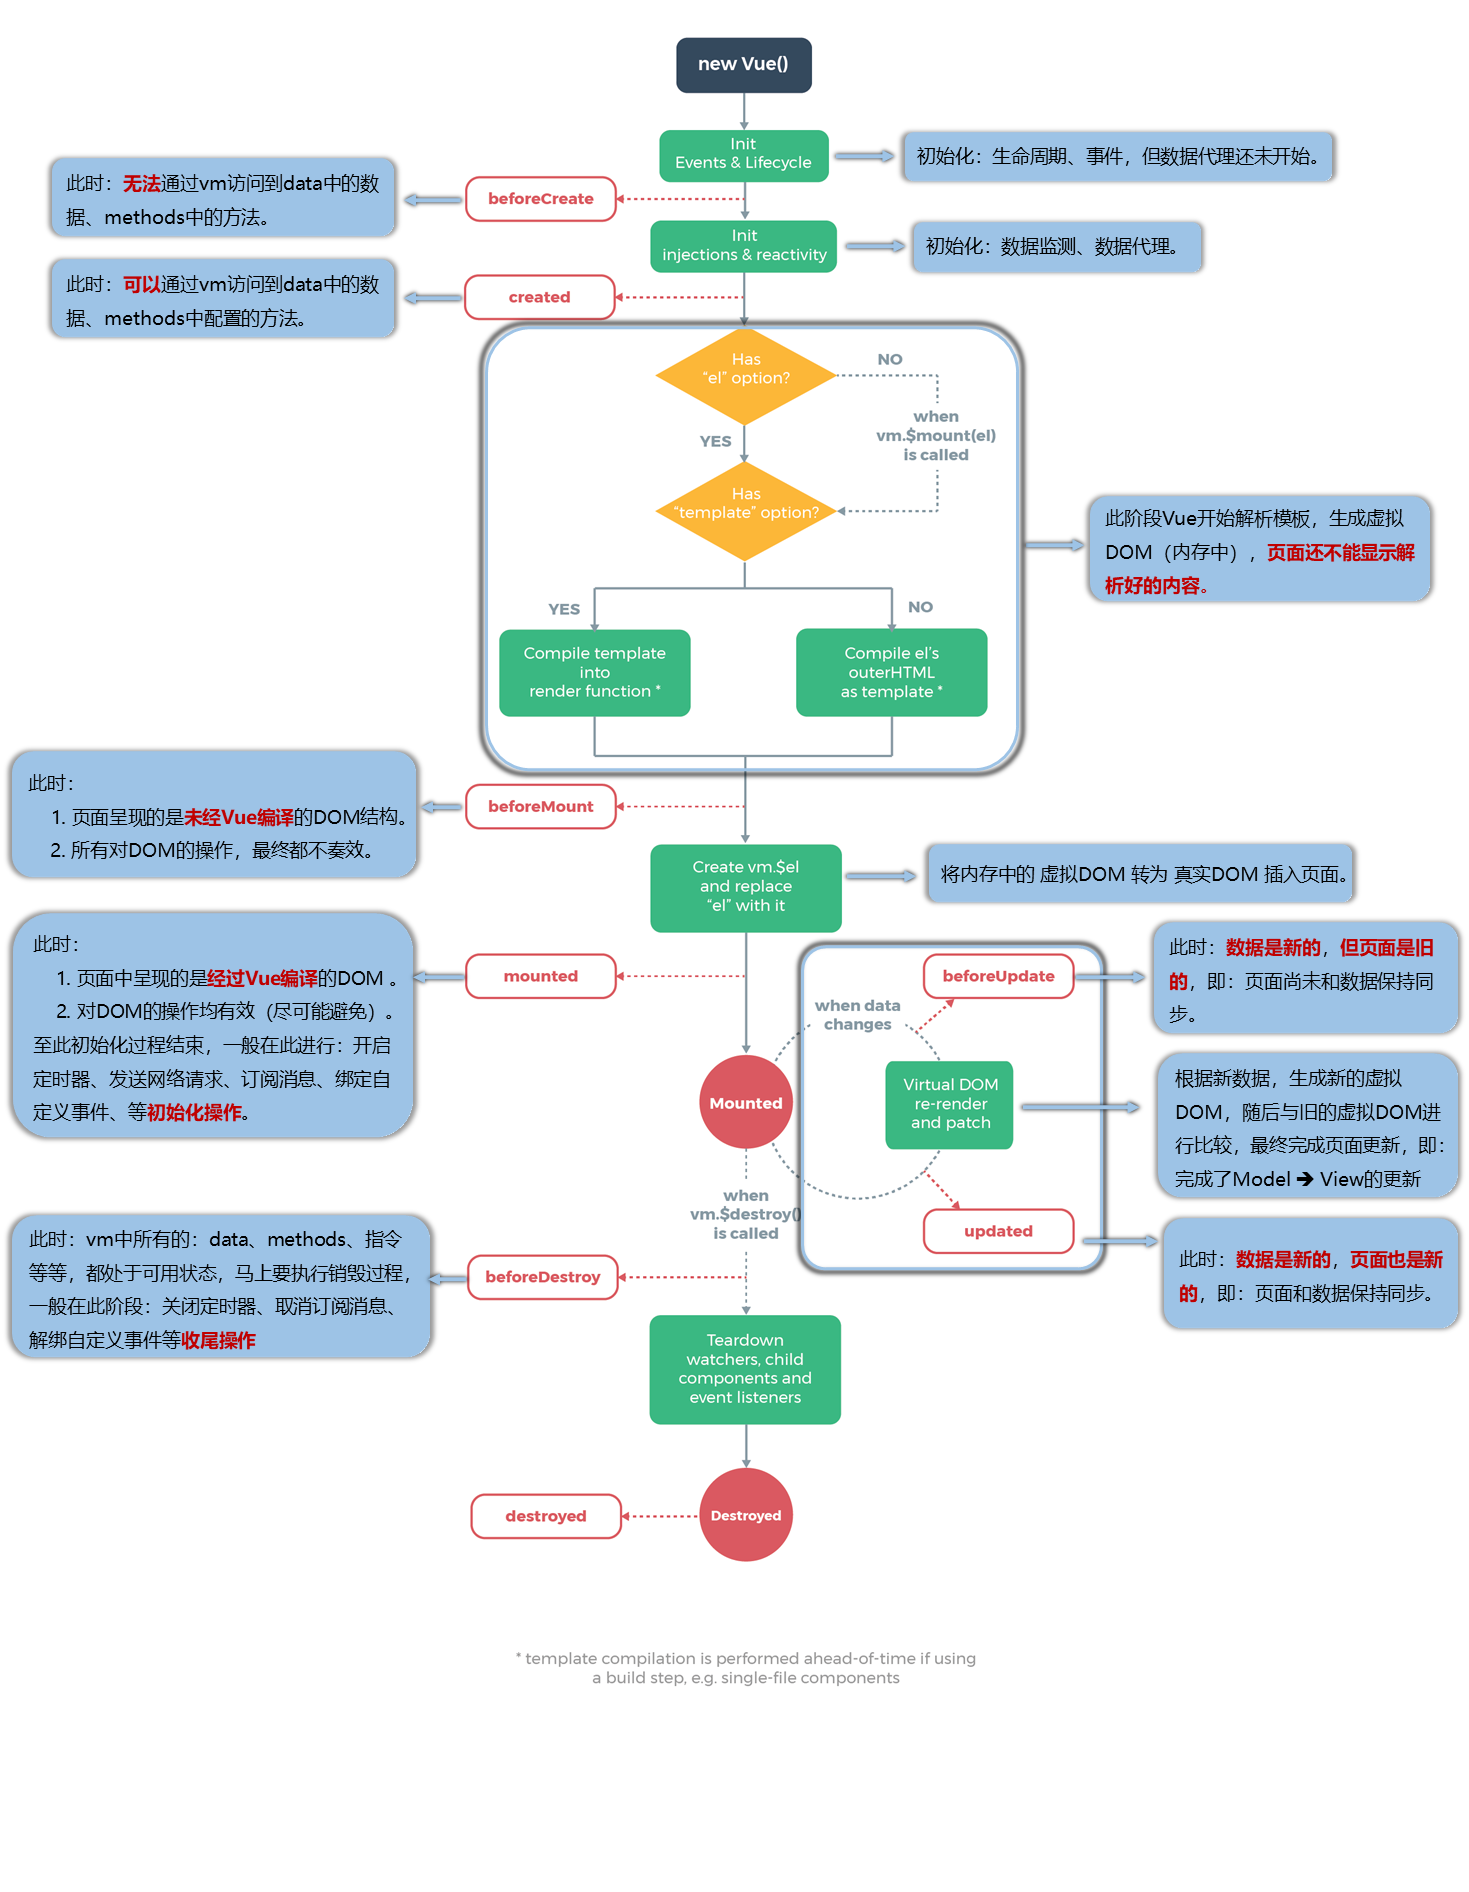
beforeCreate: Vue 实例被创建之前执行,此时无法访问到 data、computed、methods 等属性created: Vue 实例被创建完成后执行,此时可以访问到 data、computed、methods 等属性beforeMount: Vue 实例挂载到 DOM 前执行,在该钩子中可以修改模板内容mounted: Vue 实例挂载到 DOM 后执行,通常在该钩子中进行异步操作或添加事件监听器beforeUpdate: 组件数据更新之前执行,此时可以对更新前和更新后的数据进行比较updated: 组件数据更新完成后执行,此时 DOM 已经重新渲染完毕beforeDestroy: Vue 实例销毁之前执行,此时还可以访问到实例属性和方法destroyed: Vue 实例销毁完成后执行,此时实例上的所有绑定都已经解除,所有子实例也同时被销毁 需要注意的是,Vue2 生命周期的钩子函数一般用于实现特定的逻辑或行为,并非一定需要按照顺序都全部实现。在实际开发过程中,我们可以根据具体需求来选择使用其中的某些钩子函数。
下面是一个 Vue2 生命周期的示例代码,展示了各个阶段的钩子函数的执行顺序:
new Vue({
  el: '#app',
  data: {
    message: 'Hello, Vue2!'
  },
  beforeCreate() {
    console.log('beforeCreate')
  },
  created() {
    console.log('created')
  },
  beforeMount() {
    console.log('beforeMount')
  },
  mounted() {
    console.log('mounted')
  },
  beforeUpdate() {
    console.log('beforeUpdate')
  },
  updated() {
    console.log('updated')
  },
  beforeDestroy() {
    console.log('beforeDestroy')
  },
  destroyed() {
    console.log('destroyed')
  }
})
关于销毁过程:
- 销毁后借助 Vue 开发者工具看不到任何信息。
- 销毁后自定义事件会失效,但原生 DOM 事件依然有效。
- 一般不在 beforeDestroy 操作数据,因为即便操作数据,也不会再触发更新流程
Vue2 生命周期示意图