

入口文件swagger配置
// @title Gin swagger  展示在web端的title上
// @version 1.0 定义接口的版本
// @description Gin swagger 示例项目 首页展示
// @securityDefinitions.apikey ApiKeyAuth  API的认证方式
// @in header 发送认证的方式
// @name Authorization  后端获取认证值得方式

// @contact.name 联系人
// @contact.url 联系人地址
// @contact.email 1355081829@qq.com 联系人的邮箱

// @license.name Apache 2.0 文档采用的协议
// @license.url http://www.apache.org/licenses/LICENSE-2.0.html 协议地址
// @host localhost:8080 文档服务器的地址
示例:
package main

import (
	"ginLearn.com/controller"
	_ "ginLearn.com/docs"
	"github.com/gin-gonic/gin"
	"github.com/swaggo/gin-swagger"
	"github.com/swaggo/gin-swagger/swaggerFiles"
)

// @title Gin swagger
// @version 1.0
// @description Gin swagger 示例项目

// @contact.name hanyun
// @contact.url
// @contact.email 1355081829@qq.com

// @license.name Apache 2.0
// @license.url http://www.apache.org/licenses/LICENSE-2.0.html
// @host localhost:8080
func main() {
	router := gin.Default()
	router.GET("/swagger/*any", ginSwagger.WrapHandler(swaggerFiles.Handler))
	router.GET("/api/v1", controller.Index)
	router.Run()
}
swagger请求注释
| 注释 | 描述 |
|---|---|
| @Id | 接口唯一标识,不能重复,推荐使用接口的请求路径 |
| @Tags | 标签,一个接口可以打上多个标签,方便搜索 |
| @Accept | 表示该该请求的请求类型,例如:json、xml、html 等等 |
| @Summary | 摘要 |
| @Description | 详细说明 |
| @Produce | 可以产生的MIME 类型的列表,MIME 类型,你可以简单的理解为响应类型,例如:json、xml、html 等等 |
| @Param | 参数格式,从左到右分别为: 1. 参数名 2. 入参类型(query、body、path、formDataformData、header) 3. 数据类型(string、int, uint, uint32, uint64、float32、bool、file、自定义结构体) 4. 是否必填 5. 注释 |
| @Success | 响应成功,从左到右分别为:状态码、参数类型、数据类型、注释 |
| @Failure | 响应失败,从左到右分别为:状态码、响应体类型、响应数据类型、注释 |
| @Router | 路由,从左到右分别为:路由地址,HTTP 方法 |
| @Security | ApiKeyAuth 表示这是一个需要认证才可以调用的接口,对应// @securityDefinitions.apikey ApiKeyAuth |
| @Version | 接口版本号 |
| @contact.name | 接口联系人 |
| @contact.url | 接口联系人地址 |
| @contact.email | 接口联系人邮箱 |
@Description
@Description可以写多个,也可以做这种表格形式的展示。
// @Description | 项目 | 价格 | 数量 |
// @Description | :-------- | --------:| :--: |
// @Description | iPhone | 6000 元 | 5 |
// @Description | iPad | 3800 元 | 12 |
// @Description | iMac | 10000 元 | 234 |
示例:
// @Summary 获取多个文章
// @Produce json
// @Param id path int true "文章ID"  // path 表示路径参数
// @Param name query string false "文章名称"  // query 表示查询参数
// @Param tag_id query int false "标签ID" // query 表示查询参数
// @Param title body string false "文章标题" // body 表示请求体参数
// @Success 200 {object} Article "成功"
// @Failure 400 {object} string "请求错误"
不同响应:
# 返回一个字符串
@Success      200              {string}  json   "{"msg":"ok"}"
@Success      200              {string}  string    "正常"
# 返回一个浮点数
@Failure      403              {number}  float32    "权限错误"
# 返回一个整数
@Success      202              {integer}  int    "名称"
# 返回一个布尔值
@Success      203              {boolean}  bool    "名称"
# 返回一个对象
@Success      204              {object}  util.ResponseResult    "名称"
# 返回一个数组
@Success      205              {array}  util.ResponseResult    "名称"
请求参数设置属性值
# 设置默认值为 123
@Param   default     query     string     false  "string default"     default(123)

# 设置示例值为 abc
@Param   example     query     string     false  "string example"     example(abc)

# 设置枚举值
@Param   enumstring  query     string     false  "string enums"       Enums(A, B, C)

# 设置最小长度、最大长度
@Param   string      query     string     false  "string valid"       minlength(5)  maxlength(10)

# 设置最小值、最大值
@Param   int         query     int        false  "int valid"          minimum(1)    maximum(10)

# 设置默认值
@Param   default     query     string     false  "string default"     default(A)

# 设置示例值
@Param   example     query     string     false  "string example"     example(string)

# 设置集合格式
@Param   collection  query     []string   false  "string collection"  collectionFormat(multi)
集合格式:
csv:逗号分隔的字符串(默认) 示例:?tags=a,b,cssv:空格分隔的字符串 示例:?tags=a b ctsv:制表符分隔的字符串 示例:?tags=a\tb\tcpipes:竖线分隔的字符串 示例:?tags=a|b|cmulti:数组结构 示例:?tags=a&tags=b&tags=c
结构体设置属性值
当参数为结构体时,我们可以在结构体内设置这些属性:
type Foo struct {
    // 设置最小长度、最大长度、示例值
    Bar string `minLength:"4" maxLength:"16" example:"random string"`
    // 设置最小值、最大值、默认值
    Baz int `minimum:"10" maximum:"20" default:"15"`
    // 设置枚举值
    Qux []string `enums:"foo,bar,baz"`
}
使用token鉴权
在main函数中增加全局配置,其中
@nameheaer中的名称
@in token携带的位置,这里是在header中
@securityDefinitions.apikey 就入口文件中定义的认证方式
// @securityDefinitions.apikey ApiKeyAuth
// @in header
// @name Authorization
func main() {
    router := gin.Default()
    router.GET("/swagger/*any", ginSwagger.WrapHandler(swaggerFiles.Handler))
    router.GET("/api/v1", controller.Index)
    router.Run()
}
在需要鉴权的API上增加@Security注释,一定要与上面@securityDefinitions.apikey一致
// @Security ApiKeyAuth
示例:
// @Summary 获取多个文章
// @Produce json
// @Param id path int true "文章ID"  // path 表示路径参数
// @Param name query string false "文章名称"  // query 表示查询参数
// @Param tag_id query int false "标签ID" // query 表示查询参数
// @Param title body string false "文章标题" // body 表示请求体参数
// @Success 200 {object} Article "成功"
// @Failure 400 {object} string "请求错误"
// @Security ApiKeyAuth
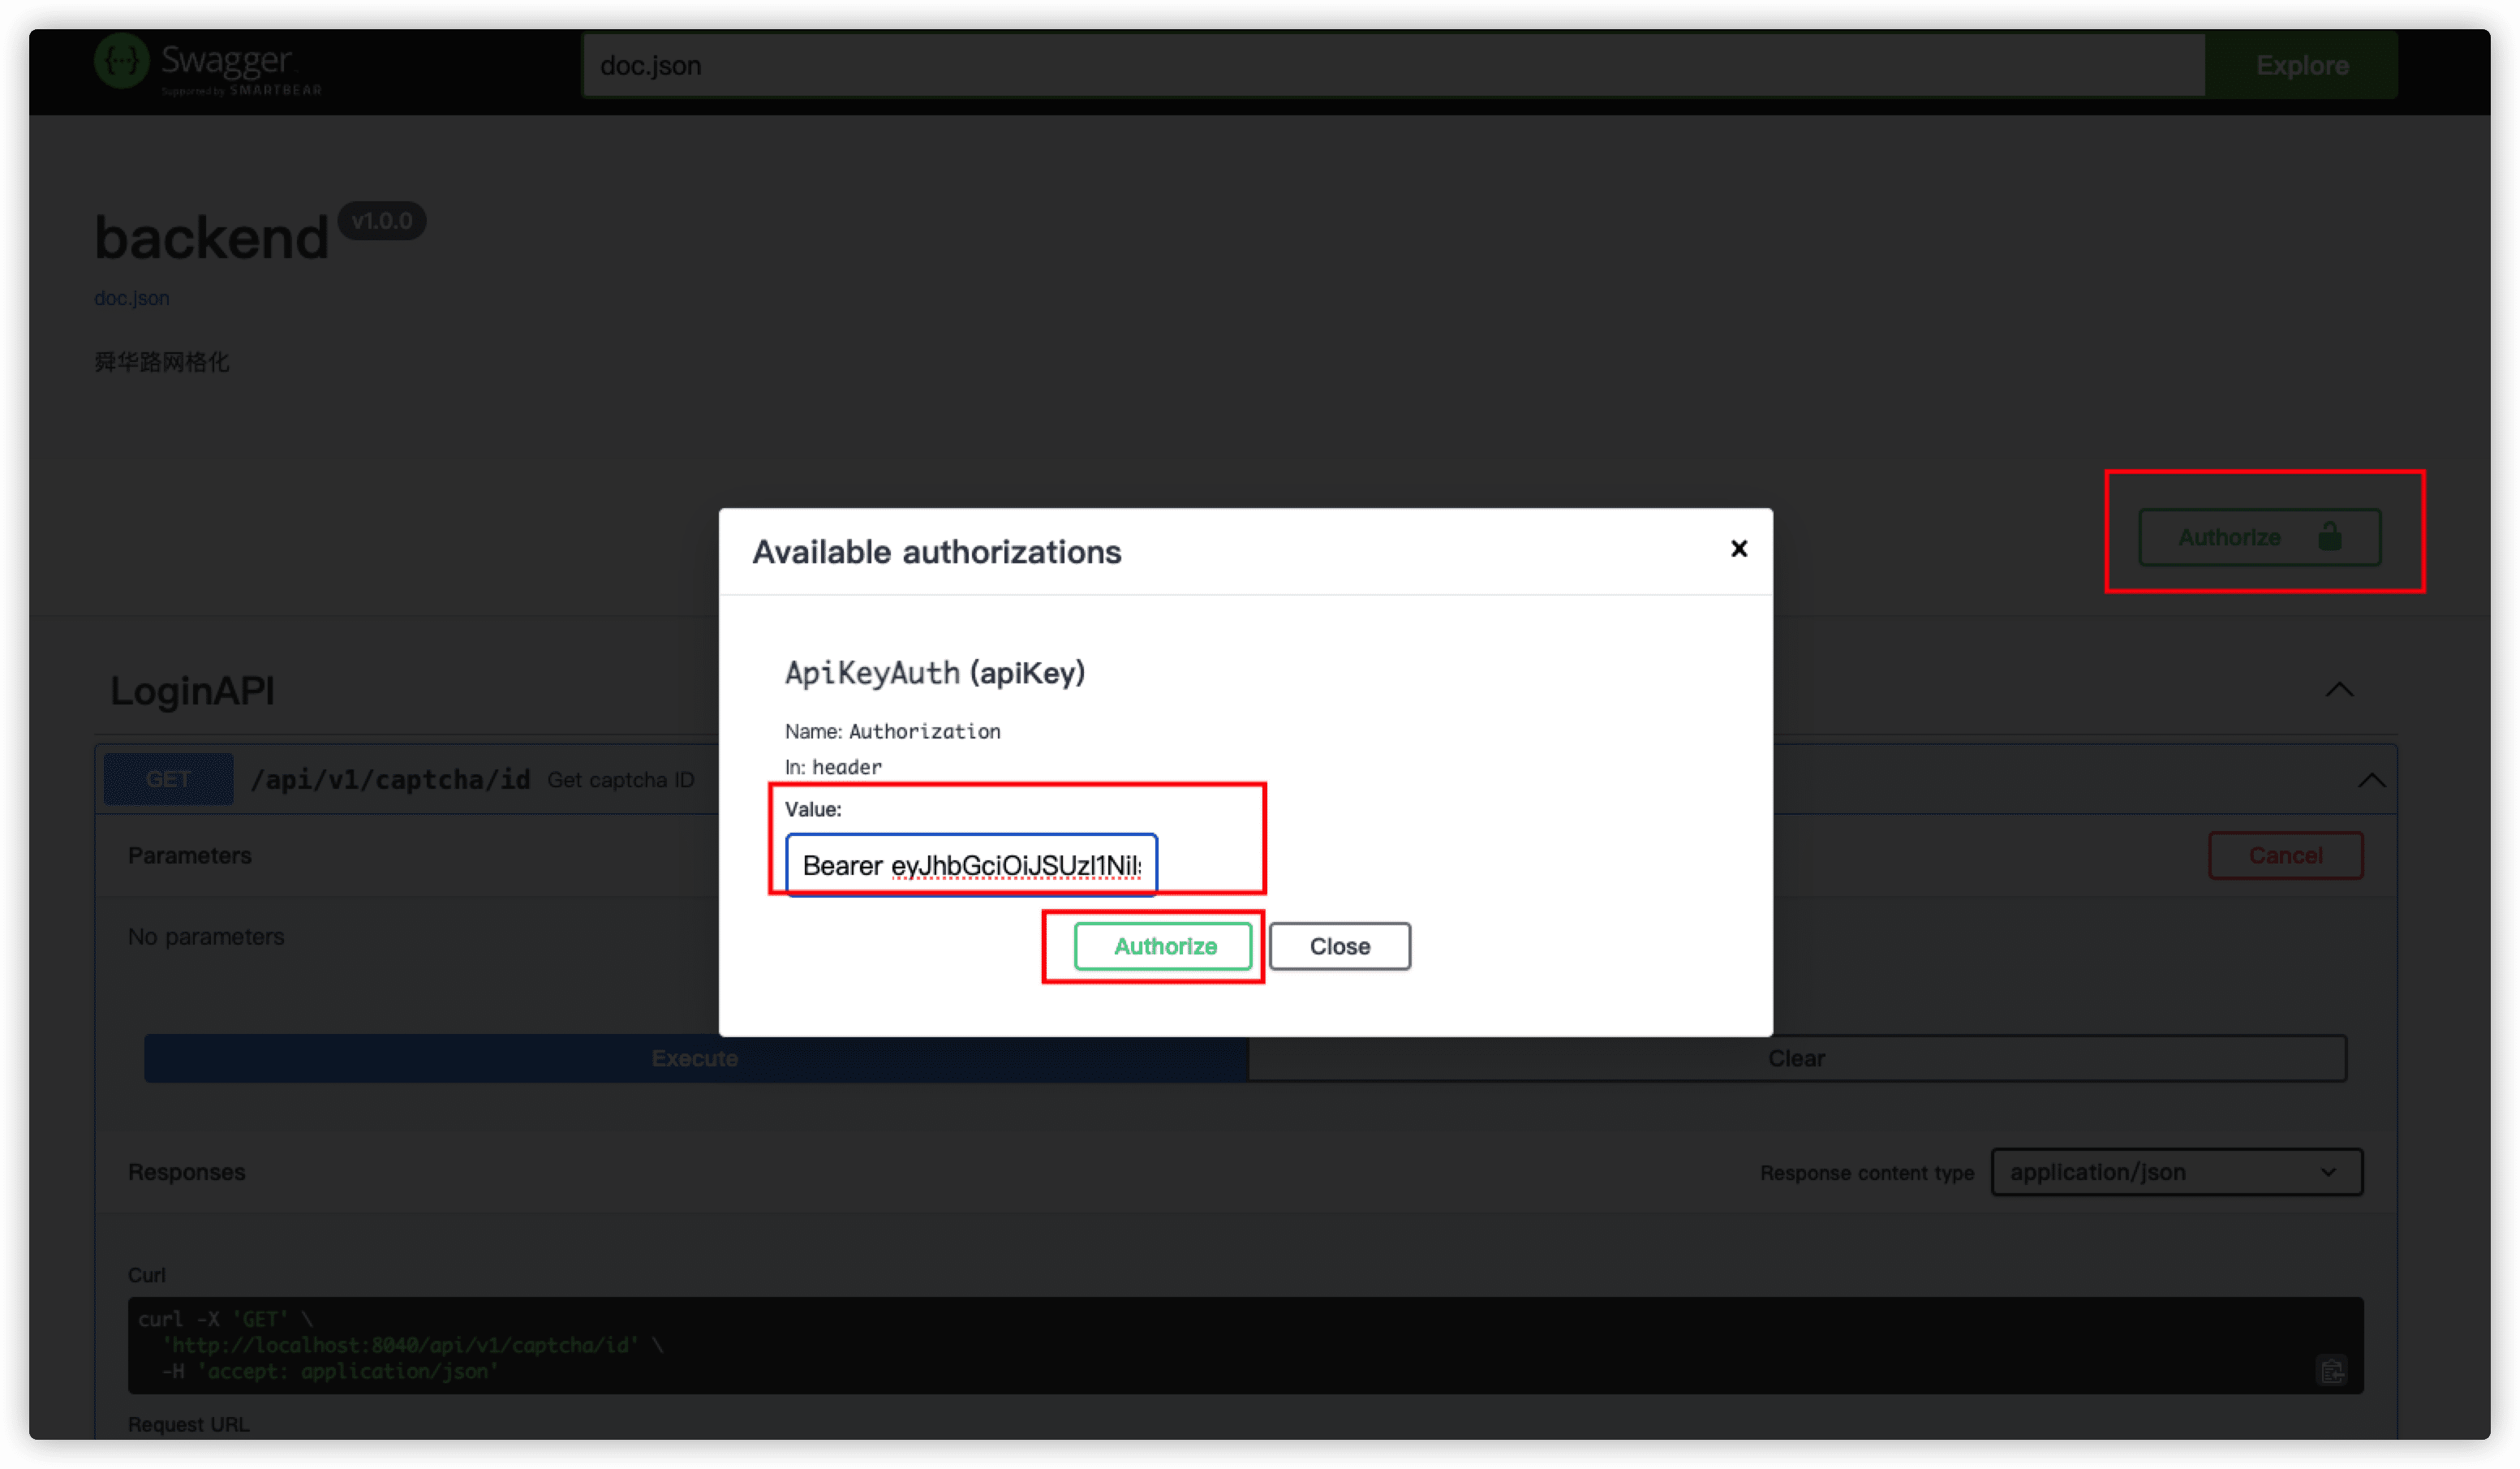
使用步骤:
swagger UI中先请求/api/v1/login接口获取token,然后在右上角点击Authorize按钮,输入Bearer + token,点击Authorize按钮即可。
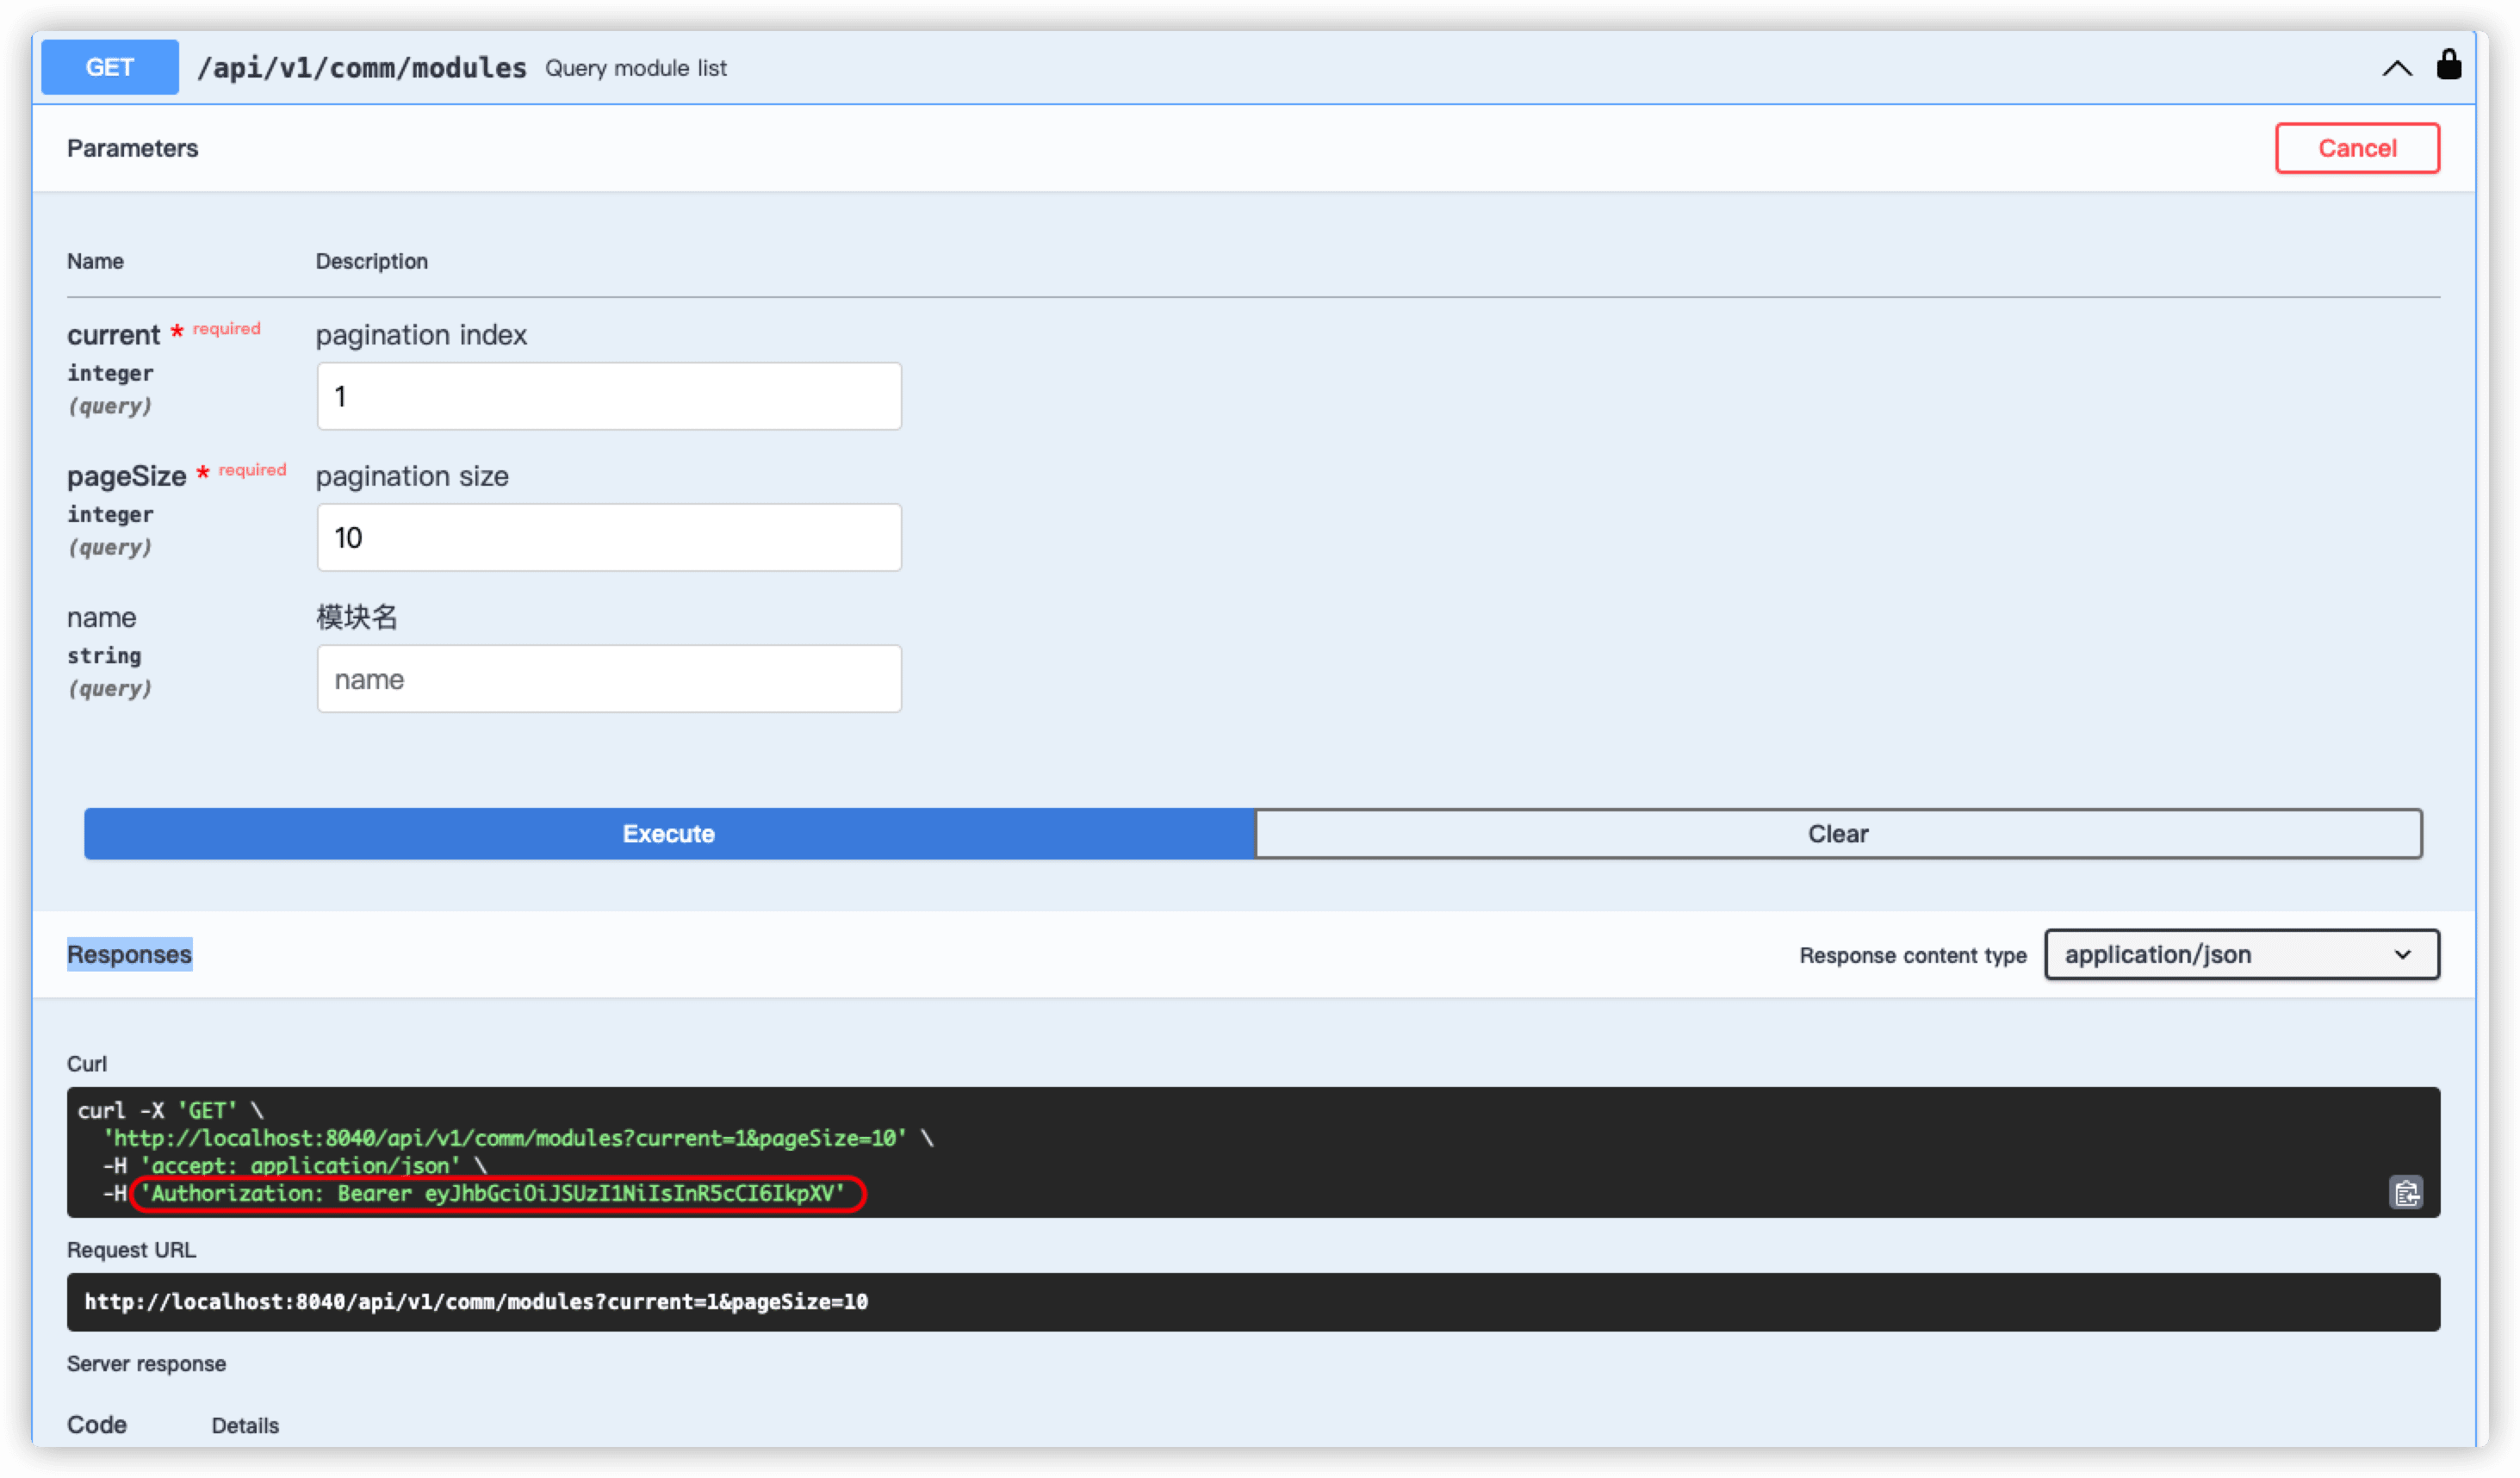 可以看到,请求头中已经携带了token。
使用普通账号密码鉴权
在main函数中增加全局配置,其中
@nameheaer中的名称
@in token携带的位置,这里是在header中
@securityDefinitions.basic 就入口文件中定义的认证方式
// @securityDefinitions.basic BasicAuth
// @in header
// @name Authorization
func main() {
    router := gin.Default()
    router.GET("/swagger/*any", ginSwagger.WrapHandler(swaggerFiles.Handler))
    router.GET("/api/v1", controller.Index)
    router.Run()
}
在需要鉴权的API上增加@Security注释,一定要与上面@securityDefinitions.basic一致
// @Security BasicAuth
示例:
// @Summary 获取多个文章
// @Produce json
// @Param id path int true "文章ID"  // path 表示路径参数
// @Param name query string false "文章名称"  // query 表示查询参数
// @Param tag_id query int false "标签ID" // query 表示查询参数
// @Param title body string false "文章标题" // body 表示请求体参数
// @Success 200 {object} Article "成功"
// @Failure 400 {object} string "请求错误"
// @Security BasicAuth

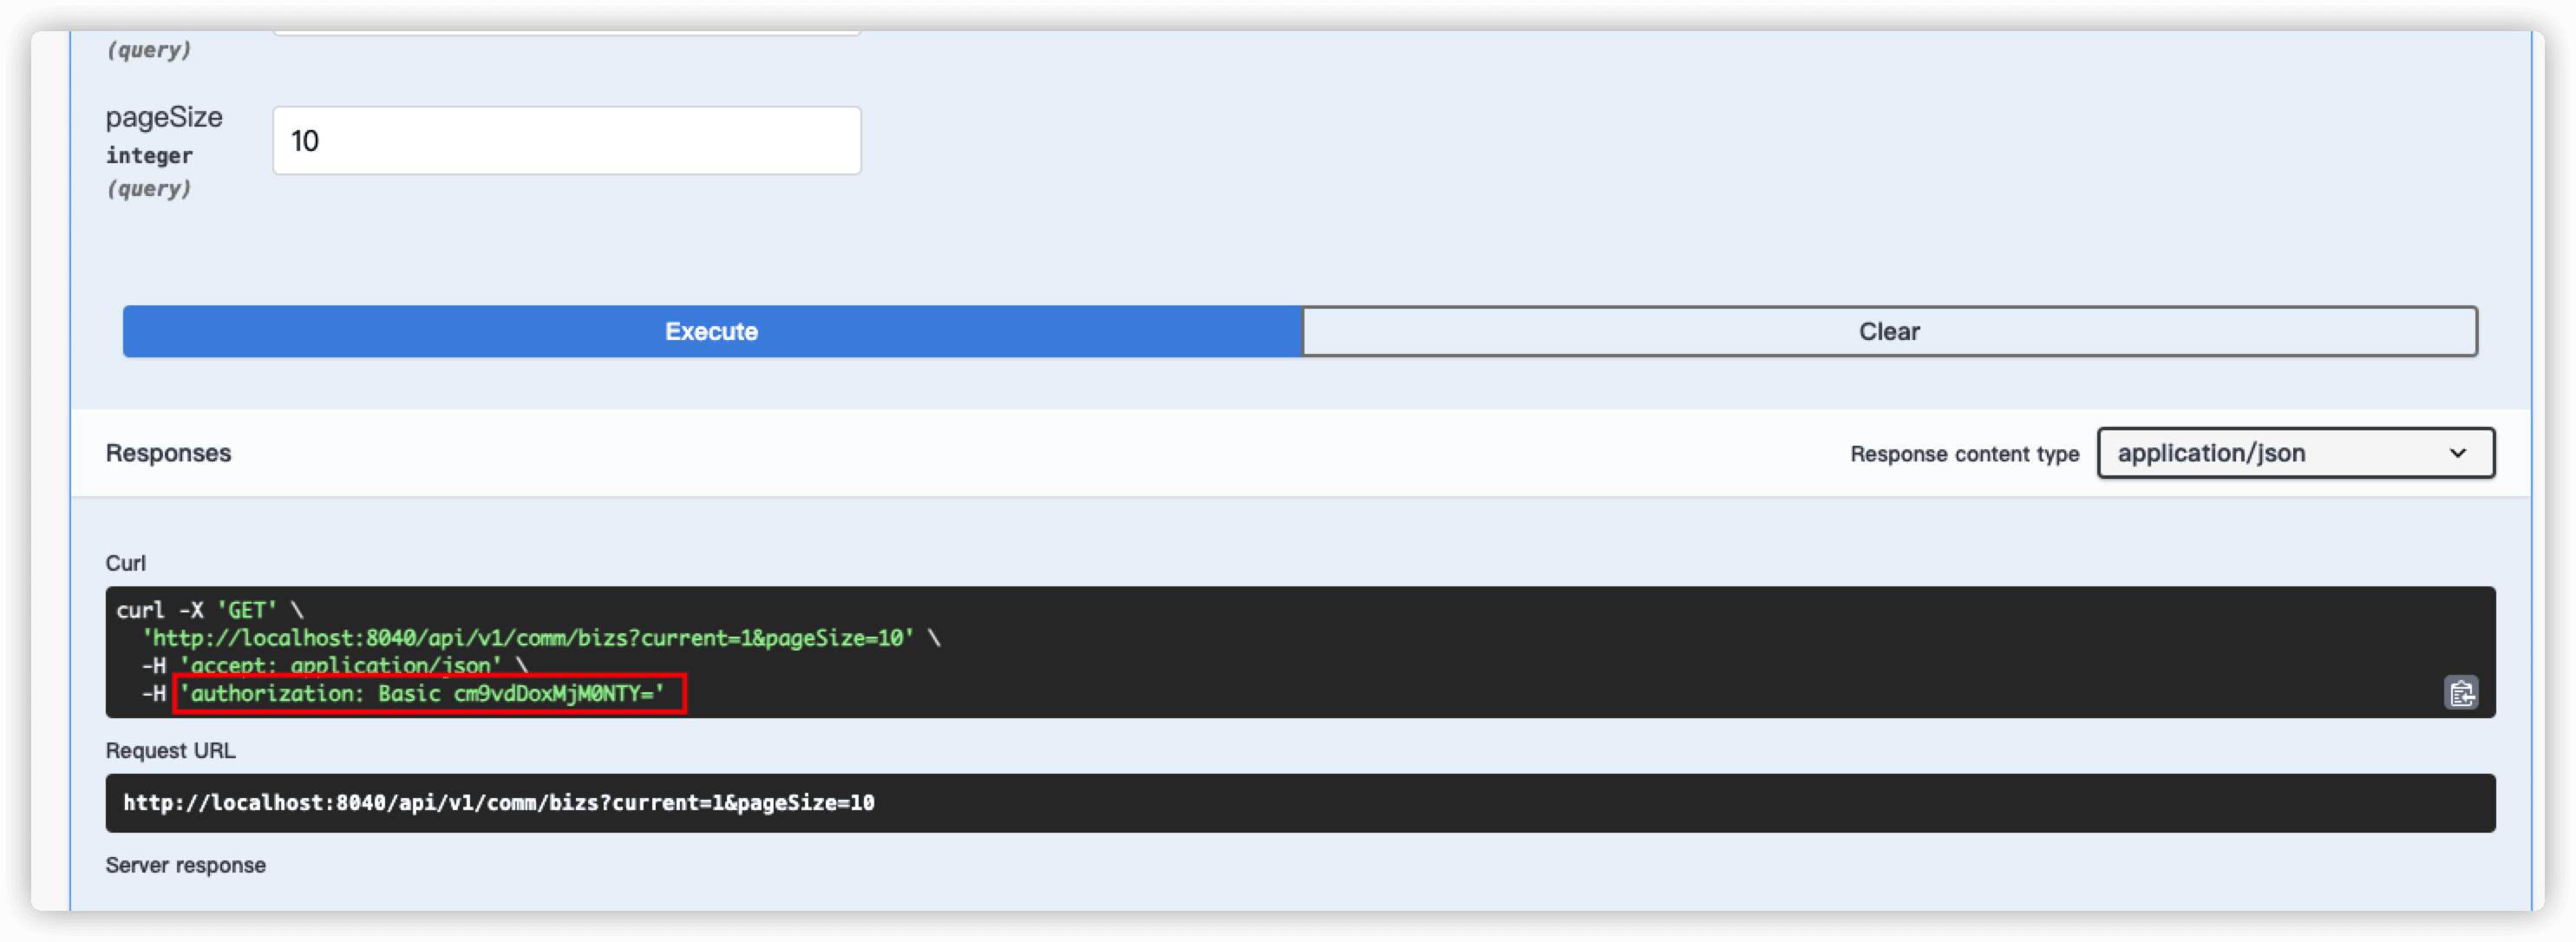 可以看到请求头中也带上了认证标示。加密方式为:
const username = 'username';
const password = 'password';

const base64Credentials = Buffer.from(`${username}:${password}`).toString('base64');

console.log(`Basic ${base64Credentials}`);
其他认证问题参考:Security安全
