前言
- SpringSecurity中最常见的认证方式便是用用户名+密码进行表单认证
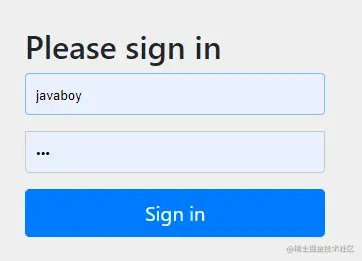
- 下面也就是默认提供的表单页面
1. FormLoginConfigurer
- FormLoginConfigurer是UsernamePasswordAuthenticationFilter对应的配置类
- FormLoginConfigurer中可供用户调用的方法比较多但都很简单,这里就列举几个
1.1 loginPage(...)
1.2 usernameParameter(...)
- usernameParameter(...) 和 passwordParameter(...):更新表单提交时用户名和密码的键
public FormLoginConfigurer<H> usernameParameter(String usernameParameter) {
   getAuthenticationFilter().setUsernameParameter(usernameParameter);
   return this;
}

public FormLoginConfigurer<H> passwordParameter(String passwordParameter) {
   getAuthenticationFilter().setPasswordParameter(passwordParameter);
   return this;
}
1.3 failureForwardUrl(...)
- failureForwardUrl(...) 和 successForwardUrl(...):设置认证失败和成功跳转的Url
public FormLoginConfigurer<H> failureForwardUrl(String forwardUrl) {
  failureHandler(new ForwardAuthenticationFailureHandler(forwardUrl));
  return this;
}
- url其实是被包装为一个ForwardAuthenticationFailureHandler而已
1.3.1 AuthenticationFailureHandler
- AuthenticationFailureHandler:是认证失败处理器
public interface AuthenticationFailureHandler {
void onAuthenticationFailure(HttpServletRequest request, HttpServletResponse response,
AuthenticationException exception) throws IOException, ServletException;
}
- 其子类还是蛮多的
- ForwardAuthenticationFailureHandler:直接转发到指定的Url
- AuthenticationEntryPointFailureHandler:适配AuthenticationEntryPoint
- ExceptionMappingAuthenticationFailureHandler:根据抛出异常的不同,转发到不同的地址
1.3.2 AuthenticationSuccessHandler
- AuthenticationSuccessHandler:认证成功处理器
public interface AuthenticationSuccessHandler {
- 其子类只有两个:
- ForwardAuthenticationSuccessHandler:直接转发到指定的Url
- SavedRequestAwareAuthenticationSuccessHandler:根据RequestCache将上一次因为未认证而进行跳转的URL拿出来,在进行转发
- 比如说访问/hello接口,因为无权限而跳转到/loginPage,进行身份认证,认证完成后转发到/hello接口
1.4 loginProcessingUrl(...)
- loginProcessingUrl(...): 设置认证请求的Url
public FormLoginConfigurer<H> successForwardUrl(String forwardUrl) {
   successHandler(new ForwardAuthenticationSuccessHandler(forwardUrl));
   return this;
}
1.5 authenticationDetailsSource(...)
- authenticationDetailsSource(...):设置认证信息详情源,通常是创建了新的认证对象,然后填充详情信息
public final T authenticationDetailsSource(
      AuthenticationDetailsSource<HttpServletRequest, ?> authenticationDetailsSource) {
   this.authenticationDetailsSource = authenticationDetailsSource;
   return getSelf();
}
- 默认注册的是WebAuthenticationDetails:与web身份验证请求相关的所选HTTP详细信息的持有者
- 也就就保存了请求的远程地址,HttpSession的Id
public WebAuthenticationDetails(HttpServletRequest request) {
   this.remoteAddress = request.getRemoteAddr();
   HttpSession session = request.getSession(false);
   this.sessionId = (session != null) ? session.getId() : null;
}
1.6 init(...)
- FormLoginConfigurer重写了init(...)方法,并实现了额外的配置
@Override
public void init(H http) throws Exception {
   super.init(http);
   initDefaultLoginFilter(http);
}
- 我们先看父类的init(...)方法干了什么:分别调用了三个方法
@Override
public void init(B http) throws Exception {
   updateAuthenticationDefaults();
   updateAccessDefaults(http);
   registerDefaultAuthenticationEntryPoint(http);
}
- updateAuthenticationDefaults():更新一些默认值
protected final void updateAuthenticationDefaults() {
if (this.loginProcessingUrl == null) {
loginProcessingUrl(this.loginPage);
}
if (this.failureHandler == null) {
failureUrl(this.loginPage + "?error");
}
LogoutConfigurer<B> logoutConfigurer = getBuilder().getConfigurer(LogoutConfigurer.class);
if (logoutConfigurer != null && !logoutConfigurer.isCustomLogoutSuccess()) {
logoutConfigurer.logoutSuccessUrl(this.loginPage + "?logout");
}
}
- updateAccessDefaults(...):更新可直接访问的Url,使其不受到FilterSecurityInterceptor
protected final void updateAccessDefaults(B http) {
if (this.permitAll) {
PermitAllSupport.permitAll(http, this.loginPage, this.loginProcessingUrl, this.failureUrl);
}
}
- registerDefaultAuthenticationEntryPoint(...):注册一个身份认证入口点
protected final void registerDefaultAuthenticationEntryPoint(B http) {
registerAuthenticationEntryPoint(http, this.authenticationEntryPoint);
}
@SuppressWarnings("unchecked")
protected final void registerAuthenticationEntryPoint(B http, AuthenticationEntryPoint authenticationEntryPoint) {
ExceptionHandlingConfigurer<B> exceptionHandling = http.getConfigurer(ExceptionHandlingConfigurer.class);
if (exceptionHandling == null) {
return;
}
exceptionHandling.defaultAuthenticationEntryPointFor(postProcess(authenticationEntryPoint),
getAuthenticationEntryPointMatcher(http));
}
protected final RequestMatcher getAuthenticationEntryPointMatcher(B http) {
ContentNegotiationStrategy contentNegotiationStrategy = http.getSharedObject(ContentNegotiationStrategy.class);
if (contentNegotiationStrategy == null) {
contentNegotiationStrategy = new HeaderContentNegotiationStrategy();
}
MediaTypeRequestMatcher mediaMatcher = new MediaTypeRequestMatcher(contentNegotiationStrategy,
MediaType.APPLICATION_XHTML_XML, new MediaType("image", "*"), MediaType.TEXT_HTML,
MediaType.TEXT_PLAIN);
mediaMatcher.setIgnoredMediaTypes(Collections.singleton(MediaType.ALL));
RequestMatcher notXRequestedWith = new NegatedRequestMatcher(
new RequestHeaderRequestMatcher("X-Requested-With", "XMLHttpRequest"));
return new AndRequestMatcher(Arrays.asList(notXRequestedWith, mediaMatcher));
}
- 所谓身份认证入口就是当用户认证异常的时候该怎么办,通常情况下都是直接重定向到登录页
- 然后我们再回到FormLoginConfigurer的initDefaultLoginFilter(...)方法
- initDefaultLoginFilter(...):当有有登录页过滤器时,配置用户名和密码键、登录页Url等信息
private void initDefaultLoginFilter(H http) {
DefaultLoginPageGeneratingFilter loginPageGeneratingFilter = http
.getSharedObject(DefaultLoginPageGeneratingFilter.class);
if (loginPageGeneratingFilter != null && !isCustomLoginPage()) {
loginPageGeneratingFilter.setFormLoginEnabled(true);
loginPageGeneratingFilter.setUsernameParameter(getUsernameParameter());
loginPageGeneratingFilter.setPasswordParameter(getPasswordParameter());
loginPageGeneratingFilter.setLoginPageUrl(getLoginPage());
loginPageGeneratingFilter.setFailureUrl(getFailureUrl());
loginPageGeneratingFilter.setAuthenticationUrl(getLoginProcessingUrl());
}
}
1.7 configure(...)
- FormLoginConfigurer的configure(...)代码比较多,也出现很多的类,我们一一解析
@Override
public void configure(B http) throws Exception {
PortMapper portMapper = http.getSharedObject(PortMapper.class);
if (portMapper != null) {
this.authenticationEntryPoint.setPortMapper(portMapper);
}
RequestCache requestCache = http.getSharedObject(RequestCache.class);
if (requestCache != null) {
this.defaultSuccessHandler.setRequestCache(requestCache);
}
this.authFilter.setAuthenticationManager(http.getSharedObject(AuthenticationManager.class));
this.authFilter.setAuthenticationSuccessHandler(this.successHandler);
this.authFilter.setAuthenticationFailureHandler(this.failureHandler);
if (this.authenticationDetailsSource != null) {
this.authFilter.setAuthenticationDetailsSource(this.authenticationDetailsSource);
}
SessionAuthenticationStrategy sessionAuthenticationStrategy = http
.getSharedObject(SessionAuthenticationStrategy.class);
if (sessionAuthenticationStrategy != null) {
this.authFilter.setSessionAuthenticationStrategy(sessionAuthenticationStrategy);
}
RememberMeServices rememberMeServices = http.getSharedObject(RememberMeServices.class);
if (rememberMeServices != null) {
this.authFilter.setRememberMeServices(rememberMeServices);
}
F filter = postProcess(this.authFilter);
http.addFilter(filter);
}
1.7.1 PortMapper
- PortMapper:翻译为端口映射器,将Https可以和Http的端口进行互相映射
public interface PortMapper {
- 其实现类只有一个PortMapperImpl,所谓的映射也很简单,默认只注册了这两组
public PortMapperImpl() {
   this.httpsPortMappings = new HashMap<>();
   this.httpsPortMappings.put(80, 443);
   this.httpsPortMappings.put(8080, 8443);
}
1.7.2 RequestCache
- 使用场景:在身份认证发生后,缓存当前请求以供以后使用
- 比如说:在一个论坛的帖子中,进行回帖,然后因为没有登录,先将回帖的信息保存到请求缓存器中,再重定向到登录页 然后登陆成功后就会获取请求缓存器中上次保存的回帖信息,然后将当前request进行包装,变成一个回帖请求
public interface RequestCache {
void saveRequest(HttpServletRequest request, HttpServletResponse response);
SavedRequest getRequest(HttpServletRequest request, HttpServletResponse response);
HttpServletRequest getMatchingRequest(HttpServletRequest request, HttpServletResponse response);
void removeRequest(HttpServletRequest request, HttpServletResponse response);
}
- 有两个经典的实现,看名字就知道是将原请求保存在Cookie和Session中
- CookieRequestCache
- HttpSessionRequestCache
1.7.3 AuthenticationManager
- AuthenticationManager:翻译过来为认证管理器,后续再详细介绍其实现ProviderManager
public interface AuthenticationManager {
Authentication authenticate(Authentication authentication) throws AuthenticationException;
boolean supports(Class<?> authentication);
}
其他类
- 关于SessionAuthenticationStrategy和RememberMeServices以后在对应的过滤器中详细说明
2. UsernamePasswordAuthenticationFilter
- 进入过滤器还是从doFilter(...)方法开始看
private void doFilter(HttpServletRequest request, HttpServletResponse response, FilterChain chain)
throws IOException, ServletException {
if (!requiresAuthentication(request, response)) {
chain.doFilter(request, response);
return;
}
try {
Authentication authenticationResult = attemptAuthentication(request, response);
if (authenticationResult == null) {
return;
}
this.sessionStrategy.onAuthentication(authenticationResult, request, response);
if (this.continueChainBeforeSuccessfulAuthentication) {
chain.doFilter(request, response);
}
successfulAuthentication(request, response, chain, authenticationResult);
}
catch (InternalAuthenticationServiceException failed) {
this.logger.error("An internal error occurred while trying to authenticate the user.", failed);
unsuccessfulAuthentication(request, response, failed);
}
catch (AuthenticationException ex) {
unsuccessfulAuthentication(request, response, ex);
}
}
- 步骤:
- 判断是否是认证请求
- 是认证请求就执行认证操作
- 认证完成Session认证策略
- 执行认证成功后续操作
- 不是认证异常就执行下一个过滤器
- 核心就是调用attemptAuthentication(...)方法,而这个方法在UsernamePasswordAuthenticationFilter中被重写了
- 这个方法主要就是拿到用户名和密码封装为认证对象,然后调用AuthenticationManager(认证管理器)进行认证
@Override
public Authentication attemptAuthentication(HttpServletRequest request, HttpServletResponse response)
throws AuthenticationException {
if (this.postOnly && !request.getMethod().equals("POST")) {
throw new AuthenticationServiceException("Authentication method not supported: " + request.getMethod());
}
String username = obtainUsername(request);
username = (username != null) ? username : "";
username = username.trim();
String password = obtainPassword(request);
password = (password != null) ? password : "";
UsernamePasswordAuthenticationToken authRequest = new UsernamePasswordAuthenticationToken(username, password);
setDetails(request, authRequest);
return this.getAuthenticationManager().authenticate(authRequest);
}


