

#完整原文地址见简书www.jianshu.com/p/7ae1901d7…
#本文内容提要
v-htmlv-bind插值表达式的内容可以是js各种表达式,但不能是语句v-oncev-on:click指令 与v-bind指令 的简写动态属性表单 事件拦截的 简写- ref指令 引用 DOM节点实例【慎用,不够灵活】
- ref指令 引用 子组件实例 及 子组件函数【慎用,不够灵活】
- 使用provide和inject 优化 多层DOM组件的props数据传递
- 常规的props传递方法
- 使用provide和inject 进行优化
- 弊端1:要使用
data中的字段时候,provide需要使用函数的形式- 弊端2:除非使用
响应式特性编程,否则无法使用双向绑定特性,数据的传输只能是一次性的
##v-html
v-html:在指定的标签上, 通过HTML的方式展示配置的变量:
<!DOCTYPE html>
<html lang="en">
<head>
    <meta charset="UTF-8">
    <meta name="viewport" content="width=device-width, initial-scale=1.0">
    <title>Hello World! heheheheheheda</title>
    <script src="https://unpkg.com/vue@next"></script>
</head>
<body>
    <div id="heheApp"></div>
</body>
  <script>
    const app = Vue.createApp({
        data() {
            return {
                heheString: '<strong>hello world</strong>'
            }
        },
        template: `<div v-html="heheString"></div>`
    });
    const vm = app.mount('#heheApp');
  </script>
</html>
##v-bind - **`v-bind`:`DOM标签`的某个`属性值`要使用data中的变量值的时候使用:** 没有用`v-bind`的效果: ``` Hello World! heheheheheheda ``` **图标展示的是`title`直接指定的字符串:** 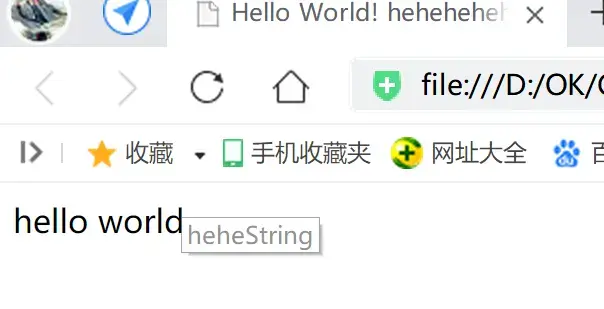
**如果使用了`v-bind`指令:** ``` Hello World! heheheheheheda ``` **UI展示的就是`v-bind`指定的`数据变量`的值:**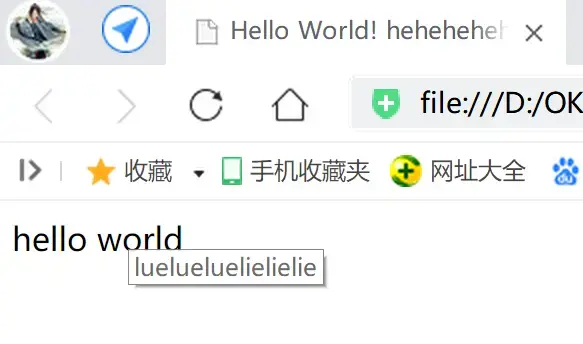 **再来一例: 同样是通过`v-bind`引用data中的字段值,作为UI节点的属性值:** ``` Hello World! heheheheheheda ``` 效果: 将字段值改为false: ``` Hello World! heheheheheheda ``` 输入框编程可用状态: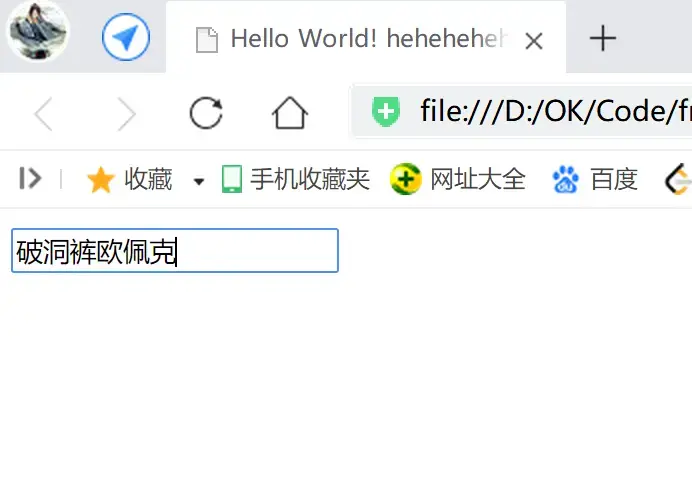
##插值表达式的内容可以是js各种表达式,但不能是语句 **表达式是一个有值的式子,语句则不是;** ``` Hello World! heheheheheheda ``` 效果: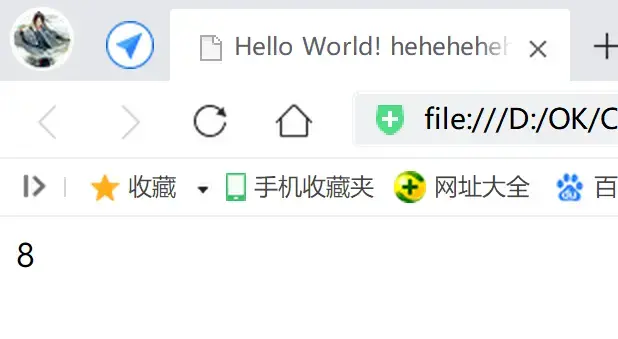
##v-once **修饰`template`中的UI节点,使得`节点`引用`data()`字段值的时候, 只使用一次字段的值,之后,无论`data字段`怎么被修改, `节点`都不再引用其值(去重新渲染UI); !!开发中可以用于规避没必要的渲染,提高性能;** ``` Hello World! heheheheheheda ``` **效果如下,UI引用data字段的值,但是重新赋值的时候,UI不再做其字段值对应的UI渲染:**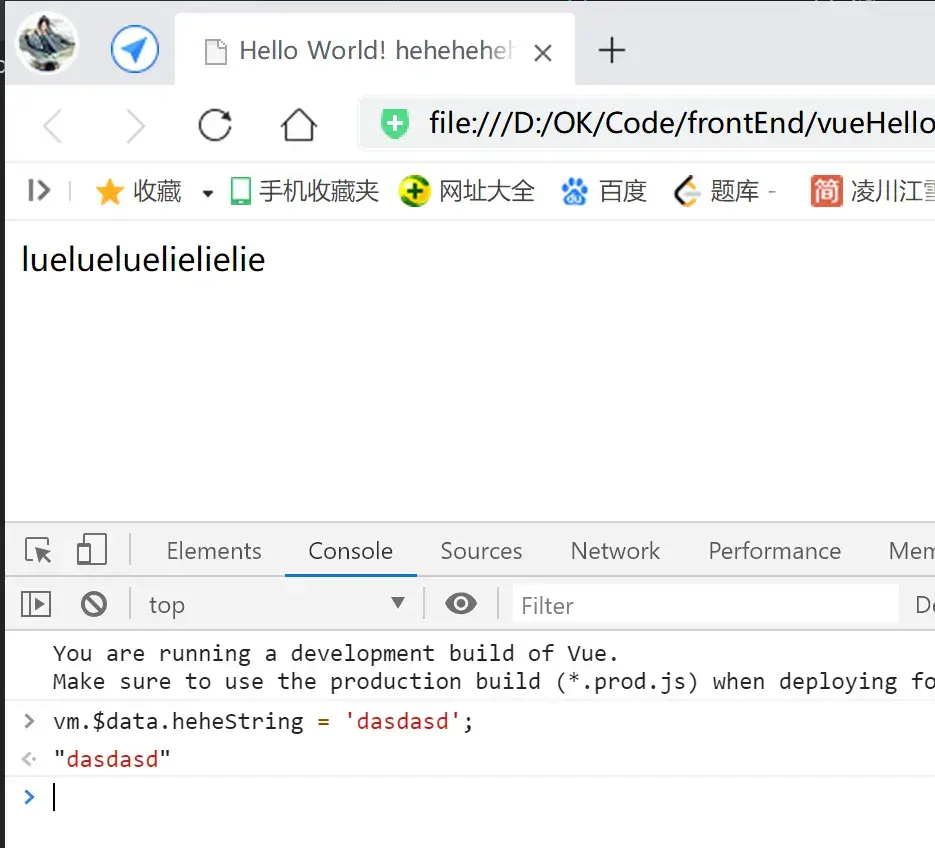
##v-on:click指令 与 v-bind指令 的简写 **`v-on:click =`指令 可以简写成 `@click = `; `v-bind:[var name]` 可以简写成 `:[var name]`;** 例程如下: ``` Hello World! heheheheheheda ``` 效果如下, 点击之后会触发对应的回调函数, 鼠标滞留在文本则可以看到`title`对应绑定的字段值: 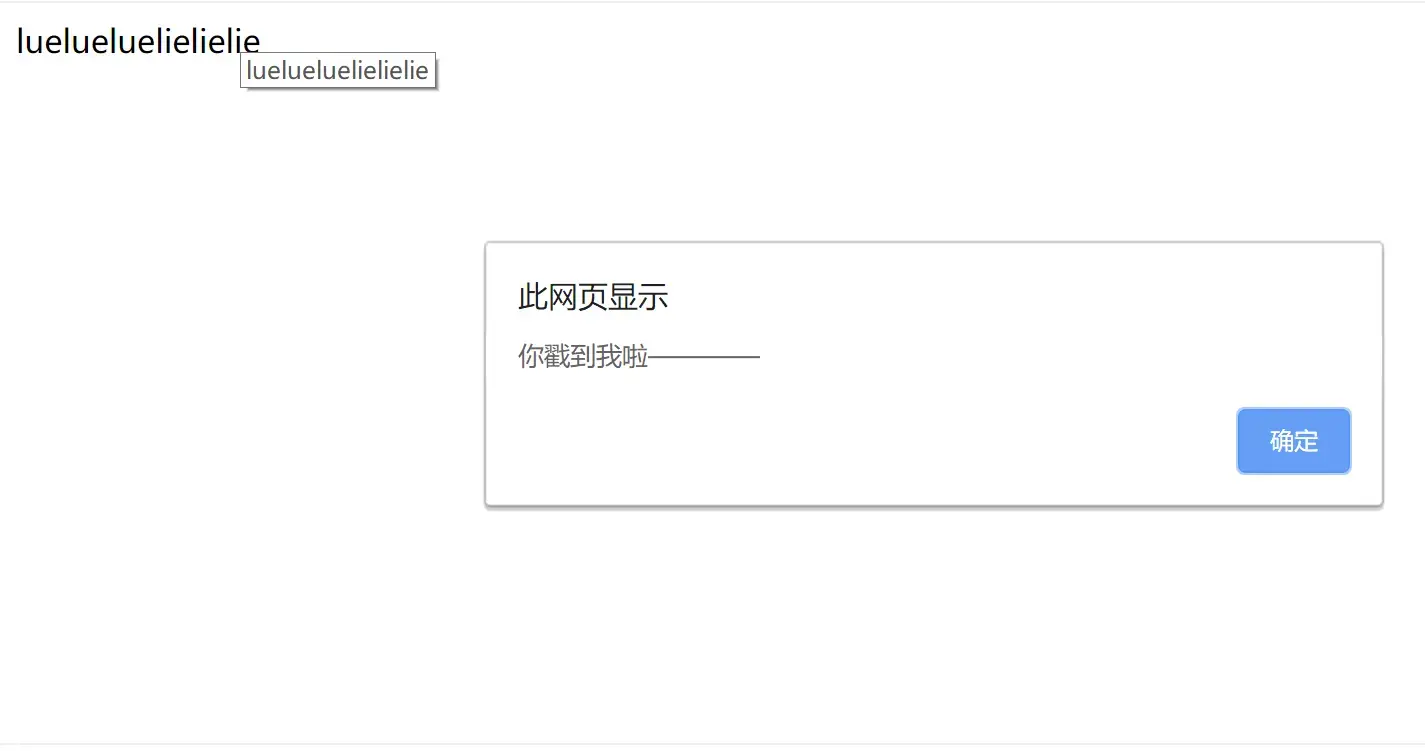
##动态属性 在`template`的DOM节点编写中, 使用方括号`[]`指定`data`中的变量名,实现动态绑定属性; 代码: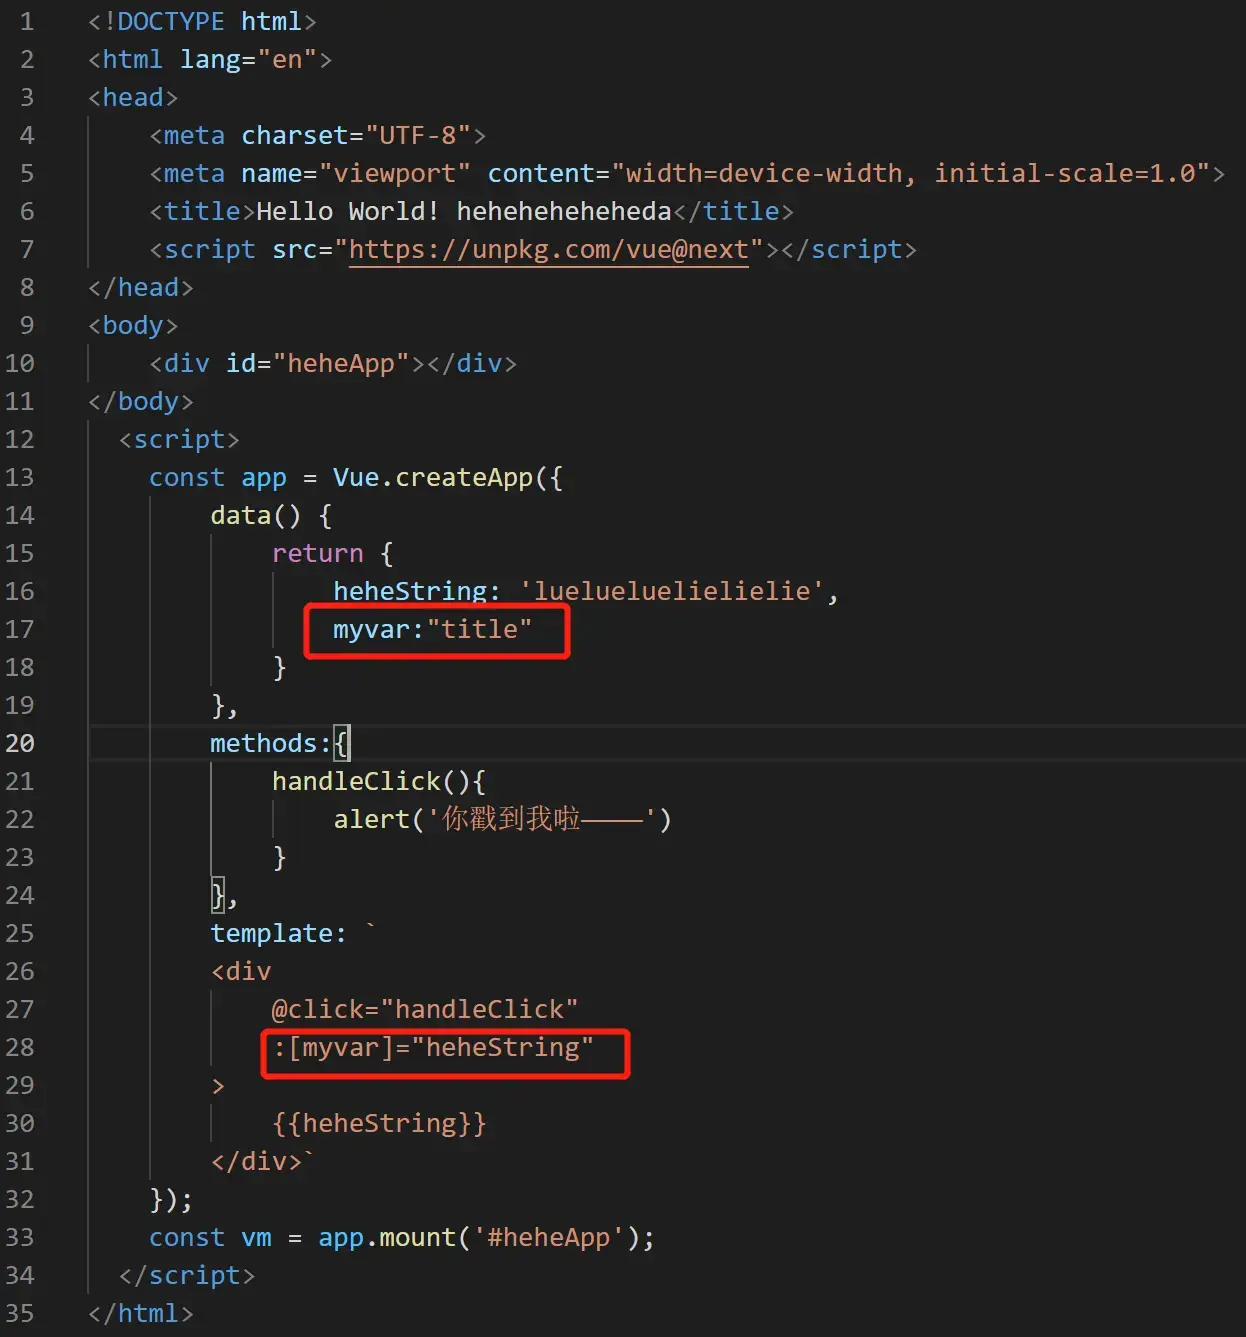效果如下,属性动态绑定: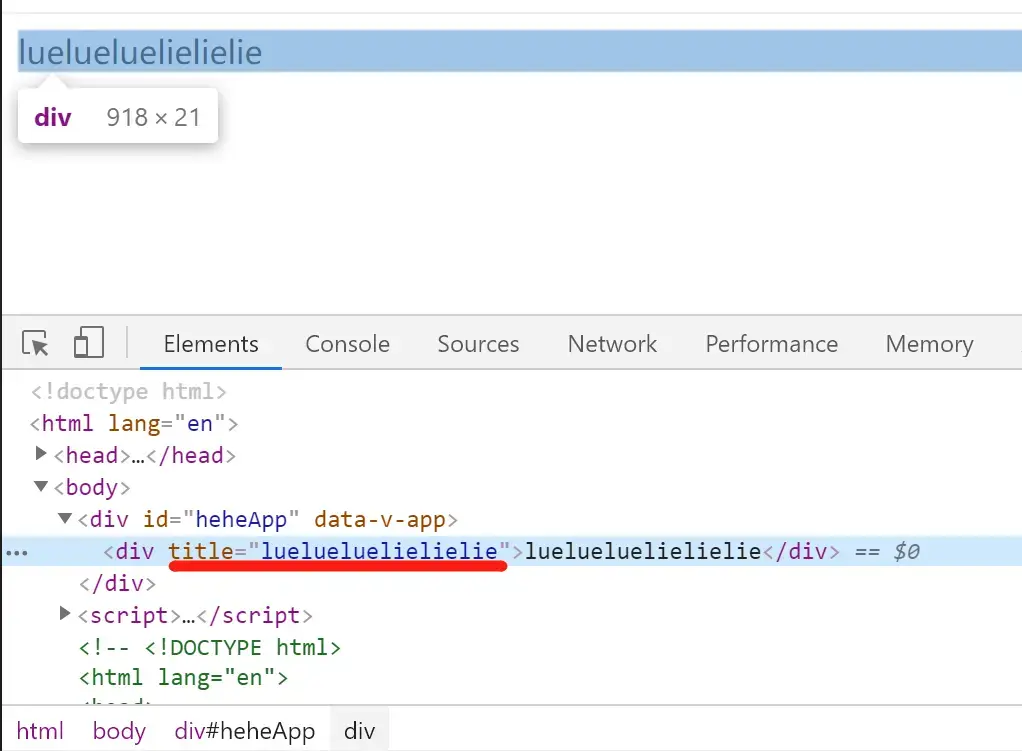举一反三再来一例: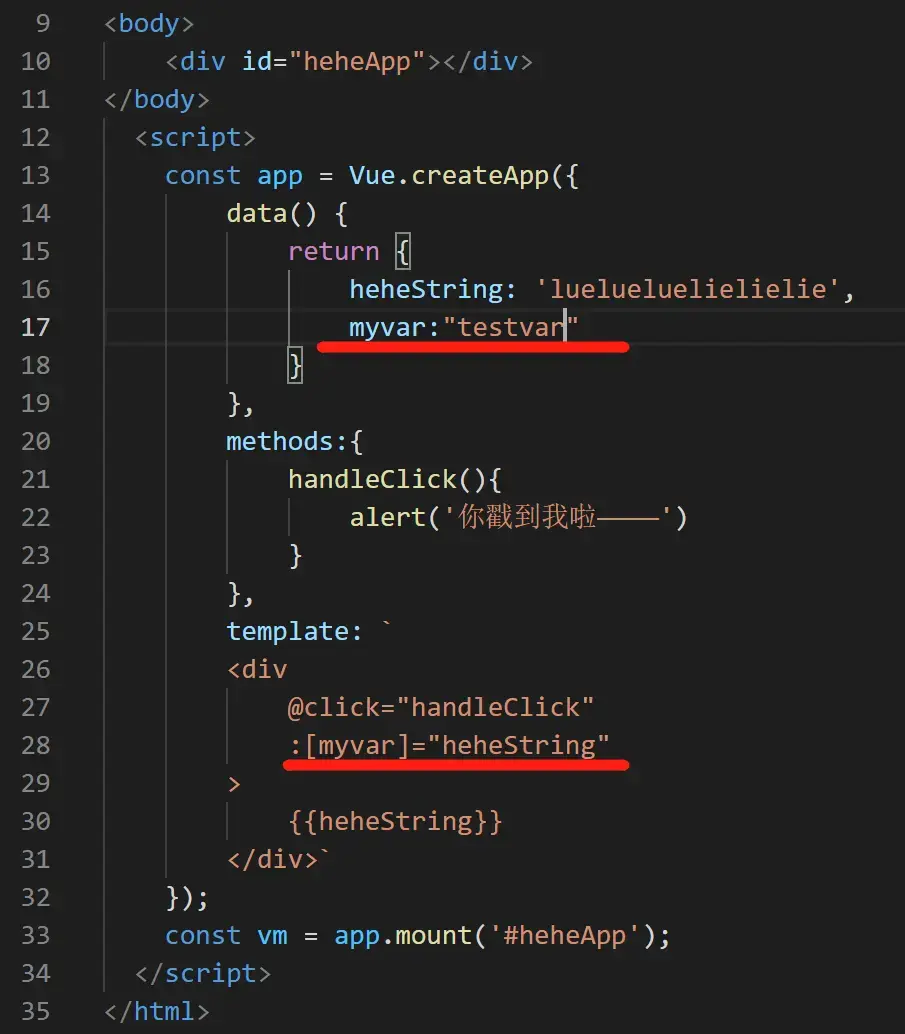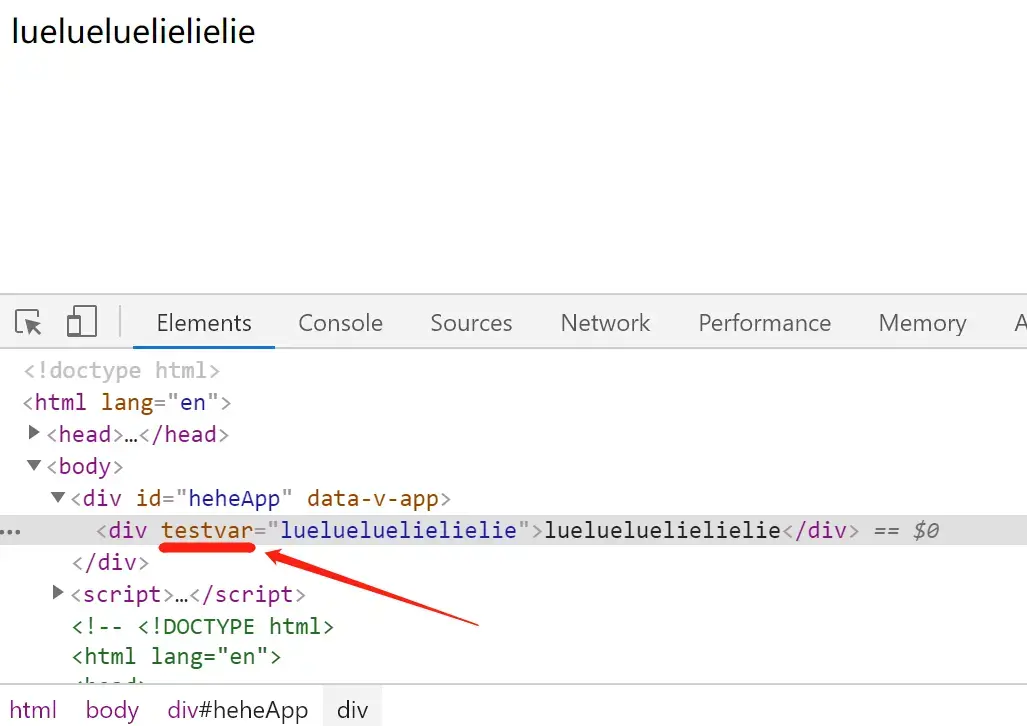!!!! 同理,事件绑定也可以这样搞, 首先是点击事件的例子: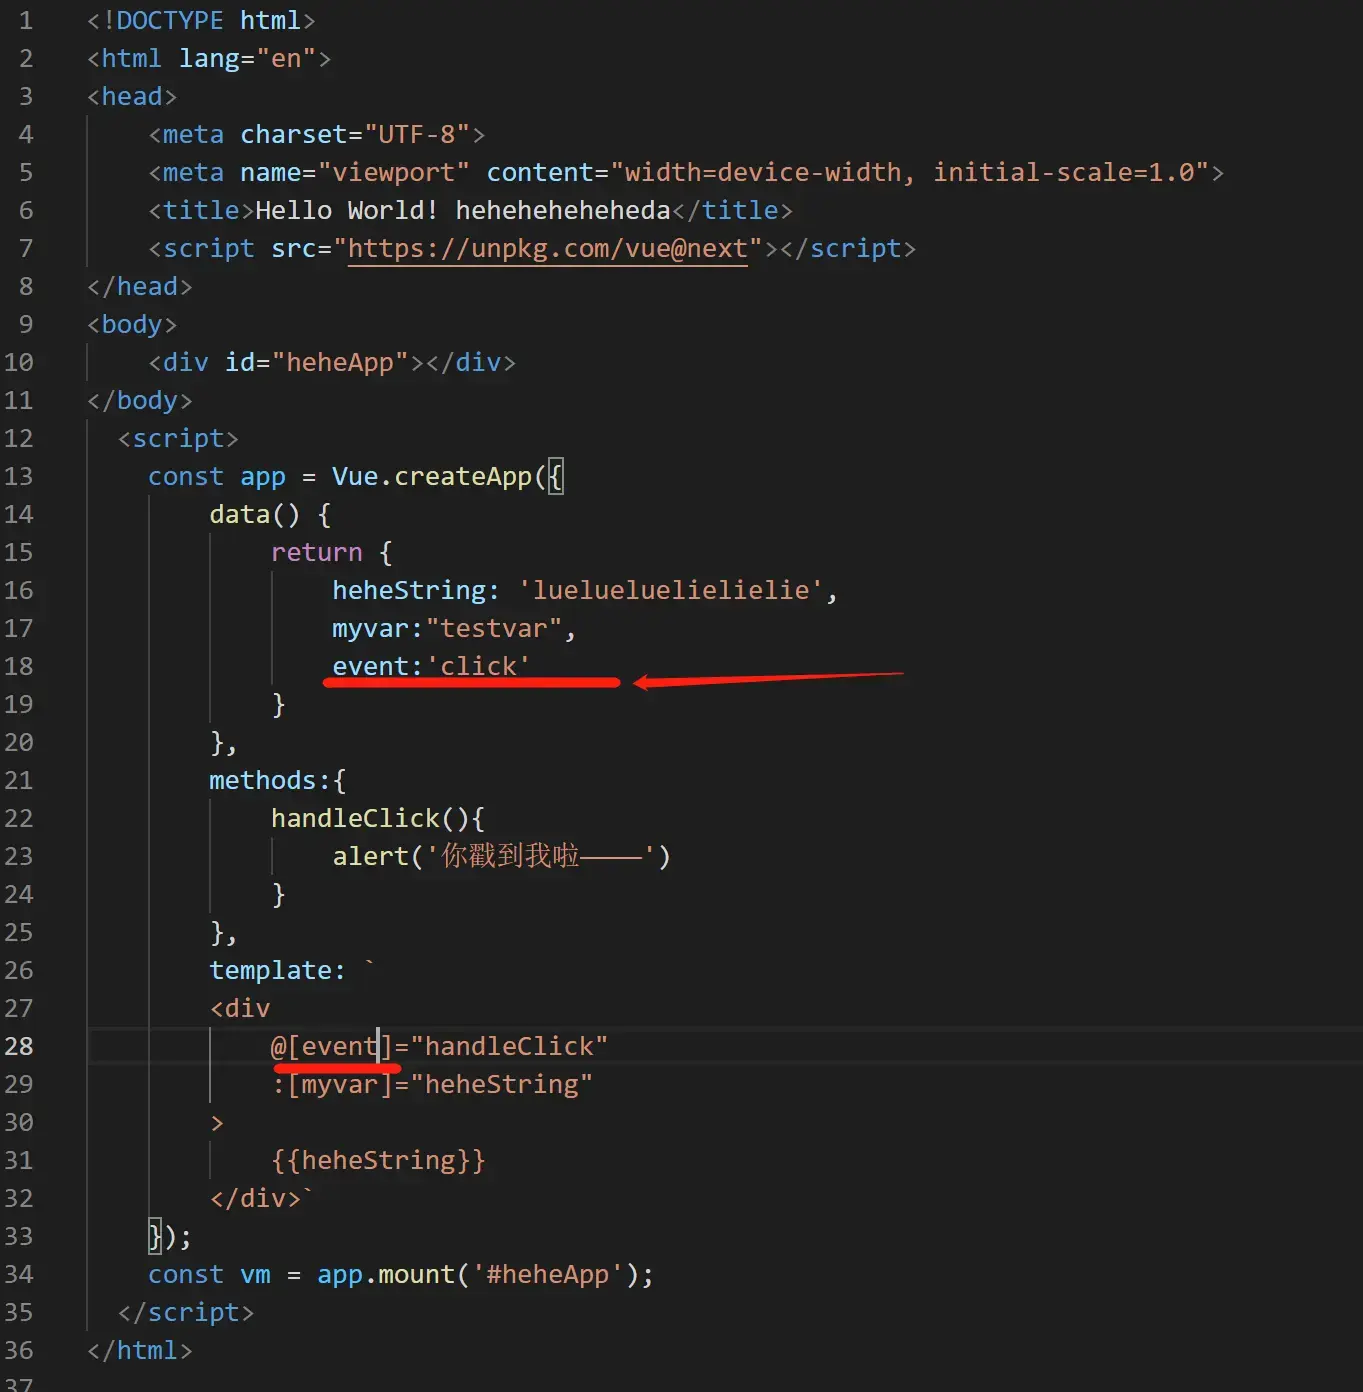同样是点击文本触发事件: 再来一例,把`click`事件改成`mouseenter`事件: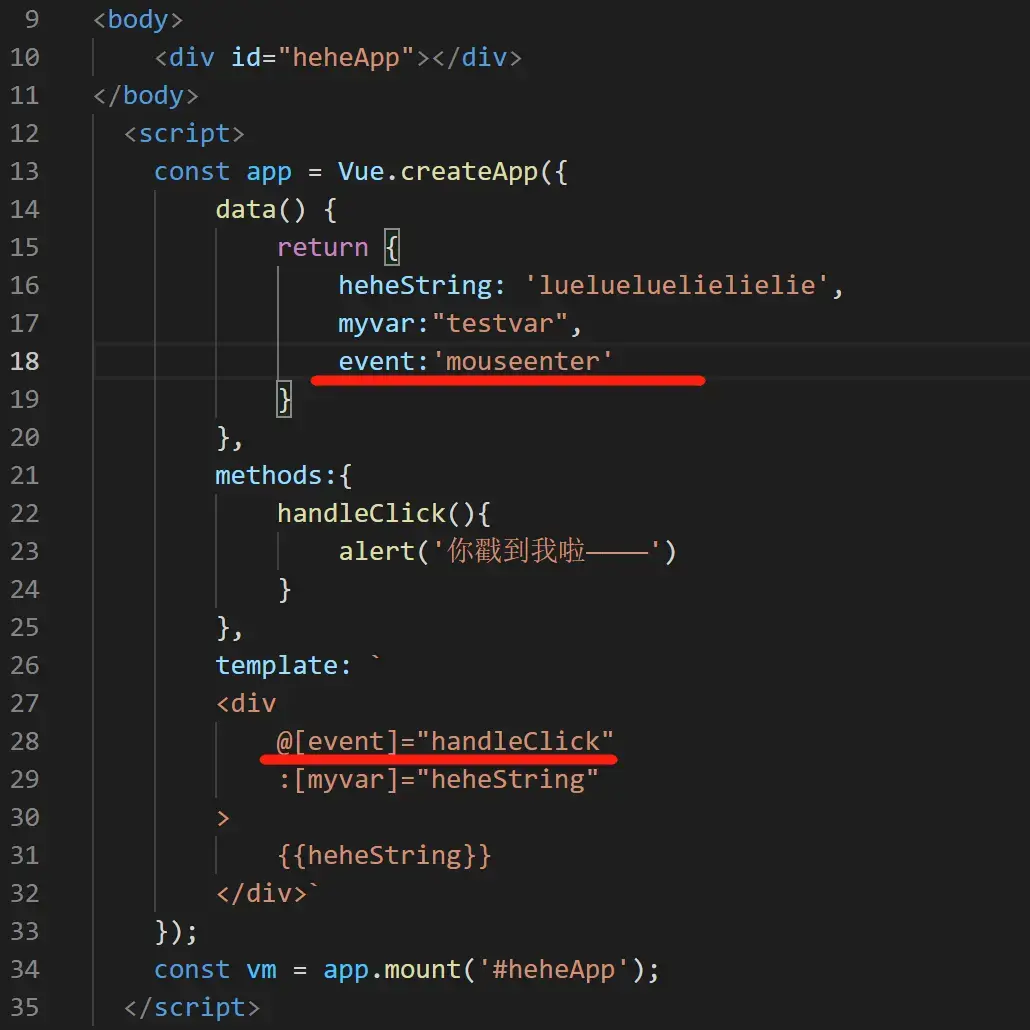则运行之后,鼠标移动到文本DOM节点上,就会触发事件回调函数: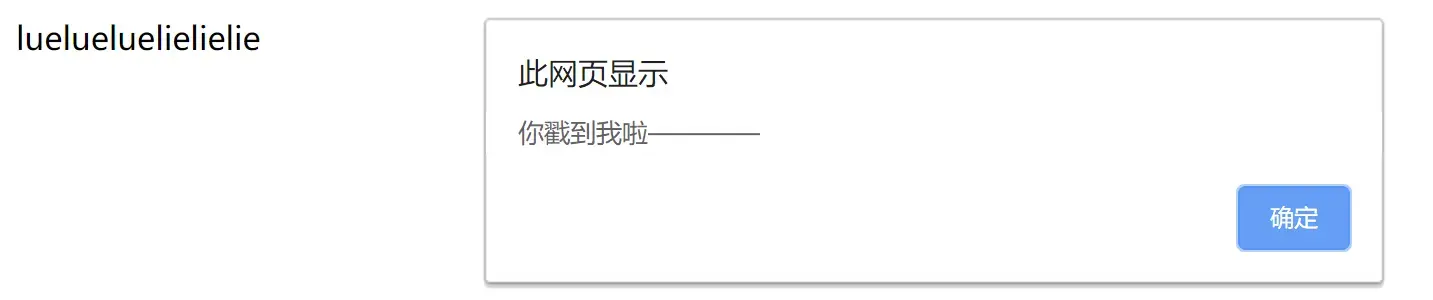
##表单 事件拦截的 简写 案例的话,我们首先写一个 可以点击跳转到`百度首页`的`表单`: ``` Hello World! heheheheheheda ``` 效果如下,点击`[提交]按钮`可以跳转到`百度首页`: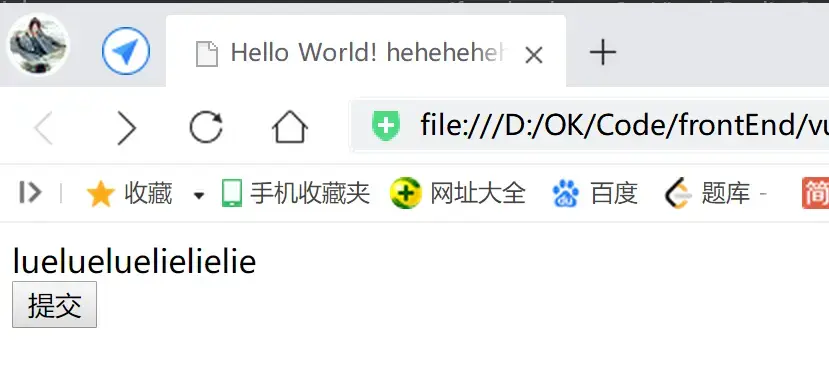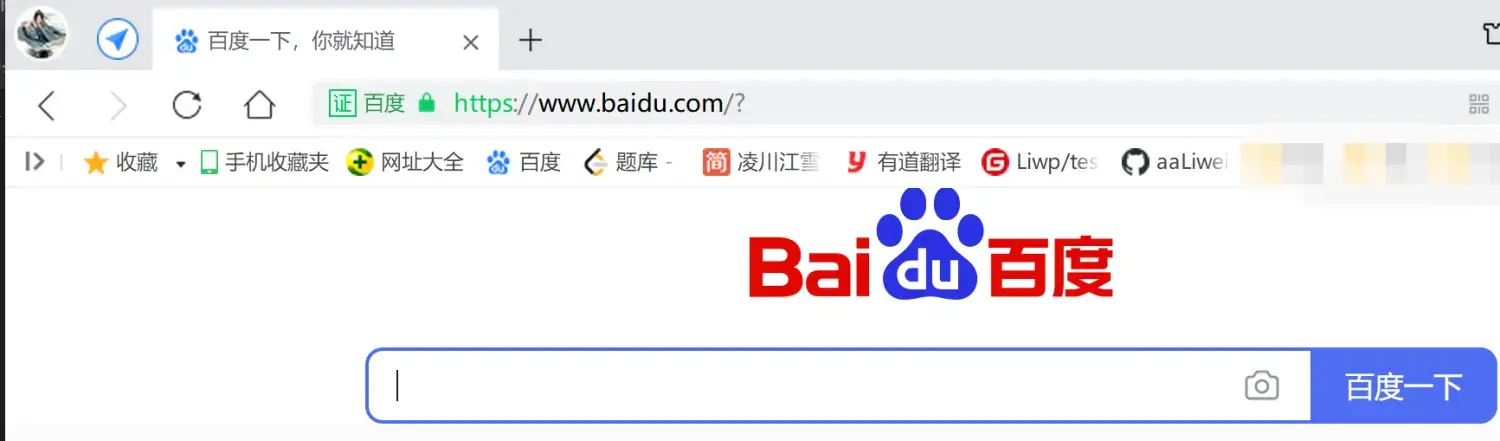
**常规事件拦截写法:** ``` Hello World! heheheheheheda ``` **运行效果如下,点击之后`跳转事件`无响应, 即触发`handleClick()`, 打印相关信息`console.log('你戳到我啦———— 拦截拦截!');`, 同时执行`e.preventDefault();`进行跳转事件拦截, 使得无法正常跳转: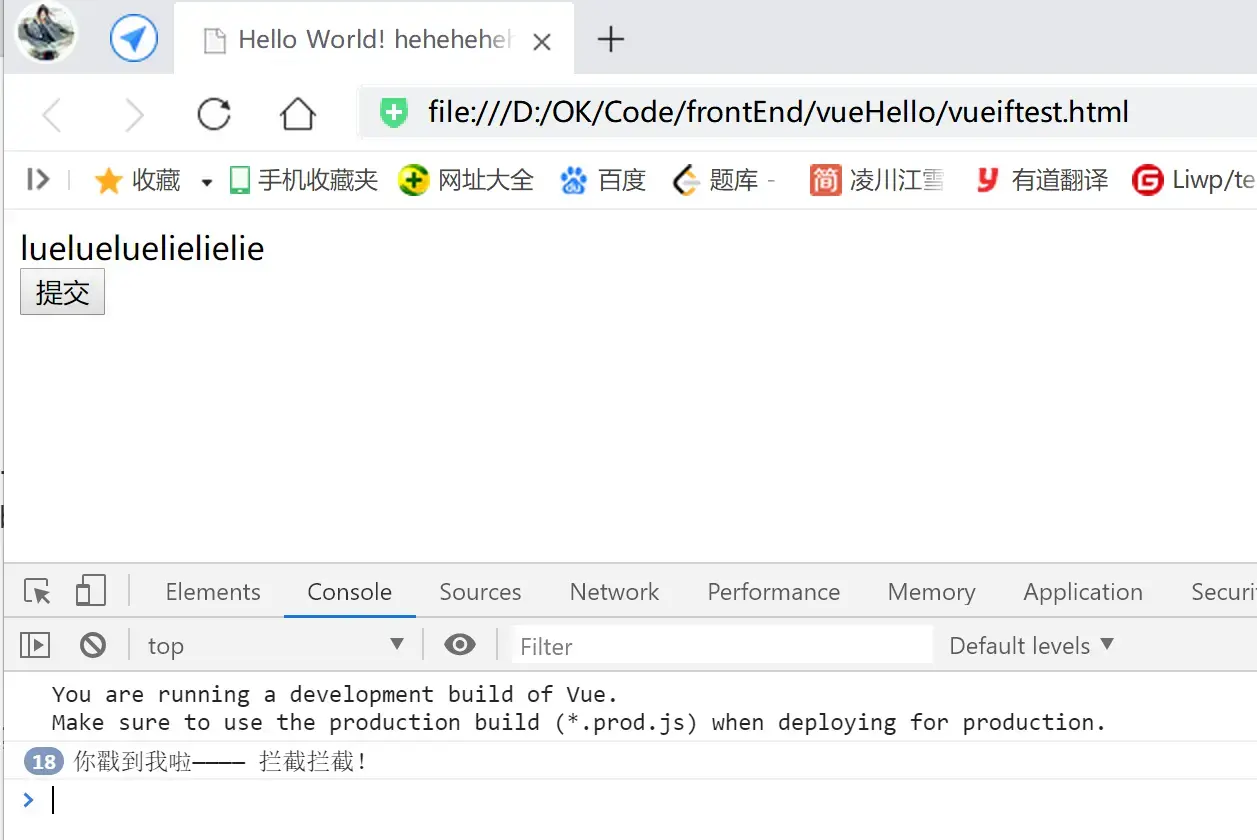 Vue的事件拦截简写: 在`@click`指令后加上`.prevent`修饰符, 这样的话,点击对应的组件之后, 程序会先拦截事件,接着再执行`@click`指令绑定的回调方法:** ``` Hello World! heheheheheheda ``` **运行效果如下,点击之后`跳转事件`无响应, 即触发`.prevent`修饰符(及其内在封装的事件拦截逻辑),使得无法正常跳转, 接着触发`handleClick()`, 打印相关信息`console.log('你戳到我啦———— 拦截拦截 —— .prevent!');`: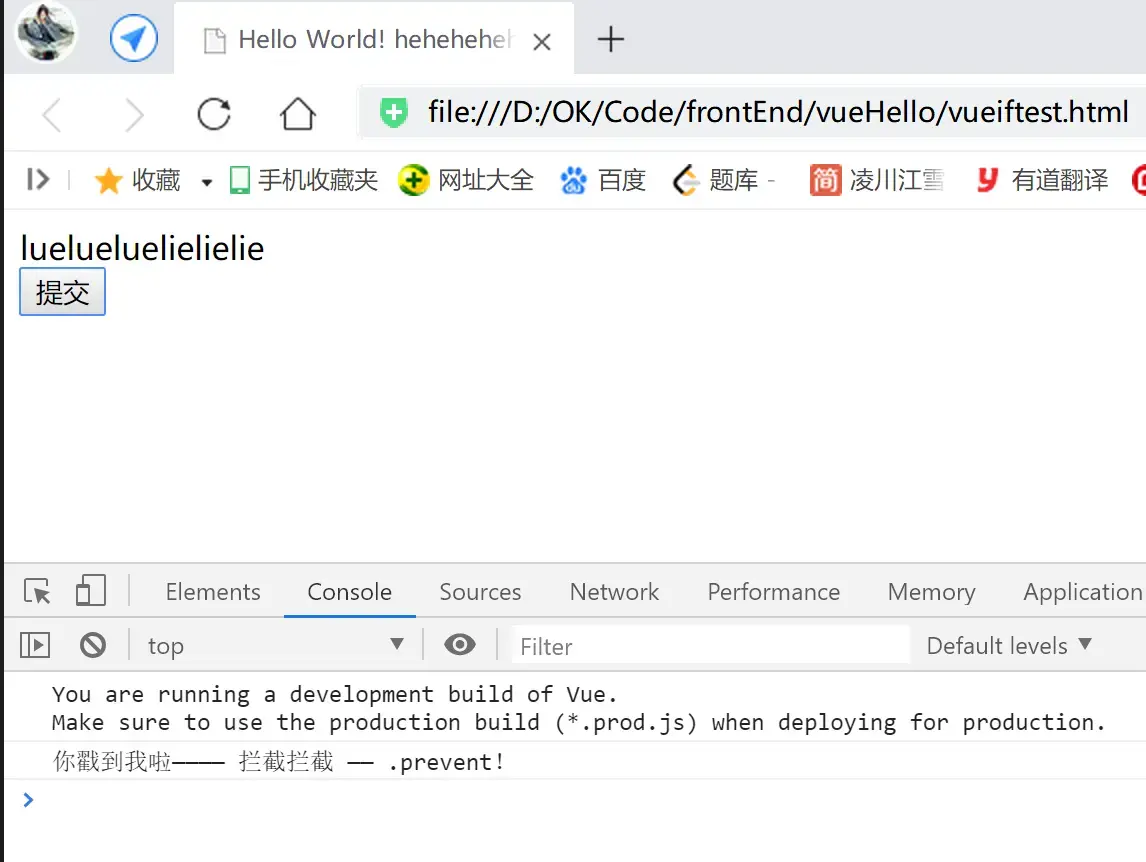**
####ref指令 引用 DOM节点实例【慎用,不够灵活】 **template中,使用`ref:[指定命名]`指令 修饰一个DOM标签, 之后可以在 该`DOM节点已经挂载好`的`生命周期回调`中, 通过`ref`指定的 `命名(字段属性)`【如下的`countDom`】, 引用到这个DOM节点实例【如下的`this.$refs.countDom`】:** 随后可以做 `更改属性值`,更新 UI相关的`属性值` 等操作; ``` Hello World! heheheheheheda ``` 运行效果: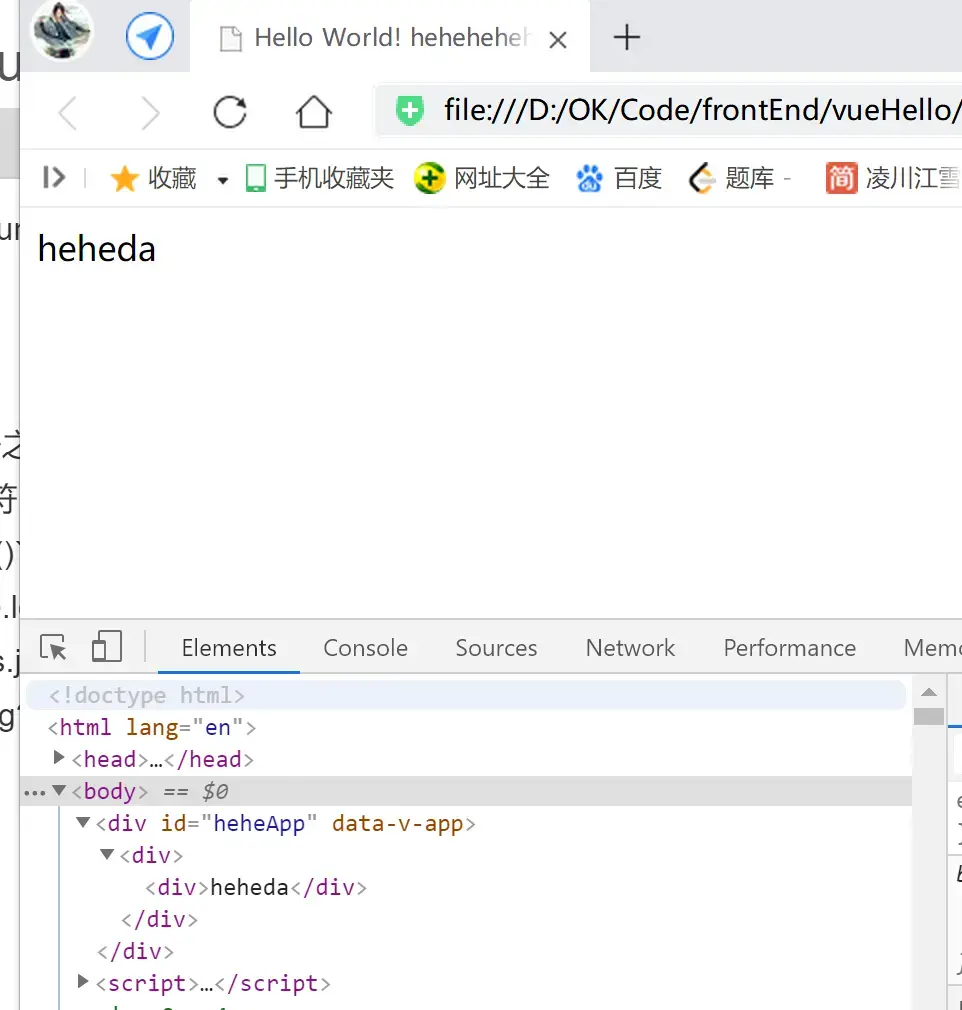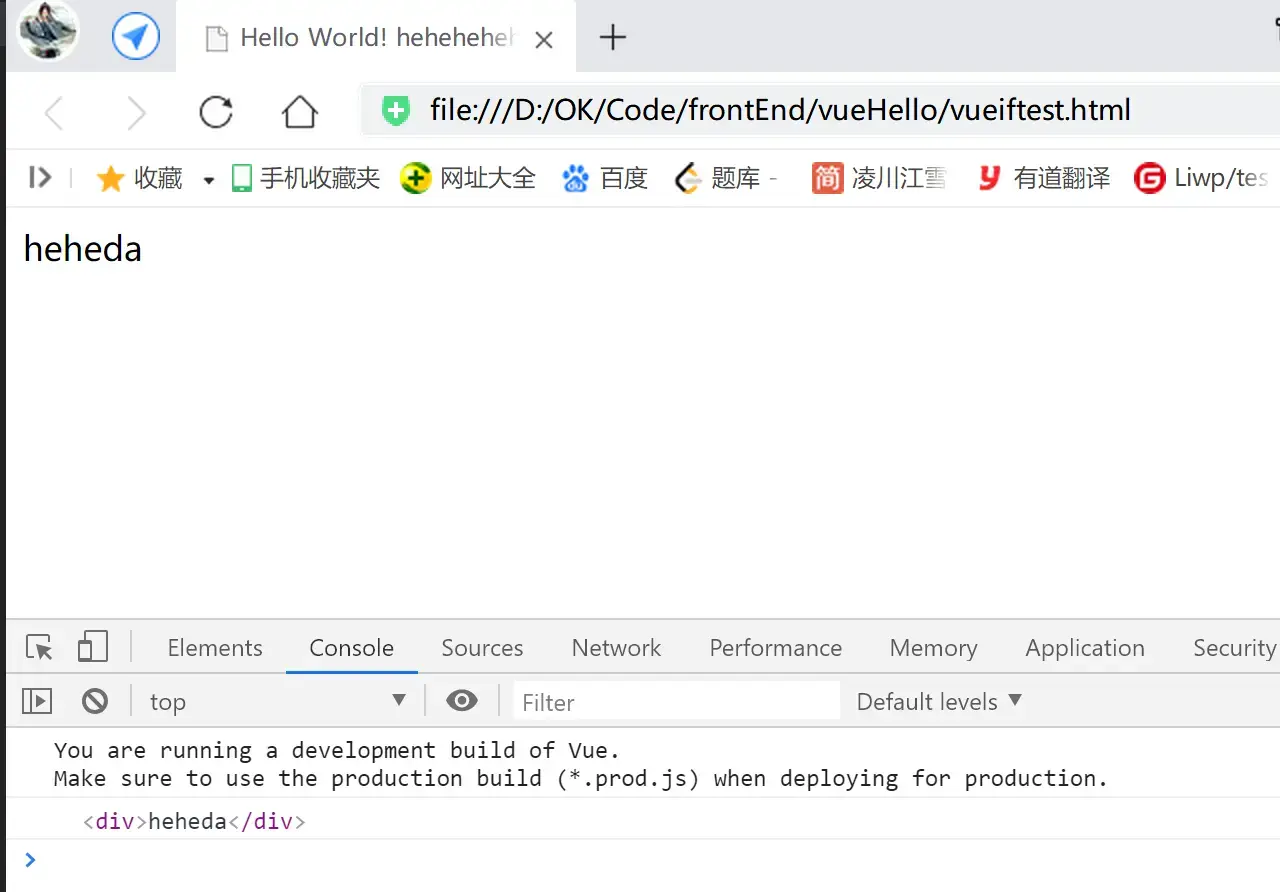
####ref指令 引用 子组件实例 及 子组件函数【慎用,不够灵活】 **template中,使用`ref:[指定命名]`指令 修饰一个 `子组件引用标签`, 之后可以在 该`DOM节点已经挂载好`的`生命周期回调`中, 通过`ref`指定的 `命名(字段属性)`【如下的`hehedaDom`】, 引用到这个 `子组件实例`【如下的`this.$refs.hehedaDom`】:** 随后还可使用这个 `子组件实例`,做调用其`函数方法` 等操作;
如下, 在根组件中,使用`ref:[hehedaDom]`指定 `子组件引用标签`, 在`mounted`中,拿到其实例, `打印`该子组件实例,同时`调用其函数`: ``` ```
####使用provide和inject 优化 多层DOM组件的props数据传递 三层DOM传递时,
######常规的props传递方法:
<script>
    const app = Vue.createApp({
        data() {
            return {count: 666}
        },
        template: `
            <div>
                <child :countFromRoot="count" />
            </div>`
    });

    app.component('child',{
        props: ['countFromRoot'],
        template: `<child-child :countFromChild="countFromRoot" />`
    });

    app.component('child-child',{
        props: ['countFromChild'],
        template: `<div>{{countFromChild}}</div>`
    });

    const vm = app.mount('#heheApp');
</script>
效果:
#####使用provide和inject 进行优化
只要在 提供数据 和 接收数据 的首尾两个组件中,
使用provide 和 inject 特性 控制数据传递数据即可,
至于这两个组件之间的间接组件,就无需再写数据传递的控制了:
<script>
    const app = Vue.createApp({
        data() {
            return {count: 666}
        },
        provide: {
            myCount: 8888
        },
        template: `
            <div>
                <child :countFromRoot="count" />
            </div>`
    });

    app.component('child',{
        template: `<child-child />`
    });

    app.component('child-child',{
        inject: ['myCount'],
        template: `<div>{{myCount}}</div>`
    });

    const vm = app.mount('#heheApp');
</script>
运行效果:
######弊端1:要使用`data`中的字段时候,`provide`需要使用函数的形式 ``` ``` 运行效果: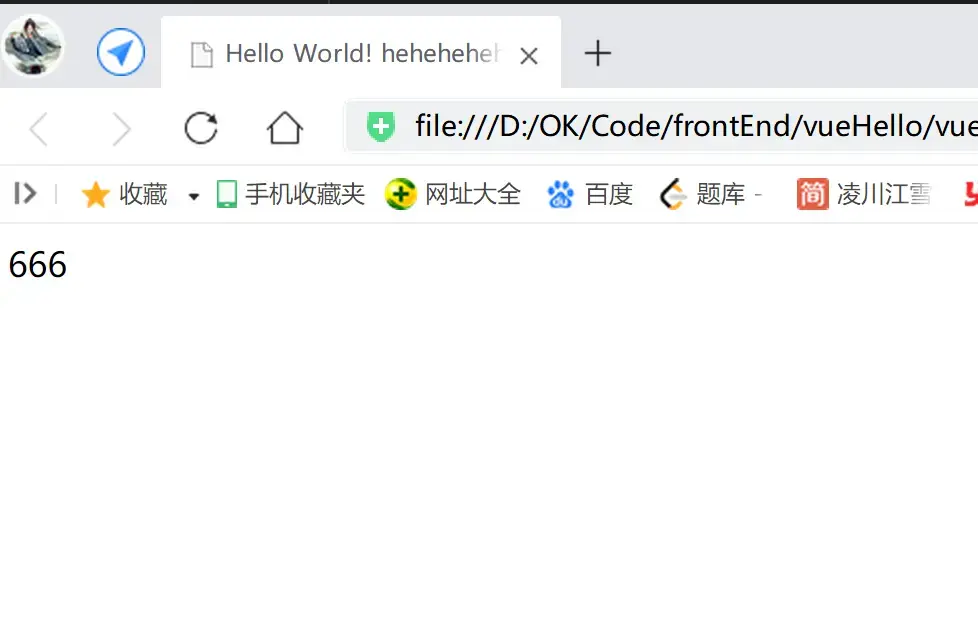
######弊端2:除非使用`响应式特性`编程,否则无法使用`双向绑定`特性,数据的传输只能是`一次性`的 ``` ``` **运行效果,一直点击按钮跌家`provide`组建的数据,但是`inject`组件没反应, 因为数据的传输只能是`一次性`的: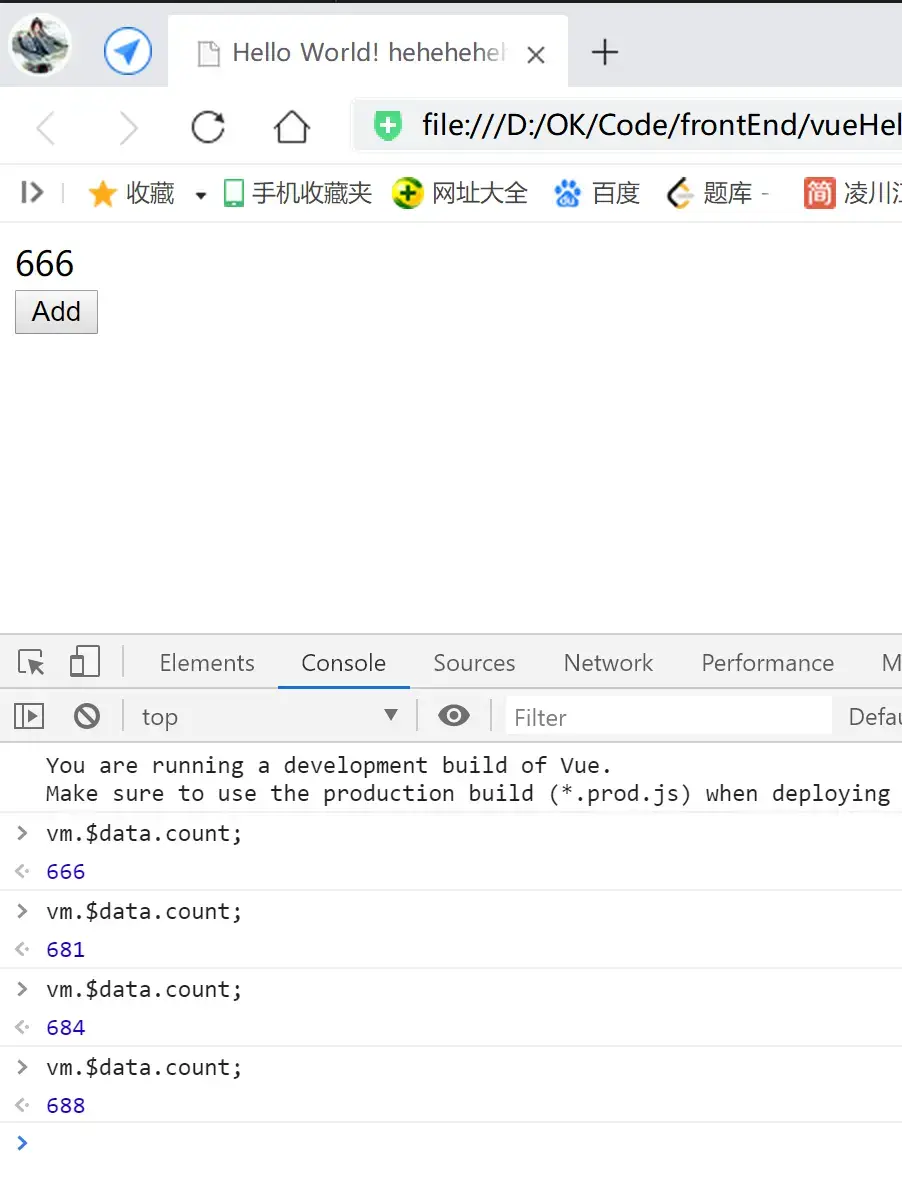**
####
