

#完整原文地址见简书www.jianshu.com/p/dc7652457… #更多完整Vue笔记目录敬请见《前端 Web 笔记 汇总目录(Updating)》
#本文内容提要
- Mixin基础
Mixin 之 methods
Mixin 之 自定义属性
Mixin 之 生命周期
全局Mixin
Vue3之后,推荐使用Composition API 或者 插件 替代Mixin
- 1. 首先是逻辑不直观,出了问题难以定位,可维护性差
- 2. 全局Mixin的维护性也很差
Vue中的 ref 和 $refs
自定义指令 directive
以上是全局定义的自定义指令,下面是 局部自定义指令
再例:再验生命周期
再例2:根据v-show和v-if的特性不同,会触发的生命周期钩子 也不一样:
自定义指令 结合 style 【自定义指令传参】
再结合data 和 updated钩子,将上例 动态化
简化上例 的 设计技巧
打印binding对象
用上binding.arg,自定义更加灵活
- Teleport传送门
- CSS基础案例回顾——居中布局
- 局部蒙版
- Teleport传送门 助力 全局蒙版
- 或者传送到某个body下覆盖全局的DOM节点上,
- 加上字体
- Render函数
- Vue传统写法
- 使用Render函数优化
- 使用Render函数 生成多层嵌套UI
- 插件
- install参数初解读
- 插件 —— 使用
provide提供数据给 子组件 使用- 插件 —— 自定义指令 供 (子)组件使用
- 插件 —— 拓展生命周期
- 插件 —— 拓展底层变量
- 数据校验案例
- Mixin方案 —— 对数据做校验 案例
- 每层迭代 增加监听
- 将 校验mixin 封装进 plugin
####Mixin基础 >**Mixin其实就是定义一个`命名`模块,可以包含`data`字段,
定义后可以 赋值 给一个 引用;
然后可以在某个组件中, 使用`mixins:[ Mixin字段 ...]`的方式,引入这个`Mixin`字段;
引入`Mixin`模块的组件,可以直接使用 `引入 Mixin 模块`的内容(data字段等),而不需要自身有事先定义;
**
如果组件本身有 自身定义的data字段 且与 引入的Mixin 模块的data字段有冲突,
则以组件本身的字段为准;
例程1:
组件本身定义number一个字段,
Mixin定义了number和 count两个字段,
组件引入Mixin后,使用数据时,number以组件为准,count则可以直接使用Mixin的:
<!DOCTYPE html>
<html lang="en">
<head>
    <meta charset="UTF-8">
    <meta name="viewport" content="width=device-width, initial-scale=1.0">
    <title>Hello World! heheheheheheda</title>
    <script src="https://unpkg.com/vue@next"></script>
</head>
<body>
    <div id="heheApp"></div>
</body>
<script>
    const myMixin = {
        data() {
            return {
                number: 666,
                count: 666
            }
        }
    }

    const app = Vue.createApp({
        data() {
            return {
                number: 1
            }
        },
        mixins: [myMixin],
        template: `
            <div>
                <div>{{number}}</div>
                <div>{{count}}</div>
            </div>`
    });

    const vm = app.mount('#heheApp');
</script>
</html>
运行效果:
再例:
<!DOCTYPE html>
<html lang="en">
<head>
    <meta charset="UTF-8">
    <meta name="viewport" content="width=device-width, initial-scale=1.0">
    <title>Hello World! heheheheheheda</title>
    <script src="https://unpkg.com/vue@next"></script>
</head>
<body>
    <div id="heheApp"></div>
</body>
<script>
    const myMixin = {
        data() {
            return {
                number: 666,
                count: 666
            }
        }
    }

    const myMixin2 = {
        data() {
            return {
                biubiu: 'biubiubiu'
            }
        }
    }

    const app = Vue.createApp({
        data() {
            return {
                number: 1
            }
        },
        mixins: [myMixin, myMixin2],
        template: `
            <div>
                <div>{{number}}</div>
                <div>{{count}}</div>
                <div>{{biubiu}}</div>
            </div>`
    });

    const vm = app.mount('#heheApp');
</script>
</html>
运行效果:
####Mixin 之 methods >**Mixin 混入 methods 的规则同 `data`, 混入后,`组件`可以直接使用`Mixin`的`methods`, 如有冲突,则以`组件自身`的`methods`为准:** ``` Hello World! heheheheheheda ``` **运行效果:**
####Mixin 之 自定义属性 >**Mixin 混入 自定义属性 的 默认规则同 `data`/`methods`, 混入后,`组件`可以直接使用`Mixin`的`自定义属性`, 如有冲突,则以`组件自身`的`自定义属性`为准:** ``` Hello World! heheheheheheda ``` 运行效果: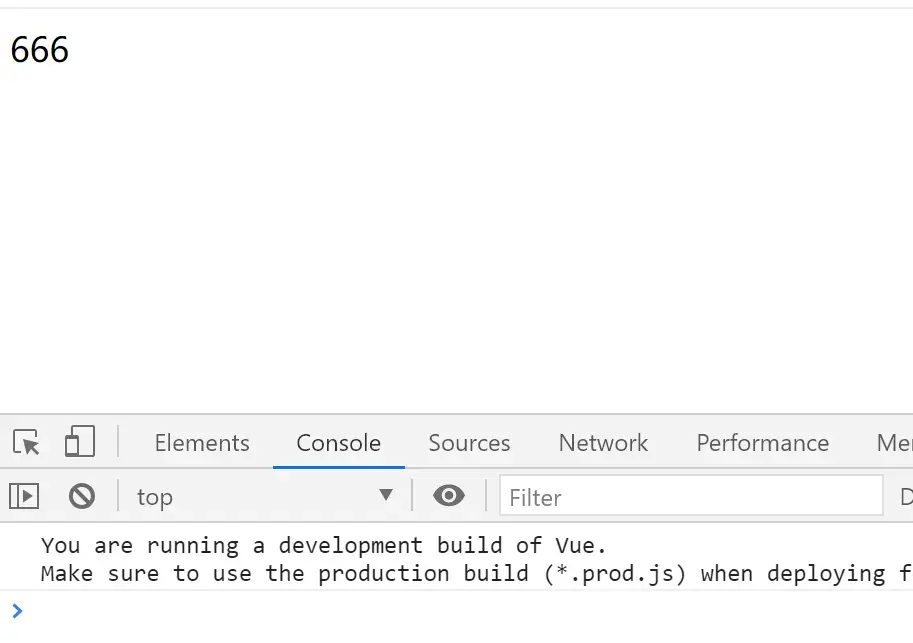
不过Mixin的自定义属性这一块比较特殊,开发者可以通过
app.config.optionMergeStrategies.[对应冲突字段]自行定义优先级策略;app.config.optionMergeStrategies.[对应冲突字段]对应一个函数, 其中一参为字段对应的Mixin的值,二参为字段对应的组件本身的值;
如下,自定义新的规则为——如果存在mixinValue,
默认优先返回mixinValue,不存在再返回appValue;
<!DOCTYPE html>
<html lang="en">
<head>
    <meta charset="UTF-8">
    <meta name="viewport" content="width=device-width, initial-scale=1.0">
    <title>Hello World! heheheheheheda</title>
    <script src="https://unpkg.com/vue@next"></script>
</head>
<body>
    <div id="heheApp"></div>
</body>
<script>

    const myMixin = {
        myNumber: 1
    }

    const app = Vue.createApp({
        mixins: [myMixin],
        myNumber: 666,
        template: `
            <div>
                <div>{{this.$options.myNumber}}</div>
            </div>`
    });

    app.config.optionMergeStrategies.myNumber = (mixinValue, appValue) => {
        return mixinValue || appValue;
    }

    const vm = app.mount('#heheApp');
</script>
</html>
运行效果:
####Mixin 之 生命周期 >**Mixin混入生命周期时,规则 与 `data`、`methods`略不相同, >`Mixin`中的生命周期 > 与 `组件`中的 冲突时,两边 都会执行, >执行顺序, >先按`mixins:[ Mixin字段 ...]`引入的顺序执行完`Mixin`的`钩子`, >最后执行`组件`自己的`钩子`;** ``` Hello World! heheheheheheda ``` 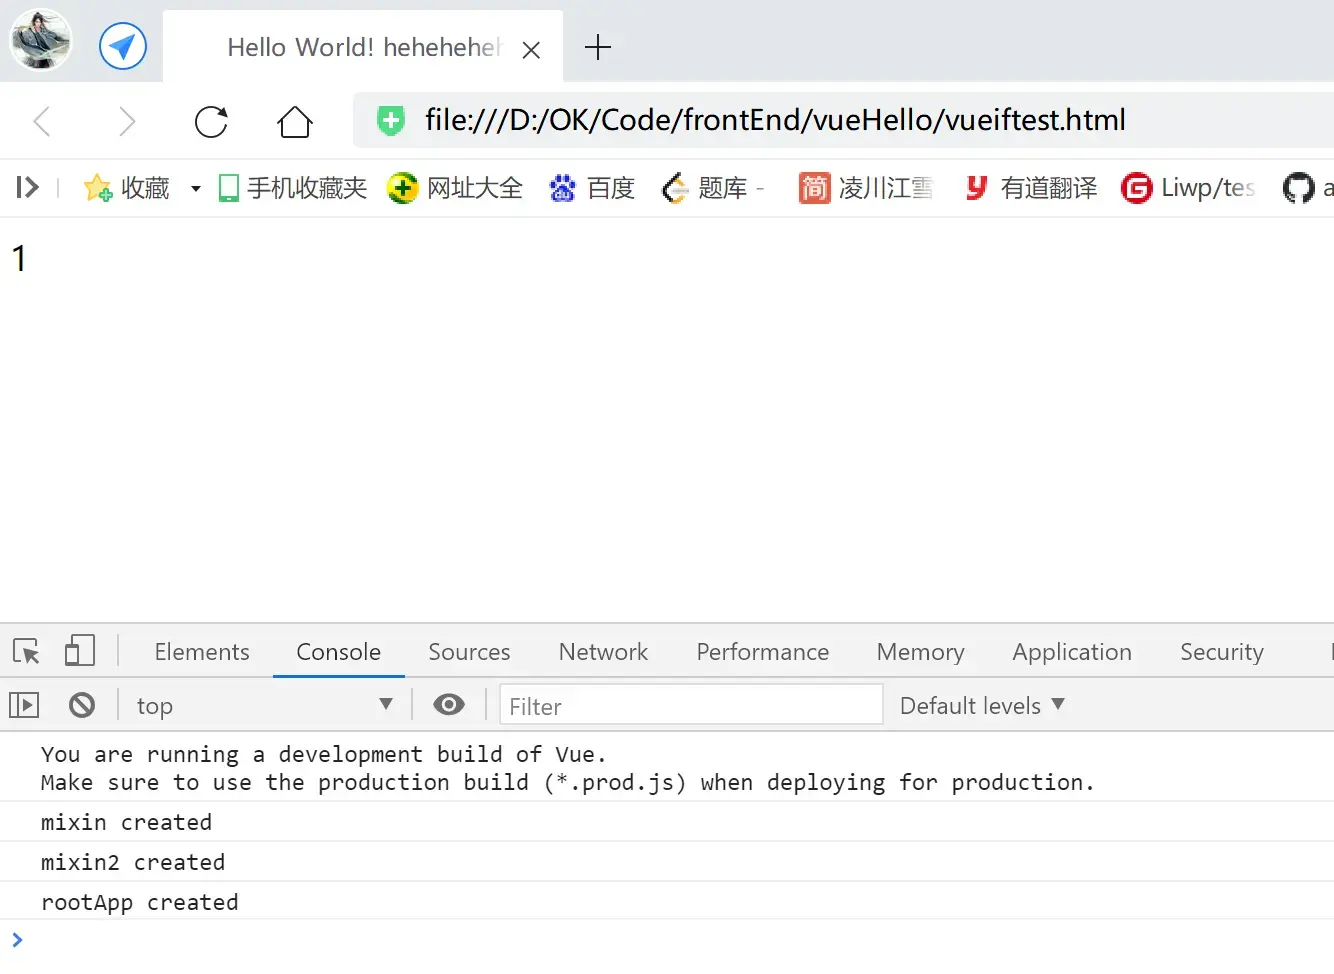
####本例此前的`Mixin`都是`局部Mixin`!!在`父组件`中引入的`Mixin`,无法在`子组件`中使用 如下,父组件引入的`Mixin`【myMixin】,无法在`子组件`【child】中使用: ``` Hello World! heheheheheheda ``` **运行效果: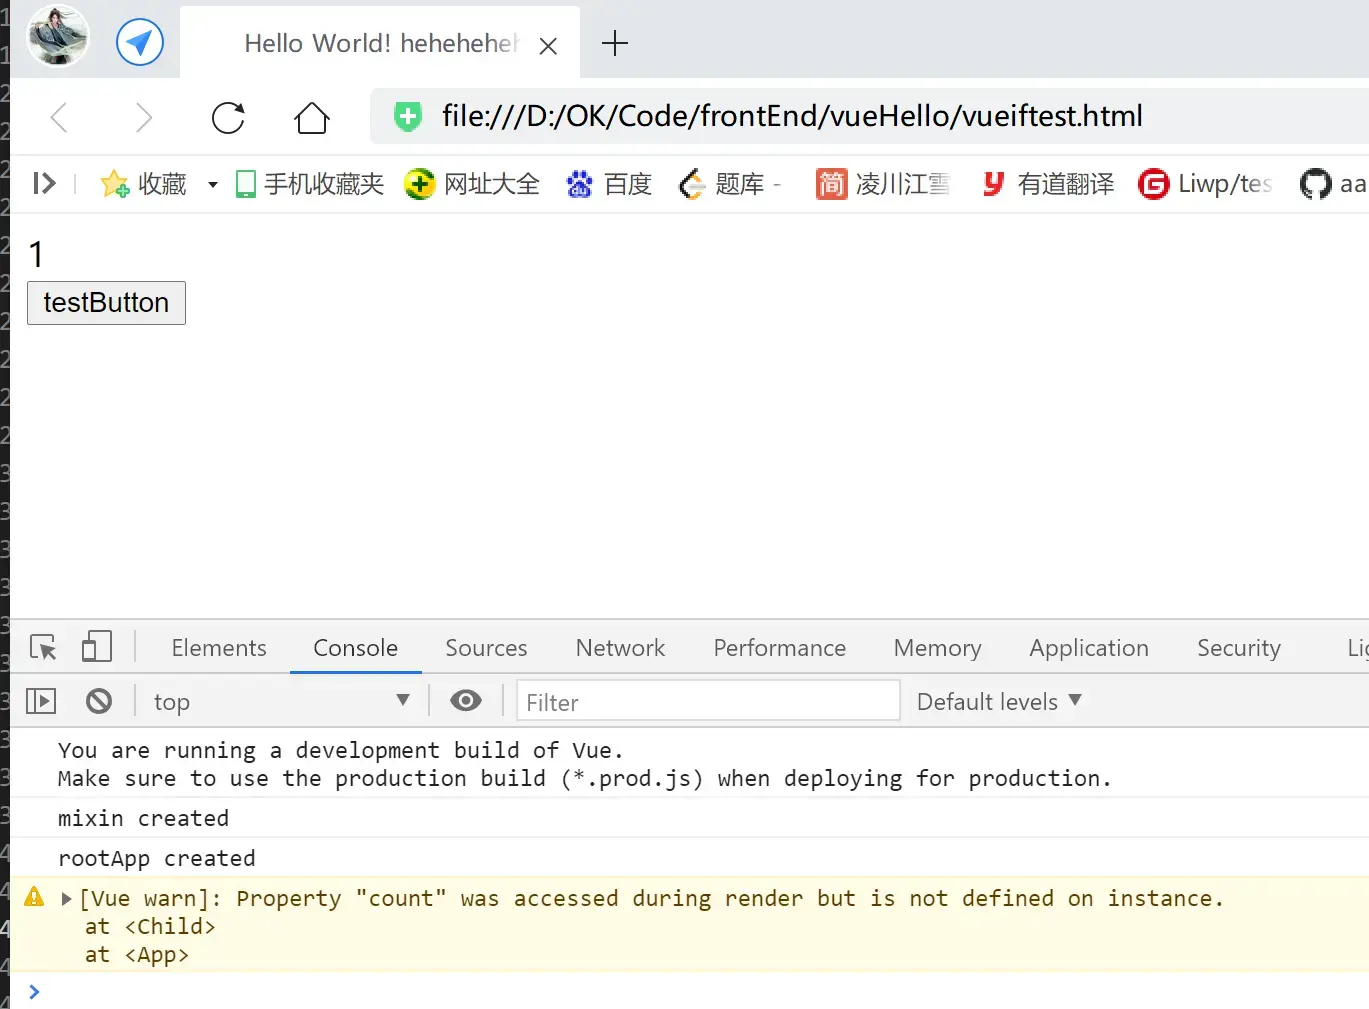 如在子组件也要用对应`Mixin`的字段,则子组件也要写明`mixins: [myMixin],`自行引入:** ``` ... app.component('child', { mixins: [myMixin], template:`
####全局Mixin >**使用`app.mixin()`定义一个`全局Mixin`, 可以使得`根组件`及其`所有子组件`都自动注入这个`全局Mixin`, 无需再写 似`mixins: [myMixin]`的引入语法:**
例程:
<!DOCTYPE html>
<html lang="en">
<head>
    <meta charset="UTF-8">
    <meta name="viewport" content="width=device-width, initial-scale=1.0">
    <title>Hello World! heheheheheheda</title>
    <script src="https://unpkg.com/vue@next"></script>
</head>
<body>
    <div id="heheApp"></div>
</body>
<script>

    const app = Vue.createApp({
        data() {
            return {
                number: 1
            }
        },
        created() {
            console.log('rootApp created');
        },
        methods: {
            handleClick() {
                console.log("rootApp methods");
            }
        },
        template: `
            <div>
                <div>{{number}}</div>
                <div>{{count}}</div>
                <child />
                <button @click="handleClick">testButton</button>
                </div>`
    });

    app.mixin({
        data() {
            return {
                count: 666
            }
        },
        created() {
            console.log('mixin created');
        },
        methods: {
            handleClick() {
                console.log("mixin methods");
            }
        }
    })

    app.component('child', {
        template:`<div>{{count}}</div>`
    })

    const vm = app.mount('#heheApp');
</script>
</html>
运行效果:
####Vue3之后,推荐使用Composition API 或者 插件 替代Mixin >**--- Vue3之后,推荐使用Composition API 替代Mixin, 因为Mixin的可维护性其实不高;** ######1. 首先是逻辑不直观,出了问题难以定位,可维护性差 **像刚刚 混入自定义属性的例子,运行的结果是返回1,
接盘侠要看为何返回1,需要去看到 mixin引入、找到对应的 mixin模块, 最后查阅 自定义的匹配策略,过程非常麻烦;
出了问题,要确认是 组件、mixin、冲突、匹配策略 等谁的锅,也不容易;** ``` Hello World! heheheheheheda ```
######2. 全局Mixin的维护性也很差
全局Mixin会对 注册全局Mixin的 根组件及其所有子孙组件都自动混入内容,
这个时候如果项目规模一大,管理起来就很麻烦,
首先
Mixin的内容一大,往各种地方混入的时候就很难管理,
其次,
单子孙组件体量一大、数量一多,
容易 忽略了、忘了 定义的全局Mixin,也是个问题;
####Vue中的 ref 和 $refs >**科普文章《[vue中的 ref 和 $refs](https://www.cnblogs.com/xumqfaith/p/7743387.html)》** >>`console.log(this.$refs.input1) //` `console.log(document.getElementById('input1')) //`
>> **这两种方法获得的都是Dom节点, 而$refs相对document.getElementById的方法,会减少获取dom节点的消耗。**
案例:
<!DOCTYPE html>
<html lang="en">
<head>
    <meta charset="UTF-8">
    <meta name="viewport" content="width=device-width, initial-scale=1.0">
    <title>Hello World! heheheheheheda</title>
    <script src="https://unpkg.com/vue@next"></script>
</head>
<body>
    <div id="heheApp"></div>
</body>
<script>

    const app = Vue.createApp({
        mounted() {
            this.$refs.input1.focus();
        },
        template: `
            <div>
                <input ref="input">
                <input ref="input1">
                <input ref="input2">
            </div>`
    });

    const vm = app.mount('#heheApp');
</script>
</html>
运行效果:
####自定义指令 directive >**使用自定义指令 可以封装常用的逻辑, 使得常用的代码模块得到复用,提高效率;**
使用自定义指令封装focus逻辑,优化上例:
<!DOCTYPE html>
<html lang="en">
<head>
    <meta charset="UTF-8">
    <meta name="viewport" content="width=device-width, initial-scale=1.0">
    <title>Hello World! heheheheheheda</title>
    <script src="https://unpkg.com/vue@next"></script>
</head>
<body>
    <div id="heheApp"></div>
</body>
<script>

    const app = Vue.createApp({
        template: `
            <div>
                <input v-focus>
            </div>`
    });

    app.directive('focus', {
        mounted(el) {
            el.focus();
        }
    })

    const vm = app.mount('#heheApp');
</script>
</html>
运行效果,自动聚焦:
####以上是全局定义的自定义指令,下面是 局部自定义指令 同样实现上例效果: ``` Hello World! heheheheheheda ```
####-再例:再验生命周期
<!DOCTYPE html>
<html lang="en">
<head>
    <meta charset="UTF-8">
    <meta name="viewport" content="width=device-width, initial-scale=1.0">
    <title>Hello World! heheheheheheda</title>
    <script src="https://unpkg.com/vue@next"></script>
</head>
<body>
    <div id="heheApp"></div>
</body>
<script>

    const app = Vue.createApp({
        data() {
            return {
                hehe: true
            }
        },
        template: `
            <div>
                <div v-show="hehe">
                    <input v-focus>
                </div>
            </div>`
    });

    app.directive('focus', {
        beforeMount() {
            console.log('beforeMount');
        },
        mounted(el) {
            console.log('mounted');
            el.focus();
        },
        beforeUpdate() {
            console.log('beforeUpdate');
        },
        updated() {
            console.log('updated');
        }
    })

    const vm = app.mount('#heheApp');
</script>
</html>
运行效果:
#####再例2: 根据v-show和v-if的特性不同,会触发的生命周期钩子 也不一样:
<!DOCTYPE html>
<html lang="en">
<head>
    <meta charset="UTF-8">
    <meta name="viewport" content="width=device-width, initial-scale=1.0">
    <title>Hello World! heheheheheheda</title>
    <script src="https://unpkg.com/vue@next"></script>
</head>
<body>
    <div id="heheApp"></div>
</body>
<script>

    const app = Vue.createApp({
        data() {
            return {
                hehe: true
            }
        },
        template: `
            <div>
                <div v-if="hehe">
                    <input v-focus>
                </div>
            </div>`
    });

    app.directive('focus', {
        beforeMount() {
            console.log('beforeMount');
        },
        mounted(el) {
            console.log('mounted');
            el.focus();
        },
        beforeUpdate() {
            console.log('beforeUpdate');
        },
        updated() {
            console.log('updated');
        },
        beforeUnmount() {
            console.log('beforeUnmount');
        },
        unmounted() {
            console.log('unmounted');
        },
    })

    const vm = app.mount('#heheApp');
</script>
</html>
运行效果:
####自定义指令 结合 style 【自定义指令传参】 **自定义指令 中的钩子, 除了默认第一个参数【el】 为修饰的DOM节点外, 还可以有第二个参数【binding】, 这个参数可以把 使用 本`自定义指令`时,传过来的参数 都 囊括其中;**
如下,
定义css类【header】,指定为绝对布局样式;
自定义指令pos,
钩子接收两个参数——el、binding;
使用指令时,传入一个数值参数【80】,
这在指令中,会被接收,然后用于定义style布局样式——
el.style.top = (binding.value + 'px');
<!DOCTYPE html>
<html lang="en">
<head>
    <meta charset="UTF-8">
    <meta name="viewport" content="width=device-width, initial-scale=1.0">
    <title>Hello World! heheheheheheda</title>
    <style>
        .header {position: absolute}
    </style>
    <script src="https://unpkg.com/vue@next"></script>
</head>
<body>
    <div id="heheApp"></div>
</body>
<script>

    const app = Vue.createApp({
        data() {
            return {
                hehe: true
            }
        },
        template: `
            <div>
                <div v-pos="80" class="header">
                    <input />
                </div>
            </div>`
    });

    app.directive('pos', {
        mounted(el, binding) {
            el.style.top = (binding.value + 'px');
        }
    })

    const vm = app.mount('#heheApp');
</script>
</html>
运行效果:
换成180:
...
template: `
            <div>
                <div v-pos="180" class="header">
                    <input />
                </div>
            </div>`
...
运行效果:
####再结合data 和 updated钩子,将上例 动态化 ``` Hello World! heheheheheheda .header {position: absolute} ``` 运行效果: 初始: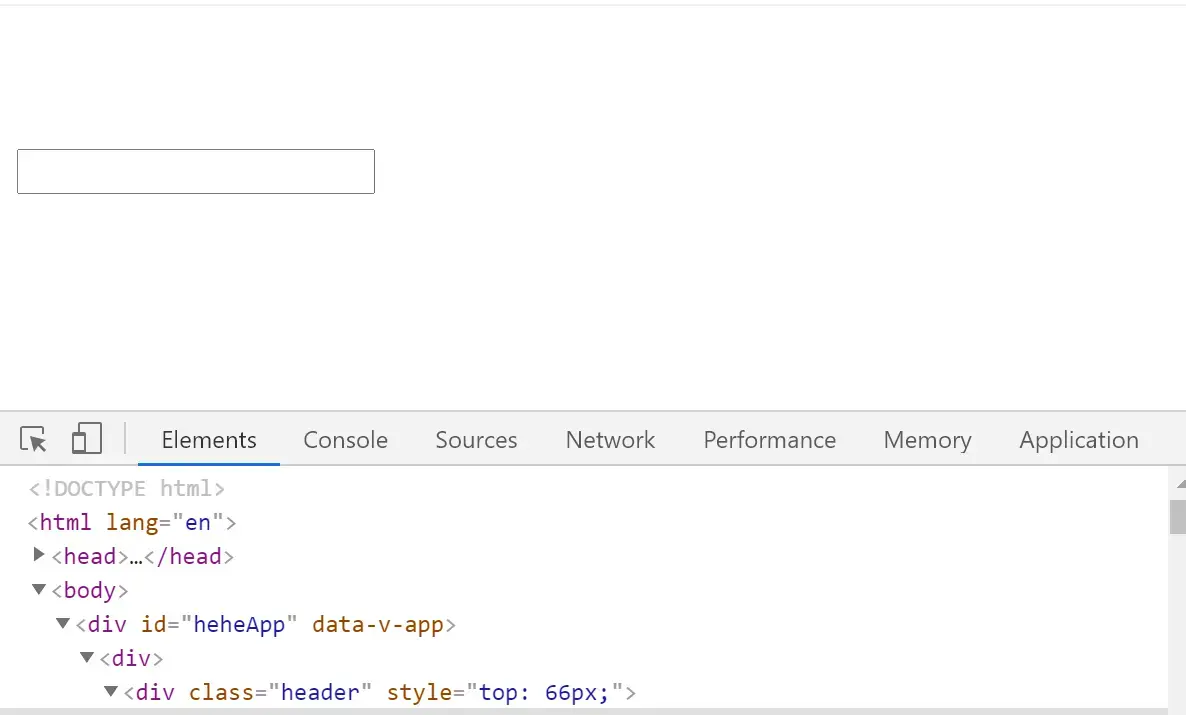动态赋值: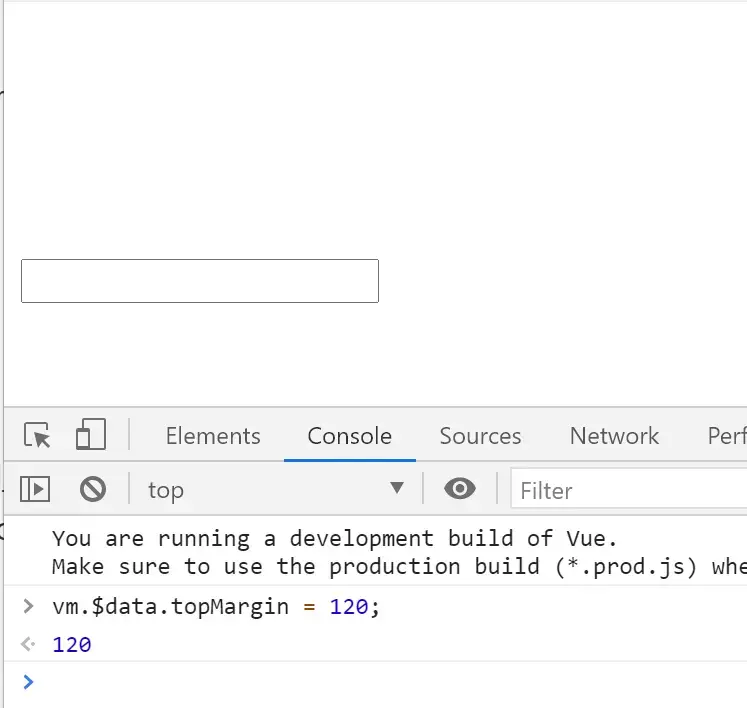效果: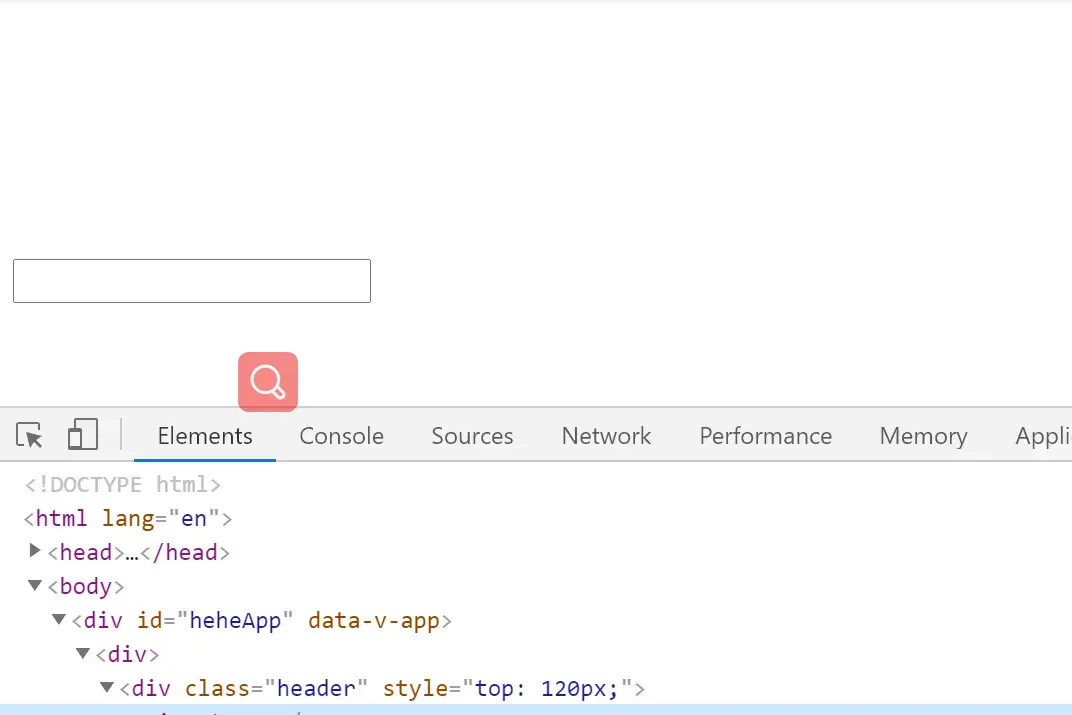
####简化上例 的 设计技巧 例程: ``` Hello World! heheheheheheda .header {position: absolute} ``` **即当`自定义指令`里边, 只有`mounted`和`updated`两个钩子 且 这两个钩子的`内容`和`参数列表` 是 完全一样的话, 我们可以简写成下面的写法, 即变对象为函数,函数的内容 为 钩子中相同的内容:** ``` app.directive('pos', (el, binding) => { el.style.top = (binding.value + 'px'); }) ``` **这种写法 是 等价于上例的写法的:** ``` app.directive('pos', { mounted(el, binding) { el.style.top = (binding.value + 'px'); }, updated(el, binding) { el.style.top = (binding.value + 'px'); } }) ```
####打印binding对象 ``` Hello World! heheheheheheda .header {position: absolute} ``` 运行效果: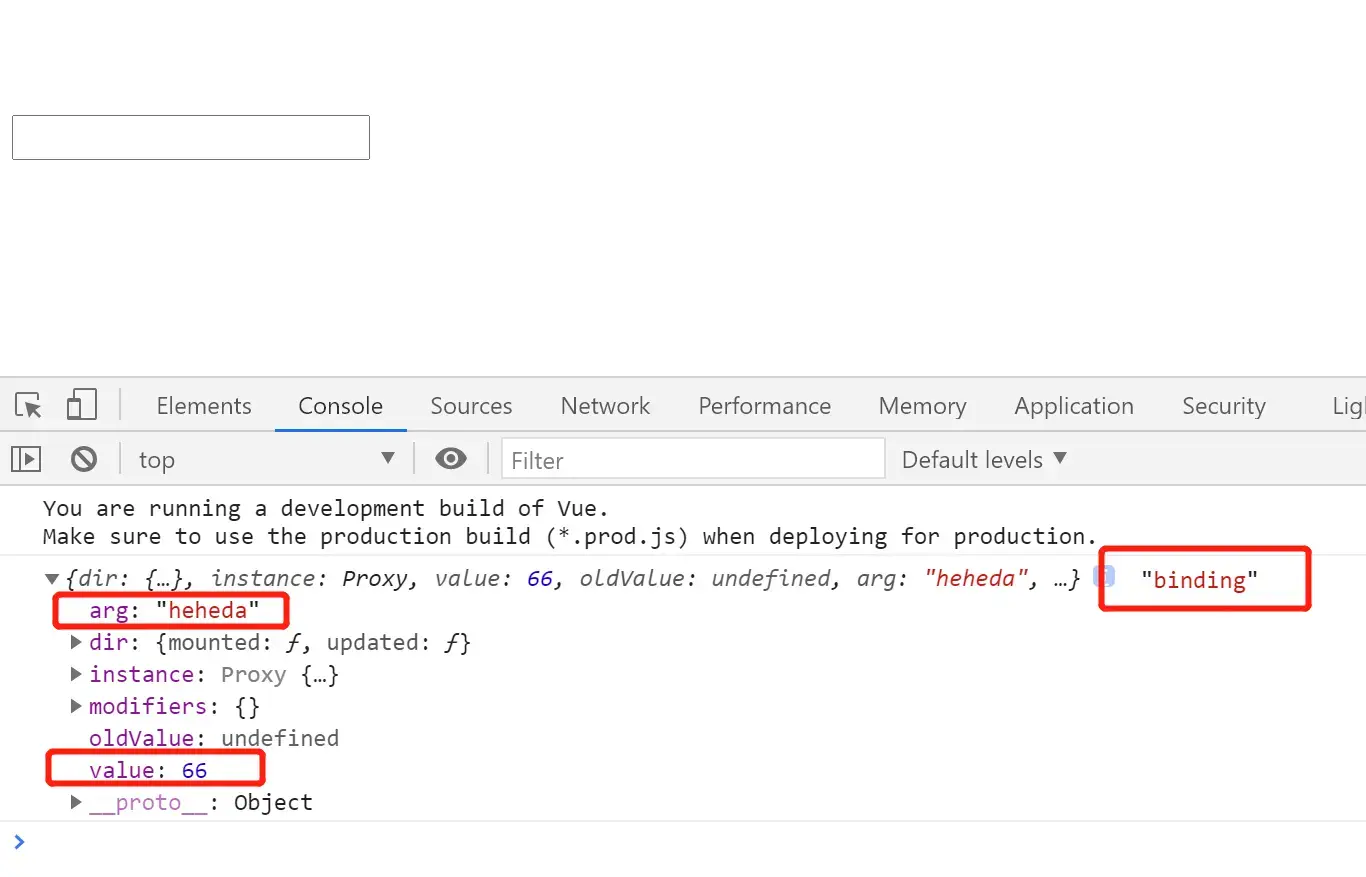
####用上binding.arg,自定义更加灵活 **直接`v-pos:top="topMargin"`, 即`[自定义指令]:[arg]="[value]"`的结构; 如下例的写法,用户 既可以配置style的值,也可以 配置style的属性:**
如下, 配置为top的margin,数值是80:
<script>

    const app = Vue.createApp({
        data() {
            return {
                margin: 80
            }
        },
        template: `
            <div>
                <div v-pos:top="margin" class="header">
                    <input />
                </div>
            </div>`
    });

    app.directive('pos', (el, binding) => {
        el.style[binding.arg] = (binding.value + 'px');
    })

    const vm = app.mount('#heheApp');
</script>
运行效果:
配置为right的margin,数值是80:
<script>

    const app = Vue.createApp({
        data() {
            return {
                margin: 80
            }
        },
        template: `
            <div>
                <div v-pos:right="margin" class="header">
                    <input />
                </div>
            </div>`
    });

    app.directive('pos', (el, binding) => {
        el.style[binding.arg] = (binding.value + 'px');
    })

    const vm = app.mount('#heheApp');
</script>
运行效果:
配置为left的margin,数值是80:
<script>

    const app = Vue.createApp({
        data() {
            return {
                margin: 80
            }
        },
        template: `
            <div>
                <div v-pos:left="margin" class="header">
                    <input />
                </div>
            </div>`
    });

    app.directive('pos', (el, binding) => {
        el.style[binding.arg] = (binding.value + 'px');
    })

    const vm = app.mount('#heheApp');
</script>
运行效果:
####CSS基础案例回顾——居中布局 **首先, `left: 50%;`和`top: 50%;` 使得使用该CSS类的 DOM节点 的 左上角顶点, 在窗口的中点处:** ``` Hello World! heheheheheheda .area { position: absolute; left: 50%; top: 50%; width: 228px; height: 336px; background: paleturquoise;} ``` 运行效果: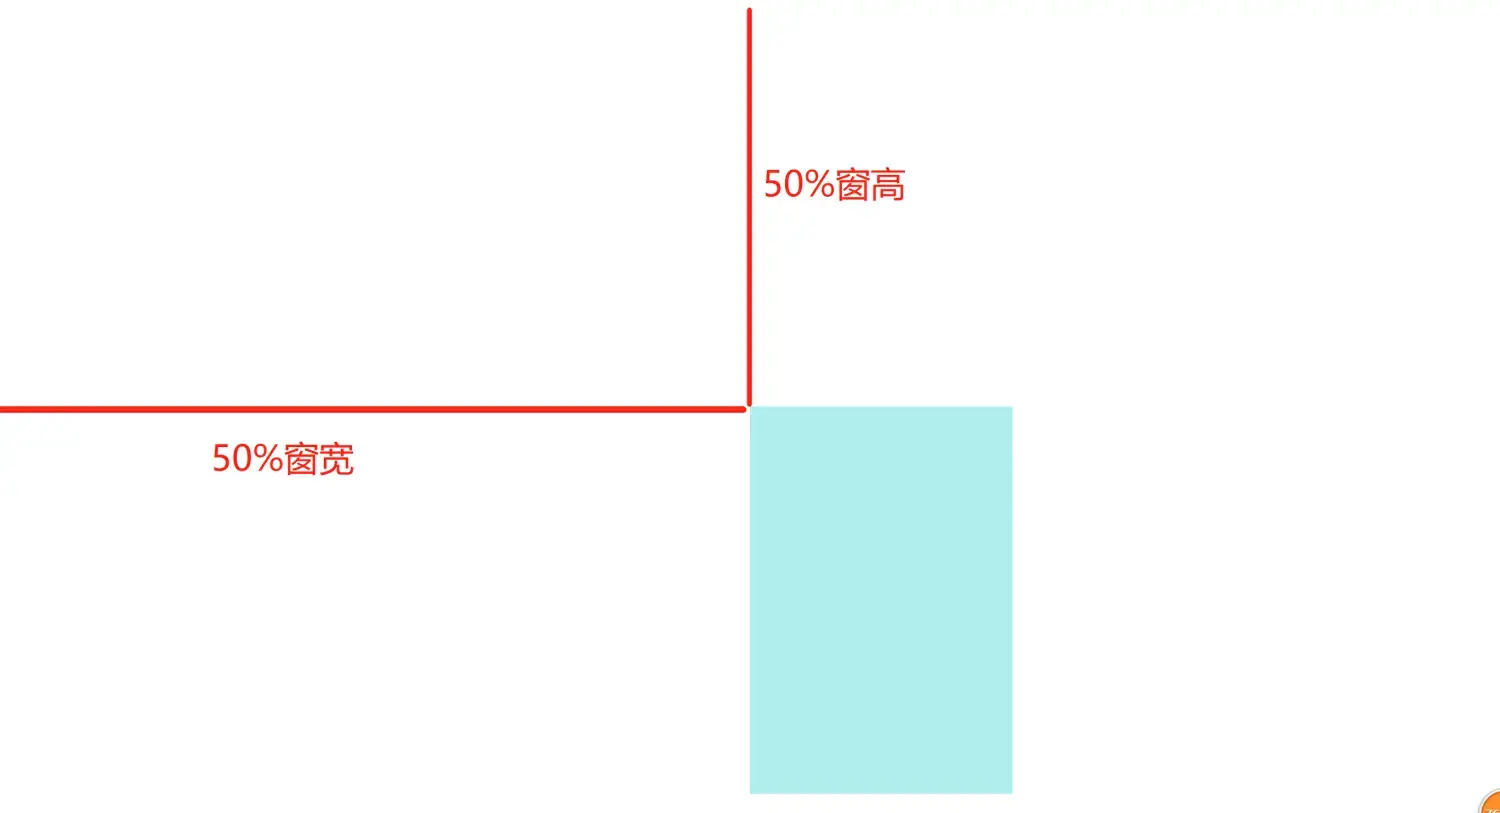
再加上一笔,
transform: translate(-50%, -50%);使得组件在上面两个margin之后,
让本节点移动(-50%, -50%)的距离,
其实就是 左移和上移 分别为 节点宽高的一半 的距离:
<style>
        .area {
            position: absolute;
            left: 50%;
            top: 50%;
            transform: translate(-50%, -50%);
            width: 228px;
            height: 336px;
            background: paleturquoise;}
</style>
运行效果:
####局部蒙版 如下添加`.mask`这个蒙版样式, 绝对布局,左上右下四方为0,即遍布父布局(`
####Teleport传送门 助力 全局蒙版 **欲将上例中的【局部蒙版】升级成【全局蒙版】, 需要调用DOM将``送到``的第一子组件位置, 这样 蒙版节点css样式的 遍布父布局的 特性, 就可以直接遍布 整个body 成为【全局蒙版】了, 这个时候就可以使用【Teleport】进行助力了:** 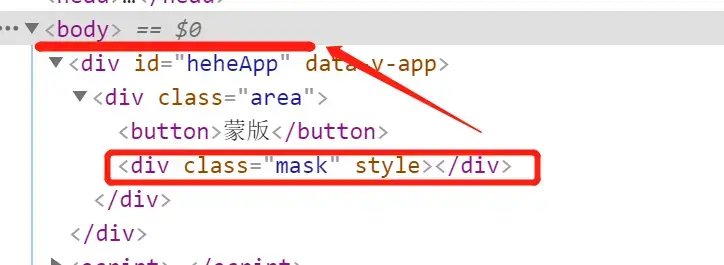 **使用``标签将其包裹起来,指定`to="body"`传送到 body:** ``` ... template: `
或者传送到某个body下覆盖全局的DOM节点上,
...
<body>
    <div id="heheApp"></div>
    <div id="heheda"></div>
</body>
<script>
    const app = Vue.createApp({
       ...
        template: `
            <div class="area">
                <button @click="handleBtnClick">蒙版</button>
                <teleport to="#heheda">
                    <div class="mask" v-show="show"></div>
                </teleport>
            </div>`
    });
    ...
</script>
</html>
运行效果同上例,
结构图:
####加上字体 ``` Hello World! heheheheheheda .area { position: absolute; left: 50%; top: 50%; transform: translate(-50%, -50%); width: 228px; height: 336px; background: paleturquoise;} .mask { position: absolute; left: 0; right: 0; top: 0; bottom: 0; background: #000; opacity: 0.5; color: skyblue; font-size: 88px; } ``` **运行效果:**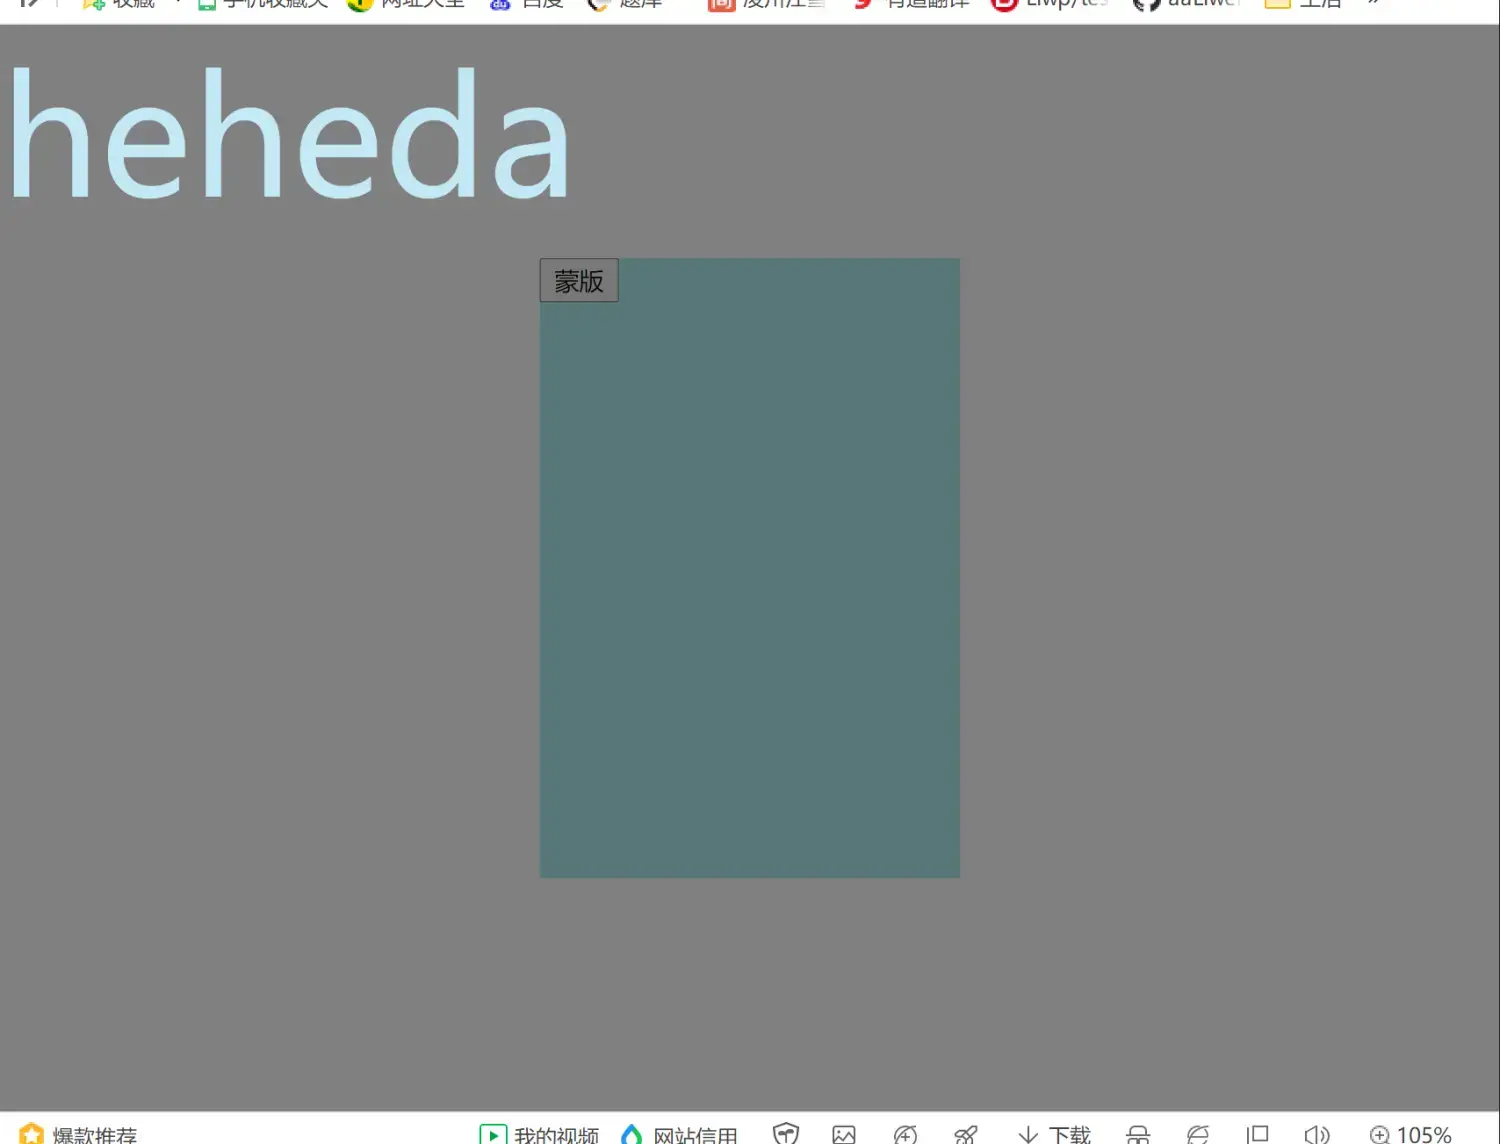
####Render函数 >**【template】标签实际上在编译的时候会生成一个render函数; 我们可以直接使用render函数去生成UI; render函数 提高了Vue的性能,且使其获得跨平台的能力;**
首先假设有这么一个需求,
定义一个子组件,
接受调用它的父组件的一个参数level,
子组件 根据这个level显示不同的DOM节点,
最基本的也许我们会写成这样:
<!DOCTYPE html>
<html lang="en">
<head>
    <meta charset="UTF-8">
    <meta name="viewport" content="width=device-width, initial-scale=1.0">
    <title>Hello World! heheheheheheda</title>
    <script src="https://unpkg.com/vue@next"></script>
</head>
<body>
    <div id="heheApp"></div>
</body>
<script>
    const app = Vue.createApp({
        template: `
            <my-title :level="2">
                heheda
            </my-title>
        `
    });

    app.component('my-title', {
        props: ['level'],

        template:
        `
            <h1 v-if="level === 1"><slot /></h1>
            <h2 v-if="level === 2"><slot /></h2>
            <h3 v-if="level === 3"><slot /></h3>
            <h4 v-if="level === 4"><slot /></h4>`
    })

    const vm = app.mount('#heheApp');
</script>
</html>
运行效果:
######使用Render函数优化 ``` Hello World! heheheheheheda ``` 关键代码: ``` render() { const { h } = Vue; return h('h' + this.level, {}, this.$slots.default()); } ``` >**h() 的 三个参数: >标题等级【tagName】, >其他属性的 键值对形式, 【attributes】 >标题内容;【text】
>这里`h() `返回的是一个 `虚拟DOM【JS对象】`, >虚拟DOM 简要说就是 用JS映射【表示】一个 `真实DOM节点`; >结构类似于:** >``` >{ > tagName: 'h3', > text: 'heheda', > attributes: {} >} >``` >**Vue接收到 `render函数`返回的`虚拟DOM`之后, 会将其`映射`成`真正的DOM节点`并展示出来;**
运行效果:传参
level改成3:
######使用Render函数 生成多层嵌套UI
<script>
    const app = Vue.createApp({
        template: `
            <my-title :level="1">
                heheda
            </my-title>
        `
    });

    app.component('my-title', {
        props: ['level'],

        render() {
            const { h } = Vue;
            return h('h' + this.level, {}, [
                this.$slots.default(),
                h('h' + String(Number(this.level) + 1), {}, [
                    this.$slots.default(),
                    h('h' + String(Number(this.level) + 3), {},
                        this.$slots.default()
                    )
                ])
            ]);
        }
    })

    const vm = app.mount('#heheApp');
</script>
运行效果:
####插件 >**插件,即`plugin`,可以用于封装`通用性的功能`; >`install`钩子,在插件运行时会回调;**
#####install参数初解读
如图,打印插件接收的app、plugin参数:
<!DOCTYPE html>
<html lang="en">
<head>
    <meta charset="UTF-8">
    <meta name="viewport" content="width=device-width, initial-scale=1.0">
    <title>Hello World! heheheheheheda</title>
    <script src="https://unpkg.com/vue@next"></script>
</head>
<body>
    <div id="heheApp"></div>
</body>
<script>

    const myPlugin = {
        install(app, options) {
            console.log(app, options);
        }
    }

    const app = Vue.createApp({
        template: `
            <my-title />
        `
    });

    app.component('my-title', {
        template: `<div>heheda</div>`
    })

    app.use(myPlugin, {myTestKey: 'lululu'})
    const vm = app.mount('#heheApp');
</script>
</html>
运行效果:
####插件 —— 使用`provide`提供数据给 子组件 使用 ``` Hello World! heheheheheheda ``` 运行效果: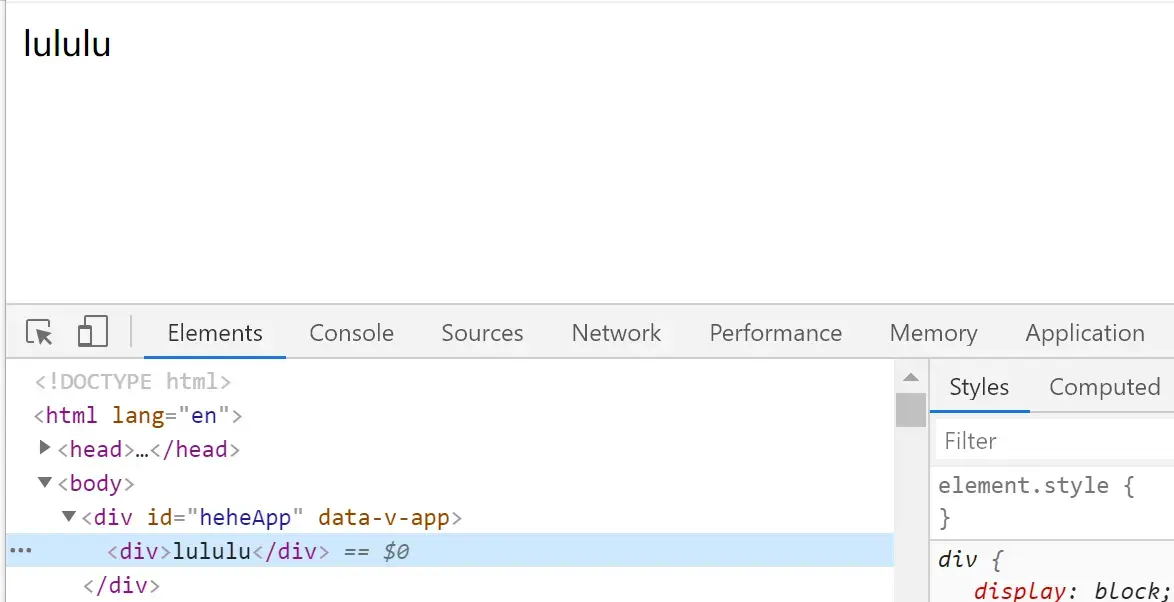
####插件 —— 自定义指令 供 (子)组件使用 ``` ... ... ``` 运行效果: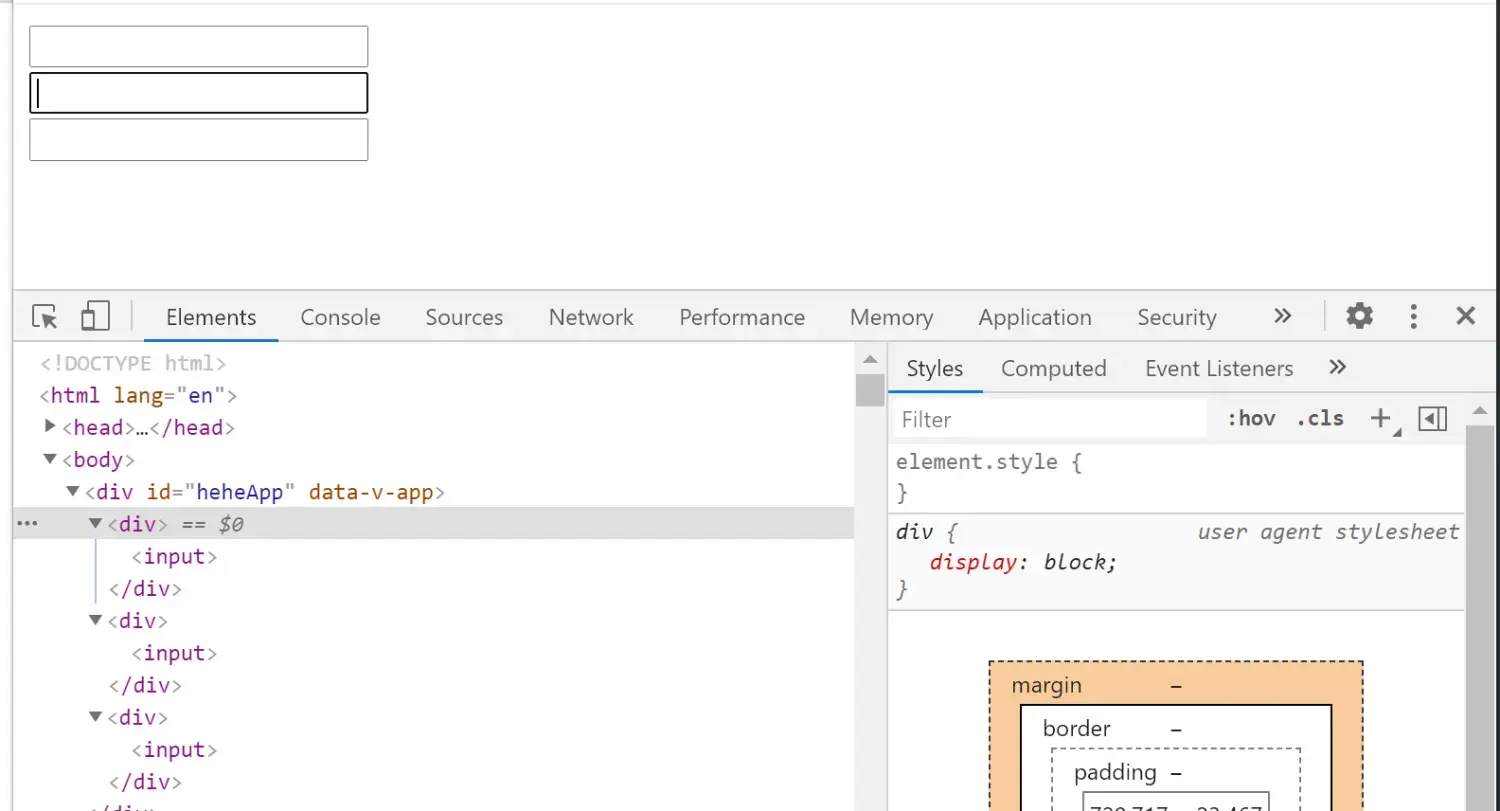
####插件 —— 拓展生命周期 ``` ``` 运行效果: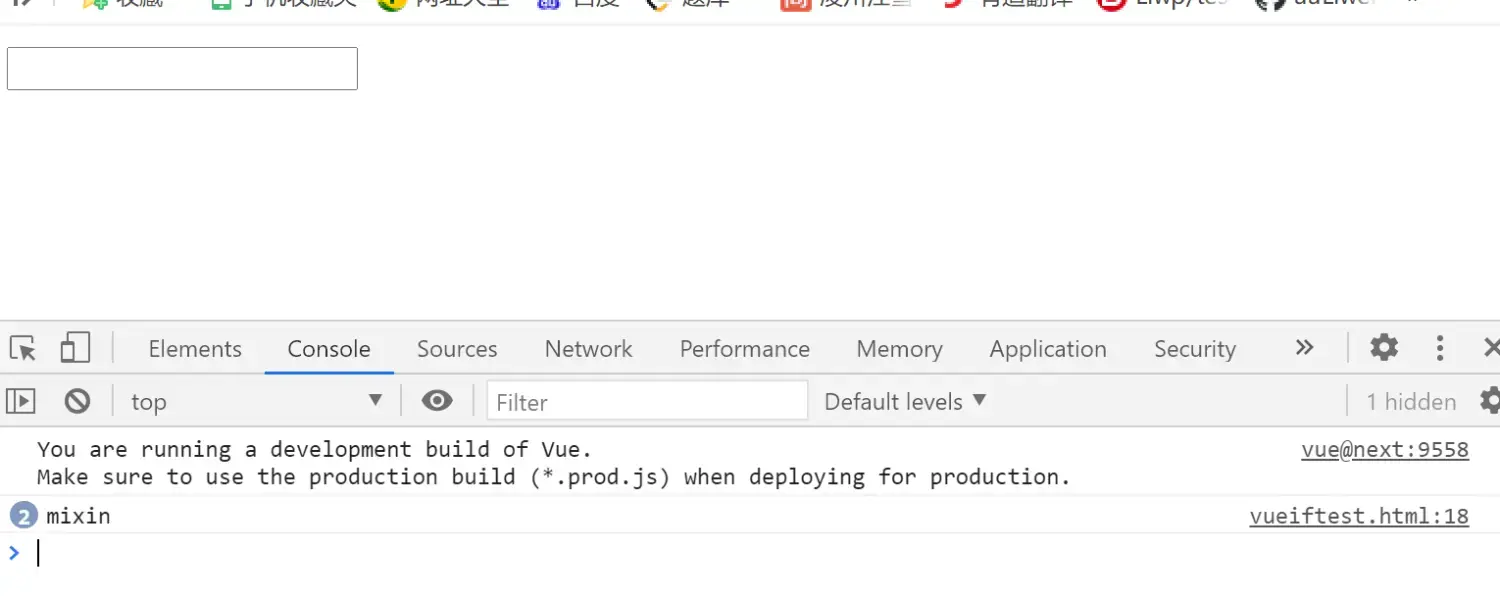
可以看到打印了两次,上次说过, 因为这是全局mixin,所以挂载的组件,根组件子组件都会打印!
####插件 —— 拓展底层变量 >**`app.config.globalProperties.$[变量名]`可以 在底层拓展的拓展app私有字段; 这样在使用时,只要看到`$[变量名]`, 就可以知道是 自己 `底层定义的拓展`, 而不是 `组件里定义的普通变量`,也不是 `父组件传递过来的参数`, `语义上`和`可维护性上`是比较有`特性`的;** ``` ``` 运行效果: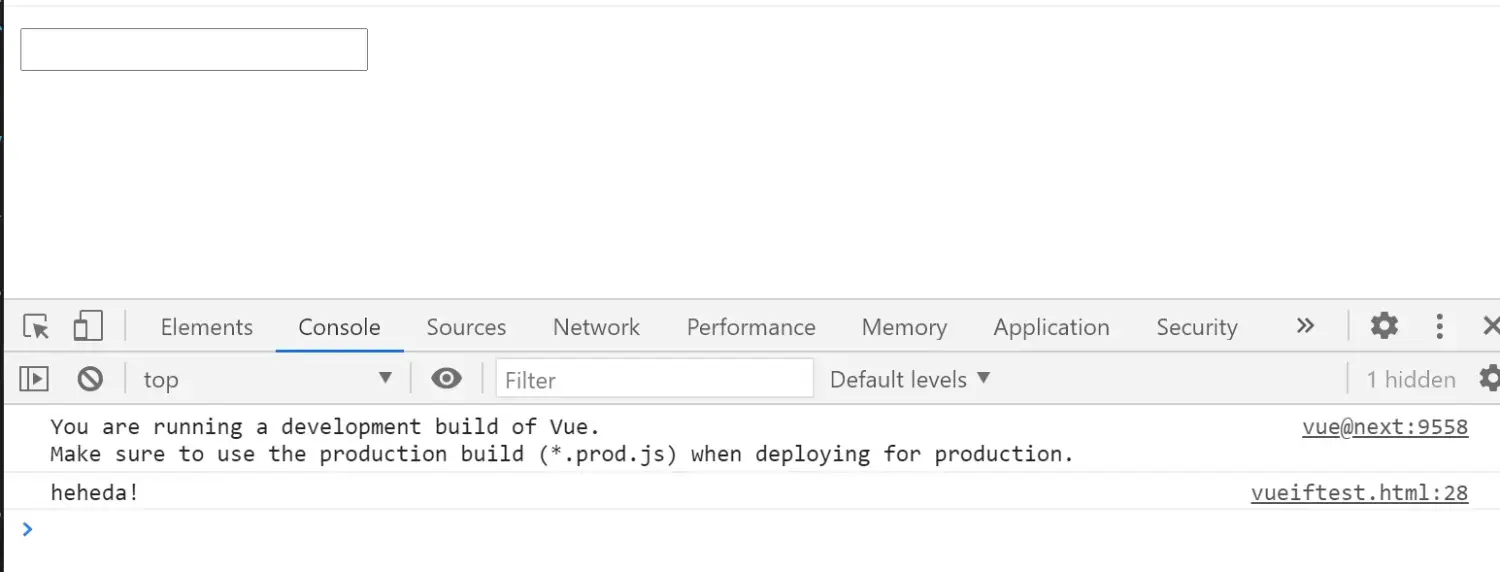
####Mixin方案 —— 对数据做校验 案例 **首先打印观察`rules对象`:** ``` Hello World! heheheheheheda ``` 运行效果: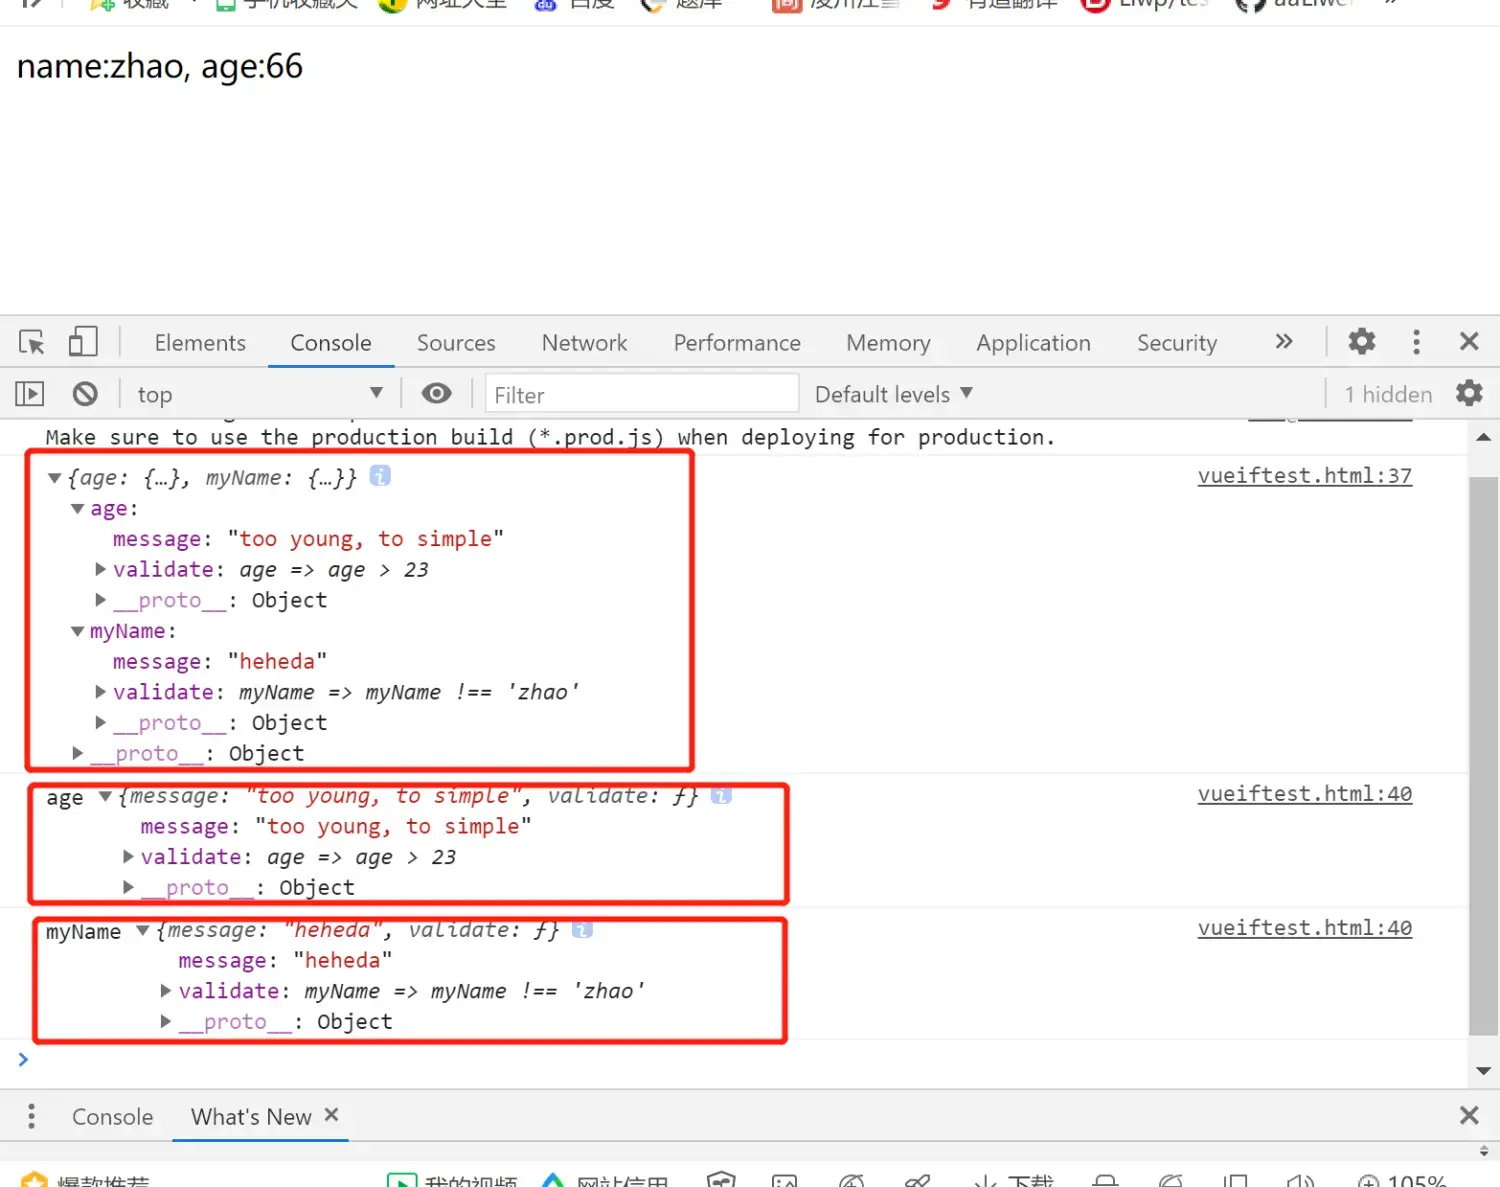 >**可以看到, `this.$options.rules`的内容就是一个`JSON Object Array`, 而这`array`的每一个元素,都是一个`rule`对象, 它都是由 `[定义了校验的变量名]: {校验相关的信息}` 这么一个键值对组成; 这里这个`key的引用`其实就完全是`data中对应的字段`,完全同步的!!
其中, `{校验相关的信息}`这个值,也是一个`JSON Object`, 其中主要信息主要是`message`、`validate`两个键值对, `validate`便是存储`检验规则`, `message`提供`不通过检验时的信息`;**
####每层迭代 增加监听 **例程: 遍历rules的key, 每一层迭代里—— 对每一个key,都用这个key去获取对应的`rule对象`,赋给item, 然后对item的`key【被校验字段】`设置`监听`,
当`key/被校验字段`发生改变时,触发回调, 这时,可以用`[rule对象].validate()`去校验值,然后返回结果, 如果校验不通过, 可以用`[rule对象].message `获取到我们准备好的话术!!** ``` Hello World! heheheheheheda ``` 运行效果: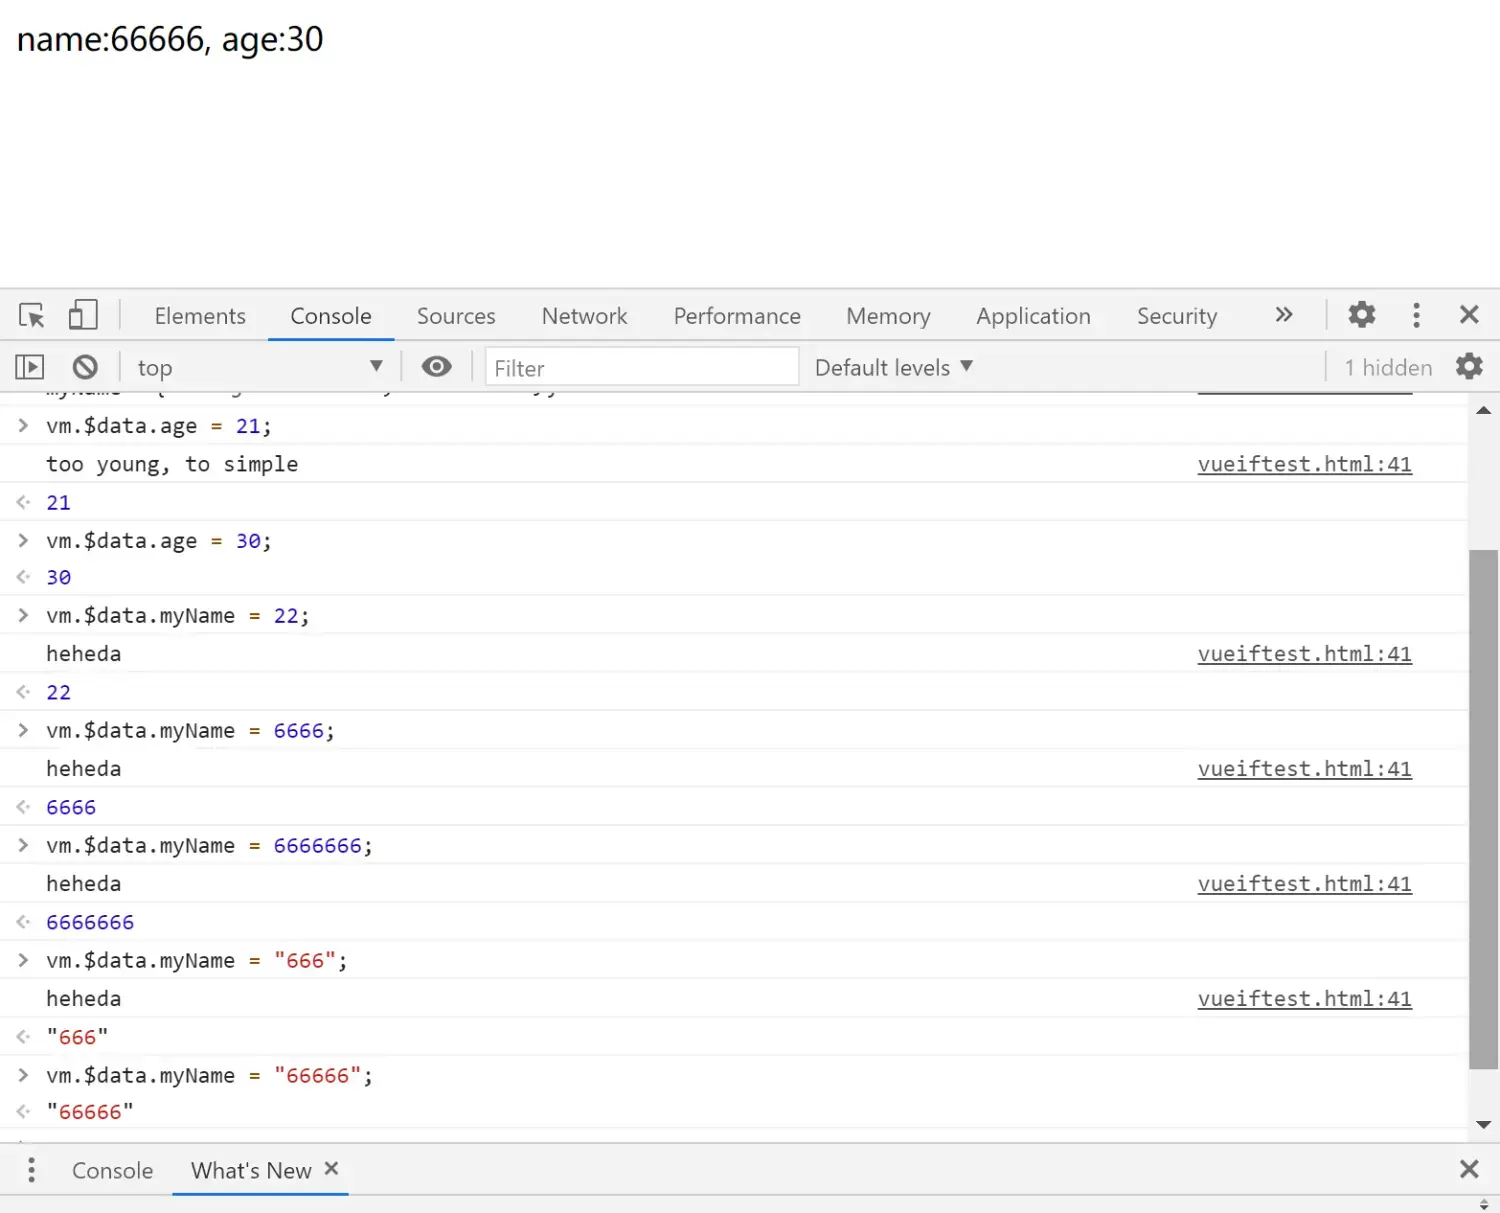
####将 校验mixin 封装进 plugin >**将mixin 封装进plugin, 把这个`plugin`存进一个字段 并基于`功能`进行`命名`, `可读性`会比`无名无姓`的`mixin`高很多,也更加`规范`;** ``` Hello World! heheheheheheda ``` **运行效果同上例;**
