

#完整原文地址见简书www.jianshu.com/p/4b57257de… #更多完整Vue笔记目录敬请见《前端 Web 笔记 汇总目录(Updating)》
#Vue3 特性升级
- 体积更小、速度更快
- 解决遗留问题
- 相对于原生的JS编程,Vue3是面向数据编程,直接操作数据,
少了
通过 组件id 去get到组件 完了set值等面向DOM的编程,提高开发效率;
#本文主要涉及的 语法糖 与 知识点:
文章内容将围绕这些 语法糖 与 知识点 展开 demo实现讲解 和 相关阐述;
-Vue.createApp(),创建Vue实例,开始使用Vue;
-.mount()指定在哪个组件上使用Vue; 注意没有被mount()指定的组件是不会生效的!
-变量的使用,用双花括号{{}}表示【也叫插值表达式】, 如template:'<div>{{content}}</div>'
-template:vue的重点, 意思是在mount()指定的组件中,展示template的内容, 其中的组件可以与data()中的数据相互绑定;
-data(){ return{ ***:*** (, ***:***, ... ) } }:vue的重点, 用于存放数据,可以为template提供数据供其绑定, 配合template完成数据UI双向绑定;
【!!!数据UI 双向绑定!!!】组件UI绑定数据的值,数据发生改动,则UI随之发生变化!!! 开发者可以通过js脚本去控制数据变化从而使得相关UI组件发生变化; (学过安卓的同学可能发现这有点类似于安卓的Adapter设计模式 / MVVM 设计模式)
-mounted()方法,当页面加载完成的时候会调用,其实它就是一个 Vue生命周期回调;
-template的冒号之后,可以用反引号 “ ` ” 来囊括表述更多的组件;
-v-on:是Vue的一个指令,表示要绑定事件;v-on:click表示要绑定点击事件;
-methods对象中可以用来编写Vue架构中使用到自定义函数/方法;
-v-if:标签配置了v-if指令的话, 则标签(对应UI组件)的显示与否由v-if指令所指定的值决定;
-v-for:标签配置了v-for指令, 则标签(对应UI组件)可以迭代遍历其绑定的数据List, 遍历的内容(index、item等)可以由v-for指定;
-v-model:标签配置了v-model指令, 则标签(对应UI组件)的内容(如input标签对应的输入框组件的内容), 会跟v-model指定的数据变量/字段(一般这个数据字段存放在data()特性函数中)的值双向绑定!!!;
-v-bind:指定标签组件的某个属性(如例子中挂载的title属性)跟数据绑定; 注意跟v-model区分开来,v-model指定的是标签组件的内容跟数据绑定;
另外注意,v-bind的冒号后接着的是v-bind修饰的组件的属性, 接着等号后面接着的是组件属性对应要绑定的数据字段名, 如<my-todoItem v-for="item of hehedaList" v-bind:content="item"/>中,content为组件my-todoItem的属性,content这个属性绑定的数据字段为item;
-【拆组件设计思想】,将页面的某一个部分作为 独立的模块聚合出来; 避免把整个网站的内容编写全部放在一个文件中;
-注意调用顺序!!! 必须先实例化Vue()应用实例, 然后再component()注册组件, 然后再mount()挂载入;
-【使用component()注册组件,组件化的组件模块】, 注册之后可以直接作为一个标签组件来使用: 如heheApp.component('my-todoItem', {...});是注册组件的代码, 一参为组件名字,二参可以编写组件的UI和数据等描述, 之后在Vue.createApp()的template中, 就可以像这样,把我们自己注册的组件的组件名, 像DOM标签一样去使用:<ul><my-todoItem .../></ul>
-【v-bind与props】 用v-bind给组件绑定的数据字段(如下面demo中的content), 会在注册该组件的代码模块(heheApp.component())中的props字段中被接收到;
#Demo:HelloWorld >**本demo涉及的 语法或知识:
-`Vue.createApp()`,创建Vue实例,开始使用Vue;
-`.mount()`指定在哪个组件上使用Vue; 注意没有被`mount()`指定的组件是不会生效的!**
#####开始步骤 - 下载好 [VSCode](https://code.visualstudio.com/)
- 随便创建一个新的文件夹:
- 把文件夹拖到VSCode打开;
- 创建一个html文件: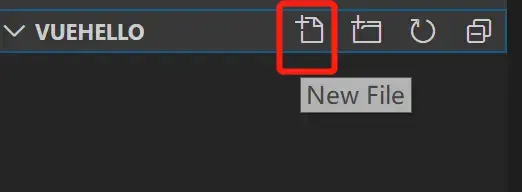
- 输入`!`然后敲一下`Tab`键,自动生成`H5代码架构`: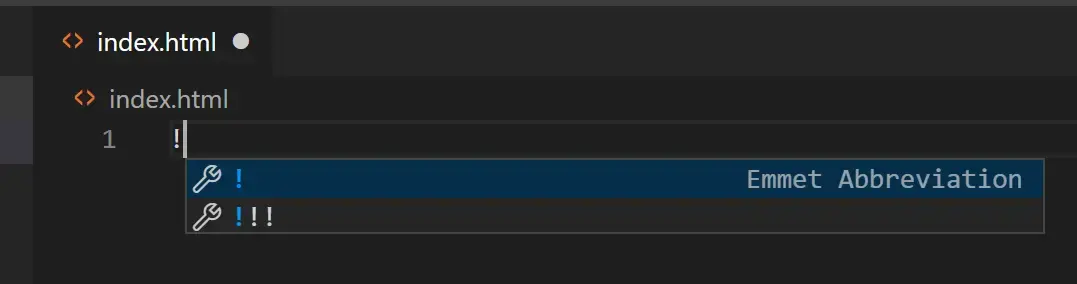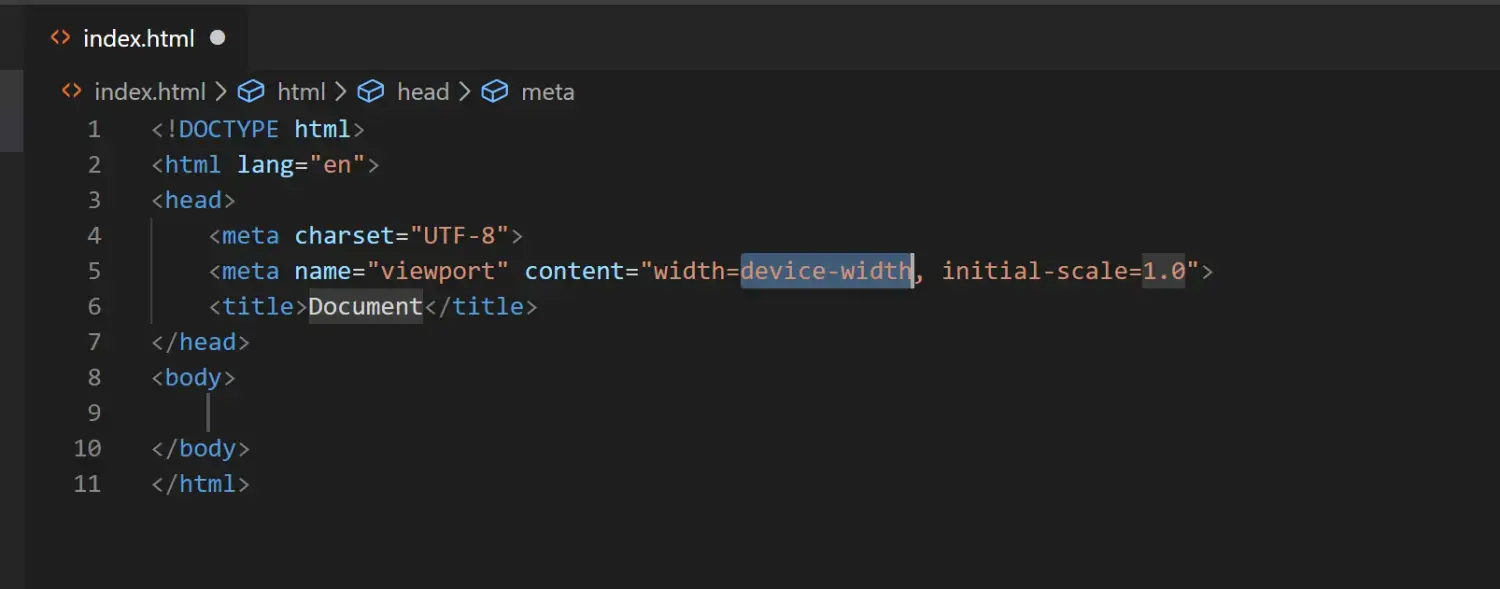
- 接着在`head标签`中, 加入一行``, 就可以直接引入`Vue库`,使用`Vue`编写代码了: ``` Hello World! heheheheheheda ```
- 键入例程: ``` Hello World! heheheheheheda ```
- **保存键入的例程之后,在文件夹处双击html文件:成功显示内容: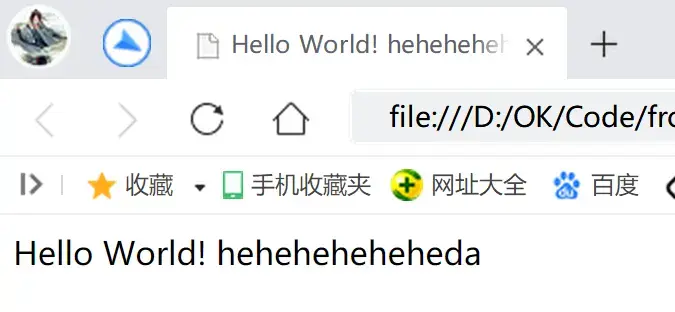**
- **&举一反三: 再来一个例程,再度理解`Vue.createApp()`和`mount()`的用法:** ``` Hello World! heheheheheheda ``` **效果: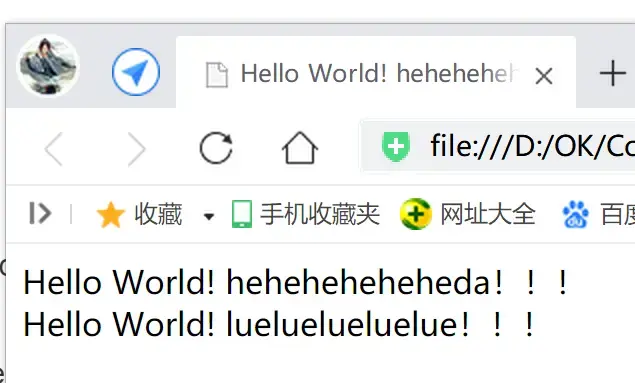 把对应的`mount()`注释掉,对应的组件就不会生效了:** ``` Hello World! heheheheheheda ``` 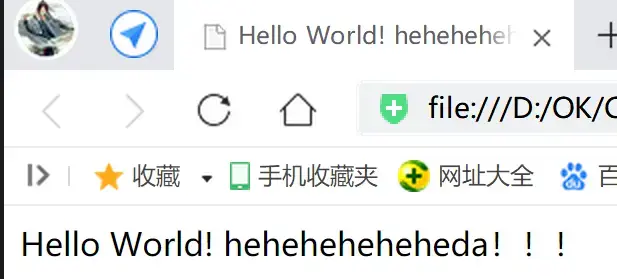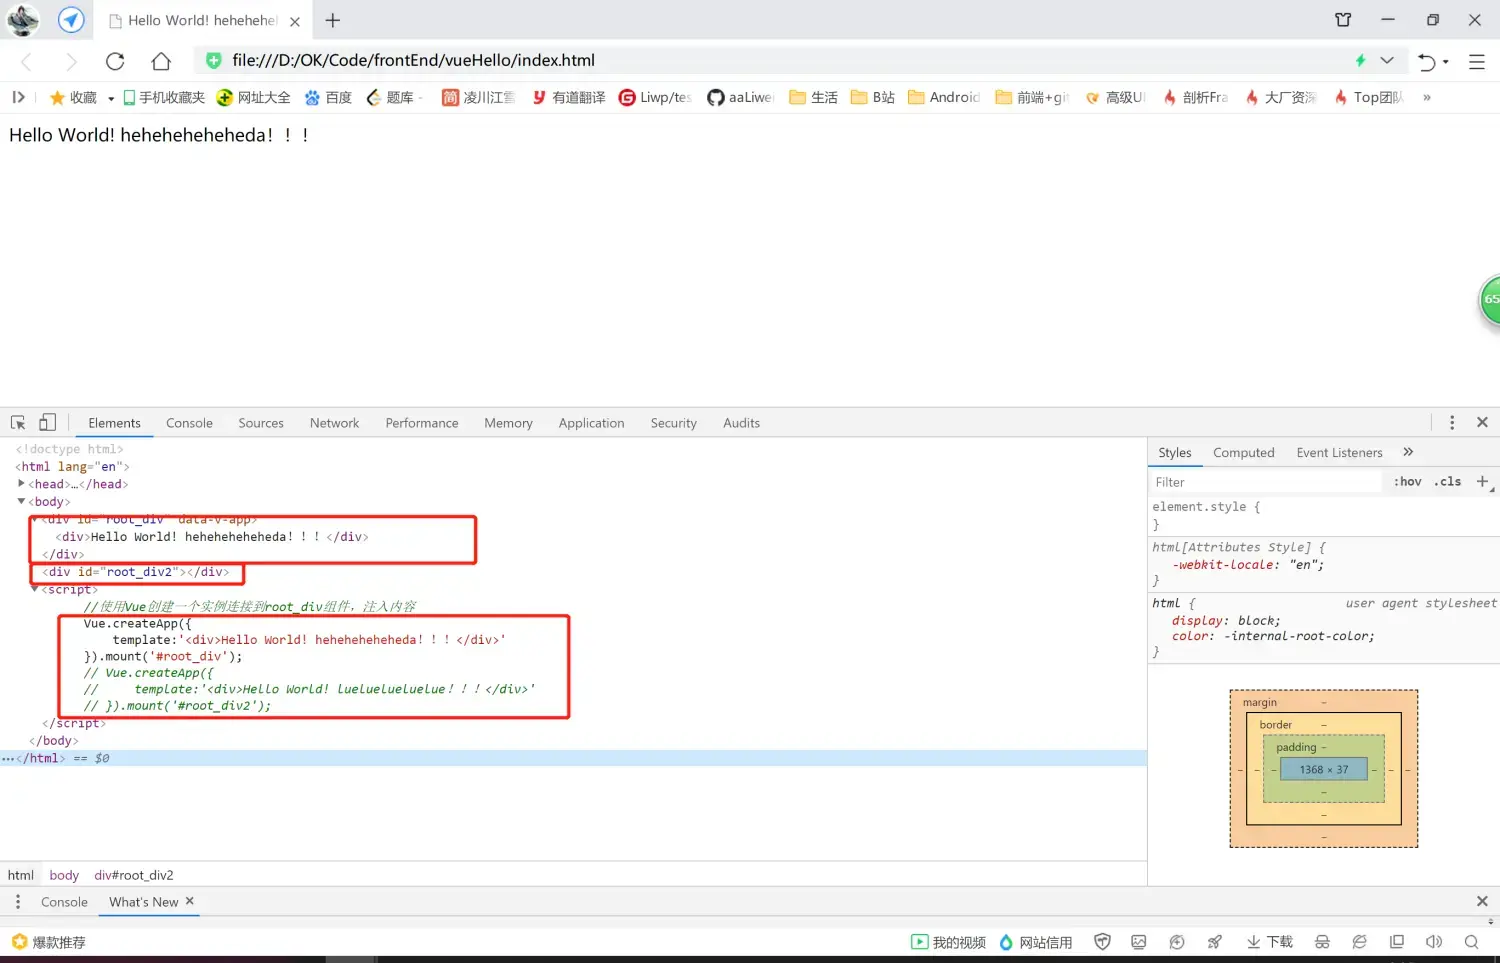
####Demo:变量、数据UI绑定 >**本demo涉及的 语法或知识:
-`template:`意思是在`mount()`指定的组件中,展示`template`的内容;
-变量的使用,用双花括号`{{}}`表示,如` template:'
-`data(){ return{ ***:*** } }`函数的使用,可以配合`template`完成数据UI双向绑定;**
- 修改
body#script部分的代码:
<script>
    //使用Vue创建一个实例连接到root_div组件,注入内容
    Vue.createApp({
        data(){
            return{
                content: '66668686'
            }
        },
        template:'<div>{{content}}</div>'
    }).mount('#root_div');
</script>
效果:
data()完成数据配置,template指定UI,两者配合完成双向绑定; mount()指定渲染的目的HTML组件,各司其职!
####Demo:mounted()应用 >**本demo涉及的 语法或知识:
-`mounted()`方法,当页面加载完成的时候会调用,其实它就是一个[ Vue生命周期回调](https://blog.csdn.net/zhangvalue/article/details/108842561);**
<!DOCTYPE html>
<html lang="en">
<head>
    <meta charset="UTF-8">
    <meta name="viewport" content="width=device-width, initial-scale=1.0">
    <title>Hello World! heheheheheheda</title>
    <script src="https://unpkg.com/vue@next"></script>
</head>
<body>
    <div id="root_div"></div>
</body>
<script>
    Vue.createApp({
        data(){
            return{
                content: '66668686'
            }
        },
        mounted(){
            console.log('monnted ====')
        },
        template:'<div>{{content}}</div>'
    }).mount('#root_div');
</script>
</html>
效果:可见当页面加载完成时候,会自动调用
mounted()中的逻辑,执行其中的代码;
&举一反三:
再一例,利用这个生命周期回调,我们写一个迭代计时器:
<!DOCTYPE html>
<html lang="en">
<head>
    <meta charset="UTF-8">
    <meta name="viewport" content="width=device-width, initial-scale=1.0">
    <title>Hello World! heheheheheheda</title>
    <script src="https://unpkg.com/vue@next"></script>
</head>
<body>
    <div id="root_div"></div>
</body>
<script>
    Vue.createApp({
        data(){
            return{
                content: 66668686
            }
        },
        mounted(){
            setInterval(() => {
                this.content += 1;
                console.log('monnted ====' + this.content)
            }, 1000);
        },
        template:'<div>{{content}}</div>'
    }).mount('#root_div');
</script>
</html>
注意:
this.content等价于this.$data.content
效果图:
####Demo:Vue事件绑定(v-on)、`methods`对象 >**本demo涉及的 语法或知识:
-`template`的冒号之后,可以用反引号 “ \` ” 来囊括表述更多的组件;
-`v-on:`是Vue的一个指令,表示要`绑定事件`; `v-on:click`表示要绑定`点击事件`;
-`methods`对象中可以用来编写Vue架构中使用到`自定义函数/方法`;**
上代码:
<!DOCTYPE html>
<html lang="en">
<head>
    <meta charset="UTF-8">
    <meta name="viewport" content="width=device-width, initial-scale=1.0">
    <title>Hello World! heheheheheheda</title>
    <script src="https://unpkg.com/vue@next"></script>
</head>
<body>
    <div id="root_div"></div>
</body>

<script>
    Vue.createApp({
        data(){
            return{
                content: 66668686
            }
        },
        methods:{
            onBtnClick(){
                alert("heheda");
            }
        },
        template:`
        <div>
            {{content}}
            <button v-on:click="onBtnClick">反转字符串</button>
        </div>
        `
    }).mount('#root_div');
</script>
</html>
运行代码、点击按钮,其UI效果如下:
&继续例子:
<!DOCTYPE html>
<html lang="en">
<head>
    <meta charset="UTF-8">
    <meta name="viewport" content="width=device-width, initial-scale=1.0">
    <title>Hello World! heheheheheheda</title>
    <script src="https://unpkg.com/vue@next"></script>
</head>
<body>
    <div id="root_div"></div>
</body>

<script>
    Vue.createApp({
        data(){
            return{
                content: 'hehedaheheda'
            }
        },
        methods:{
            onBtnClick(){
                this.content = this.content.split('').reverse().join('');
                console.log(this.content);
            }
        },
        template:`
        <div>
            {{content}}
            <button v-on:click="onBtnClick">反转字符串</button>
        </div>
        `
    }).mount('#root_div');
</script>
</html>
效果:点击按钮不断地反转字符串:
####Demo:Vue指令(v-if) >**本demo涉及的 语法或知识:
>-`v-if`:标签配置了`v-if`指令的话, 则标签(对应UI组件)的`显示与否`由`v-if`指令`所指定的值`决定;**
上代码:
<!DOCTYPE html>
<html lang="en">
<head>
    <meta charset="UTF-8">
    <meta name="viewport" content="width=device-width, initial-scale=1.0">
    <title>Hello World! heheheheheheda</title>
    <script src="https://unpkg.com/vue@next"></script>
</head>
<body>
    <div id="root_div"></div>
</body>

<script>
    Vue.createApp({
        data(){
            return{
                show: true
            }
        },
        methods:{
            onBtnClick(){
                this.show = !this.show;
            }
        },
        template:`
        <div>
            <span v-if="show">hehedadahehedada</span>
            <button v-on:click="onBtnClick">显示/隐藏字符串</button>
        </div>
        `
    }).mount('#root_div');
</script>
</html>
效果:
####Demo:Vue指令(v-for、v-model)、综合Demo:TODOlist、双向绑定案例再体会 >**本demo涉及的 语法或知识:
>-`v-for`:标签配置了`v-for`指令, >则标签(对应UI组件)可以`迭代遍历`其绑定的数据List, >遍历的内容(index、item等)可以由`v-for`指定;
>-`v-model`:标签配置了`v-model`指令, >则标签(对应UI组件)的内容(如`input标签`对应的`输入框组件的内容`), >会跟`v-model`指定的`数据变量/字段`(一般这个`数据字段`存放在`data()`特性函数中)的值`双向绑定`!!!;**
上代码:
<li v-for="item of hehedaList">{{item}} lalala</li>通过使用v-for指定item为遍历临时对象,去遍历了数据listhehedaList;
<!DOCTYPE html>
<html lang="en">
<head>
    <meta charset="UTF-8">
    <meta name="viewport" content="width=device-width, initial-scale=1.0">
    <title>Hello World! heheheheheheda</title>
    <script src="https://unpkg.com/vue@next"></script>
</head>
<body>
    <div id="root_div"></div>
</body>

<script>
    Vue.createApp({
        data(){
            return{
                hehedaList:['hehe','heheda','haha','hahada']
            }
        },
        template:`
        <ul>
            <li v-for="item of hehedaList">{{item}}  lalala</li>
        </ul>
        `
    }).mount('#root_div');
</script>
</html>
效果:
再一例,添加数据List的
index索引的迭代遍历:
【为了实践其可运算的特性,这里遍历的时候还给index加了个一】
<!DOCTYPE html>
<html lang="en">
<head>
    <meta charset="UTF-8">
    <meta name="viewport" content="width=device-width, initial-scale=1.0">
    <title>Hello World! heheheheheheda</title>
    <script src="https://unpkg.com/vue@next"></script>
</head>
<body>
    <div id="root_div"></div>
</body>

<script>
    Vue.createApp({
        data(){
            return{
                hehedaList:['hehe','heheda','haha','hahada']
            }
        },
        template:`
        <ul>
            <li v-for="(item, index) of hehedaList">{{item}} {{index + 1}} lalala</li>
        </ul>
        `
    }).mount('#root_div');
</script>
</html>
效果:
######综合Demo:TODOlist、双向绑定案例再体会
Tip: -
v-model:标签配置了v-model指令, 则标签(对应UI组件)的内容(如input标签对应的输入框组件的内容), 会跟v-model指定的数据变量/字段(一般这个数据字段存放在data()特性函数中)的值双向绑定!!!;下面的案例是, data字段
inputValue与template中<input>组件的内容双向绑定,<input>组件的内容的值存放在data字段inputValue中,inputValue改变则<input>组件的内容,反之亦然!
<!DOCTYPE html>
<html lang="en">
<head>
    <meta charset="UTF-8">
    <meta name="viewport" content="width=device-width, initial-scale=1.0">
    <title>Hello World! heheheheheheda</title>
    <script src="https://unpkg.com/vue@next"></script>
</head>
<body>
    <div id="root_div"></div>
</body>

<script>
    Vue.createApp({
        data(){
            return{
                inputValue: '',
                hehedaList:[]
            }
        },
        methods:{
            addItemClick() {
                this.hehedaList.push(this.inputValue);//hehedaList体现了数据影响了UI
                console.log(this.inputValue);//体现了UI影响了数据
                this.inputValue = '';//体现了数据影响了UI,与上面这行代码验证了双向绑定
            }
        },
        template:`
        <div>
            <input v-model="inputValue"/>
            <button v-on:click="addItemClick">增加</button>
            <ul>
                <li v-for="(item, index) of hehedaList">{{item}} {{index+1}} lalala</li>
            </ul>
        </div>
        `
    }).mount('#root_div');
</script>
</html>
##双向绑定案例再体会!! -
this.hehedaList.push(this.inputValue);一行,hehedaList体现了数据影响了UI —— 当hehedaList有新成员加入时, 对应通过v-for绑定数据hehedaList的<ul>组件,就会即使更新UI!!
-console.log(this.inputValue);一行, 体现了UI影响了数据—— 因为这里的this.inputValue被通过v-model绑定的<input>组件决定着,<input>组件的当前内容是什么,this.inputValue的当前值就是什么,<input>组件的当前内容发生变化时, 其当前内容会即时刷新到this.inputValue字段中;
this.inputValue = '';一行, 体现了数据影响了UI,与上面这行代码验证了数据UI双向绑定的特性!!! 当点击增加按钮时候,会触发addItemClick()回调方法, 执行this.hehedaList.push(this.inputValue);将输入框内容加入到hehedaList之后, !!执行this.inputValue = '';将data字段置空!! 这时对应的双向绑定的UI组件<input>组件的内容 !!也会被更新为inputValue刚刚被赋予的值(即空)!! !!所以点击按钮的时候,<input>组件会更新UI,输入框组件内容置空!!!
效果:
#### >**本demo涉及的 语法或知识:
>-`v-bind`:指定`标签组件的某个属性`(如例子中挂载的`title`属性)跟数据绑定; 注意跟`v-model`区分开来, `v-model`指定的是`标签组件的内容`跟数据绑定;**
上代码:
<!DOCTYPE html>
<html lang="en">
<head>
    <meta charset="UTF-8">
    <meta name="viewport" content="width=device-width, initial-scale=1.0">
    <title>Hello World! heheheheheheda</title>
    <script src="https://unpkg.com/vue@next"></script>
</head>
<body>
    <div id="root_div"></div>
</body>

<script>
    Vue.createApp({
        data(){
            return{
                inputValue: '',
                hehedaList:[]
            }
        },
        methods:{
            addItemClick() {
                this.hehedaList.push(this.inputValue);//hehedaList体现了数据影响了UI
                console.log(this.inputValue);//体现了UI影响了数据
                this.inputValue = '';//体现了数据影响了UI,与上面这行代码验证了双向绑定
            }
        },
        template:`
        <div>
            <input v-model="inputValue"/>
            <button
                v-on:click="addItemClick"
                v-bind:title="inputValue">
                增加
            </button>
            <ul>
                <li v-for="(item, index) of hehedaList">{{item}} {{index+1}} lalala</li>
            </ul>
        </div>
        `
    }).mount('#root_div');
</script>
</html>
代码中,使用
v-bind属性,挂载一个title属性, 它的值指定为与inputValue数据变量的值绑定;inputValue的值又与input输入框的内容绑定,
输入框输入随机的内容,随后把鼠标放在按钮上, 可以看到按钮的title属性,效果图如下:
#### >**本demo涉及的 语法或知识:
>-【`拆组件`设计思想】,将`页面的某一个部分` 作为 独立的模块 `聚合`出来; 避免把`整个网站的内容编写`全部放在一个文件中;
>-注意调用顺序!!! 必须先实例化`Vue()`应用实例, 然后再`component()`注册组件, 然后再`mount()`挂载入;
>-【使用`component()`注册组件,组件化的`组件模块`】, 通常可以添加`dom标签、css样式、数据、js`等结构! 最好是按照`data() + template()`的结构设计模式来设计组件! 其本质思想可以类比`安卓开发`的`自定义组件`、`组件化开发`;
注册之后可以直接作为一个标签组件来使用: 如`heheApp.component('my-todoItem', {...});`是注册组件的代码, 一参为组件名字,二参可以编写`组件的UI和数据`等描述, 之后在`Vue.createApp()`的`template`中, 就可以像这样,把我们自己注册的组件的组件名, 像DOM标签一样去使用:`
>-【`v-bind`与`props`】 用`v-bind`给`组件`绑定的`数据字段`(如下面demo中的content), 会在注册该组件的代码模块(`heheApp.component()`)中的`props`字段中被`接收到`;**
- 随着开发的迭代,某个组件的内容可能会变得越来越复杂:
<!DOCTYPE html>
<html lang="en">
<head>
    <meta charset="UTF-8">
    <meta name="viewport" content="width=device-width, initial-scale=1.0">
    <title>Hello World! heheheheheheda</title>
    <script src="https://unpkg.com/vue@next"></script>
</head>
<body>
    <div id="root_div"></div>
</body>

<script>
    Vue.createApp({
        data(){
            return{
                inputValue: '',
                hehedaList:[]
            }
        },
        methods:{
            addItemClick() {
                this.hehedaList.push(this.inputValue);//hehedaList体现了数据影响了UI
                console.log(this.inputValue);//体现了UI影响了数据
                this.inputValue = '';//体现了数据影响了UI,与上面这行代码验证了双向绑定
            }
        },
        template:`
        <div>
            <input v-model="inputValue"/>
            <button
                v-on:click="addItemClick"
                v-bind:title="inputValue"
            >
                增加
            </button>
            <ul>
                <li v-for="(item, index) of hehedaList">
                    <div>
                        <span>{{index}}</span>
                        <span> --- </span>
                        <span>{{item}}</span>
                    </div>
                </li>
            </ul>
        </div>
        `
    }).mount('#root_div');
</script>
</html>
效果图:如上改动的Item的UI这一块:
before:

            <ul>
                <li v-for="(item, index) of hehedaList">{{item}} {{index+1}} lalala</li>
            </ul>

---------------------------------------------------------------------------
now:

            <ul>
                <li v-for="(item, index) of hehedaList">
                    <div>
                        <span>{{index}}</span>
                        <span> --- </span>
                        <span>{{item}}</span>
                    </div>
                </li>
            </ul>
- **接着,上关于`注册组件`的代码:** ``` Hello World! heheheheheheda ``` >####概念与代码说明: >**-``一行, >我们加载渲染了一个`my-todoItem`组件,
>-然后使用`v-bind`属性挂载了一个属于`my-todoItem`这个`组件`的`content`属性, >然后这个属性与指定的这个`item`数据变量绑定, 即`content`属性的值是`item`的值;
>-【`v-bind`与`props`】 接着我们刚刚用`v-bind`给`组件`绑定的`数据字段`(如这里的content), 会在注册该组件的代码模块(`heheApp.component()`)中的`props`字段中被`接收到`!! >接着在`组件注册模块`(`heheApp.component()`)代码中, 就可以使用这个`接收`到的`数据字段`(如通过`插值表达式`使用 —— `{{content}}`)了;
-注册之后可以直接作为一个标签组件来使用: 如`heheApp.component('my-todoItem', {...});`是注册组件的代码, 一参为组件名字,二参可以编写`组件的UI和数据`等描述, 之后在`Vue.createApp()`的`template`中, 就可以像这样,把我们自己注册的组件的组件名, 像DOM标签一样去使用:`
**
效果图:
- demo迭代:
<!DOCTYPE html>
<html lang="en">
<head>
    <meta charset="UTF-8">
    <meta name="viewport" content="width=device-width, initial-scale=1.0">
    <title>Hello World! heheheheheheda</title>
    <script src="https://unpkg.com/vue@next"></script>
</head>
<body>
    <div id="root_div"></div>
</body>

<script>
    const heheApp = Vue.createApp({
        data(){
            return{
                inputValue: '',
                hehedaList:[]
            }
        },
        methods:{
            addItemClick() {
                this.hehedaList.push(this.inputValue);//hehedaList体现了数据影响了UI
                console.log(this.inputValue);//体现了UI影响了数据
                this.inputValue = '';//体现了数据影响了UI,与上面这行代码验证了双向绑定
            }
        },
        template:`
        <div>
            <input v-model="inputValue"/>
            <button
                v-on:click="addItemClick"
                v-bind:title="inputValue"
            >
                增加
            </button>
            <ul>
                <my-todoItem
                    v-for="(item, index) of hehedaList"
                    v-bind:content="item"
                    v-bind:index="index"
                />
            </ul>
        </div>
        `
    });

    //必须先实例化Vue应用实例,然后再component注册组件,然后再mount挂载入
    heheApp.component('my-todoItem', {
        props:['content', 'index'],
        template:
        // '<div>{{content}}</div>'
        '<li>{{index}} -- {{content}}</li>'
    });
    heheApp.mount('#root_div');
</script>
</html>
效果:
