

#数据类型占位 **byte = 8bit;**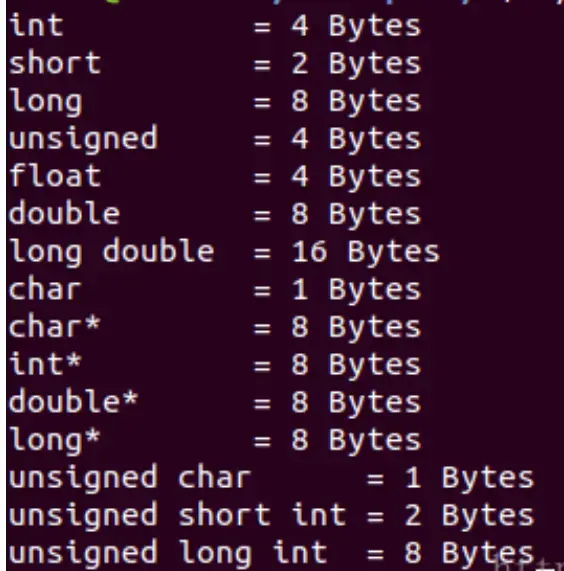
#降采样(图片压缩)  ``` private void displaySelectedImage() { if(fileUri == null) return; ImageView imageView = (ImageView)this.findViewById(R.id.sample_img);
    BitmapFactory.Options options = new BitmapFactory.Options();
    options.inJustDecodeBounds = true;

    BitmapFactory.decodeFile(fileUri.getPath(), options);
    int w = options.outWidth;
    int h = options.outHeight;
    int inSample = 1;
    if(w > 1000 || h > 1000) {
        while(Math.max(w/inSample, h/inSample) > 1000) {
            inSample *=2;
        }
    }

    options.inJustDecodeBounds = false;
    options.inSampleSize = inSample;
    options.inPreferredConfig = Bitmap.Config.ARGB_8888;

    Bitmap bm = BitmapFactory.decodeFile(fileUri.getPath(), options);
    imageView.setImageBitmap(bm);
}
<br>
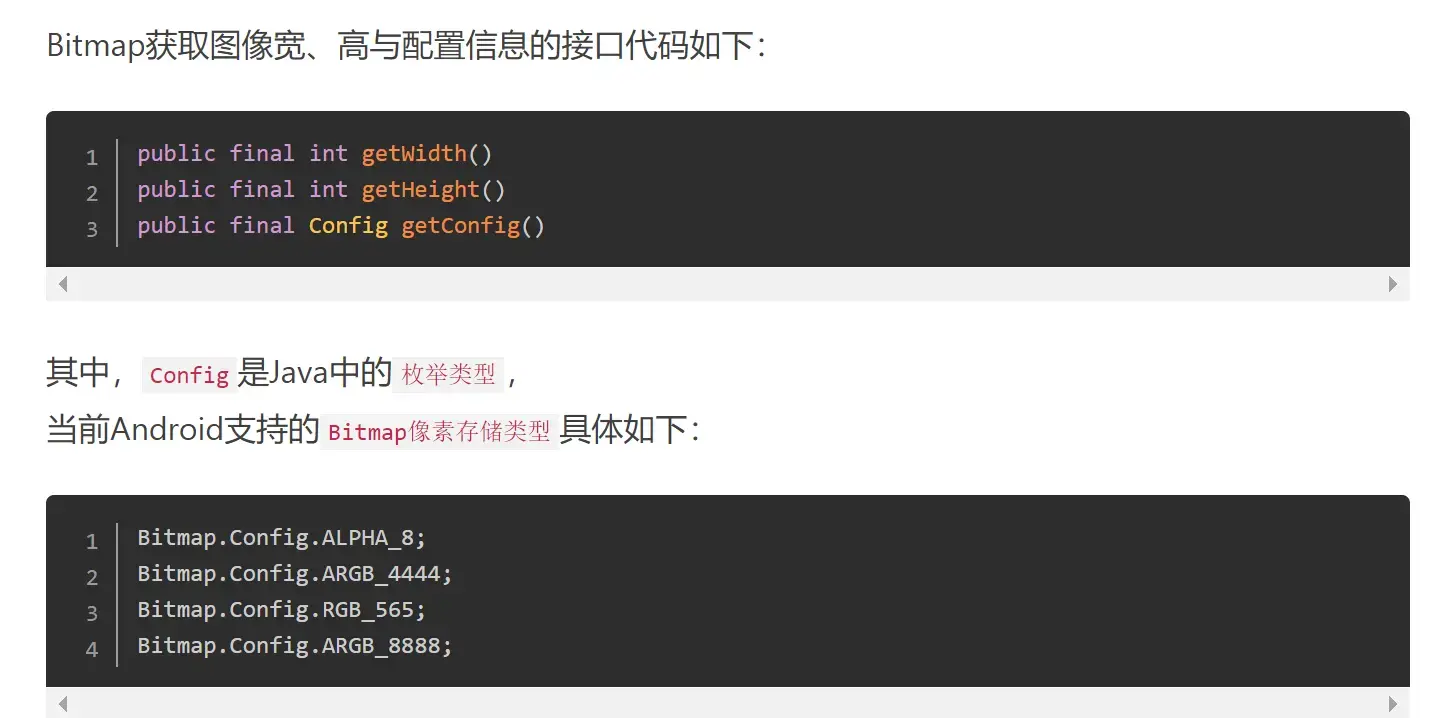
#Bitmap的API
<br>
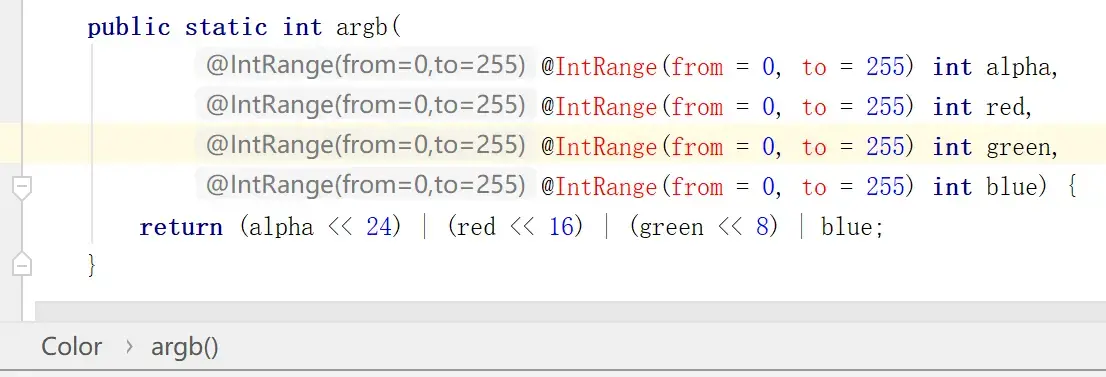
#Color的源码
@ColorInt
public static int rgb(float red, float green, float blue) {
    return 0xff000000 |
           ((int) (red   * 255.0f + 0.5f) << 16) |
           ((int) (green * 255.0f + 0.5f) <<  8) |
            (int) (blue  * 255.0f + 0.5f);
}
@ColorInt
public static int rgb(
        @IntRange(from = 0, to = 255) int red,
        @IntRange(from = 0, to = 255) int green,
        @IntRange(from = 0, to = 255) int blue) {
    return 0xff000000 | (red << 16) | (green << 8) | blue;
}
@IntRange(from = 0, to = 255)
public static int alpha(int color) {
    return color >>> 24;
}
@IntRange(from = 0, to = 255)
public static int red(int color) {
    return (color >> 16) & 0xFF;
}
@IntRange(from = 0, to = 255)
public static int green(int color) {
    return (color >> 8) & 0xFF;
}
@IntRange(from = 0, to = 255)
public static int blue(int color) {
    return color & 0xFF;
}
<br>
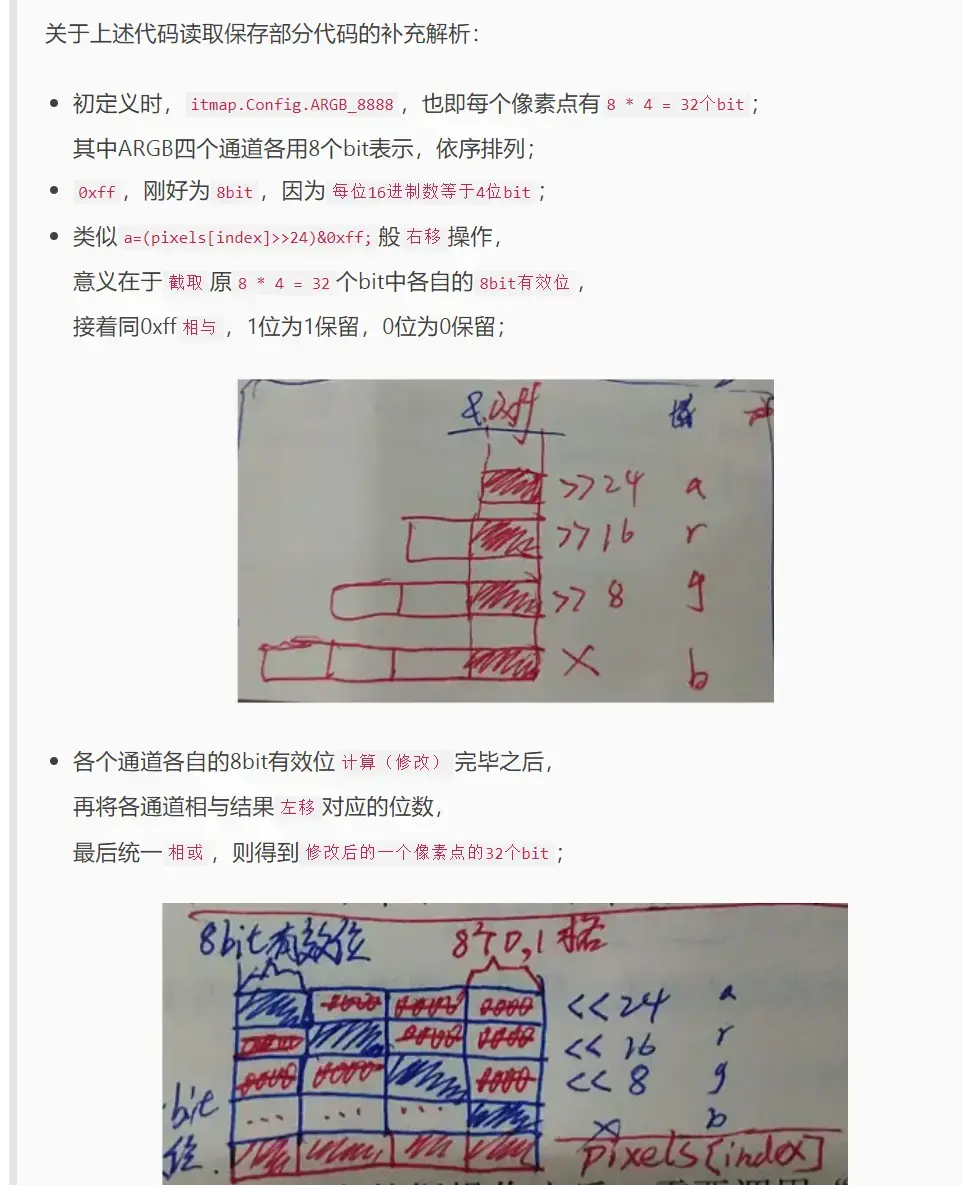
#ARGB_8888像素读取
一个像素数据量有32位大小,需要用int存储;
public void getBitmapInfo() { Bitmap bm = BitmapFactory.decodeResource(this.getResources(), R.drawable.lena); int width = bm.getWidth(); int height = bm.getHeight(); Bitmap.Config config = bm.getConfig();
    int a=0, r=0, g=0, b=0;
    for(int row=0; row<height; row++) {
        for(int col=0; col<width; col++) {
            // 读取像素
            int pixel = bm.getPixel(col, row);
            a = Color.alpha(pixel);
            r = Color.red(pixel);
            g = Color.green(pixel);
            b = Color.blue(pixel);
            // 修改像素
            r = 255 - r;
            g = 255 - g;
            b = 255 - b;
            // 保存到Bitmap中
            bm.setPixel(col, row, Color.argb(a, r, g, b));
        }
    }
下面修改通道的时候使用的是位运算,
其实对比Color源码我们知道这跟调用Color的API是一样的:
private void scanPixelsDemo() { Bitmap bm = BitmapFactory.decodeResource(this.getResources(), R.drawable.lena).copy(Bitmap.Config.ARGB_8888, true); int width = bm.getWidth(); int height = bm.getHeight(); Bitmap.Config config = bm.getConfig();
    int[] pixels = new int[width*height];
    bm.getPixels(pixels, 0, width, 0, 0, width, height);
    int a=0, r=0, g=0, b=0;
    int index = 0;
    for(int row=0; row<height; row++) {
        for(int col=0; col<width; col++) {
            // 读取像素
            index = width*row + col;
            a=(pixels[index]>>24)&0xff;
            r=(pixels[index]>>16)&0xff;
            g=(pixels[index]>>8)&0xff;
            b=pixels[index]&0xff;
            // 修改像素
            r = 255 - r;
            g = 255 - g;
            b = 255 - b;
            // 保存到Bitmap中
            pixels[index] = (a << 24) | (r << 16) | (g << 8) | b;
        }
    }

    bm.setPixels(pixels, 0, width, 0, 0, width, height);

    ImageView iv = (ImageView)this.findViewById(R.id.matInfo_imageView);
    iv.setImageBitmap(bm);
    bm.recycle();//释放内存!!!!!!!!

}
<br>
#OpenCV中的Mat读法像素操作
**(一共 [三种](https://www.jianshu.com/p/232b6468f80a),这里写的第一种)**
Mat src = Imgcodecs.imread(fileUri.getPath()); if(src.empty()){ return; } int channels = src.channels(); int width = src.cols(); int height = src.rows();
byte[] data = new byte[channels]; int b=0, g=0, r=0; for(int row=0; row<height; row++) { for(int col=0; col<width; col++) { // 读取 src.get(row, col, data);//!!!!!!!!!!!!!!!!!!!!!!!读取一个px b = data[0]&0xff; g = data[1]&0xff; r = data[2]&0xff; // 修改 b = 255 - b; g = 255 - g; r = 255 - r; // 写入 data[0] = (byte)b; data[1] = (byte)g; data[2] = (byte)r; src.put(row, col, data); } }
