

一、安装虚拟机
安装vagrant
根据自己的电脑操作系统选择最新版本进行安装即可
安装virtualbox
vagrant用于构建虚拟机,virtualbox相当于是一个虚拟机管理工具
相关命令
依次执行如下命令:
| 1 2 3 | ```
cd local mkdir centos7 vagrant init centos/7
| -------------- | ----------------------------------------------------- |
即可在当前目录下看到有一个`Vagrantfile`文件生成
然后运行`vagrant up`命令进行构建虚拟机(需要有点耐心)
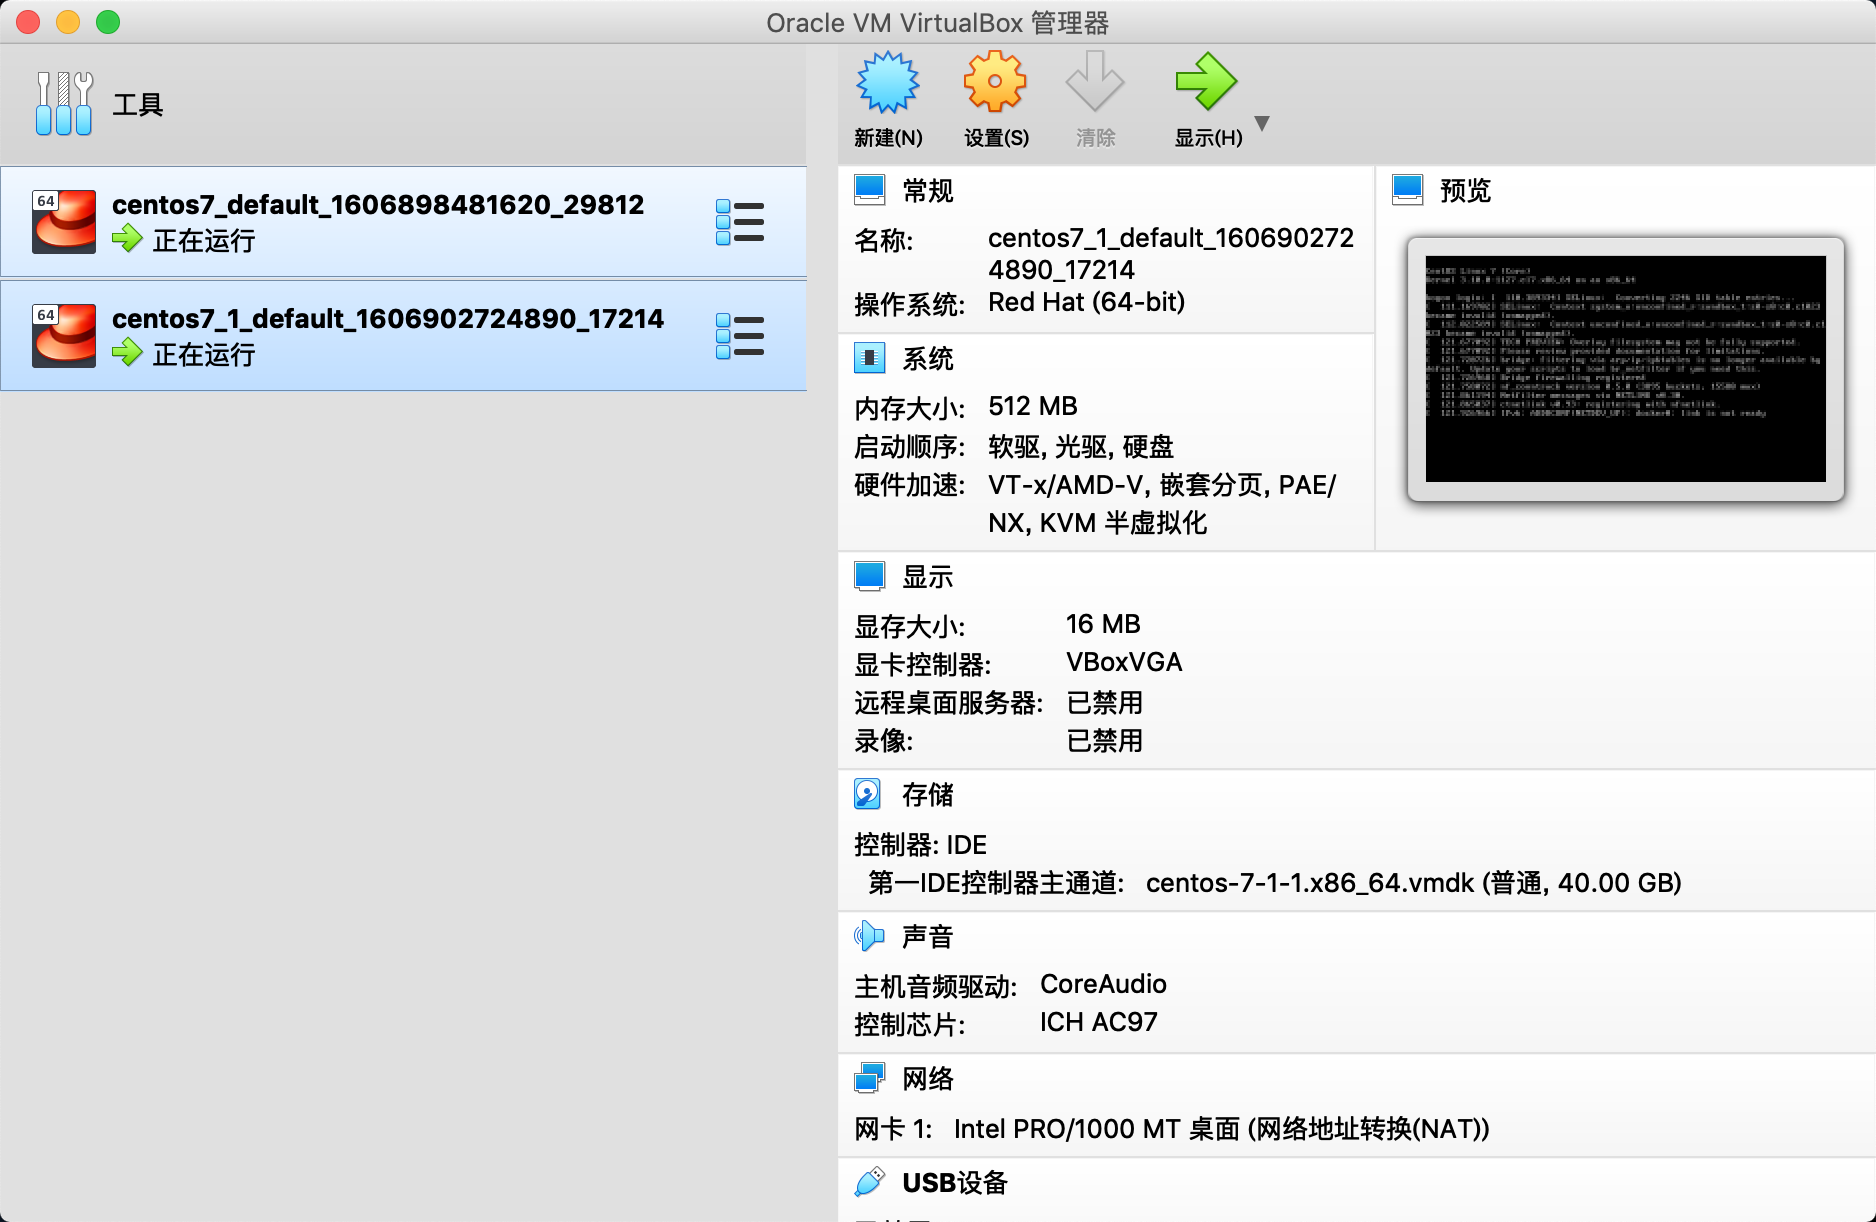
构建完毕会在当前目录下生成一个文件夹:

然后在virtualbox程序中,会有相应的虚拟机生成:
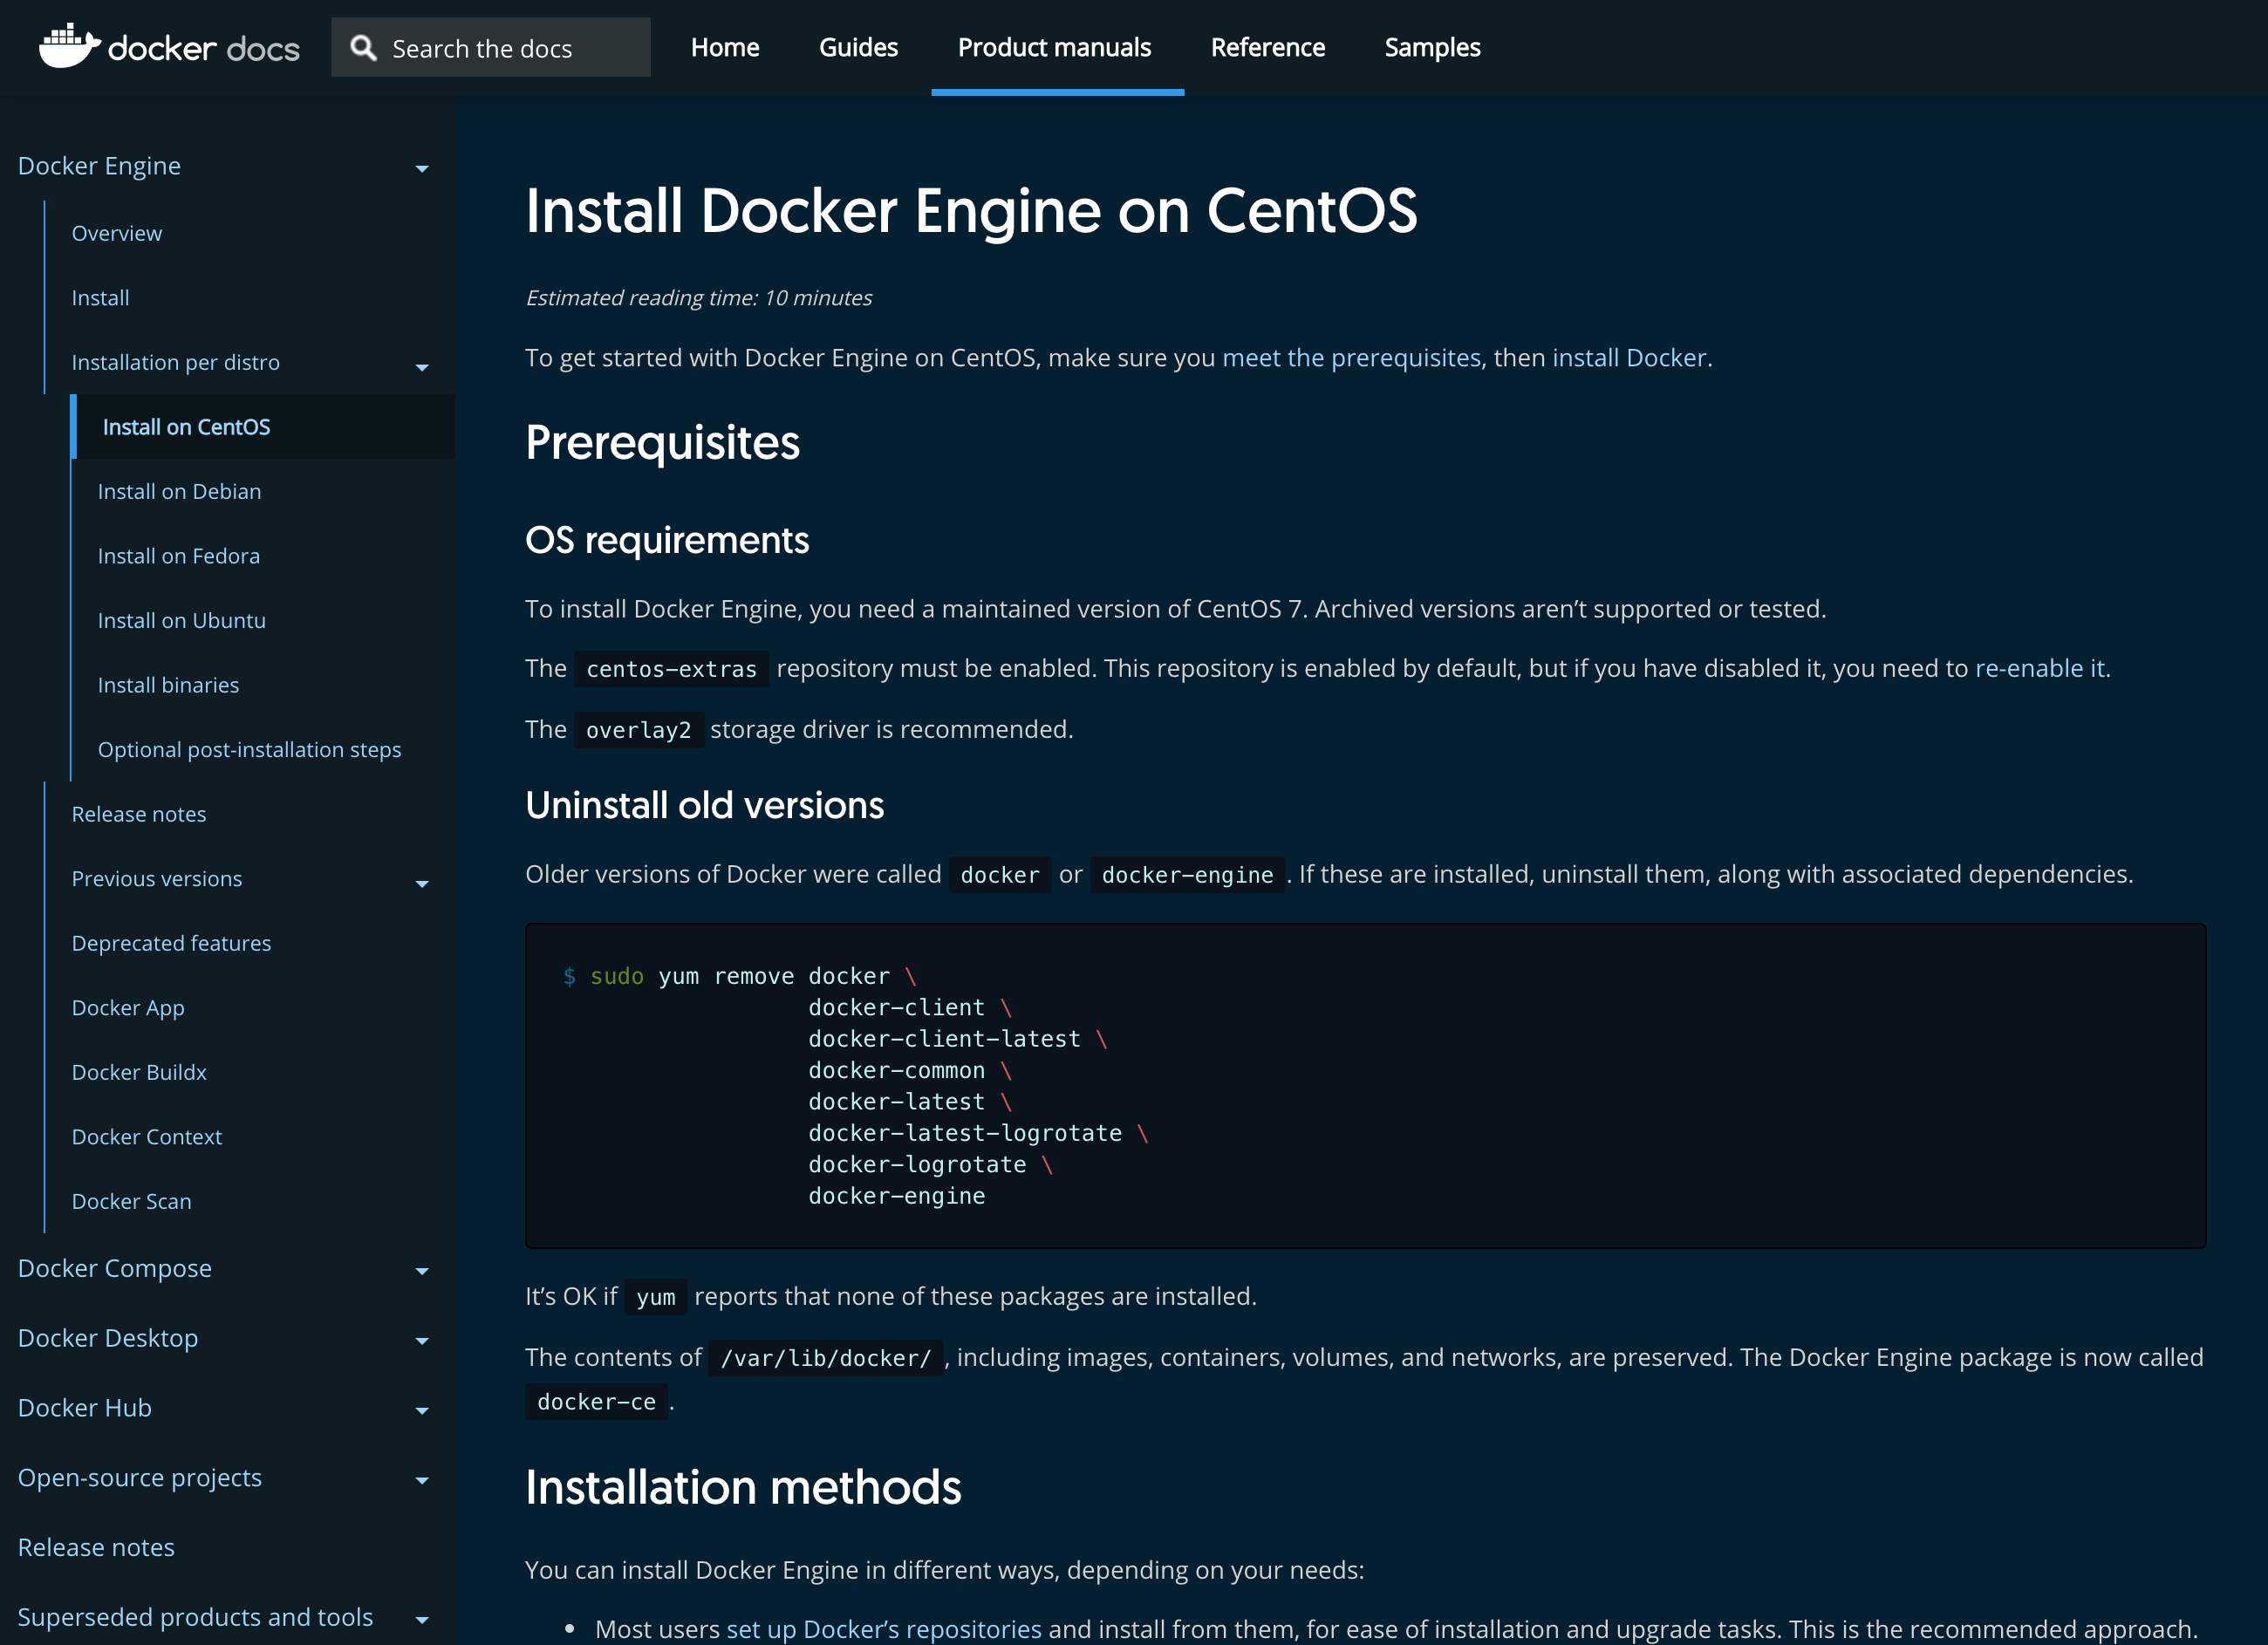
### [](#%E4%BA%8C%E3%80%81%E5%AE%89%E8%A3%85Docker "二、安装Docker")二、安装Docker
参考官方文档:[Docker官方文档](https://docs.docker.com/)
#### [](#%E5%91%BD%E4%BB%A4 "命令")命令
在当前文件夹下,使用命令`vagrant ssh`进入构建出来的虚拟机,然后执行如下命令构建Docker:
| ```
1 2 3 4 5
``` | ```
sudo yum remove docker docker-client docker-client-latest docker-common docker-latest docker-latest-logrotate docker-logrotate docker-engine sudo yum install -y yum-utils sudo yum-config-manager --add-repo https://download.docker.com/linux/centos/docker-ce.repo sudo yum install docker-ce docker-ce-cli containerd.io sudo systemctl start docker
``` |
| ------------------ | ------------------------------------------------------------------------------------------------------------------------------------------------------------------------------------------------------------------------------------------------------------------------------------------------------------------------------------------------------------------------- |
到此为止,docker就创建成功并且启动了\
运行命令:
| ```
1
``` | ```
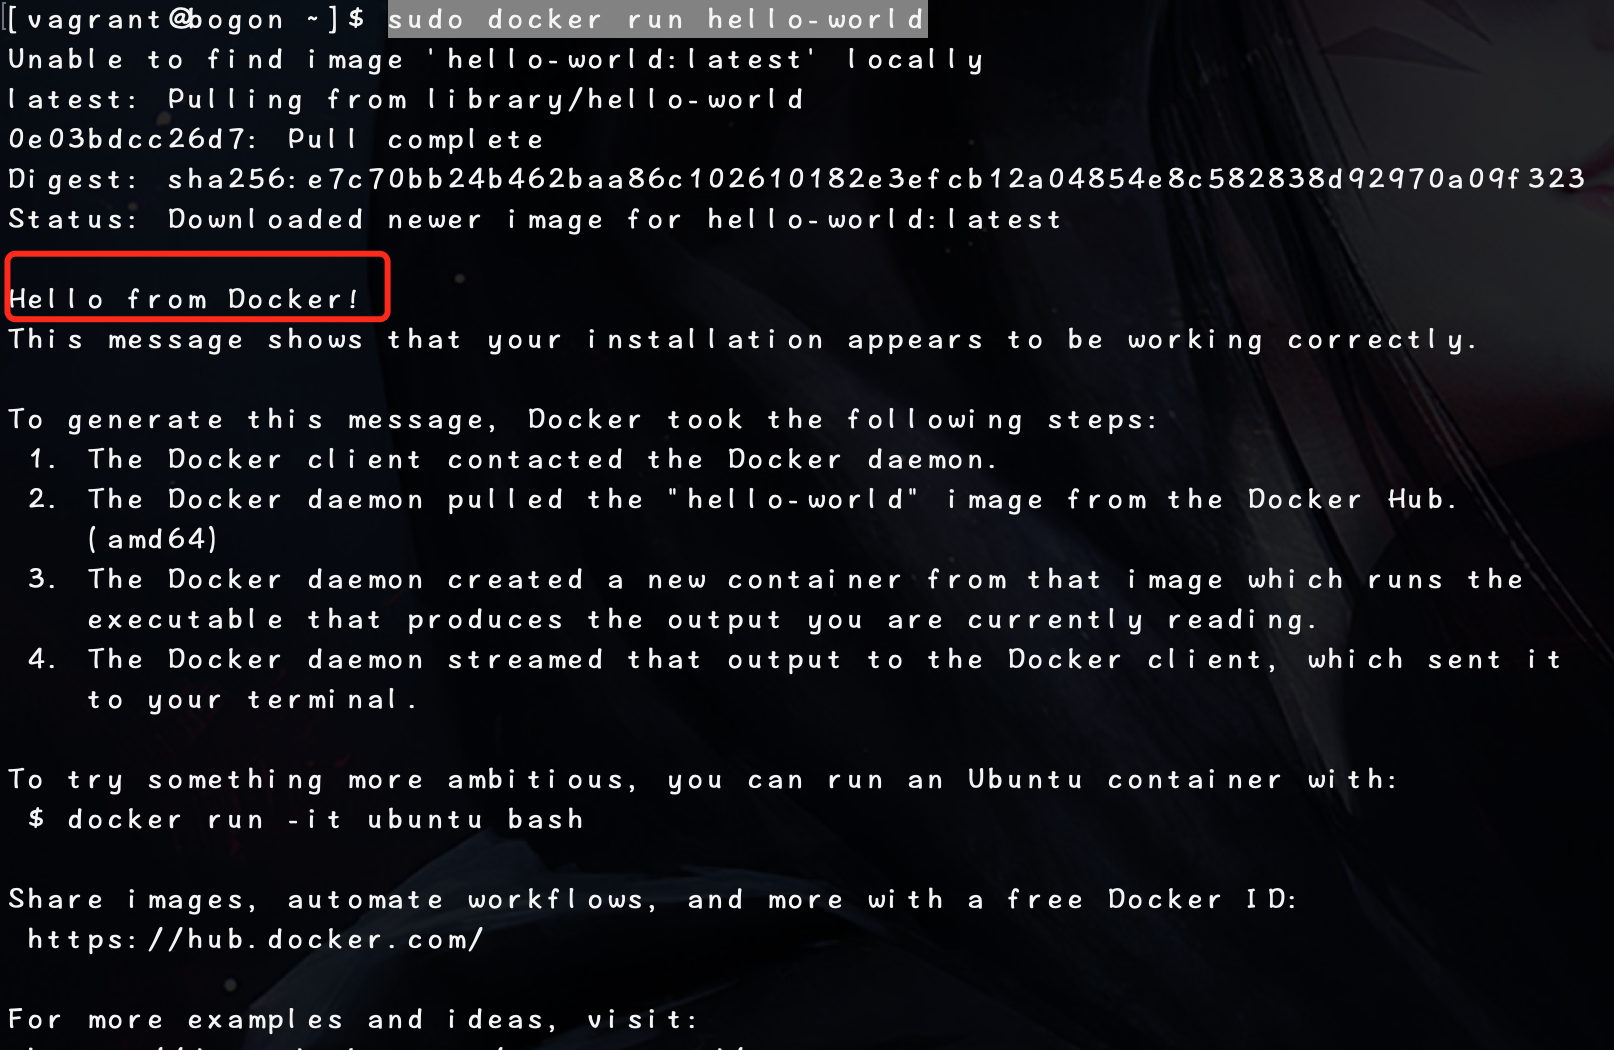
sudo docker run hello-world
``` |
| ---------- | ------------------------------------ |
可以看到如下信息
将vagrant添加到docker用户组中
| ```
1 2 3 4
``` | ```
sudo groupadd docker sudo gpasswd -a vagrant docker sudo service docker restart exit
``` |
| ---------------- | --------------------------------------------------------------------------------------------- |
重启之后,再次`vagrant ssh`进入虚拟机,运行docker命令就不必加sudo了
### [](#%E4%B8%89%E3%80%81vagrant%E7%9B%B8%E5%85%B3%E5%91%BD%E4%BB%A4 "三、vagrant相关命令")三、vagrant相关命令
| 命令 | 含义 |
| :----------------: | :-------: |
| vagrant init | 初始化 |
| vagrant up | 启动虚拟机 |
| vagrant halt | 关闭虚拟机 |
| vagrant reload | 重启虚拟机 |
| vagrant ssh | SSH至虚拟机 |
| vagrant suspend | 挂起虚拟机 |
| vagrant resume | 唤醒虚拟机 |
| vagrant status | 查看虚拟机运行状态 |
| vagrant destroy | 销毁当前虚拟机 |
| vagrant box list | 查看本地box列表 |
| vagrant box add | 添加box到列表 |
| vagrant box remove | 从box列表移除 |
### [](#%E5%9B%9B%E3%80%81%E5%BD%A9%E8%9B%8B "四、彩蛋")四、彩蛋
在我们运行`vagrant init centos/7`之后,就可以看到在当前目录下生成了`Vagrantfile`文件
我们可以在运行`vagrant up`的时候即可让虚拟机构建出一个Docker环境,需要修改`Vagrantfile`文件\
如下:
| ```
1 2 3 4 5 6 7 8 9 10 11 12 13 14 15 16 17 18 19 20 21 22 23 24 25 26 27 28 29 30 31 32 33 34 35 36 37 38 39 40 41 42 43 44 45 46 47 48 49 50 51 52 53 54 55 56 57 58 59 60 61 62 63 64 65 66 67 68 69 70 71 72 73 74 75 76 77
``` | ```
# -*- mode: ruby -*- # vi: set ft=ruby : # All Vagrant configuration is done below. The "2" in Vagrant.configure # configures the configuration version (we support older styles for # backwards compatibility). Please don't change it unless you know what # you're doing. Vagrant.configure("2") do |config| # The most common configuration options are documented and commented below. # For a complete reference, please see the online documentation at # https://docs.vagrantup.com. # Every Vagrant development environment requires a box. You can search for # boxes at https://vagrantcloud.com/search. config.vm.box = "centos/7" # Disable automatic box update checking. If you disable this, then # boxes will only be checked for updates when the user runs # `vagrant box outdated`. This is not recommended. # config.vm.box_check_update = false # Create a forwarded port mapping which allows access to a specific port # within the machine from a port on the host machine. In the example below, # accessing "localhost:8080" will access port 80 on the guest machine. # NOTE: This will enable public access to the opened port # config.vm.network "forwarded_port", guest: 80, host: 8080 # Create a forwarded port mapping which allows access to a specific port # within the machine from a port on the host machine and only allow access # via 127.0.0.1 to disable public access # config.vm.network "forwarded_port", guest: 80, host: 8080, host_ip: "127.0.0.1" # Create a private network, which allows host-only access to the machine # using a specific IP. # config.vm.network "private_network", ip: "192.168.33.10" # Create a public network, which generally matched to bridged network. # Bridged networks make the machine appear as another physical device on # your network. # config.vm.network "public_network" # Share an additional folder to the guest VM. The first argument is # the path on the host to the actual folder. The second argument is # the path on the guest to mount the folder. And the optional third # argument is a set of non-required options. # config.vm.synced_folder "../data", "/vagrant_data" # Provider-specific configuration so you can fine-tune various # backing providers for Vagrant. These expose provider-specific options. # Example for VirtualBox: # # config.vm.provider "virtualbox" do |vb| # # Display the VirtualBox GUI when booting the machine # vb.gui = true # # # Customize the amount of memory on the VM: # vb.memory = "1024" # end # # View the documentation for the provider you are using for more # information on available options. # Enable provisioning with a shell script. Additional provisioners such as # Ansible, Chef, Docker, Puppet and Salt are also available. Please see the # documentation for more information about their specific syntax and use. # config.vm.provision "shell", inline: <<-SHELL # apt-get update # apt-get install -y apache2 config.vm.provision "shell", inline: <<-SHELL sudo yum remove docker docker-client docker-client-latest docker-common docker-latest docker-latest-logrotate docker-logrotate docker-engine sudo yum install -y yum-utils sudo yum-config-manager -y --add-repo https://download.docker.com/linux/centos/docker-ce.repo sudo yum -y install docker-ce docker-ce-cli containerd.io sudo systemctl start docker SHELL end
``` |
| -------------------------------------------------------------------------------------------------------------------------------------------------------------------------------------------------------------------------------------- | ---------------------------------------------------------------------------------------------------------------------------------------------------------------------------------------------------------------------------------------------------------------------------------------------------------------------------------------------------------------------------------------------------------------------------------------------------------------------------------------------------------------------------------------------------------------------------------------------------------------------------------------------------------------------------------------------------------------------------------------------------------------------------------------------------------------------------------------------------------------------------------------------------------------------------------------------------------------------------------------------------------------------------------------------------------------------------------------------------------------------------------------------------------------------------------------------------------------------------------------------------------------------------------------------------------------------------------------------------------------------------------------------------------------------------------------------------------------------------------------------------------------------------------------------------------------------------------------------------------------------------------------------------------------------------------------------------------------------------------------------------------------------------------------------------------------------------------------------------------------------------------------------------------------------------------------------------------------------------------------------------------------------------------------------------------------------------------------------------------------------------------------------------------------------------------------------------------------------------------------------------------------------------------------------------------------------------------------------------------------------------------------------------------------------------------------------------------------------------------------------------------------------------------------------------------------------------------------------------------------------------------------------------------------------------------------------------------------------------------------------------------------------------------------------------------------------------------------------------------------------------------------------------------------------------------------------------------------------------------------------------------------------------------------------------------------------------------------------------------------------------------------------------------------------------------------------------------------------------------------------------------------------------------------------------------------------------------------------------------------------------------------------------------------------------------------------------------------------------------------------------------------------------------------------------------------------- |
