

安装nexus3
安装nexus3,必须安装jdk1.8+都可
下载jdk1.8:
mac版本:download.oracle.com/otn/java/jd…
其他版本www.oracle.com/java/techno…
下载nexus3:
sonatype-download.global.ssl.fastly.net/repository/…
或:www.sonatype.com/products/ne…
启动nexus命令
cd nexus-2.14.15-01-bundle/nexus-2.14.15-01/bin
./nexus start
如果碰到错误Detected execution as "root" user. This is NOT recommended!,执行export RUN_AS_USER=root即可
注意报错:
把java路径填到下面
INSTALL4J_JAVA_HOME="/Library/Java/JavaVirtualMachines/jdk1.8.0_351.jdk/Contents/Home/bin/java"
bin目录运行 ./nexus run
浏览器启动:
初试账号密码如图:
创建npm仓库
创建npm代理服务
分别填写
- (1) npm-proxy
- (2) registry.npm.taobao.org/
- (5) -1
创建npm私有仓库
分别填写
- (1) npm-internal
创建npm-group 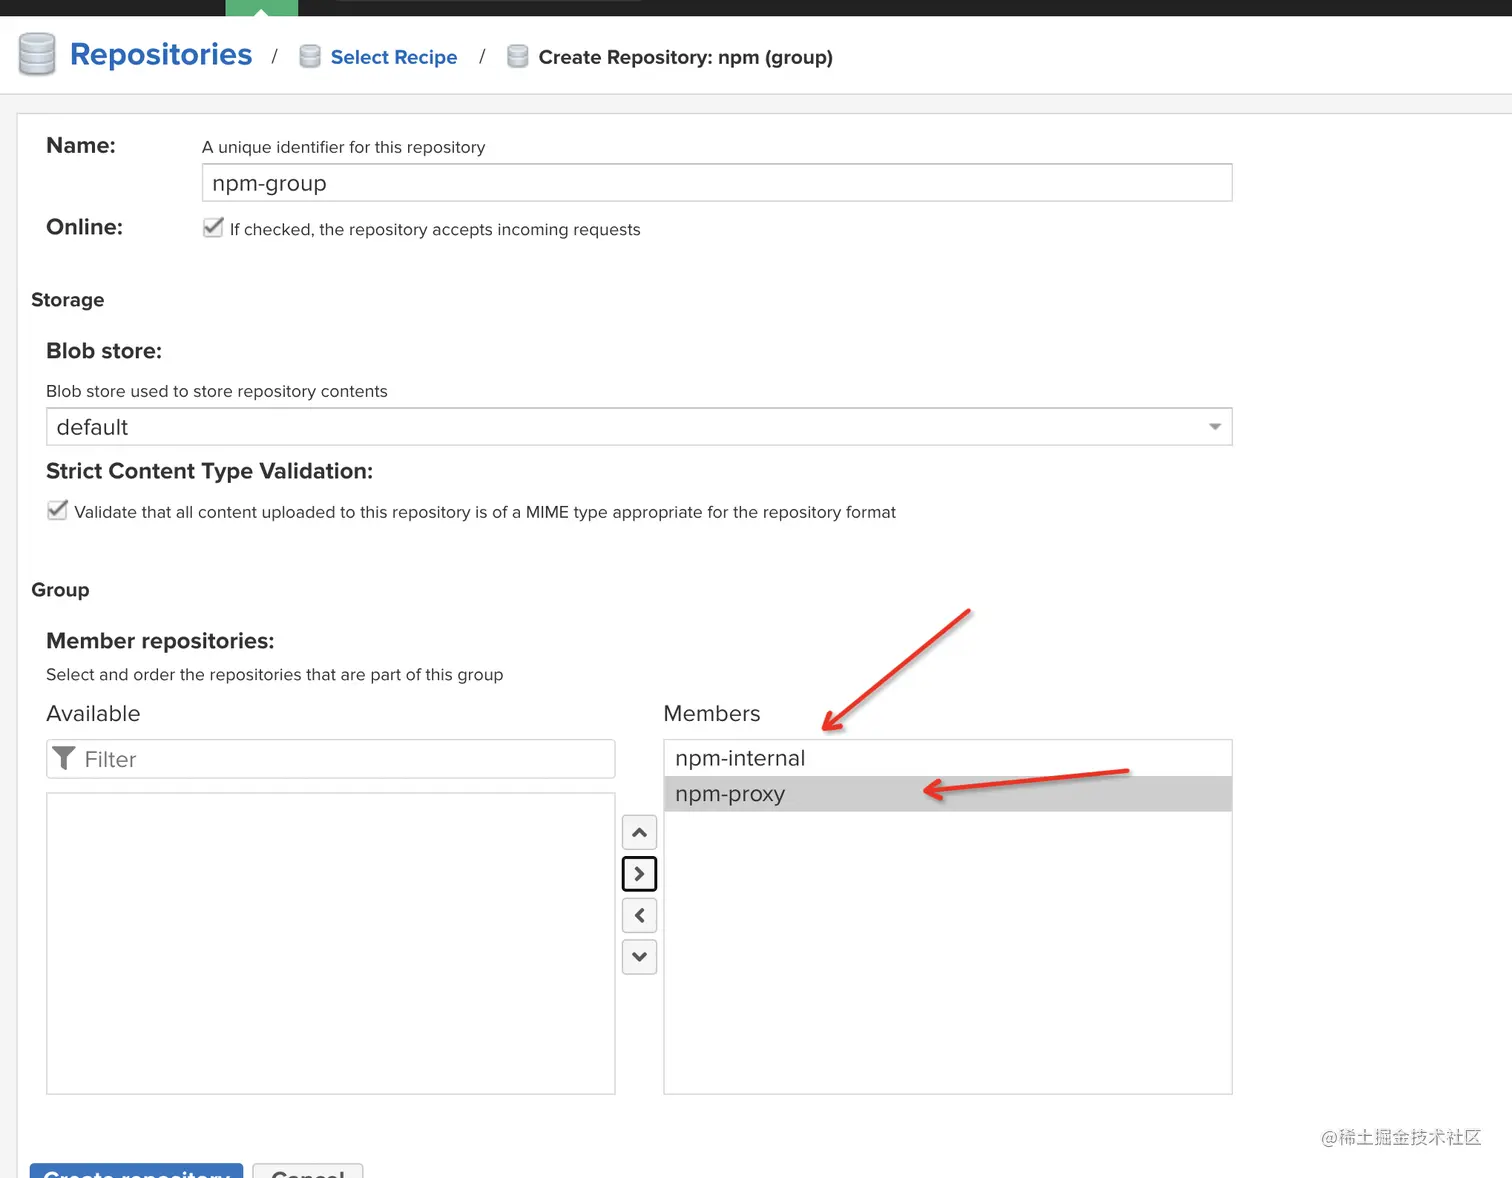
分别填写
- (1) npm-group
- (4) 全选并点击中间的箭头加入到右边的列表
npm安装依赖
npm i -g nrm  //安装
nrm ls        //查看镜像源列表
//添加镜像源
nrm add n4 http://localhost:8082/nexus/content/groups/npm-group/
nrm use n4
npm install xxx 默认去私有仓库,找不到会去代理仓库拉取
npm镜像源管理
npm i -g nrm  //安装
nrm ls        //查看镜像源列表
//添加镜像源
 nrm add n4 http://127.0.0.1:8082/nexus/content/groups/npm-group/
//删除镜像源
nrm del n4
npm包发布
nexus无法上传npm包到group组,只能上传到私有仓库。报错pro版本功能
so暂时只能上传私有仓库
发布步骤:
//添加镜像源
nrm add n4 http://localhost:8082/nexus/content/repositories/npm-internal/
nrm use n4
- nexus控制台创建账号
- 命令行运行:npm login 输入账号密码邮箱
- 如果出现400,,401报错 打开设置界面,npm token放到右边框内,save
-
运行npm publish即可
verdaccio迁移数据到nexus shell合集
查看环境变量:vi ~/.bash_profile
制作后面地址文件夹打包成tar压缩包到前面目录:
tar -zcvf /data/stoage.tar.gz /root/.local/share/verdaccio/storage
解压文件:tar -zxvf stoage.tar.gz
查看目录文件大小:du -h
查看根目录状态:df
复制服务器文件 到本机地址:
scp -r root@180.97.69.xxx:/data/stoage.tar.gz /data/Documents/nexus-2.14.15-01-bundle/
base64编码账号密码签名,用于npm验签
echo -n 'username:password' | openssl base64
运行:
./npmimport.sh -r 镜像源地址
#!/bin/bash

# Get command line params
while getopts ":r:k:" opt; do
case $opt in
r) REPO_URL="$OPTARG"
;;
esac
done

find . -type f -not -path '*/.*' -name '*.tgz' -exec npm publish {} --registry $REPO_URL ;
看到运行如图,等待发布完毕
