

Gatsby是一个基于React的开源框架,有助于构建网站和应用程序。它允许你使用React构建你的网站和应用程序,然后在你构建生产时生成HTML、CSS和JS。
使用Gatsby的许多优点之一是,它允许通过一种称为GraphQL的查询语言访问数据。GraphQL是一种用于API的查询语言,它为你的API中的数据提供了一个完整的、可理解的描述,让客户有能力准确地要求他们所需要的东西,而不是其他。Gatsby使用GraphQL是因为它提供了以下几点:
- 具体性。只请求需要的数据,而不是由API返回的任何数据。
- 静态构建。在GraphQL查询中,在构建时执行数据转换。
- 标准化。它是一种高性能的数据查询语言,适用于通常复杂/嵌套的数据依赖关系。
如果你有兴趣,你可以阅读更多关于Gatsby为什么使用GraphQL。在这篇文章中,我将分享在Gatsby项目中使用GraphQL时的一些有用提示。
从GraphQL查询创建Gatsby页面
默认情况下,Gatsby中的页面/路线是通过在src/pages 文件夹中创建一个新文件来创建的,即创建一个about.js 文件意味着在/about 创建一个页面。然而,还有另一种方法来创建页面,那就是使用createPage动作与createPagesAPI一起以编程方式创建页面。这种方法在创建这些页面时也为你提供了更多的选择,如自定义页面的lug:
// gatsby-node.jsconst path = require('path')
exports.createPages = ({ graphql, actions }) => {  const { createPage } = actions  const ShopPage = path.resolve(`src/components/shop-page.js`)
  createPage({    path: "/store",    component: ShopPage,    context: {},  })}
在上面的代码片段中,createPage动作被用来创建一个页面,网址是/store 。createPage动作接受多个参数,但我将专注于以下参数:
path- 这是该页面的相对URL,应该总是以斜线开始。component- 这是React组件的路径,它被用作这个页面的模板。context- 这是一个对象,可以包含任何数据,作为道具传递给React组件。
本质上,createPage可以帮助我们在任何需要动态创建页面的地方。createPage动作的一个更实际的用途是为一个出版物网站中的每篇文章创建多个页面。这是该用例的最佳方法,因为它允许从外部来源以编程方式创建多个页面。这也是一个很好的选择,因为我们可以使用从外部来源获得的数据来为这些页面创建permalinks/paths。让我们来看看一个例子。
// gatsby-node.jsconst path = require('path')
exports.createPages = ({ graphql, actions }) => {  const { createPage } = actions  const ArticlePage = path.resolve(`src/components/article-page.js`)
  return new Promise((resolve, reject) => {    resolve(      graphql(        `{            articles: allArticles {              edges {                node {                  id                  slug                  title                  category {                    slug                  }                }              }            }        }`,      ).then(result => {        result.data.articles.edges.forEach(edge => {          createPage({            path: `${edge.node.category.slug}/${edge.node.slug}`,            component: ArticlePage,            context: {              slug: edge.node.slug            },          })        })      }),    )}
在上面的代码中,我们正在查询一个(虚构的)外部GraphQL源以获取文章条目。查询主体包含了我们希望在结果中返回的属性,这对构建固定链接很有用。
然后,从查询中得到的结果被用来创建页面,方法是在结果中循环,使用文章的属性为页面创建一个路径。
当以编程方式创建页面时,另一个有用的提示是提取createPage动作,以防它们在gatsby-node.js 文件中很多。这有助于简化文件,使代码更容易阅读。
这通常发生在有多个查询和多个页面需要创建的时候。请看下面的代码片断作为一个例子。
// gatsby-node.jsconst path = require('path')
exports.createPages = ({ graphql, actions }) => {  const { createPage } = actions  const ArticlePage = path.resolve(`src/components/article-page.js`)  const AuthorPage = path.resolve(`src/components/author-page.js`)  const ProductPage = path.resolve(`src/components/product-page.js`)
  return new Promise((resolve, reject) => {    resolve(      graphql(        `{            articles: allArticles {              edges {                node {                  id                  slug                  title                  category {                    slug                  }                }              }            }            authors: allAuthors {              edges {                node {                  id                  slug                  name                  bio                }              }            }            products: allProducts {              edges {                node {                  id                  slug                  title                }              }            }        }`,      ).then(result => {        result.data.articles.edges.forEach(edge => {          createPage({            path: `${edge.node.category.slug}/${edge.node.slug}`,            component: ArticlePage,            context: {              slug: edge.node.slug            },          })        })
        result.data.authors.edges.forEach(edge => {          createPage({            path: `${edge.node.slug}`,            component: AuthorPage,            context: {              slug: edge.node.slug            },          })        })
        result.data.products.edges.forEach(edge => {          createPage({            path: `${edge.node.slug}`,            component: ProductPage,            context: {              slug: edge.node.slug            },          })        })      }),    )}
上面的代码片断与我们创建的第一个代码片断相似,只是增加了更多的查询来获取更多的数据。如果我们继续以这种速度增加查询和createPage ,gatsby-node.js ,就会变得杂乱无章,成为一个非常长的文件,需要滚动浏览。
一个可能的解决方法是为你想在Gatsby项目中创建的每个页面提取createPage 动作到单独的文件。这意味着创建特定于页面的助手来管理每个页面,而不是把所有页面放在同一个地方。最终的结果应该是,该文件对于它所实现的每个Gatsby钩子都是相当声明性的。
// createArticlePages.jsconst path = require('path')
module.exports = (createPage, edge) => {  const ArticlePage = path.resolve(`src/components/article-page.js`)
  createPage({    path: `${edge.node.category.slug}/${edge.node.slug}`,    component: ArticlePage,    context: {      slug: edge.node.slug    },  })}
// createAuthorPages.jsconst path = require('path')
module.exports = (createPage, edge) => {  const AuthorPage = path.resolve(`src/components/author-page.js`)
  createPage({    path: `${edge.node.category.slug}/${edge.node.slug}`,    component: AuthorPage,    context: {      slug: edge.node.slug    },  })}
// createProductPages.jsconst path = require('path')
module.exports = (createPage, edge) => {  const ProductPage = path.resolve(`src/components/product-page.js`)
  createPage({    path: `${edge.node.category.slug}/${edge.node.slug}`,    component: ProductPage,    context: {      slug: edge.node.slug    },  })}
上面的三个代码片段是特定于页面的辅助函数;createArticlePages,createAuthorPages, 和createProductPages ,它们将分别帮助创建文章页面、作者页面和产品页面。它们也接受一个createPage 动作本身的参数和一个edge 对象,其中包含创建路径所需的数据。
然后,这些新的辅助函数可以像这样在gatsby-node.js 文件中使用。
// gatsby-node.js
import createArticlePages from './createArticlePages'import createAuthorPages from './createAuthorPages'import createProductPages from './createProductPages'
exports.createPages = ({ graphql, actions }) => {  const { createPage } = actions  return new Promise((resolve, reject) => {    resolve(      graphql(        `{            articles: allArticles {              edges {                node {                  id                  slug                  title                  category {                    slug                  }                }              }            }            authors: allAuthors {              edges {                node {                  id                  slug                  name                  bio                }              }            }            products: allProducts {              edges {                node {                  id                  slug                  title                }              }            }        }`,      ).then(result => {        result.data.articles.edges.forEach(edge => {          createArticlePages(createPage, edge)        })
        result.data.authors.edges.forEach(edge => {          createAuthorPages(createPage, edge)        })
        result.data.products.edges.forEach(edge => {          createProductPages(createPage, edge)        })      }),    )}
这种实现方式有助于确保gatsby-node.js 文件保持整洁和易于阅读。
页面查询与静态查询
Gatsby为你提供了两种使用GraphQL获取数据的方法--Page Query和StaticQuery。页面查询是一种方法,允许你在你的React组件中使用graphql 标签来获取数据。StaticQuery是一种方法,你可以在你的React组件中使用useStaticQueryReact Hook来执行查询。
// example of a page query// article-page.jsimport { graphql } from 'gatsby'import React from 'react'
const ArticlePage = ({ data }) => {  return (    {data.edges.map(article, index) => (      <h2>{article.title}</h2>      <p>{article.snippet}</p>    )}  )}
export default ArticlePage
export const query = graphql`  query Articles($locale: String!) {    articles: allArticles(      filter: { locale: { eq: $locale } }    ) {      edges {        node {          id          title          snippet          locale          publishDate        }      }    }  }`
// example of a static query// article-page.jsimport { graphql, useStaticQuery } from 'gatsby'import React from 'react'
const ArticlePage = ({ data }) => {  const data = useStaticQuery(graphql`    query Articles {      edges {        node {          id          title          snippet          locale          publishDate        }      }    }  `)
  return (    {data.edges.map(article, index) => (      <h2>{article.title}</h2>      <p>{article.snippet}</p>    )}  )}
export default ArticlePage
这两种方法的主要区别是,页面查询可以访问页面上下文,这是在createPage ,这基本上意味着,页面查询可以接受GraphQL变量。静态查询则没有这个功能。
它们之间的另一个区别是,静态查询可以在任何组件的任何地方使用,但页面查询只能在页面上使用,这些页面在createPage函数中被用作component 属性。
在Gatsby中使用GraphQL片段
当在Gatsby中使用GraphQL时,你很可能会遇到这样的情况:你在多个组件中多次使用一个特定的查询。幸运的是,GraphQL中有一个叫做片段的功能,允许你创建一组字段,然后把它们包含在会用到的查询中。
片段也有助于将复杂的查询转换为更小的模块化查询。在某种程度上,它类似于从一个辅助文件中导出一个函数,然后在多个组件中重复使用该函数。
// AuthorInfo.fragment.jsexport const query = graphql` fragment AuthorInfo on AuthorEntry { id name slug twitter locale }`
上面的代码片段是Gatsby项目中的一个片段文件的例子。上面的查询获取了一个作者的详细信息,我们假设这个查询在整个代码库中被写过几次。
片段可以在任何GraphQL查询中创建,但我发现最好在一个新文件中单独创建查询。片段中有3个关键元素:片段的名称、它将被用于的GraphQL类型以及查询的实际主体。
使用上面的例子,AuthorInfo 是片段的名称,以及在其他组件中用来引用它的内容。AuthorEntry 是GraphQL类型,正文是对象值。
一旦你创建了这个文件,你需要做的就是在Gatsby项目的任何地方使用这个片段。
// ArticlePage.jsimport { graphql } from 'gatsby'import React from 'react'
const ArticlePage = ({data}) => {  // Use the `data` property here...}
export const query = graphql`  query FetchArticle {    article {      id      slug      title      publishDate      author {        ...AuthorInfo      }    }    }`
在使用之前不需要导入文件或片段,因为Gatsby已经知道在编译网站时预处理所有GraphQL查询。
在Gatsby中使用TypeScript的GraphQL片段
如果你在你的Gatsby项目中使用TypeScript,你也可以在创建你的GraphQL片段时定义类型。这意味着,无论你在哪里使用你的片段,你都可以使用它的类型来确保你得到预期的东西。以下面的代码片断为例。
// AuthorInfo.fragment.tsimport { graphql } from 'gatsby'
export interface AuthorInfoFragment {  id: string  name: string  slug: string  twitter: string  locale: string}
export const query = graphql`  fragment AuthorInfo on AuthorEntry {    id    name    slug    twitter    locale  }`
在上面的代码片段中,有一个叫做AuthorInfo 的GraphQL片段和一个叫做AuthorInfoFragment 的接口,这两个都被导出了。然后这两个可以在另一个组件中使用,分别查询GraphQL和检查类型安全。以下面的代码片段为例,我们正试图使用底部的GraphQL查询来获取一个文章条目。
// ArticlePage.tsximport { graphql } from 'gatsby'import React from 'react'
// Import the TypeScript interface from the fragment fileimport { AuthorInfoFragment } from 'AuthorInfo.fragment.ts'
interface Props {  data: {    article: {      id: string      slug: string      title: string      publishDate: string      author: AuthorInfoFragment    }  }}
const ArticlePage = ({data}) => {  // Use the `data` property here...}
export const query = graphql`  query FetchArticle {    article {      id      slug      title      publishDate      author {        ...AuthorInfo      }    }  }`
在查询中包含了author 属性,它使用了AuthorInfo 片段,而且我们还在Prop TypeScript 接口中对author 的内容进行类型检查。
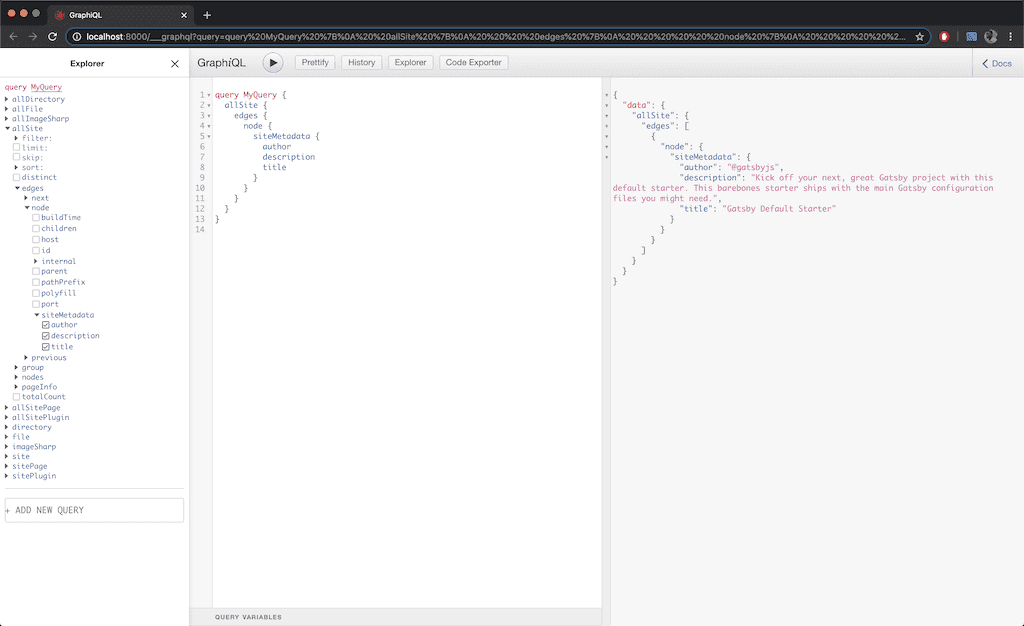
Gatsby的GraphQL游乐场
每当你在开发模式下运行你的Gatsby网站,它也会启动GraphiQL,一个浏览器内的IDE,以探索你的网站的数据和模式,网址是localhost:8000/___graphql 。
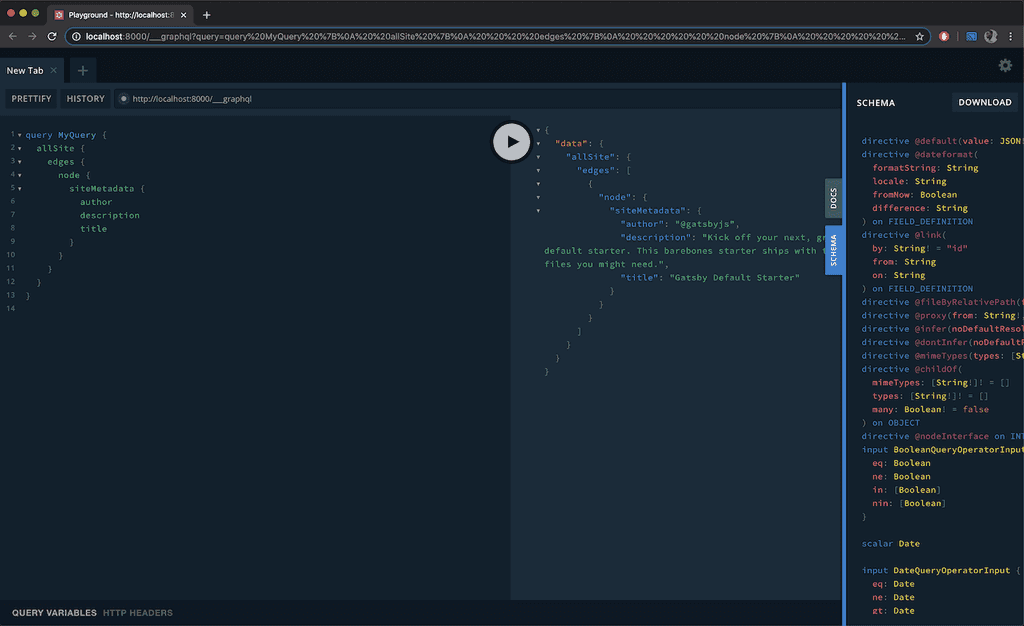
然而,有一个替代GraphiQL的工具,那就是Prisma的GraphQL Playground。它允许你与所有的数据、由额外的Gatsby插件添加的模式进行互动。GraphQL Playground在引擎盖下使用GraphiQL的组件,但本质上是一个更强大的GraphQL IDE,能够实现更好的开发工作流程。GraphQL Playground还增加了额外的功能,如。
- 交互式的、多列的模式文档。
- 多个标签,就像你在IDE中拥有的那样。
- 可定制的 HTTP 标头。
- 查询历史。
要在你的Gatsby项目中使用GraphQL Playground,编辑package.json 文件中的develop 脚本。
// package.json"develop": "GATSBY_GRAPHQL_IDE=playground gatsby develop",
如果你是在Windows上,那么这个脚本应该是这样的,同时安装cross-env 包。
// package.json"develop": "cross-env GATSBY_GRAPHQL_IDE=playground gatsby develop"
一旦你修改了脚本,你就可以运行yarn develop ,以开发模式运行网站,同时启动新的GraphQL Playground。
这些是我在使用Gatsby和GraphQL时学到的一些东西,你可以在这里阅读更多关于这两种技术的信息。如果你有任何有用的Gatsby+GraphQL技巧,请在下面的评论中分享它们
