

持续创作,加速成长!这是我参与「掘金日新计划 · 10 月更文挑战」的第3天,点击查看活动详情
导航的基本结构
首先准备好字体图标,首先我们先学习下字体图标的使用
首先下载。我们先在 iconfont 搜索到所需图片,然后添加到购物车,然后点击右上角购物车,点击下载代码(浏览器如果缩放太大,可能只看到两个按钮哦,调整下缩放)
下载的 zip 文件解压后有如下文件:
复制 iconfont.css 和 iconfont.ttf 到项目的 static 目录下。由于字体文件的引用路径推荐使用以~@开头的绝对路径,所以我们修改 iconfont.css 中 iconfont.ttf 路径如下:
然后在 App.vue 中引入 iconfont.css
<style>
	/*每个页面公共css */
	@import url(static/iconfont.css);
</style>
然后在页面中使用
<view class="iconfont icon-charutupian"></view>
这样图片就显示出来了
我们回到现在的项目。在 static 文件夹下创建 font 目录,放入下载的 iconfont.css 和 iconfont.ttf
修改 iconfont.css 中 iconfont.ttf 的路径
App.vue 中引入
<style>
	/*每个页面公共css */
	@import url(static/font/iconfont.css);
</style>
然后修改 index.vue
<template>
<view class="content">
<!--轮播图-->
......
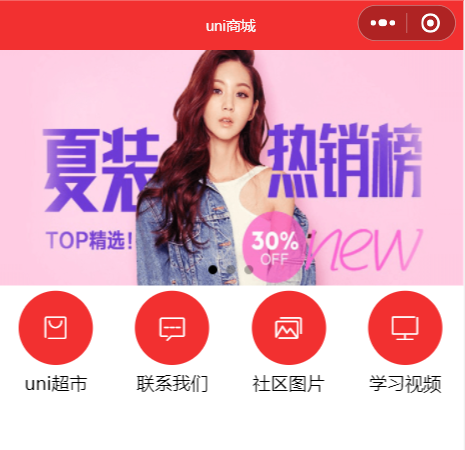
<!--导航-->
<view class='nav'>
<view class='nav_item'>
<view class="iconfont icon-shangpin"></view>
<text>uni超市</text>
</view>
<view class='nav_item'>
<view class="iconfont icon-xinxi"></view>
<text>联系我们</text>
</view>
<view class='nav_item'>
<view class="iconfont icon-tuku"></view>
<text>社区图片</text>
</view>
<view class='nav_item'>
<view class="iconfont icon-diannao"></view>
<text>学习视频</text>
</view>
</view>
</view>
</template>
<script>
......
</script>
<style lang="scss">
.content{
......
.nav{
display: flex;
.nav_item{
width: 25%;
text-align: center;
view{
width: 120rpx;
height: 120rpx;
border-radius: 60rpx;
background: #f23030;
margin: 10rpx auto;
line-height: 120rpx;
color: #fff;
font-size: 50rpx;
}
text{
font-size: 30rpx;
}
}
}
}
</style>
最终效果图:
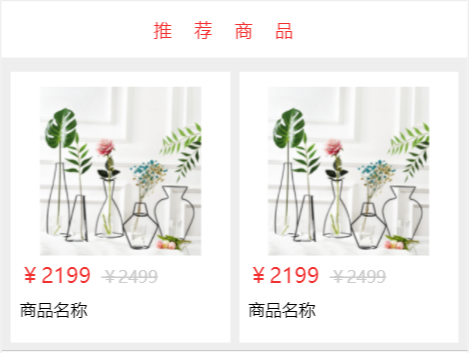
推荐商品
对于常用的样式,可以在根目录下的 uni.scss 定义颜色变量
$shop-color : #f23030;
<template>
	<view class="content">
		......
		<!--推荐商品-->
		<view class="hot_goods">
			<view class="title">推荐商品</view>
			<view class="goods_list">
				<view class="goods_item">
					<image src="../../static/goods.png"></image>
					<view class="price">
						<text>¥2199</text>
						<text>¥2499</text>
					</view>
					<view class="name">
						<text>商品名称</text>
					</view>
				</view>

				<view class="goods_item">
					<image src="../../static/goods.png"></image>
					<view class="price">
						<text>¥2199</text>
						<text>¥2499</text>
					</view>
					<view class="name">
						<text>商品名称</text>
					</view>
				</view>

			</view>
		</view>
	</view>
</template>

<script>
......
</script>

<style lang="scss">
	.content{
		......
		.hot_goods{
			background: #eee;
			overflow: hidden;
			margin-top: 10rpx;
			.title{
				height: 50px;
				line-height: 50px;
				color: $shop-color;
				background: #fff;
				text-align: center;
				letter-spacing: 20px;
				margin: 7rpx 0;
			}

			.goods_list{
				padding: 0 15rpx;
				display: flex;
				flex-wrap: wrap;
				justify-content: space-between;
				.goods_item{
					background: #fff;
					width: 355rpx;
					margin: 10px 0;
					padding: 15rpx;
					box-sizing: border-box;
					image{
						width: 80%;
						height: 150px;
						display: block;
						margin: 5px auto;
					}
					.price{
						color: $shop-color;
						font-size: 36rpx;
						text:nth-child(2){
							color: #ccc;
							font-size: 28rpx;
							margin-left: 17rpx;
							text-decoration: line-through;
						}
					}
					.name{
						font-size: 28rpx;
						line-height: 50rpx;
						padding-bottom: 15rpx;
						padding-top: 10rpx;
					}
				}
			}
		}
	}
</style>
然后可以通过接口获取数据,然后通过 v-for 展示即可,很简单:
<template>
	<view class="content">
		<!--轮播图-->
		......
		<!--导航-->
		......
		<!--推荐商品-->
		<view class="hot_goods">
			<view class="title">推荐商品</view>
			<view class="goods_list">
				<view class="goods_item" v-for="item in goods">
					<image :src="item.goods_big_logo"></image>
					<view class="price">
						<text>{{item.goods_price}}</text>
						<text>¥2499</text>
					</view>
					<view class="name">
						<text>{{item.goods_name}}</text>
					</view>
				</view>
			</view>
		</view>
	</view>
</template>

<script>
	export default {
		data() {
			return {
				......
				goods:[]
			}
		},
		onLoad() {
			......
			this.getHotGoods()
		},
		methods: {
			......
			//获取推荐商品
			async getHotGoods(){
				const res = await this.$myRequest({
					url:'/api/public/v1/goods/search'
				})
				this.goods = res.data.message.goods
			}
		}
	}
</script>
......

