

什么是SAML?
安全 断言 标记 语言是一种基于XML的网络认证和授权方式。它可以跨域工作,所以SaaS应用和其他企业软件通常都支持它。
Nick Gamb在《SAML开发者指南》中有一个很好的概述。
如果你想了解Spring Security是如何实现SAML的,请阅读其SAML 2.0登录文档。
在Okta上添加一个SAML应用
要开始,你需要一个Okta开发者账户。你可以在developer.okta.com/signup创建一个,或者安装Okta CLI并运行okta register 。
然后,登录你的账户,进入应用程序>创建应用程序集成。选择SAML 2.0并点击下一步。命名你的应用程序,如 Spring Boot SAML并点击下一步。
使用以下设置:
- 单一签到URL。
http://localhost:8080/login/saml2/sso/okta - 收件人URL和目的地URL使用这个。✅(默认)。
- Audience URI:
http://localhost:8080/saml2/service-provider-metadata/okta
然后点击下一步,选择以下选项:
- 我是一个Okta客户,正在添加一个内部应用
- 这是一个我们已经创建的内部应用
选择完成:
Okta将创建您的应用,您将被重定向到它的Sign On标签。向下滚动到SAML签名证书,进入SHA-2>操作>查看IdP元数据。你可以右击并复制这个菜单项的链接或打开其URL。把产生的链接复制到你的剪贴板上。它应该看起来像下面这样:
https://dev-13337.okta.com/app/<random-characters>/sso/saml/metadata
转到你的应用程序的分配选项卡,将访问权分配给Everyone组。
创建一个支持SAML的Spring Boot应用程序
Spring Boot 3需要Java 17,你可以用SDKMAN安装它:
sdk install java 17-open
做这个教程的最简单方法是克隆我创建的现有Spring Boot示例应用程序:
git clone https://github.com/oktadev/okta-spring-boot-saml-example.git
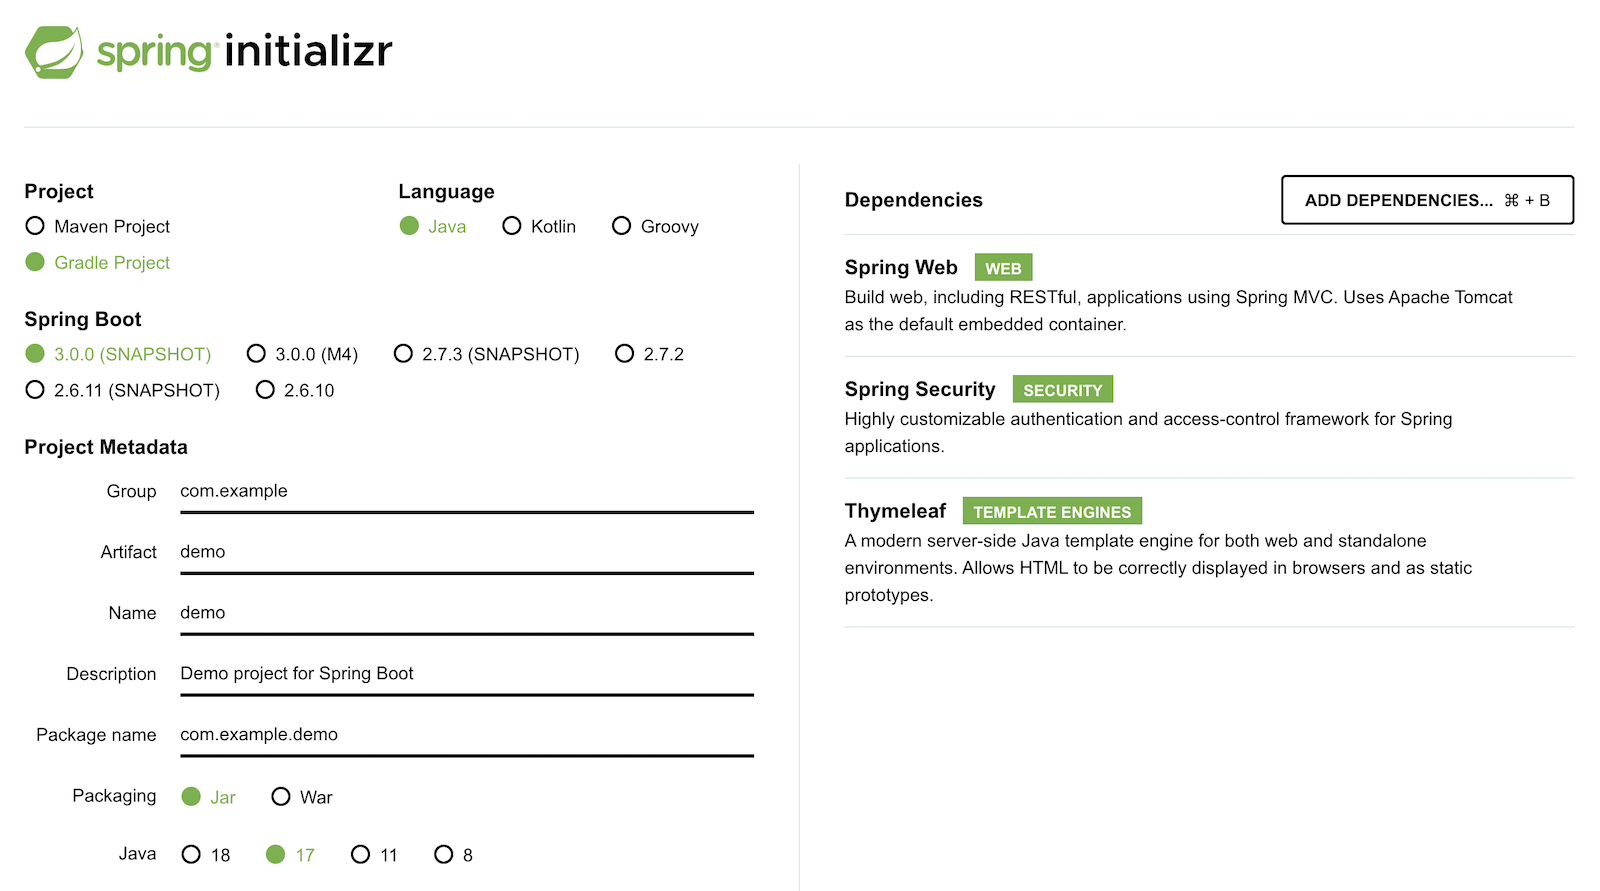
如果你愿意从头开始,你可以使用start.spring.io创建一个全新的Spring Boot应用。选择以下选项:
- 项目:Gradle
- Spring Boot:3.0.0 (快照)
- 依赖性:Spring Web,Spring Security,Thymeleaf
你也可以使用这个URL或HTTPie。
https start.spring.io/starter.zip bootVersion==3.0.0-SNAPSHOT \
  dependencies==web,security,thymeleaf type==gradle-project \
  baseDir==spring-boot-saml | tar -xzvf -
如果你创建了一个全新的应用程序,你需要完成以下步骤:
- 添加
src/main/java/com/example/demo/HomeController.java来填充认证用户的信息。
package com.example.demo;

import org.springframework.security.core.annotation.AuthenticationPrincipal;
import org.springframework.security.saml2.provider.service.authentication.Saml2AuthenticatedPrincipal;
import org.springframework.stereotype.Controller;
import org.springframework.ui.Model;
import org.springframework.web.bind.annotation.RequestMapping;

@Controller
public class HomeController {

    @RequestMapping("/")
    public String home(@AuthenticationPrincipal Saml2AuthenticatedPrincipal principal, Model model) {
        model.addAttribute("name", principal.getName());
        model.addAttribute("emailAddress", principal.getFirstAttribute("email"));
        model.addAttribute("userAttributes", principal.getAttributes());
        return "home";
    }

}
- 创建一个
src/main/resources/templates/home.html文件来呈现用户的信息。
<!DOCTYPE HTML>
<html xmlns="http://www.w3.org/1999/xhtml" xmlns:th="https://www.thymeleaf.org"
xmlns:sec="https://www.thymeleaf.org/thymeleaf-extras-springsecurity6">
<head>
<title>Spring Boot and SAML</title>
<meta http-equiv="Content-Type" content="text/html; charset=UTF-8"/>
</head>
<body>
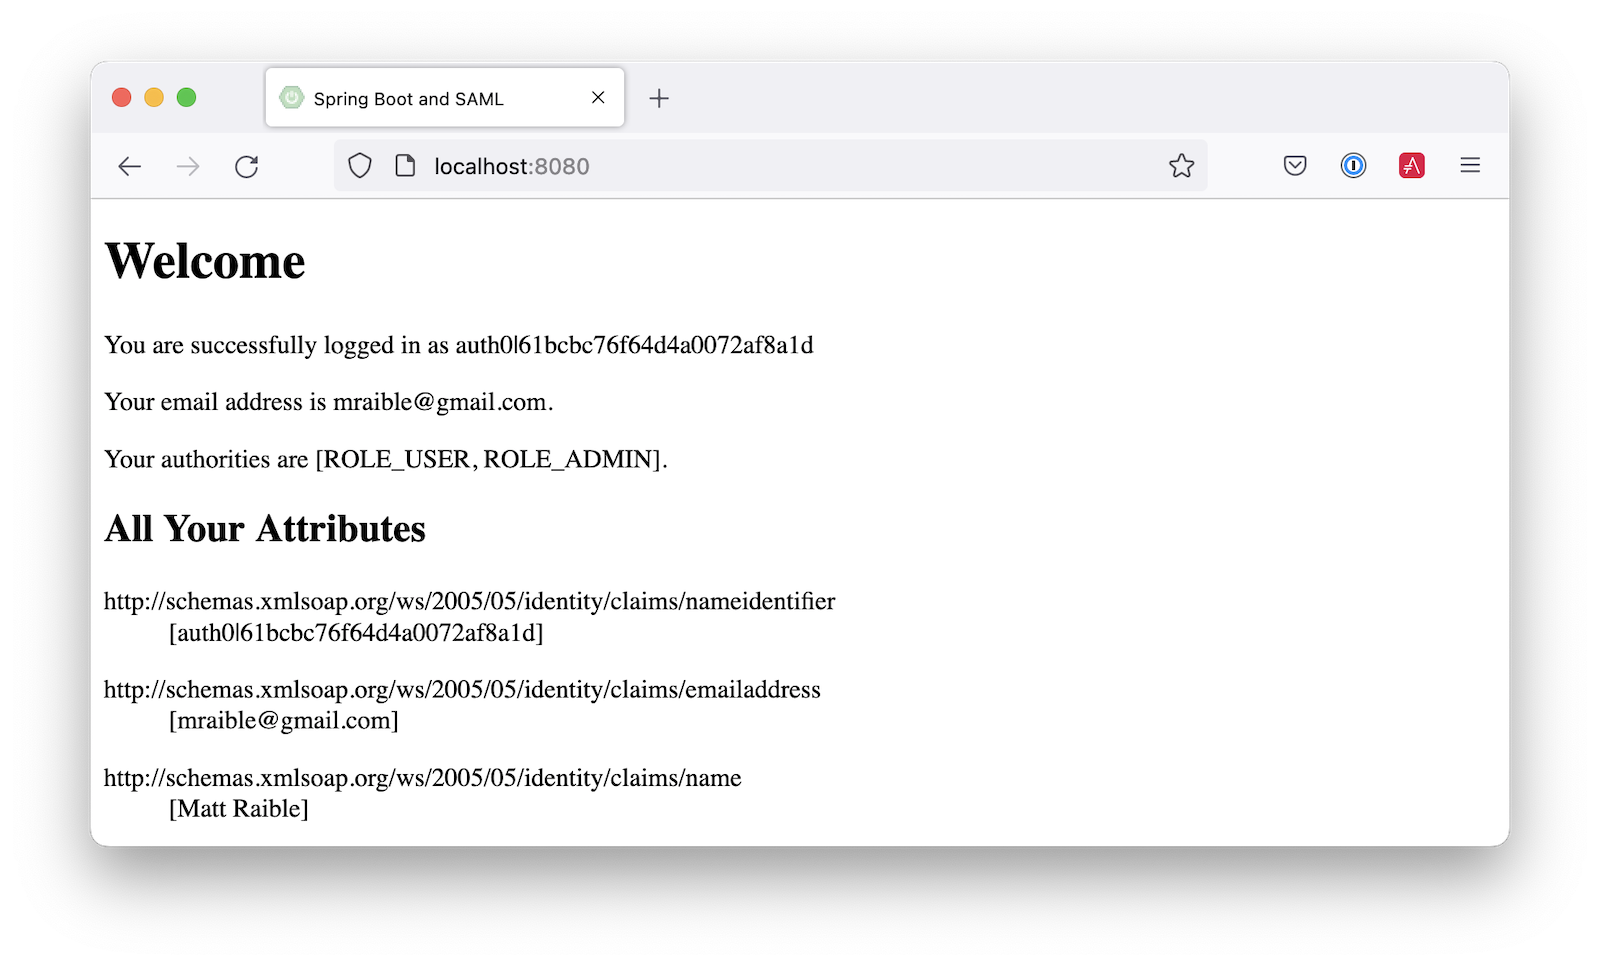
<h1>Welcome</h1>
<p>You are successfully logged in as <span sec:authentication="name"></span></p>
<p>Your email address is <span th:text="${emailAddress}"></span>.</p>
<p>Your authorities are <span sec:authentication="authorities"></span>.</p>
<h2>All Your Attributes</h2>
<dl th:each="userAttribute : ${userAttributes}">
<dt th:text="${userAttribute.key}"></dt>
<dd th:text="${userAttribute.value}"></dd>
</dl>
<form th:action="@{/logout}" method="post">
<button id="logout" type="submit">Logout</button>
</form>
</body>
</html>
- 创建一个
src/main/resources/application.yml文件,包含您在添加Okta上的SAML应用程序中复制的元数据URI。这个值应该以/sso/saml/metadata.
spring:
  security:
    saml2:
      relyingparty:
        registration:
          okta:
            assertingparty:
              metadata-uri: <your-metadata-uri>
- 然后,改变
build.gradle改为使用thymeleaf-extras-springsecurity6而不是thymeleaf-extras-springsecurity5并添加Spring Security SAML的依赖性。
implementation 'org.thymeleaf.extras:thymeleaf-extras-springsecurity6'
implementation 'org.springframework.security:spring-security-saml2-service-provider'
如果你是从GitHub克隆的,你只需要更新 application.yml以包括你的元数据URI。你可以删除其他属性,因为它们可能导致问题。
运行应用程序并进行认证
从你的IDE或使用命令行运行你的Spring Boot应用:
./gradlew bootRun
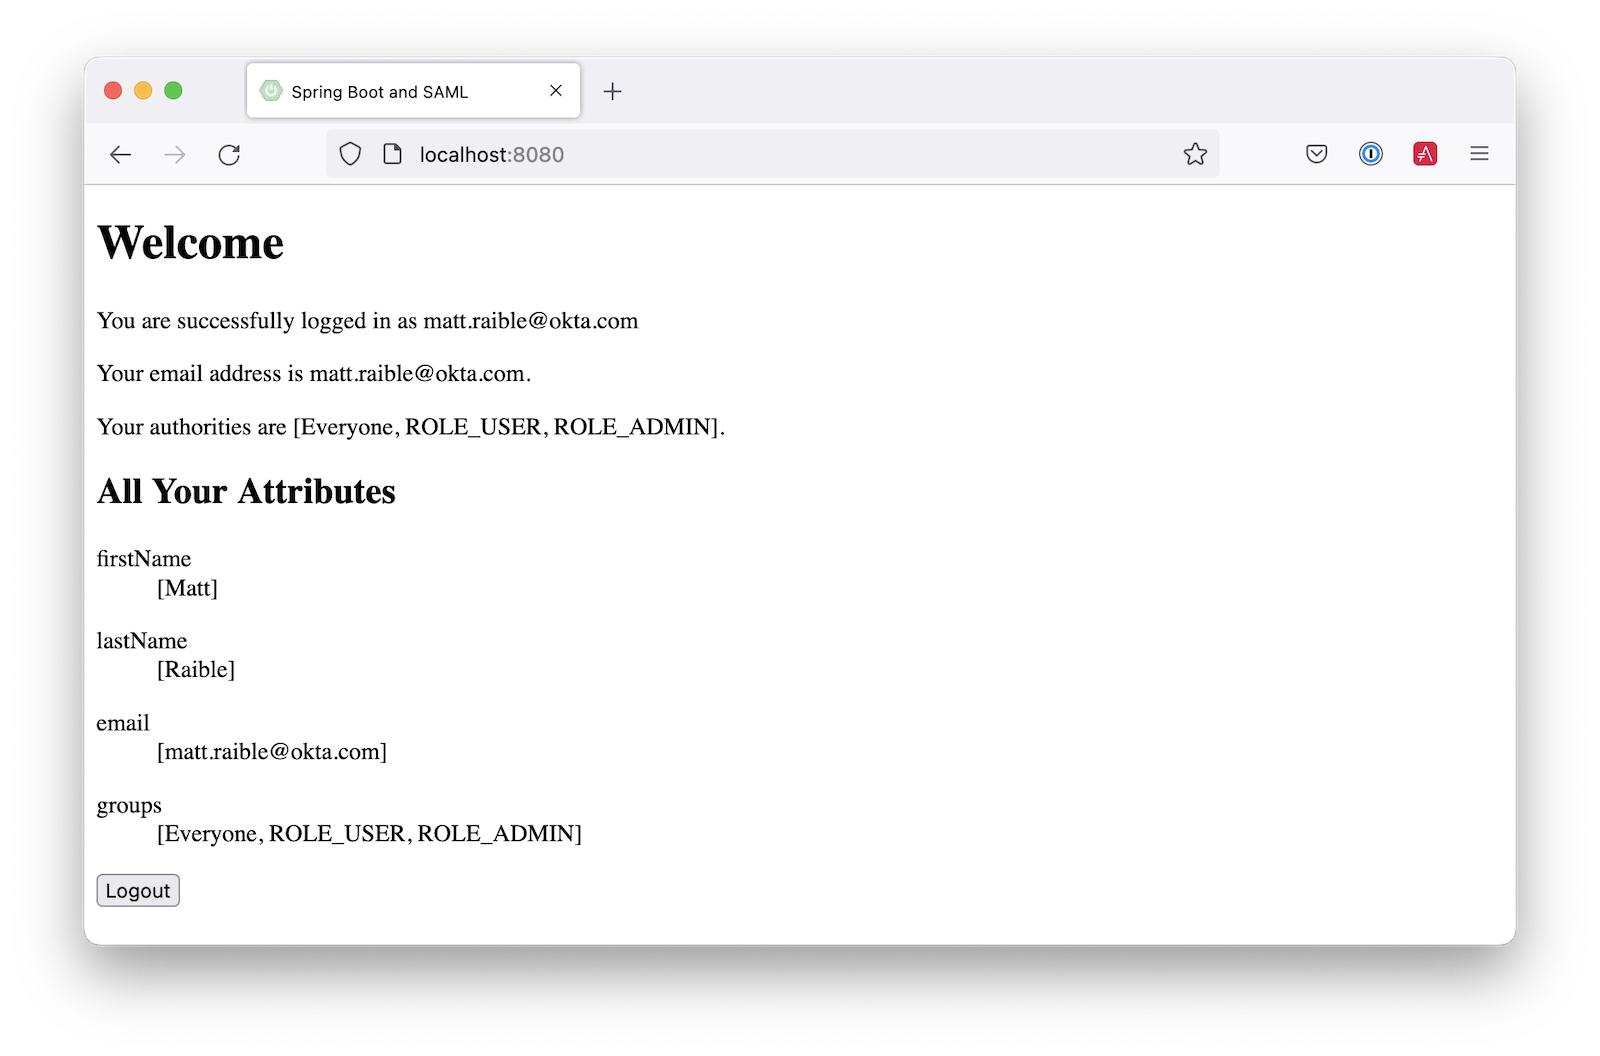
打开 http://localhost:8080在你喜欢的浏览器中打开,用你创建账户时使用的凭证登录。
你应该在浏览器中看到一个成功的结果:

如果你试图注销,就不会成功。让我们来解决这个问题。
增加一个注销功能
Spring Security的SAML支持有一个注销功能,需要花点时间来配置。首先,在Okta上编辑你的应用程序,并导航到通用>SAML设置>编辑。
继续到配置SAML步骤,显示高级设置。选择启用单一注销,并使用以下数值:
- Single Logout URL。
http://localhost:8080/logout/saml2/slo - SP发行者。
http://localhost:8080/saml2/service-provider-metadata/okta
你需要创建一个证书来签署流出的注销请求。你可以使用OpenSSL创建一个私钥和证书。至少用一个值回答其中一个问题,它应该可以工作:
openssl req -newkey rsa:2048 -nodes -keyout local.key -x509 -days 365 -out local.crt
将生成的文件复制到你的应用程序的 src/main/resources目录。在signing 和singlelogout 中配置 application.yml:
spring:
  security:
    saml2:
      relyingparty:
        registration:
          okta:
            assertingparty:
              ...
            signing:
              credentials:
                - private-key-location: classpath:local.key
                  certificate-location: classpath:local.crt
            singlelogout:
              binding: POST
              response-url: "{baseUrl}/logout/saml2/slo"
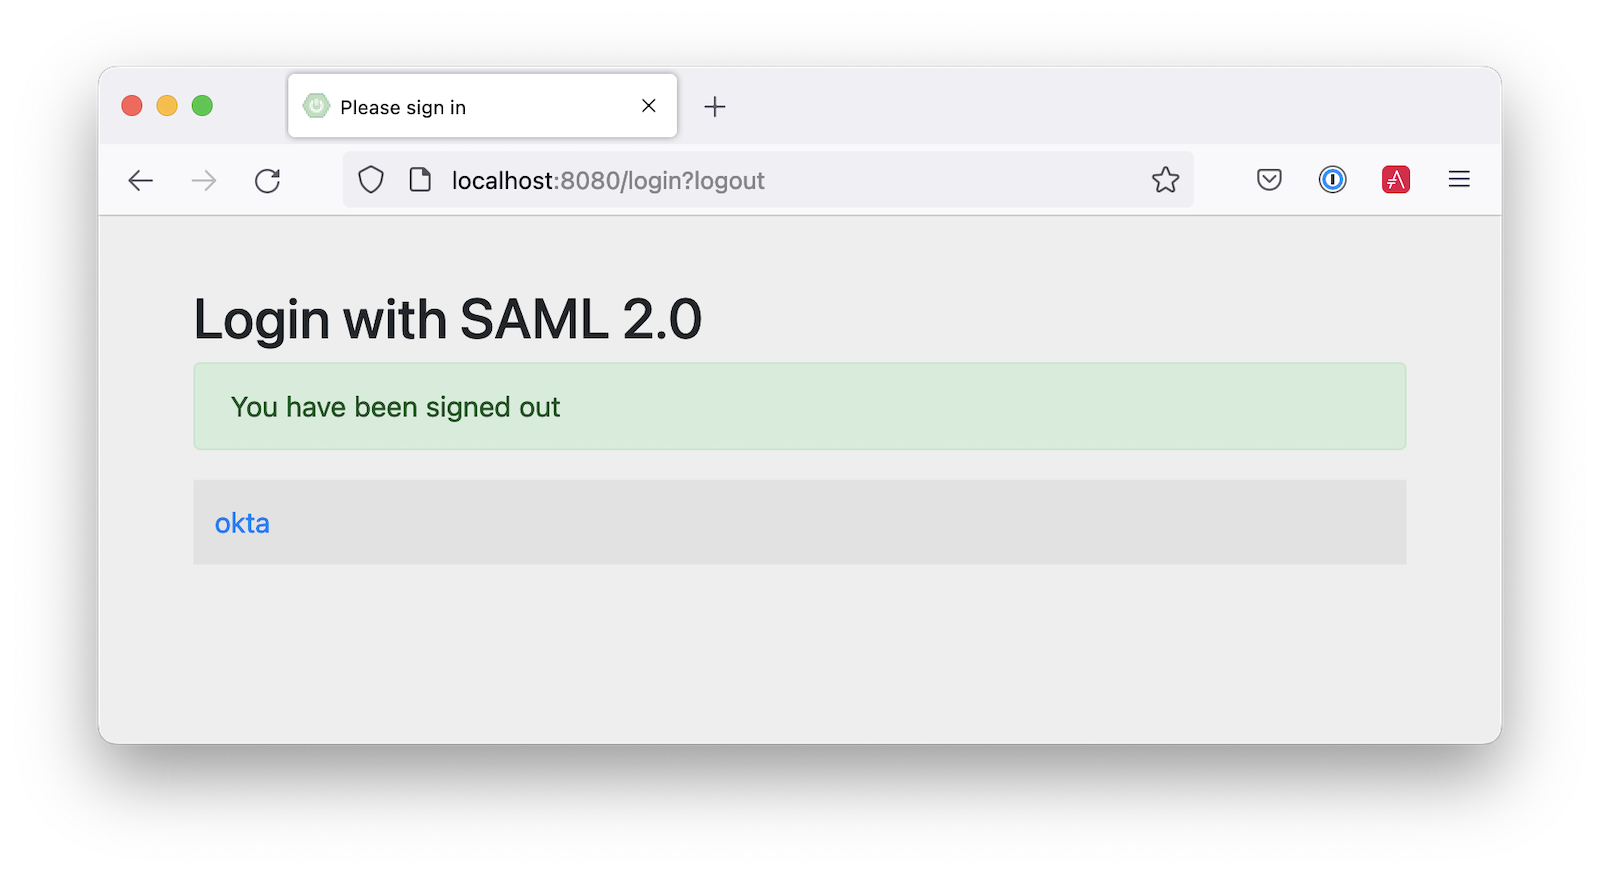
上传 local.crt到你的Okta应用程序并完成其配置。重新启动,注销按钮应该可以工作:
用Spring Security SAML定制当局
你可能会注意到当你登录时,结果页面显示你有一个 ROLE_USER权限。然而,当你给用户分配应用程序时,你给了Everyone 。 你可以在Okta上配置你的SAML应用程序,将用户的组作为一个属性发送。你也可以添加其他属性,如姓名和电子邮件。
编辑你的Okta应用程序的SAML设置,填写组属性声明部分:
- 名称:
groups - 名字的格式:
Unspecified - 过滤器:
Matches regex,并使用.*的值为
就在上面,你可以添加其他属性声明比如说:
- 电子邮件 >
user.email - 名 >
user.firstName - 姓氏 >
user.lastName
保存这些更改。
然后,创建一个SecurityConfiguration 类,该类覆盖了默认配置,并使用转换器将groups 属性中的值转换为Spring Security权限。
src/main/java/com/example/demo/SecurityConfiguration.java
package com.example.demo;

import java.util.HashSet;
import java.util.List;
import java.util.Set;

import org.springframework.context.annotation.Bean;
import org.springframework.context.annotation.Configuration;
import org.springframework.core.convert.converter.Converter;
import org.springframework.security.authentication.ProviderManager;
import org.springframework.security.config.annotation.web.builders.HttpSecurity;
import org.springframework.security.core.GrantedAuthority;
import org.springframework.security.core.authority.SimpleGrantedAuthority;
import org.springframework.security.saml2.provider.service.authentication.OpenSaml4AuthenticationProvider;
import org.springframework.security.saml2.provider.service.authentication.OpenSaml4AuthenticationProvider.ResponseToken;
import org.springframework.security.saml2.provider.service.authentication.Saml2AuthenticatedPrincipal;
import org.springframework.security.saml2.provider.service.authentication.Saml2Authentication;
import org.springframework.security.web.SecurityFilterChain;

import static org.springframework.security.config.Customizer.withDefaults;

@Configuration
public class SecurityConfiguration {

    @Bean
    SecurityFilterChain configure(HttpSecurity http) throws Exception {

        OpenSaml4AuthenticationProvider authenticationProvider = new OpenSaml4AuthenticationProvider();
        authenticationProvider.setResponseAuthenticationConverter(groupsConverter());

        // @formatter:off
        http
            .authorizeHttpRequests(authorize -> authorize
                .mvcMatchers("/favicon.ico").permitAll()
                .anyRequest().authenticated()
            )
            .saml2Login(saml2 -> saml2
                .authenticationManager(new ProviderManager(authenticationProvider))
            )
            .saml2Logout(withDefaults());
        // @formatter:on

        return http.build();
    }

    private Converter<OpenSaml4AuthenticationProvider.ResponseToken, Saml2Authentication> groupsConverter() {

        Converter<ResponseToken, Saml2Authentication> delegate =
            OpenSaml4AuthenticationProvider.createDefaultResponseAuthenticationConverter();

        return (responseToken) -> {
            Saml2Authentication authentication = delegate.convert(responseToken);
            Saml2AuthenticatedPrincipal principal = (Saml2AuthenticatedPrincipal) authentication.getPrincipal();
            List<String> groups = principal.getAttribute("groups");
            Set<GrantedAuthority> authorities = new HashSet<>();
            if (groups != null) {
                groups.stream().map(SimpleGrantedAuthority::new).forEach(authorities::add);
            } else {
                authorities.addAll(authentication.getAuthorities());
            }
            return new Saml2Authentication(principal, authentication.getSaml2Response(), authorities);
        };
    }
}
你也许可以删除 permitAll()因为这个问题最近在Spring Security中被修复了。
最后,修改你的 build.gradle文件,以强制使用最新版本的Open SAML,并与Spring Security 6一起使用:
repositories {
    ...
    maven { url "https://build.shibboleth.net/nexus/content/repositories/releases/" }
}

dependencies {
    constraints {
        implementation "org.opensaml:opensaml-core:4.1.1"
        implementation "org.opensaml:opensaml-saml-api:4.1.1"
        implementation "org.opensaml:opensaml-saml-impl:4.1.1"
    }
    ...
}
现在,如果你重新启动你的应用程序并登录,你应该看到你的用户组是授权的。欢呼吧!
增加对Auth0的支持
你知道Auth0也提供对SAML应用程序的支持吗?Auth0让配置变得更加容易,因为它的默认网络应用支持OIDC和SAML。
注册一个Auth0账户或用你现有的账户登录。导航到应用程序>创建应用程序>常规Web应用程序>创建。
选择 "设置"选项卡,将名称改为 Spring Boot SAML.添加 http://localhost:8080/login/saml2/sso/auth0作为允许的回调URL。
滚动到底部,展开高级设置,然后进入端点。复制SAML Metadata URL的值。你很快就会需要这个。选择保存更改。
如果你把你的应用程序配置为使用这些值,认证就会工作,但你将无法注销。滚动到页面顶部,选择Addons,并启用SAML。
选择 "设置"选项卡,将(有注释的)JSON改成如下内容:
{
  "logout": {
    "callback": "http://localhost:8080/logout/saml2/slo",
    "slo_enabled": true
  }
}
滚动到底部,点击启用。
改变你的 application.yml以使用auth0 ,而不是okta ,并将你的SAML元数据URL复制到其中:
spring:
  security:
    saml2:
      relyingparty:
        registration:
          auth0:
            assertingparty:
              metadata-uri: <your-auth0-metadata-uri>
            signing:
              credentials:
                - private-key-location: classpath:local.key
                  certificate-location: classpath:local.crt
            singlelogout:
              binding: POST
              response-url: "{baseUrl}/logout/saml2/slo"
重新启动你的应用程序,你应该能够用Auth0登录。
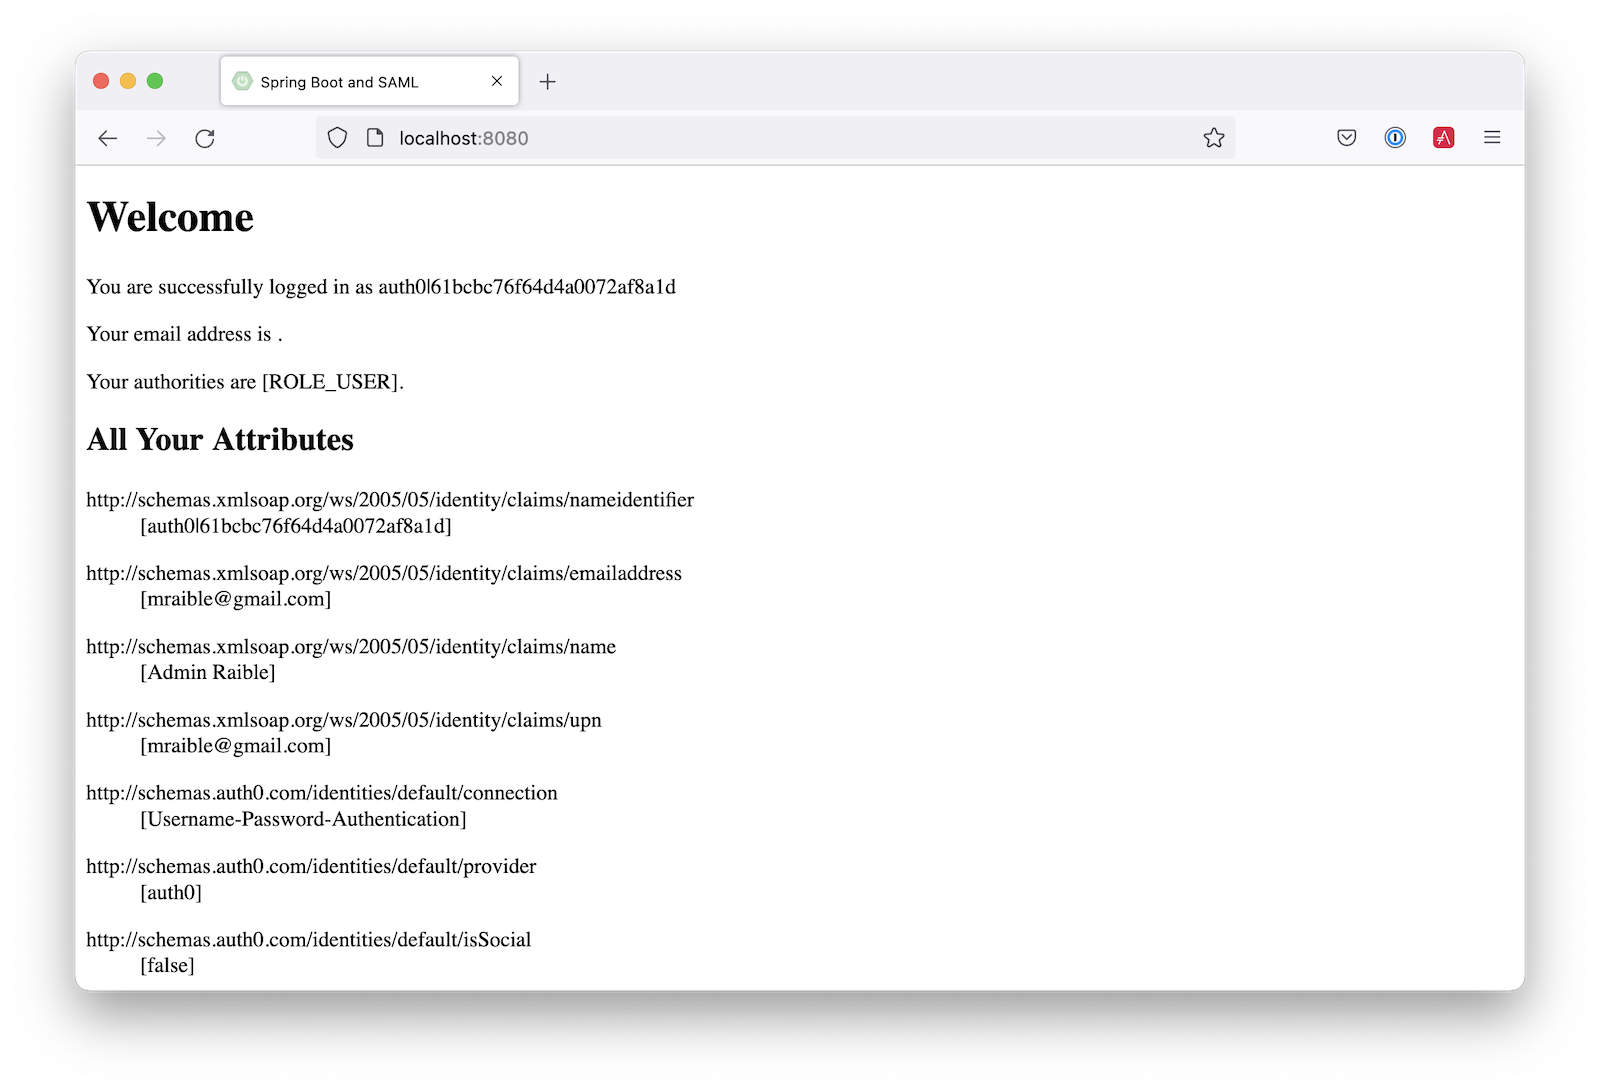
你可能会注意到,电子邮件和授权没有正确计算。这是因为Auth0的索赔名称已经改变。更新 SecurityConfiguration#groupsConverter()以允许Okta和Auth0的组名。
private Converter<OpenSaml4AuthenticationProvider.ResponseToken, Saml2Authentication> groupsConverter() {

    ...

    return (responseToken) -> {
        ...
        List<String> groups = principal.getAttribute("groups");
        // if groups is not preset, try Auth0 attribute name
        if (groups == null) {
            groups = principal.getAttribute("http://schemas.auth0.com/roles");
        }
        ...
    };
}
要使Auth0填充用户组,请导航到Auth Pipeline>Rules并创建一个新规则。选择 "空 "规则模板。提供一个有意义的名字,如Groups claim ,用下面的内容替换Script ,然后保存。
function(user, context, callback) {
  user.preferred_username = user.email;
  const roles = (context.authorization || {}).roles;

  function prepareCustomClaimKey(claim) {
    return `${claim}`;
  }

  const rolesClaim = prepareCustomClaimKey('roles');

  if (context.idToken) {
    context.idToken[rolesClaim] = roles;
  }

  if (context.accessToken) {
    context.accessToken[rolesClaim] = roles;
  }

  callback(null, user, context);
}
接下来,修改HomeController ,允许Auth0的电子邮件属性名称。
public class HomeController {

    @RequestMapping("/")
    public String home(@AuthenticationPrincipal Saml2AuthenticatedPrincipal principal, Model model) {
        model.addAttribute("name", principal.getName());
        String email = principal.getFirstAttribute("email");
        // if email is not preset, try Auth0 attribute name
        if (email == null) {
            email = principal.getFirstAttribute("http://schemas.xmlsoap.org/ws/2005/05/identity/claims/emailaddress");
        }
        model.addAttribute("emailAddress", email);
        model.addAttribute("userAttributes", principal.getAttributes());
        return "home";
    }

}
重新启动你的应用程序,登录,一切都应该按预期工作。
支持Okta和Auth0
您也可以同时支持Okta和Auth0!修改你的 application.yml修改为如下内容,Spring Security会提示你用哪种方式登录。的 &name和 *name值用于设置和检索YAML块,以避免重复。
spring:
  security:
    saml2:
      relyingparty:
        registration:
          auth0:
            assertingparty:
              metadata-uri: <your-auth0-metadata-uri>
            signing:
              credentials: &signing-credentials
                - private-key-location: classpath:local.key
                  certificate-location: classpath:local.crt
            singlelogout: &logout-settings
              binding: POST
              response-url: "{baseUrl}/logout/saml2/slo"
          okta:
            assertingparty:
              metadata-uri: <your-okta-metadata-uri>
            signing:
              credentials: *signing-credentials
            singlelogout: *logout-settings
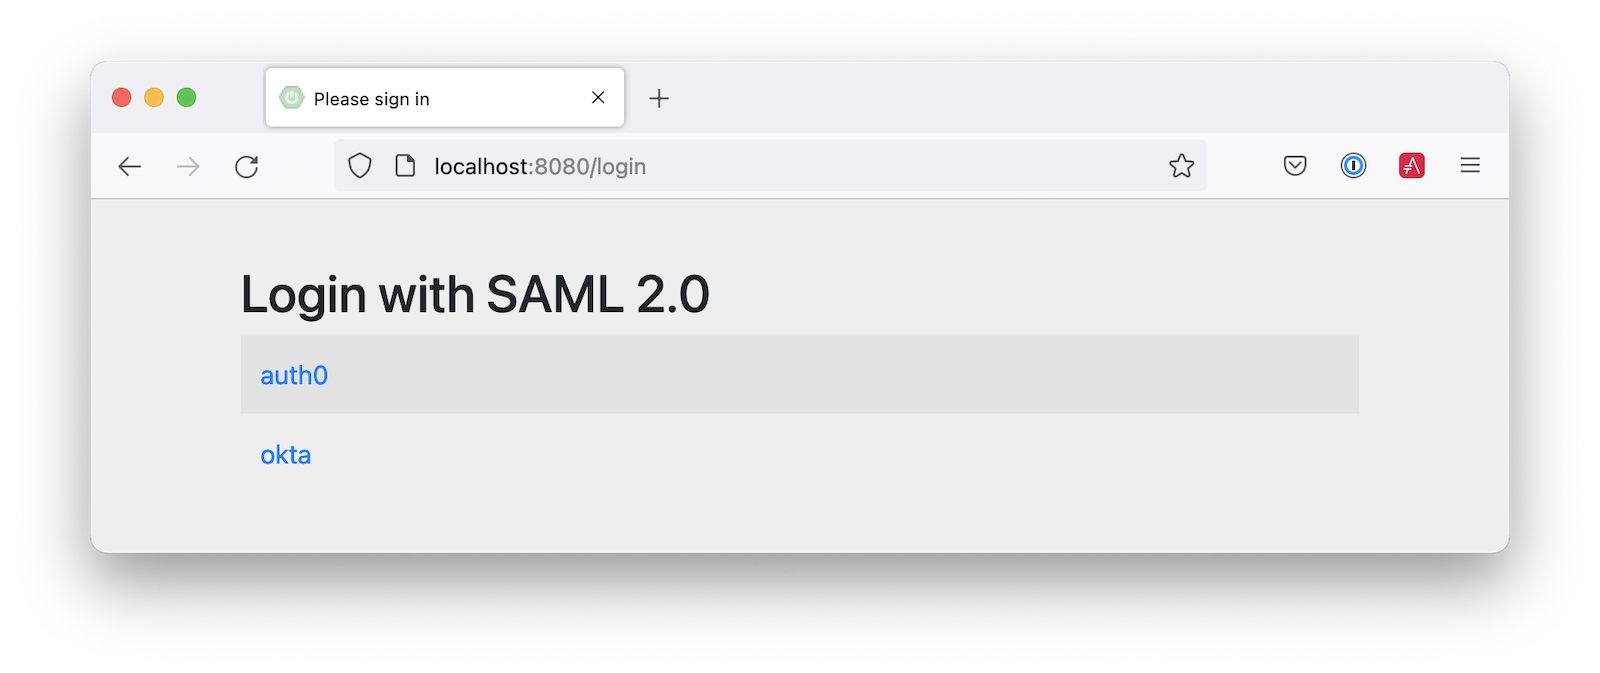
如果你用这些设置重启你的应用程序,当你第一次点击时,你会被提示使用这两个值 http://localhost:8080.
部署到生产中
看这个应用在生产环境中工作的一个快速方法是把它部署到Heroku。安装Heroku CLI并创建一个账户来开始。然后,按照下面的步骤准备和部署你的应用程序:
- 使用
heroku create,在Heroku上创建一个新的应用程序。 - 创建一个
system.properties文件,以强制执行Java 17。
java.runtime.version=17
- 创建一个
Procfile,指定如何运行你的应用程序:
web: java -Xmx256m -jar build/libs/*.jar --server.port=$PORT
- 提交你的修改:
git add .
git commit -m "Add Heroku configuration"
- 设置Gradle任务来构建你的应用程序:
heroku config:set GRADLE_TASK="bootJar"
- 使用Git部署到生产中:
git push heroku main
为了使认证与SAML一起工作,你需要更新你的Okta和Auth0应用程序,以使用你的Heroku应用程序的URL来代替 http://localhost:8080替换,只要适用。
了解更多关于Spring Boot和Spring Security的信息
我希望你喜欢学习如何使用Spring Security来添加SAML认证。集成就像配置元数据URI一样简单,只有当你添加注销功能时才会变得更加复杂。从你的身份提供者转换群组到权威机构的能力也是非常巧妙的!
