

在美国,26%的成年人至少有一种残疾。当你改善无障碍环境时,它对你现在和未来的客户有着巨大的影响。这也是一项法律要求。
检查无障碍性的最准确方法是在真实的设备上手动操作。但这需要专业的知识和大量的时间。这两点在前端团队中都很稀缺。
Twilio、Adobe和Shopify的团队使用自动和手动测试的组合。自动测试可以捕捉到常见的可访问性问题,而开发者只需付出较少的努力。人工QA则保留给那些需要人工关注的棘手问题。
有很多资源可以深入研究可及性原则,所以我们不会在这里讨论。这篇文章告诉你如何用Storybook自动进行可及性测试。这是一个实用的方法,可以找到并修复你可能遇到的大多数问题。
为什么是自动化?
在我们开始之前,让我们研究一下常见的残疾类型:视觉、听觉、移动性、认知、语言和神经系统。这些用户残疾产生的应用程序要求,如:
- ⌨ 键盘导航
- 🗣 屏幕阅读器支持
- 👆 触摸友好
- 🎨 足够高的色彩对比度
- ⚡️ 减少运动
- 🔍 缩放
在过去,你会通过检查浏览器、设备和读屏器的组合中的每个组件来验证这些要求。但这是不切实际的,因为应用程序有几十个组件,而且在不断地更新用户界面。
自动化加速了你的工作流程
自动工具根据一套基于WCAG规则和其他行业公认的最佳实践的启发式方法来审核渲染的DOM。它们作为第一线的质量保证,以捕捉公然违反无障碍性的行为。
例如,Axe平均能自动发现57%的WCAG问题。这使团队能够将他们的专家资源集中在需要人工审查的更复杂的问题上。
许多团队使用Axe库,因为它可以与大多数现有的测试环境整合。例如,Twilio Paste团队使用jest-axe集成。而Shopify Polaris & Adobe Spectrum团队则使用Storybook插件版本。
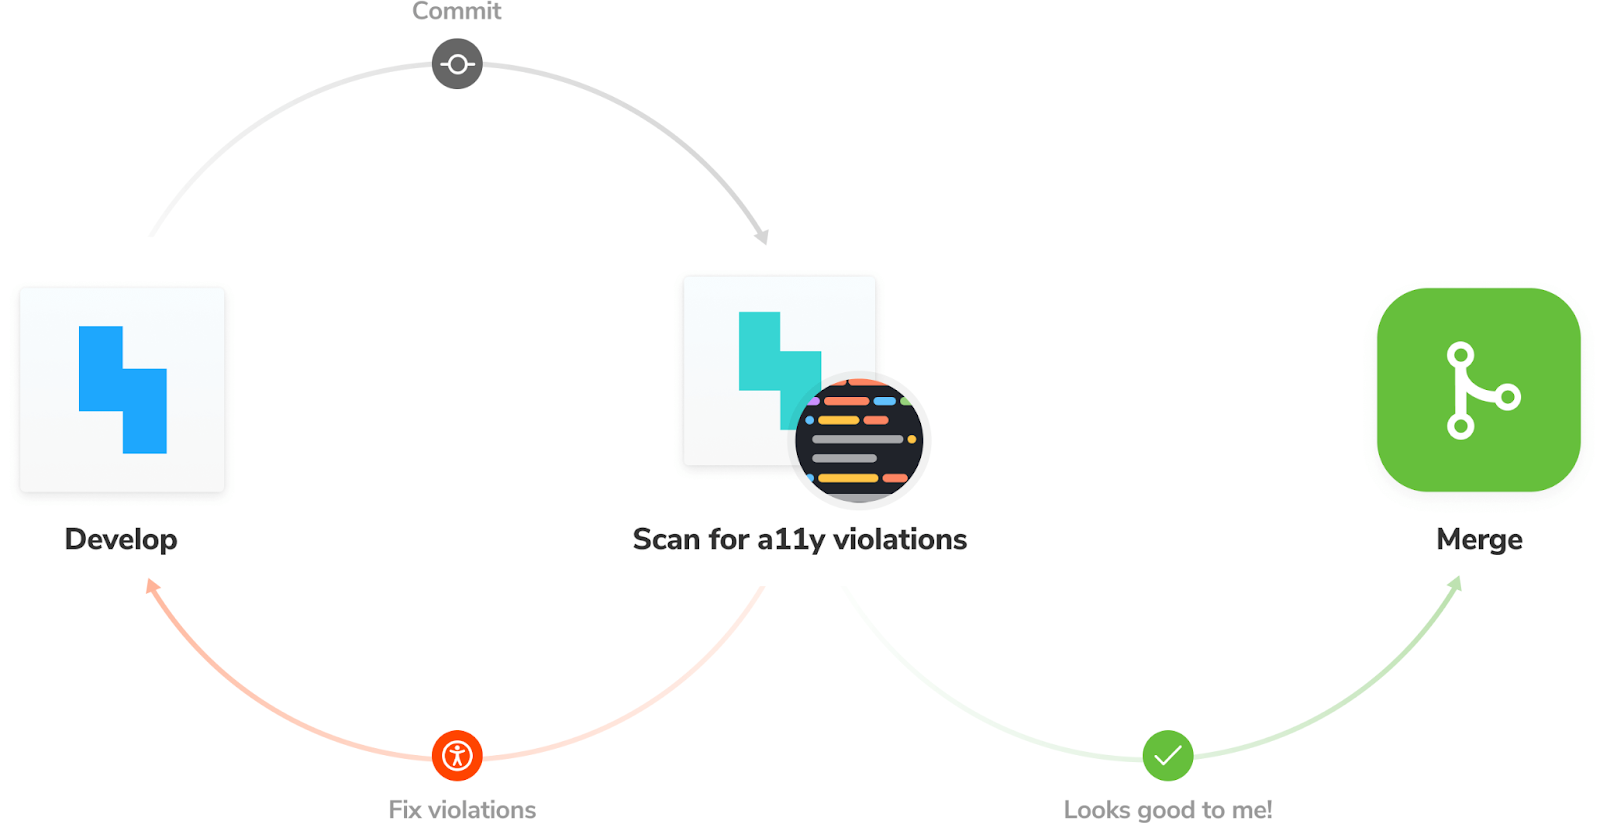
通过在整个开发过程中运行这些检查,你可以缩短反馈回路,更快地修复问题。以下是工作流程的样子。
- 👨🏽💻 在开发过程中:使用Storybook一次专注于一个组件。使用A11y插件来模拟视觉缺陷,并在组件层面上运行可访问性审计。
- ✅对于QA:将Axe审计整合到你的功能测试管道中。在所有的组件上运行检查以捕捉回归。
教程
让我们看看这个工作流程的运作。我们将使用我在之前的文章中介绍的任务箱应用程序。拿到代码并跟着做。
安装可访问性附加组件
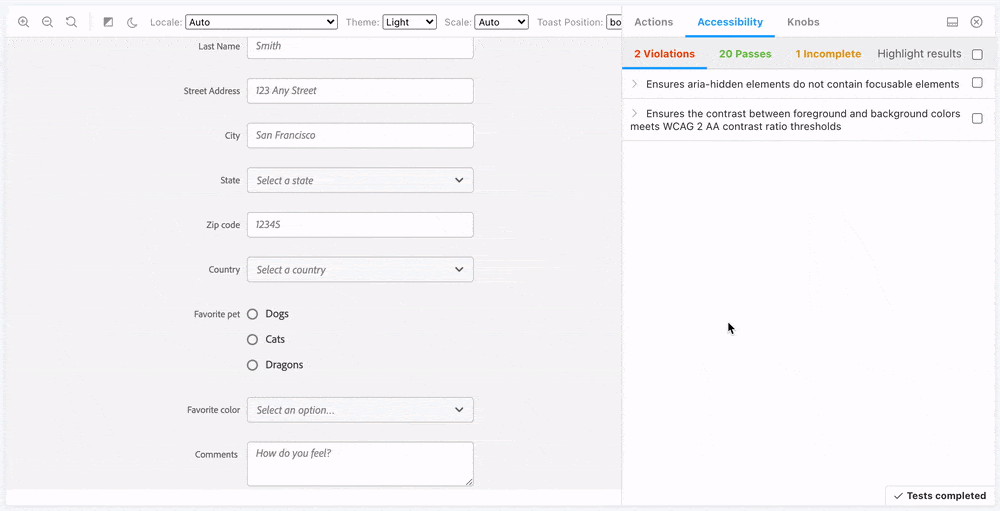
Storybook的辅助功能在活动故事上运行Axe。它将测试结果显示在一个面板上,并概述了所有有违规行为的DOM节点。
要安装该插件,请运行:yarn add -D @storybook/addon-a11y 。然后,在你的.storybook/main.js ,将'@storybook/addon-a11y' 添加到addons阵列中。
// .storybook/main.js
const path = require('path');

const toPath = (_path) => path.join(process.cwd(), _path);

module.exports = {
 stories: ['../src/**/*.stories.mdx', '../src/**/*.stories.@(js|jsx|ts|tsx)'],
 addons: [
   '@storybook/addon-links',
   '@storybook/addon-essentials',
   '@storybook/preset-create-react-app',
   '@storybook/addon-a11y',
 ],
 webpackFinal: async (config) => {...},
};
在编码时测试可访问性
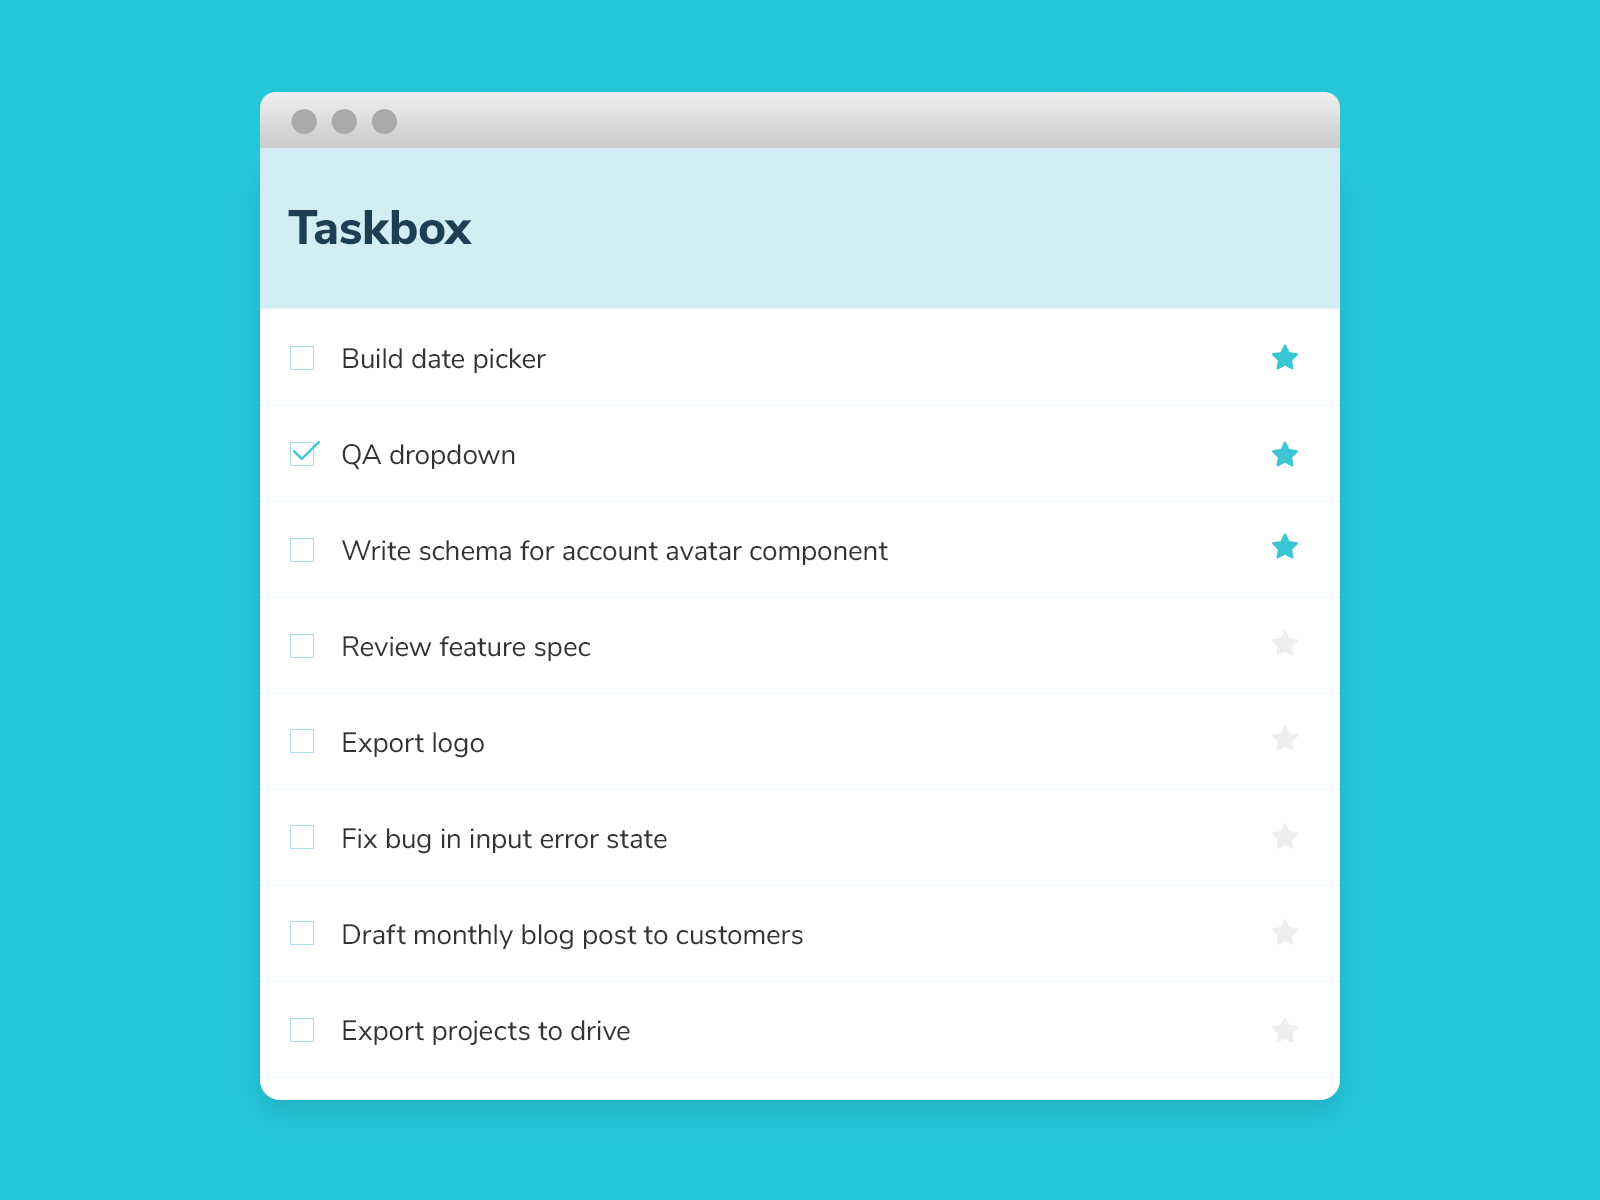
在以前的 博文中,我们学习了如何隔离一个组件并将其所有的用例作为故事来捕捉。例如,下面是任务组件的所有故事。在开发阶段,你可以循环浏览每个故事,以验证组件的外观和发现任何可访问性问题:
// src/components/Task.stories.js
import React from 'react';
import { Task } from './Task';

export default {
 component: Task,
 title: 'Task',
 argTypes: {
   onArchiveTask: { action: 'onArchiveTask' },
   onTogglePinTask: { action: 'onTogglePinTask' },
   onEditTitle: { action: 'onEditTitle' },
 },
};

const Template = (args) => <Task {...args} />;

export const Default = Template.bind({});
Default.args = {
 task: {
   id: '1',
   title: 'Buy milk',
   state: 'TASK_INBOX',
 },
};

export const Pinned = Template.bind({});
Pinned.args = {
 task: {
   id: '2',
   title: 'QA dropdown',
   state: 'TASK_PINNED',
 },
};

export const Archived = Template.bind({});
Archived.args = {
 task: {
   id: '3',
   title: 'Write schema for account menu',
   state: 'TASK_ARCHIVED',
 },
};

const longTitleString = `This task's name is absurdly large. In fact, I think if I keep going I might end up with content overflow. What will happen? The star that represents a pinned task could have text overlapping. The text could cut-off abruptly when it reaches the star. I hope not!`;

export const LongTitle = Template.bind({});
LongTitle.args = {
 task: {
   id: '4',
   title: longTitleString,
   state: 'TASK_INBOX',
 },
};
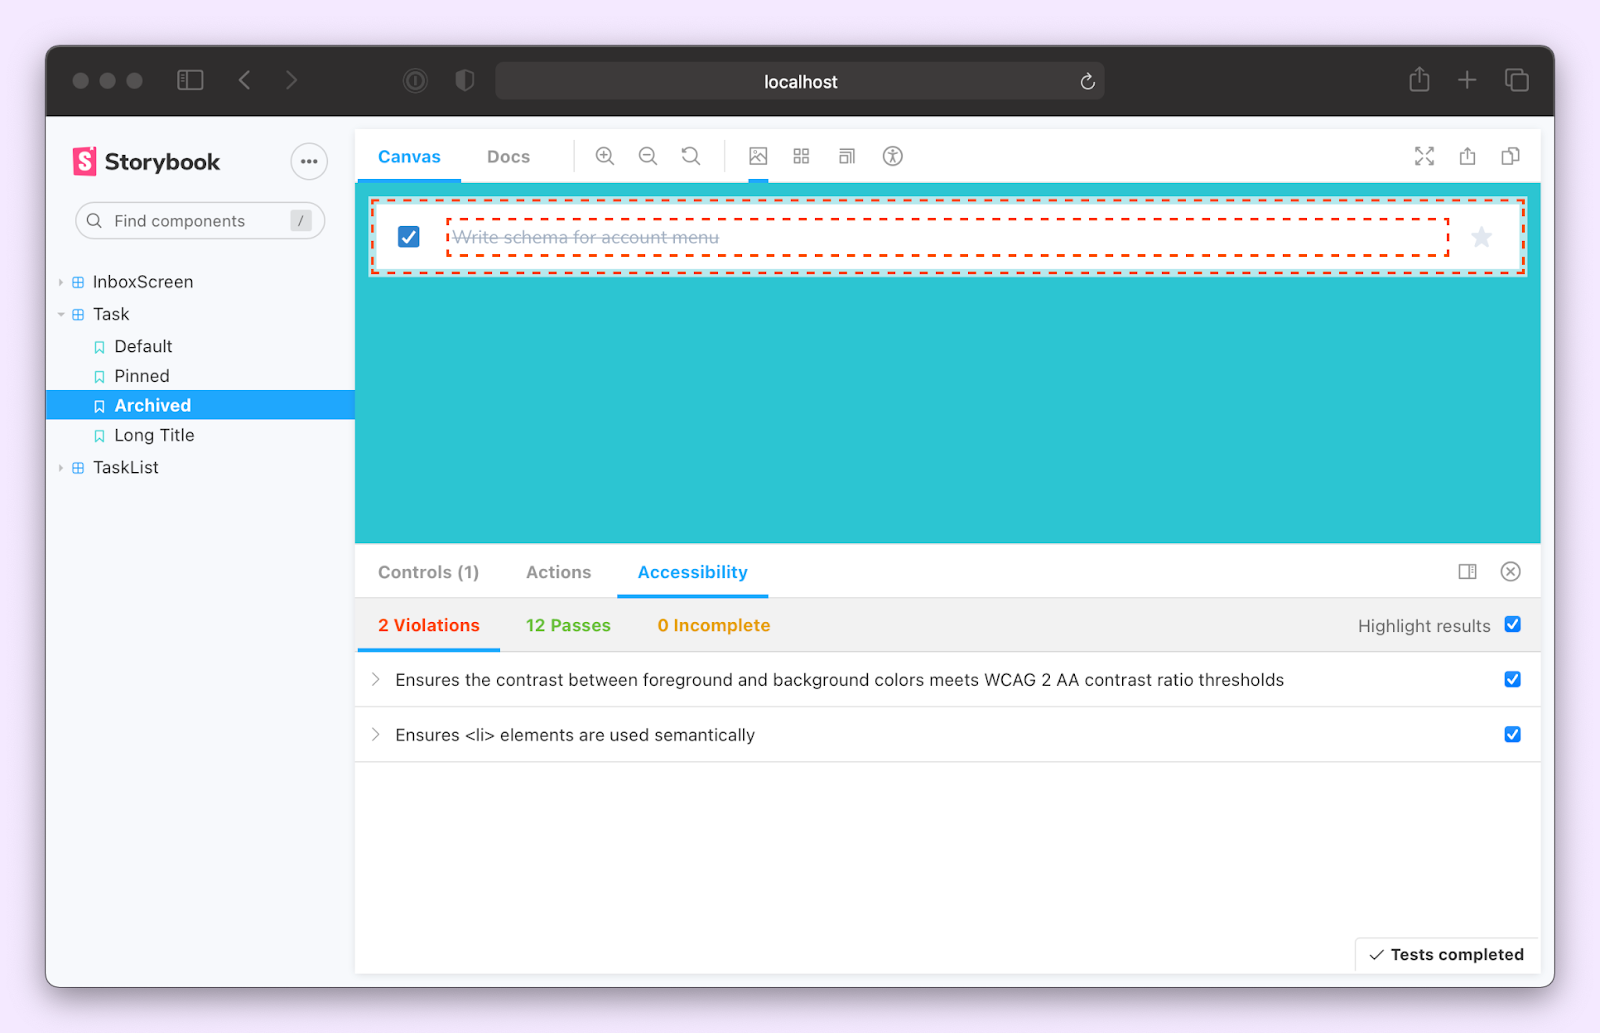
注意附加组件是如何发现两个违规行为的。第一个,"确保前景和背景颜色之间的对比度符合WCAG 2 AA对比度阈值",是针对存档状态的。从本质上讲,它的意思是文本和背景之间没有足够的对比。我们可以通过将文字颜色改为稍深的灰色来解决这个问题--从gray.400 到gray.600:
// src/components/Task.js
import React from 'react';
import PropTypes from 'prop-types';
import {
 Checkbox,
 Flex,
 IconButton,
 Input,
 Box,
 VisuallyHidden,
} from '@chakra-ui/react';
import { StarIcon } from '@chakra-ui/icons';

export const Task = ({
 task: { id, title, state },
 onArchiveTask,
 onTogglePinTask,
 onEditTitle,
 ...props
}) => (

 // code omitted for brevity

   <Box width="full" as="label">
     <VisuallyHidden>Edit</VisuallyHidden>
     <Input
       variant="unstyled"
       flex="1 1 auto"
       color={state === 'TASK_ARCHIVED' ? 'gray.600' : 'gray.700'}
       textDecoration={state === 'TASK_ARCHIVED' ? 'line-through' : 'none'}
       fontSize="sm"
       isTruncated
       value={title}
       onChange={(e) => onEditTitle(e.target.value, id)}
     />
   </Box>

   // code omitted for brevity
 </Flex>
);

Task.propTypes = {
 task: PropTypes.shape({
   id: PropTypes.string.isRequired,
   title: PropTypes.string.isRequired,
   state: PropTypes.string.isRequired,
 }),
 onArchiveTask: PropTypes.func.isRequired,
 onTogglePinTask: PropTypes.func.isRequired,
 onEditTitle: PropTypes.func.isRequired,
};
第二个违规行为,"确保<li> 元素在语义上被使用",表明DOM结构不正确。任务组件渲染了一个<li> 元素。然而,它的故事中并没有包裹着一个<ul> 。这是有道理的。这些故事是针对任务组件的。<ul> 实际上是由TaskList提供的。所以DOM结构在TaskList故事中得到了验证。因此,忽略这个错误是安全的。事实上,我们可以对所有的任务故事禁用这个规则:
// src/components/Task.stories.js
import React from 'react';
import { Task } from './Task';

export default {
 component: Task,
 title: 'Task',
 argTypes: {
   onArchiveTask: { action: 'onArchiveTask' },
   onTogglePinTask: { action: 'onTogglePinTask' },
   onEditTitle: { action: 'onEditTitle' },
 },
 parameters: {
   a11y: {
     config: {
       rules: [{ id: 'listitem', enabled: false }],
     },
   },
 },
};

// remaining code omitted for brevity
现在你可以对所有其他组件重复这个过程。
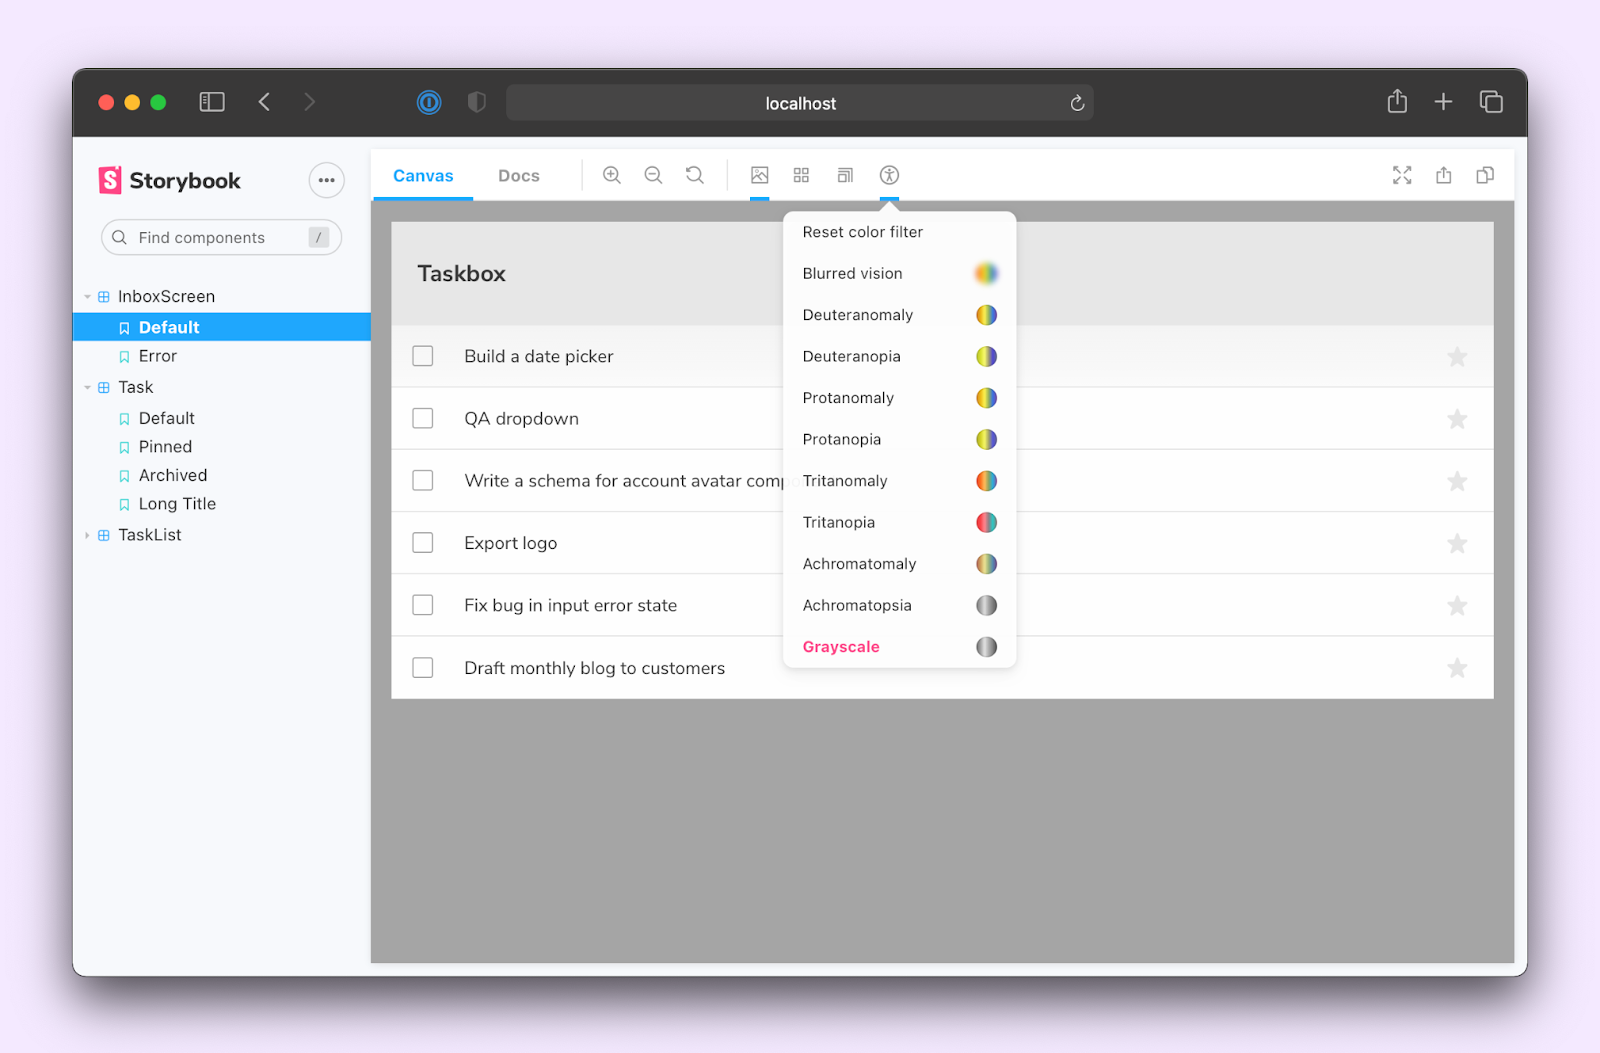
将可访问性测试整合到Storybook中,可以简化你的开发工作流程。当你在一个组件上工作时,你不必在不同的工具之间跳跃。你所需要的一切就在浏览器中。你甚至可以模拟视觉障碍,如去势、原形或三眼症:
防止退步
组件是相互依赖的--一个组件的变化可能会意外地破坏其他组件。为了确保不会出现违反可访问性的情况,我们需要在合并修改之前对所有的组件运行Axe。
故事是以基于ES6模块的格式编写的,允许你在其他测试框架中重复使用它们。在上一篇文章中,我们研究了将 故事导入Jest并验证与测试库的交互。下面是InboxScreen的测试文件的样子:
// src/InboxScreen.test.js
import React from 'react';
import '@testing-library/jest-dom/extend-expect';
import {
 render,
 waitFor,
 cleanup,
 within,
 fireEvent,
} from '@testing-library/react';
import { composeStories } from '@storybook/testing-react';
import { getWorker } from 'msw-storybook-addon';
import * as stories from './InboxScreen.stories';

describe('InboxScreen', () => {
 afterEach(() => {
   cleanup();
 });

 // Clean up after all tests are done, preventing this
 // interception layer from affecting irrelevant tests
 afterAll(() => getWorker().close());

 const { Default } = composeStories(stories);

 it('should pin a task', async () => {
   const { queryByText, getByRole } = render(<Default />);

   await waitFor(() => {
     expect(queryByText('You have no tasks')).not.toBeInTheDocument();
   });

   const getTask = () => getByRole('listitem', { name: 'Export logo' });

   const pinButton = within(getTask()).getByRole('button', { name: 'pin' });

   fireEvent.click(pinButton);

   const unpinButton = within(getTask()).getByRole('button', {
     name: 'unpin',
   });

   expect(unpinButton).toBeInTheDocument();
 });

 // More interaction tests
 it('should archive a task', async () => {...});
 it('should edit a task', async () => {...});
});
同样地,我们可以使用Jest Axe集成来运行组件的可访问性测试。让我们从安装它开始。yarn add -D jest-axe
接下来,添加一个it 块,运行Axe并检查是否有违规。Jest-axe还为你提供了一个方便的断言,toHaveNoViolations ,通过一个函数调用来验证:
// src/InboxScreen.test.js
import React from 'react';
import '@testing-library/jest-dom/extend-expect';
import {
 render,
 waitFor,
 cleanup,
 within,
 fireEvent,
} from '@testing-library/react';
import { axe, toHaveNoViolations } from 'jest-axe';
import { composeStories } from '@storybook/testing-react';
import { getWorker } from 'msw-storybook-addon';
import * as stories from './InboxScreen.stories';

expect.extend(toHaveNoViolations);

describe('InboxScreen', () => {
 afterEach(() => {
   cleanup();
 });

 // Clean up after all tests are done, preventing this
 // interception layer from affecting irrelevant tests
 afterAll(() => getWorker().close());

 const { Default } = composeStories(stories);

 // Run axe
 it('Should have no accessibility violations', async () => {
   const { container, queryByText } = render(<Default />);

   await waitFor(() => {
     expect(queryByText('You have no tasks')).not.toBeInTheDocument();
   });

   const results = await axe(container);
   expect(results).toHaveNoViolations();
 });

 it('should pin a task', async () => {...});
 it('should archive a task', async () => {...});
 it('should edit a task', async () => {...});
});
运行yarn test 来启动Jest。它将执行所有的交互测试并运行可访问性审计。现在你可以在修改代码时运行整个测试套件。允许你捕捉回归:

我们已经研究了如何将自动可及性测试分层到UI开发工作流程中。这并不能使你的应用程序完全无障碍。你仍然需要用辅助技术测试界面,如VoiceOver或NVDA。然而,自动化确实可以节省你的时间,并及早发现问题。
总结
网络无障碍性并不容易--要在无障碍性与即将到来的最后期限、商业目标和技术债务之间取得平衡,这可能会让人不知所措。
像Axe和Storybook Accessibility addon这样的工具整合到你现有的开发工作流程中,并提供一个快速的反馈回路。你在构建用户界面时发现并修复问题,从而节省时间。更重要的是,使界面无障碍化会给你的所有用户带来更好的体验。
