

电子邮件通信是大多数企业的一个重要方面。在这篇文章中,你将研究使用Twilio SendGrid电子邮件API发送电子邮件的基本知识,以及使用Handlebars模板语言发送模板化的电子邮件。最后,你将把它放在一个基于模板发送电子邮件的示例项目中来完成。
设置SendGrid
API密钥
首先要做的是。为了使用SendGrid的API,你需要一个API密钥。通过进入SendGrid仪表板,点击左侧菜单上的设置→API密钥,并点击右上角的"创建API密钥 "按钮来创建一个:
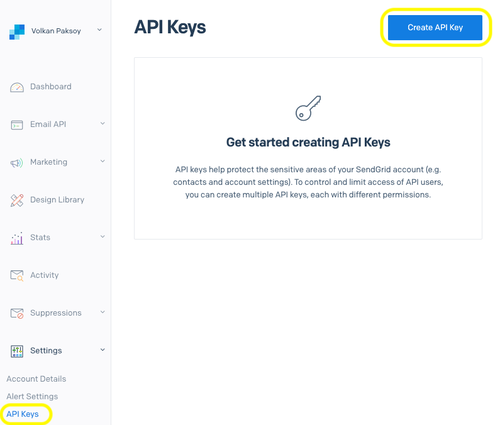
接下来,给你的密钥起个名字并选择权限。你可以选择 "限制访问"来挑选个别权限。

为简洁起见,在本教程中,选择完全访问。选择完全访问后,点击"创建和查看",完成钥匙创建过程。
最后一步很关键。密钥将被显示一次,而且只有一次:
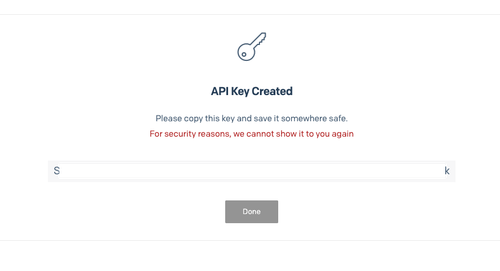
当钥匙显示时,点击钥匙,它将复制到剪贴板上。然后,把它保存在一个安全的地方,如密码管理器,并点击完成。
发件人电子邮件
你发送的每封电子邮件都必须从一个经过验证的电子邮件地址或域名发送。要创建一个发件人,请点击左侧菜单中的发件人验证。
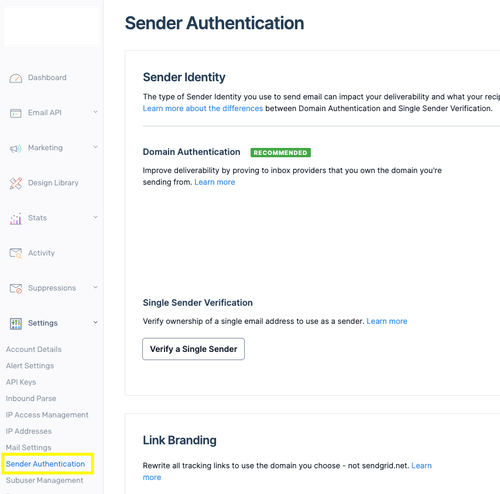
在这里,你可以验证一个单一的地址或整个域。验证整个域名需要访问DNS设置,所以为了保持简单,你将使用单一地址验证。
要做到这一点,请在 "发件人验证"页面上点击 "验证单个发件人"(如果你没有任何先前验证过的电子邮件地址,则点击 "开始")。
你应该登陆到创建一个发件人表格。
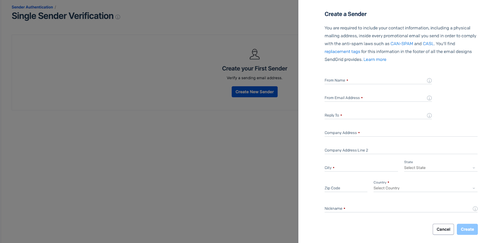
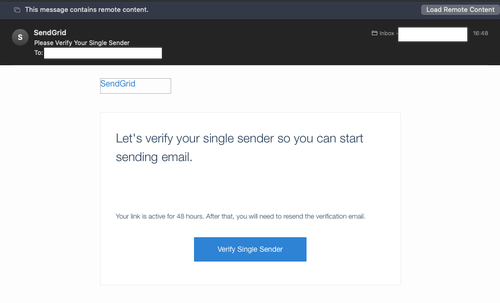
填写细节并点击创建,下一步是等待验证邮件的到来:

它应该马上出现在你的邮箱里。找到该邮件并点击邮件中的 "验证单一发件人"按钮:
这将使你进入确认页面:
现在你有了一个API密钥和一个有效的发件人地址,你就可以继续发送电子邮件了。
用SendGrid发送电子邮件
现在你有了一个API密钥,你将创建一个简单的.NET应用程序来测试发送电子邮件。(你可以在这个GitHub仓库中找到完整的源代码)。
首先,打开一个终端并运行以下命令来创建一个空白的Console应用程序并添加SendGrid NuGet包:
dotnet new console -o ConsoleMailer
cd ConsoleMailer
dotnet add package SendGrid
API密钥是你应该保密的敏感信息,所以你应该避免对其进行硬编码或将其提交到源代码控制。这就是为什么你应该将API密钥存储在环境变量或安全的金库服务中。为了保持简单,你将把API密钥存储在环境变量中。
对于macOS和Linux,像这样设置环境变量:
export SENDGRID_API_KEY={your key}
如果你在Windows或其他操作系统上使用PowerShell,使用这个命令:
$Env:SENDGRID_API_KEY = "{your key}"
如果你在Windows上使用CMD,使用这个命令:
set "SENDGRID_API_KEY={your key}"
用你之前复制的API密钥秘密替换{your key} 。
在你喜欢的编辑器中打开该项目,找到Program.cs文件。用以下代码更新Program.cs文件:
using SendGrid;
using SendGrid.Helpers.Mail;

var apiKey = Environment.GetEnvironmentVariable("SENDGRID_API_KEY");
var client = new SendGridClient(apiKey);
var from = new EmailAddress("{ Your verified email address }", "{ Sender display name }");
var to = new EmailAddress("{ Recipient email address }", "{ Recipient display name }");
上面的代码块将在本文中使用的例子中共享。你需要用你之前创建的SendGrid Single Sender电子邮件地址替换{ Your verified email address } ,并用你喜欢的任何名字替换{ Sender display name } 。该名称将显示给收件人。然后将{ Recipient email address} 和{ Recipient display name} 替换成你想要的收件人电子邮件地址和名字。
然后,附加以下代码块:
var subject = "Testing the API key";
var plainTextContent = "Testing a simple email";
var htmlContent = "<strong>Testing simple email in HTML</strong>";
var msg = MailHelper.CreateSingleEmail(from, to, subject, plainTextContent, htmlContent);

var response = await client.SendEmailAsync(msg);
if (response.IsSuccessStatusCode)
{
    Console.WriteLine("Email has been sent successfully");
}
收到的电子邮件看起来像这样:

MailHelper 类中的方法,如CreateSingleEmail ,都会创建一个SendGridMessage 对象。你也可以自己创建一个SendGridMessage 对象,但是MailHelper 类提供了一些方便的方法,为你在常见的情况下做这件事。
动态电子邮件模板
尽管电子邮件内部的数据在每封电子邮件中都会发生变化(例如收件人姓名),但大多数电子邮件都是基于一些模板的。SendGrid有一个强大的模板设计器,你可以用它来创建动态模板,但你也可以自己用代码编写模板。
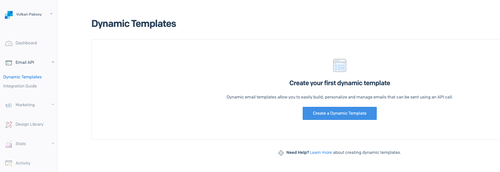
为了创建你的模板,请导航到SendGrid仪表板,点击电子邮件API,然后在左边的菜单上点击动态模板。在动态模板界面,点击"创建一个动态 "模板按钮:
给模板起个名字,然后点击创建:

模板的一个很好的特点是它们是有版本的。因此,你可以创建一个新的版本而不丢失模板的前一个版本。这样,你就可以很容易地回滚到一个较早的版本。
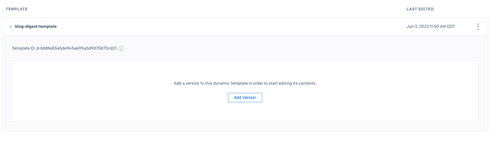
通过点击添加版本来创建你的第一个版本:
SendGrid有很多内置的电子邮件模板:

在这个例子中,你将从头开始创建一个模板。因此,点击 "你的电子邮件设计",然后点击 "空白模板":

现在你必须选择编辑器。这里你有两个选项。设计编辑器和代码编辑器。如果你已经有了一个电子邮件模板的HTML,你可以简单地切换到代码编辑器,并开始使用它作为一个起点。
在这个例子中,你将使用设计器,它在很大程度上简化了电子邮件模板的设计。你可以将模块拖放到设计器区域。你甚至可以直接在设计器中测试你的电子邮件:
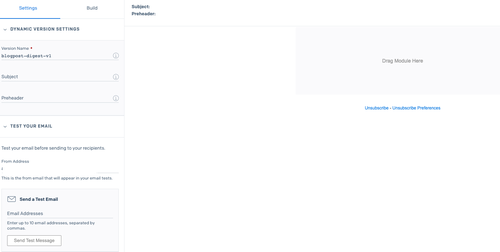
你还可以使用测试数据来确保它看起来不错,同时还可以进行设计。
例如,为了测试这个使用recipientName 变量作为占位符的设计,你可以点击预览和显示测试数据。然后你可以把你的变量值输入为JSON,并看到输出:

在这一点上,你可以通过使用基本模块,如文本、图像、HTML代码、分隔符等,按照你的喜好设计电子邮件模板。
动态 "的部分来自于使用占位符的能力,然后可以用实际值来替换。为了理解这一点,你需要了解SendGrid的模板支持是如何工作的。SendGrid电子邮件支持Handlebar模板语言(包括交易模板和营销活动设计)。接下来,你将研究Handlebars的基础知识,以了解你如何利用它来创建动态数据驱动的模板。
Handlebars 模板语言
Handlebars是一种常用的模板语言。它在创建动态模板方面很简单,而且相当强大。
变量替换
简单的变量替换在动态模板中被广泛使用。如上一节所示,你可以在你的模板中放置一个变量,把它用在开头和结尾的双弯大括号之间,如:
Hello, {{recipientName}}
当你使用这样的模板时,你需要提供包括该值的数据,否则,它就会被留为空白。好的是至少占位符还是被替换成了一个空字符串,这样它就不会出现在最终的电子邮件中,这样看起来会非常难看和业余。
在C#中,你可以利用正常的.NET对象,包括匿名类型,来提供动态数据。例如,为了给上面的模板提供数据,你可以使用这样一个匿名对象:
var dynamicEmailData = new
{
    recipientName = "Demo User",
};
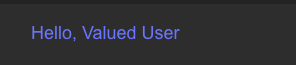
为了避免变量留空,你也可以通过使用插入关键字提供默认值。比如说:
Hello,{{ insert recipientName "default=Valued User" }}
如果你不在数据中提供recipientName ,输出结果看起来像这样:
主题字段中的变量替换
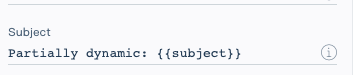
在设计器中,你可以为你的邮件手动设置一个主题,但你也可以让这个字段动态化。变量替换也适用于主题字段。你可以使用Handlebar符号将主题值设置为一个变量:

你没有义务去替换整个主题行。你可以在你的模板中的一个较长的硬编码字符串内使用一个变量,如:
为了用实际值替换占位符,在你的代码中,你可以直接通过模板数据传递实际值:
var dynamicTemplateData = new
{
    subject = $"To-Do List for {DateTime.UtcNow:MMMM}"
};
HTML替换
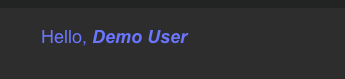
你也可以提供HTML,将其注入模板中。关键的一点是,这些值需要用三个大括号标记。例如,如果你想用HTML替换收件人的名字,你会使用:
Hello, {{{recipientName}}}
而我们提供的对象看起来会是这样的:
var dynamicEmailData = new
{
    recipientName = "<b><i>Demo User</i></b>",
};
现在的输出看起来是这样的:
请记住,只要你使用三个大括号,该变量就不会被编码,容易受到HTML注入的影响。如果这个变量持有用户的输入,这可能是有风险的
请确保使用.NET中的HtmlEncoder ,对用户输入进行编码,然后再将其传入三个大括号。
迭代
在创建模板化的电子邮件时,与数组打交道是很常见的。Handlebars支持处理列表并使用each 关键字对其进行迭代。例如,在即将到来的示例中,你将列出一些待办事项的列表。这可以通过下面的代码片断实现:
<table>
  <tr>
    <th>Title</th>
    <th>Due Date</th>
    <th>Status</th>
  </tr>

  {{#each todoItemList}}
    <tr>
      <td>{{this.Title}}</td>
      <td>{{this.DueDate}}</td>
      <td>{{this.Status}}</td>
    </tr>
  {{/each}}
</table>
数组中的项目可以通过使用this 关键字来处理,如上所示。
更多的手柄
除了上面涉及的功能外,你还可以使用条件和一些基本逻辑来实现更复杂的模板。你可以在这里找到更多关于使用Twilio SendGrid的Handlebars的信息。
使用动态邮件模板发送邮件
设置动态邮件模板
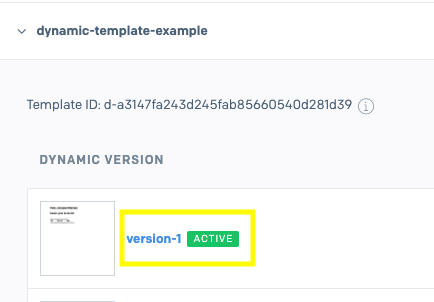
首先,进入SendGrid电子邮件模板页面。
然后,展开你的动态模板并点击活动版本:
用{{subject}} 更新主题字段,因为你要用动态数据替换它。
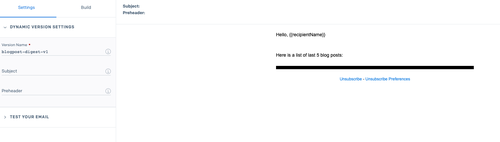
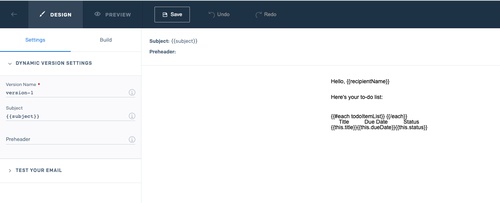
删除设计区的所有元素。你的设计应该看起来像这样:

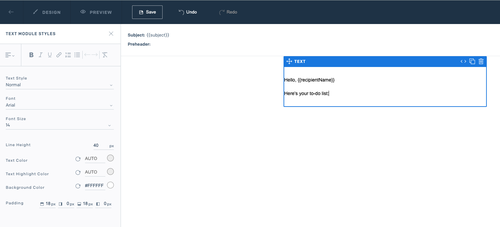
在左边的窗格中,点击建立。 把一个文本对象拖到设计区**。** 将占位符文本替换为
Hello, {{recipientName}}
Here's your to-do list:
在这个例子中,我把行高设为40。你可以根据自己的喜好玩弄文字属性:
点击设计区中文本元素以外的任何地方,再次看到左窗格中的可用元素。
点击代码并将其拖到文本元素下面。这将自动打开HTML编辑器。在编辑器中粘贴以下代码:
<table>
  <tr>
    <th>Title</th>
    <th>Due Date</th>
    <th>Status</th>
  </tr>

  {{#each todoItemList}}
    <tr>
      <td>{{this.title}}</td>
      <td>{{this.dueDate}}</td>
      <td>{{this.status}}</td>
    </tr>
  {{/each}}
</table>
点击更新。你的模板的最终版本应该是这样的:
设置C#应用程序
打开你之前创建的ConsoleMailer项目中的Program.cs文件,用突出显示的动态邮件模板代码替换之前的邮件发送代码:
using SendGrid;
using SendGrid.Helpers.Mail;

var apiKey = Environment.GetEnvironmentVariable("SENDGRID_API_KEY");
var client = new SendGridClient(apiKey);
var from = new EmailAddress("{ Your verified email address }", "{ Sender display name }");
var to = new EmailAddress("{ Recipient email address }", "{ Recipient display name }");

var templateId = "{ Your dynamic template id }";
var dynamicTemplateData = new
{
    subject = $"To-Do List for {DateTime.UtcNow:MMMM}",
    recipientName = "Demo User",
    todoItemList = new[]
    {
        new { title = "Organize invoices", dueDate = "11 June 2022", status = "Completed" },
        new { title = "Prepare taxes", dueDate = "12 June 2022", status = "In progress" },
        new { title = "Submit taxes", dueDate = "25 June 2022", status = "Pending" },
    }
};
var msg = MailHelper.CreateSingleTemplateEmail(from, to, templateId, dynamicTemplateData);

var response = await client.SendEmailAsync(msg);
if (response.IsSuccessStatusCode)
{
    Console.WriteLine("Email has been sent successfully");
}
确保你的模板中的变量的名称和大小写与你传入的动态模板数据相匹配。例如,如果你的主题变量是{{subject}} ,而你的C#数据有一个名为Subject 的属性,那么你的邮件的主题将是空的。
这段代码与前面的代码相似,但有一些不同:
- 你调用
CreateSingleTemplateEmail方法而不是CreateSingleEmail方法 - 你提供了显示在最终电子邮件输出中的数据,但你没有自己渲染HTML。
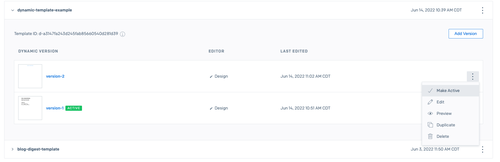
另外,你必须提供唯一的模板ID。你可以从动态模板页面获得该ID。展开你的模板的细节,模板ID应该出现在顶部:

一旦你获得了模板ID,在你的代码中用它替换{ Your dynamic template id } 。
模板ID在所有版本中都是共享的,所以当你创建一个新版本时,你不必改变你的配置。然而,你必须确保选择正确的版本作为活动版本。要使一个版本处于活动状态,请点击右边的垂直三点,然后点击使其处于活动状态。
最后的电子邮件看起来像这样:
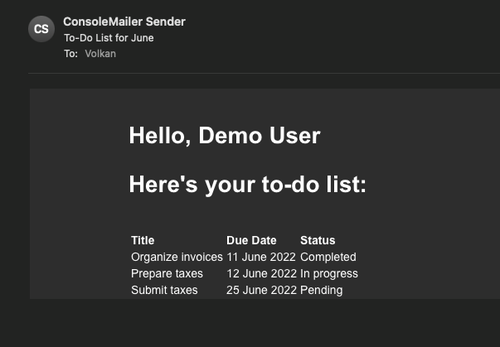
你可以看到todoItemList 数组是如何被用来以动态方式呈现待办事项列表表的。
总结
在这篇文章中,你了解了设置你的SendGrid账户和SendGrid .NET库的基本知识。然后你了解了如何使用动态电子邮件模板,以及如何使用Handlebar模板来创建动态电子邮件。你可以在GitHub上找到本教程中的应用程序的源代码。
