

受React的启发,ViewComponents是Ruby对象,用于构建渲染视图的标记。ViewComponent是一个框架,用于在Rails中构建可重用、可测试和可封装的视图组件。通常情况下,可重用的视图是在Rails中使用参数创建的,然后根据需要在不同的视图中进行渲染,但随着ViewComponent gem的引入,参数可以被替换成视图组件,因为它们提供了更多的优势。让我们深入了解这些优势是什么。
什么时候以及为什么要使用ViewComponents?
如前所述,视图组件是可重复使用和可测试的。因此,只要视图要被重用或从直接测试中受益,就可以应用它们。视图组件的一些好处,正如其文档中所述,包括以下几点:
- 它们比参数快10倍。
- 它们是Ruby对象;因此,它们的初始化方法明确定义了渲染视图所需的内容。这意味着它们更容易理解并在其他几个视图中重用。此外,Ruby代码的质量标准可以被强制执行,从而提供了一个减少错误的风险。
- 它们可以被单元测试,而不是Rails的传统视图,后者需要集成测试,除了视图外,还需要锻炼路由和控制器层。
ViewComponent的实现
ViewComponents是ViewComponent::Base 的子类,住在app/components 。它们的名字以- Component 结尾,它们应该以它们所呈现的东西而不是它们所接受的东西来命名。我们可以手动或通过组件生成器生成一个视图组件,但必须先将gem加入我们的gemfile并运行bundle install 。
gem "view_component", require: "view_component/engine"
要使用生成器,请运行以下命令:
rails generate component <Component name> <arguments needed for initialization>
例如,如果我们想生成一个负责展示学习平台上的课内课程列表的组件,我们可以使用这个命令:
rails g component Course course
我们将course 参数传给命令,因为我们将用我们期望它显示的课程来初始化这个Ruby对象,我们将它命名为Course ,因为它渲染了一个课程。多么巧合啊

正如我们在上面看到的,这个组件和它相应的视图在app/components 文件夹中被创建,同时还有一个测试文件。
ViewComponent包括erb 、haml 和slim 模板引擎的模板生成器,但会默认使用config.generators.template_engine 中指定的任何模板引擎。不过,你可以用下面的方法表明你喜欢的模板引擎。
rails generate component Course course --template-engine <your template engine>
让我们继续创建我们的课程模型和一些要显示的课程。
rails g model Course title:string price:decimal location:string
rails db:migrate
在我们的控制台中,我们可以快速创建两个新课程。
Course.create(title: 'The Art of Learning', price: 125.00, location: 'Denmark')
Course.create(title: 'Organizing your Time', price: 55.00, location: 'London')
course_component.rb 文件在生成时就已经有了初始化方法,如下图所示。

我们需要创建一个课程控制器,将我们引向课程列表。
rails g controller Courses index
在我们的routes.rb 文件中,我们通过添加以下内容表明我们的根路径。
root 'courses#index'
现在我们都准备好了,下一步是创建视图。这是在已经生成的course_component.html.erb 中完成的。
<div>
  <h2><%= @course.title %></h2>
  <h4><%=  number_to_currency(@course.price, :unit => "€") %></h4>
  <h4><%= @course.location %></h4>
</div>
在我们的视图中,我们使用@course 变量来显示课程标题、价格和位置,该变量已经在我们的CourseComponent的initialize方法中定义。这类似于你在控制器方法中创建一个变量,然后在视图中可用。
了解了控制器的工作原理,我们会被引导到我们的索引方法的相应index.html.erb 。因此,这就是我们渲染组件的地方:
#app/views/courses/index.html.erb
<%= render(CourseComponent.new(course: Course.find(1))) %>
如上所述,我们通过初始化CourseComponent的一个新实例,并在其视图中呈现我们想要的课程。这个课程成为course_component.html.erb 文件中可用的@course 变量。
也可以直接从我们的控制器中渲染这个组件,从而绕过索引文件视图。
class CoursesController < ApplicationController
  def index
    render(CourseComponent.new(course: Course.find(1)))
  end
end
无论你选择哪种方法,这都会在服务器上显示出来:

额外的内容也可以通过以下方式之一传递给该组件。
<%= render(CourseComponent.new(course: Course.find(1))) do %>
  container
<% end %>
<%= render(CourseComponent.new(course: Course.find(1)).with_content("container")) %>
在我们的视图组件文件中,我们可以把内容包含在我们想要的地方。在这种情况下,我们将通过编辑我们的div,把它作为一个类包含起来,看起来像这样。
<div class=<%= content %>>
上述所有渲染附加内容的方法都产生了下面的图片:

渲染一个集合
如果我们想渲染整个课程列表呢?ViewComponent提供了一个非常直接的方法,使用with_collection 标签来实现。不使用.new 来初始化组件,而是使用.with_collection 来初始化,并且将集合作为一个变量传递给它,如下图所示:
CourseComponent.with_collection(Course.all)
这就产生了下面的结果:

还有一个with_collection_parameter 标签可用,以备我们希望用不同的名字来称呼这个集合。
class CourseComponent < ViewComponent::Base
  with_collection_parameter :item

  def initialize(item:)
    @item = item
  end
end
在上面的例子中,课程参数被命名为item 。因此,在相应的视图中,@course 将被替换为@item ,产生相同的结果。
其他参数也可以被添加到集合中。这些参数将在集合中的每个项目中显示。让我们通过这个方法为每个项目添加一个Buy Me 文本。
#app/views/courses/index.html.erb
<%= render(CourseComponent.with_collection(Course.all, notice: "Buy Me")) %>
# app/components/course_component.rb
class CourseComponent < ViewComponent::Base
  with_collection_parameter :item
  def initialize(item:, notice:)
    @item = item
    @notice = notice
  end
end
我们在app/components/course_component.html.erb 文件中添加一个新的段落,以表明新添加的通知变量的文本。
<p><a href='#'> <%= @notice %> </a></p>
这样得到的结果如下:

最后,在集合下,我们有一个计数器变量,可以启用它对视图中的项目进行编号。它是通过在集合参数中添加_counter ,并通过初始化方法使其对视图可用而启用的。
#app/components/course_component.rb
def initialize(item:, notice:, item_counter:)
  @item = item
  @notice = notice
  @counter = item_counter
end
在我们的视图中,在项目标题的旁边,我们添加了我们的计数器。
<h2><%= @counter %>. <%= @item.title %></h2>
让我们从控制台生成第三个课程,以更好地理解计数器现象。
Course.create(title: 'Understanding Databases', price: '100', location: 'Amsterdam')
这产生的结果如下

条件性渲染
ViewComponent有一个render? 钩子,当它被使用时,可以决定一个视图是否应该被渲染。为了实现这一点,我们要给价格等于或大于100欧元的课程提供10%的折扣。让我们为这个目的创建一个组件。
rails generate component Discount item

这个组件已经被自动初始化,它应该显示折扣的项目,如下图所示:
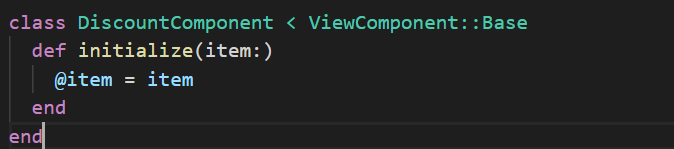
因此,在discount_component.html.erb 文件中,我们添加我们打算显示的文本。
<p class="green"> A 10% discount is available on this course </p>
不要犹豫,在你的css文件中添加green 类,并为其分配任何你喜欢的绿色阴影。此外,在我们的discount_component.rb 文件中,我们添加了render? 方法,以确定该组件应何时被渲染。
def render?
  @item.price >= 100
end
现在,我们可以继续在渲染每个课程的视图中渲染折扣组件。
# app/components/course_component.html.erb
<%= render(DiscountComponent.new(item: @item)) %>
这就产生了以下结果:

这不是很好吗?
助手
在传统的Rails视图中,我们可以通过在视图中调用方法名来轻松插入我们的帮助器,但在视图组件中的工作方式却不同。在视图组件中,帮助器方法不能直接在视图中调用,但可以包含在组件中。我们已经有一个courses_helper.rb ,这个文件是在创建CoursesController时自动生成的,所以让我们利用它。首先,让我们创建一个辅助方法,告诉我们到目前为止有多少人报名参加了某门课程。让我们把这个值定为价格的四分之一:)。
module CoursesHelper
  def count_enrollees(course)
    count = (course.price / 4).round()
    tag.p "#{count} enrollees so far"
  end
end
接下来,我们将创建一个组件,在这个组件中我们将调用辅助方法。这是一个将在我们的视图中呈现的组件。在其中,我们将添加一个include 语句,包括帮助器,然后我们可以在这个组件中调用帮助器的任何方法。
# app/components/enrollee_component.rb
class EnrolleeComponent < ViewComponent::Base
include CoursesHelper

  def total_enrollees(course)
    count_enrollees(course)
  end
end
最后一步是将EnrolleeComponent添加到显示我们课程的视图中。
# app/components/course_component.html.erb
<%= EnrolleeComponent.new.total_enrollees(@item) %>
注意,我们没有对EnrolleeComponent使用渲染词,因为它没有视图,它的输出将是被调用的帮助器方法的输出。这就产生了以下结果:

帮助器可以用于图标、引力,或者任何你可能选择的东西。ViewComponent并没有改变帮助器的使用,它只是改变了我们在组件中调用它们的方式。
before_render方法
ViewComponent提供了一个before_render 方法,可以在组件被渲染之前调用。让我们在我们的打折通知旁边添加一个星星。我们首先添加一个获取星星的辅助方法;一个star.png 的图片也已经被下载并放在app/assets/images 文件夹中。
#app/helpers/courses_helper.rb
def star_icon
  image_tag("/assets/star.png", width: "1%")
end
让我们给我们的折扣组件添加一个before_render 方法,调用这个辅助方法。
# app/components/discount_component.rb
def before_render
  @star_icon = helpers.star_icon
end
正如我们在上面看到的,引入了另一种调用帮助器的方式。帮助器也可以在component.rb文件中用helpers.method 来调用。然后,在我们的DiscountComponent的渲染方法中,我们输入了我们的星形图标,现在它通过@star_icon 变量来实现。
# app/components/discount_component.html.erb
<p class="green"> <%= @star_icon %> A 10% discount is available on this course </p>
这就产生了以下结果:
![]()
我们不一定非要使用帮助器才能使before_render 方法工作。我使用了帮助器来介绍另一种调用帮助器方法的方法。
预览器
像Action Mailer一样,ViewComponent使预览组件成为可能。这必须首先在config/application.rb 文件中启用。
config.view_component.preview_paths << "#{Rails.root}/lib/component_previews"
预览组件位于test/components/previews ,可以用来预览一个有多个不同输入的组件。我们将对我们的DiscountComponent进行预览。
# test/components/previews/discount_component_preview.rb
class DiscountComponentPreview < ViewComponent::Preview
  def with_first_course
    render(DiscountComponent.new(item: Course.find(1)))
  end

  def with_second_course
    render(DiscountComponent.new(item: Course.find(2)))
  end
end
我们添加了两个方法来预览不同场景下的DiscountComponent。要查看这个,请访问http://localhost:3000/rails/view_components ,在那里我们可以找到所有创建的预览组件和它们的方法。我们可以点击它们中的任何一个来查看它们的样子,如下图所示:

正如你在上面的视频中看到的,第一个课程渲染了折扣组件,但第二个课程却没有得到任何渲染。你知道为什么会发生这种情况吗?render? 方法检查发生了。第一种情况是当成本价格超过100欧元(第一道菜),但第二道菜的成本低于100欧元。方法名称没有更多的描述,使你能找出原因,才在这里强调:)。
预览可以在任何环境下使用show_previews 选项来启用或禁用,但在开发和测试环境下,默认是启用的。
# config/environments/test.rb
config.view_component.show_previews = false
JS和CSS的包含
可以将JavaScript和CSS包含在组件旁边,有时称为 "sidecar "资产或文件。这仍然是一个实验性的功能。因此,我们不会在这篇文章中深入研究它的内部工作原理,但你可以在这里找到更多关于这个ViewComponent功能的信息。
模板
视图组件的模板可以通过几种方式定义。比较简单的方法是将视图和组件插入到同一个文件夹中,如下图所示。

正如我们在这里看到的,我们把每个组件和视图都放在app/components 。
另一种选择是将视图和其他资产放在与组件同名的子目录下。因此,在app/components 文件夹中,我们有存放组件的component.rb 文件,然后有一个单独的course_component 文件夹,存放视图course_component.html.erb 以及与课程_组件相关的其他资产。

要以这种方式从命令行生成组件文件,需要使用--sidecar 标志。
rails g component Example name --sidecar
这使你能够将你的css和js文件添加到组件文件夹中。 通过定义一个call 方法,ViewComponents也可以在没有模板文件的情况下渲染。这方面的例子在下一节中提供,我们将讨论插槽。
插槽
多个内容块可以通过槽传递给单个ViewComponent。类似于Rails模型中的has_one 和has_many 属性,槽是用renders_one 和renders_many 定义的:
- renders_one定义了一个槽,每个组件最多渲染一次:renders_one :header。
- renders_many定义了一个槽,每个组件可以渲染多次:renders_many :title。
想象一下,我们想有一个页面,渲染一个标题和所有可用课程的标题;这可以通过槽来实现。让我们创建一个ListComponent,它将包含一个只渲染一次的标题,和一个TitleComponent,它渲染许多标题:
#app/components/list_component.rb
class ListComponent < ViewComponent::Base
  renders_one :header, "HeaderComponent"
  # `HeaderComponent` is defined within this component, so we refer to it using a string.
  renders_many :titles, TitleComponent
  # `titleComponent` will be defined in another file, so we can refer to it by class name.
  class HeaderComponent < ViewComponent::Base
    def call
      content_tag :h1, content
    end
  end
end
在上面的组件中,我们说标题被渲染一次,但标题被渲染多次,因为这个页面会包含许多标题。我们也在ListComponent中定义了HeaderComponent。是的,这在ViewComponent中是可能的;一个类可以被定义在另一个类中。让我们也注意一下前面在模板部分讨论的调用方法,以及它是如何被HeaderComponent用来渲染h1标签的,从而消除了对相应的view(html.erb)文件的需要。ListComponent的相应HTML文件将包含以下内容。
#app/components/list_component.html.erb
<div>
  <%= header %> <!-- renders the header component -->
  <% titles.each do |title| %>
    <div>
      <%= title %> <!-- renders an individual course title -->
    </div>
  <% end %>
</div>
在html文件中,我们已经包含了标题,迭代了所有传入组件的标题,并渲染了它们。正如你所看到的,我们不需要在列表视图文件中指定要渲染的组件的名称;我们的槽已经处理了这个问题。因此,我们只是将它们标识为header 和title 。
下一步是创建我们的TitleComponent和其相应的HTML文件,因为这将是每一个传递的标题的渲染内容。
# app/components/title_component.rb
class TitleComponent < ViewComponent::Base
  def initialize(title:)
    @title = title
  end
end
# app/components/title_component.html.erb
<div>
  <h3> <%= @title %> </h3>
</div>
最后,在我们的index.html 文件中,让我们暂时擦掉我们的东西,用ListComponent的渲染来代替它。
#app/views/courses/index.html.erb
<%= render ListComponent.new do |c| %>
  <% c.header do %>
  <%= link_to "List of Available Courses", root_path %>
  <% end %>
  <%= c.title(title: "First title") %>
  <%= c.title(title: "Second title!") %>
<% end %>

现在,让我们把我们的课程作为一个集合传入这个视图。要把一个集合传入一个槽中,我们必须把集合作为一个包含初始化所需变量的对象数组来传递。正如我们所看到的,传入的每门课程都应该用标题参数来初始化。我们可以将db中所有课程的标题提取到一个哈希值数组中,并将其渲染。

现在我们可以用一个集合的单一c.titles 来代替我们的几个标题列表,并把它传递给我们的标题哈希,我们用变量course_titles 来定义。
# app/views/courses/index.html.erb
<% course_titles = Course.all.pluck(:title).map { |title| {title: title}} %>

<% c.titles(course_titles) %>
这就产生了下面的结果:

这正是槽的工作方式:在一个单一的ViewComponent中渲染几个组件。槽可以用其他几种方式呈现,你可以在这里找到更多信息。
测试
测试视图组件是通过在测试文件中要求 "view_component/test_case "并使用render_inline 测试助手来完成的,这样就可以对渲染的输出进行断言。让我们从测试我们的DiscountComponent开始。
require "test_helper"
require "view_component/test_case"

class DiscountComponentTest < ViewComponent::TestCase
  def test_render_component
    render_inline(DiscountComponent.new(item: "my item"))
  end
end
当我们使用rails test test/components/discount_component_test.rb 命令运行这个测试时,我们得到以下错误:

这向我们证明了测试正在进入正确的组件,但缺少一个合适的道具,因为项目必须是一个具有价格属性的课程,而不是我们传递的字符串。它还告诉我们,在这个组件渲染之前,有一个render? 方法被检查。现在让我们传入正确的变量。
def test_render_component
  course = Course.create(title: 'Organizing your Time', price: 55.00, location: 'London')
  render_inline(DiscountComponent.new(item: course))
end
这就成功运行了。让我们继续向这个测试添加断言。
def test_render_component
  course = Course.create(title: 'Organizing your Time', price: 155.00, location: 'London')
  render_inline(DiscountComponent.new(item: course))
  assert_selector 'p[class="green"]'
  assert_text "10% discount"
end
这个测试也通过了,记得这个组件有一个渲染条件。不过不用担心,因为ViewComponent也提供了一种方法来测试一个组件是否被渲染,方法是使用refute_component_rendered 。我们可以用一个价格低于100欧元的课程来测试。
def test_component_not_rendered
  course = Course.create(title: 'Organizing your Time', price: 55.00, location: 'London')
  render_inline(DiscountComponent.new(item: course))
  refute_component_rendered
end
这个测试也通过了。
让我们为我们的CourseComponent写另一个测试,测试它是否渲染了嵌套在其中的所有组件。
require "test_helper"
require "view_component/test_case"

class CourseComponentTest < ViewComponent::TestCase
  def test_component_renders_all_children
    course = Course.create(title: 'Organizing your Time', price: 155.00, location: 'London')
    render_inline(CourseComponent.new(item: course, notice: 'A new test', item_counter: 1))
    assert_selector("h2", text: "Organizing your Time")
    assert_selector("h4", text: "€155.00")
    assert_selector("h4", text: "London")
    assert_text("enrollees")
    assert_text("discount")
  end
end
这个测试也通过了。它测试了注册者和折扣组件也在正常渲染。
记得我们有一个插槽组件,如下图所示,它渲染了一个标题和许多标题。

为了测试这一点,我们传递给该组件一个包含头和标题的代码块,然后我们可以对渲染的组件进行断言。
require "test_helper"
require "view_component/test_case"

class ListComponentTest < ViewComponent::TestCase
  def test_renders_slots_with_content
  render_inline(ListComponent.new) do |component|
  component.header { "A Test List" }
  component.titles [{title: 'Test title 1'}, {title: 'Test title 2'}]
  end

  assert_selector("h1", text: "A Test List")

  assert_text("Test title 1")
  assert_text("Test title 2")
  end
end
这个测试也通过了:)。
Rspec测试
除了上面所说的关于测试的所有内容之外,如果首选的测试框架是RSpec,那么必须进行一些额外的配置,以便为ViewComponents启用RSpec。
# spec/rails_helper.rb
require "view_component/test_helpers"
require "capybara/rspec"

RSpec.configure do |config|
  config.include ViewComponent::TestHelpers, type: :component
  config.include Capybara::RSpecMatchers, type: :component
end
我们的DiscountComponent测试可以使用Rspec重新编写和重新测试,如下图所示:
require "rails_helper"

RSpec.describe DiscountComponent, type: :component do

  it "renders the component correctly" do
    course = Course.create(title: 'Organizing your Time', price: 155.00, location: 'London')
    render_inline(DiscountComponent.new(item: course))
    expect(rendered_component).to have_css "p[class='green']", text: "10% discount"
    expect(rendered_component).to have_css "img[src*='/assets/star.png']"
  end
end
这个测试优雅地通过了。是的,我们可以看到我们的星星图标。
总结
为你的Rails应用编写几个视图组件,不仅使你的代码更易读,不容易出现不必要的复杂错误,而且还可以隔离测试你的视图,而不仅仅是在HTTP请求期间。视图组件很容易被灌输到现有的Rails应用中,而且最好从大部分被重复使用的视图开始。有了到目前为止所学到的一切,这应该是一个简单易行的任务。
