

简介
GraphQL是一种API查询语言,是Facebook在2012年开发的,供内部使用。后来,它在2015年被开源。根据Graphql官方网站的介绍:
"GraphQL是一种API的查询语言,也是用现有数据完成这些查询的运行时间。GraphQL为你的API中的数据提供了一个完整的、可理解的描述,让客户有能力准确地要求他们所需要的东西,而不是更多,使API更容易随着时间的推移而发展,并实现强大的开发者工具。"
客户端可以在响应中询问他们需要的数据,而不需要任何额外的数据,这意味着你可以控制你想要的数据的结构。在一次请求中访问许多资源。
谈论GraphQL的力量已经超出了本文的重点,请访问官方网站了解更多关于GraphQL的信息。
在本教程中,我们将专注于如何将GraphQL集成到Django项目中,并有效地使用它来查询API以获得有效的结果。
本教程的前提条件:
- 你的本地机器上已经安装了python
- 有python的基本知识
- Django的基本知识
- 互联网连接
我们将建立一个简单的产品目录,用于这个整合,我们将通过GraphQL端点公开数据。所以让我们开始工作吧。
项目设置
创建我们的项目文件夹
首先,让我们为我们的新项目创建一个目录,打开你的终端,导航到你想保存项目的文件夹。运行以下命令:
$ mkdir graphql-product-catalog
让我们把现在所在的目录改为新创建的目录:
$ cd graphql-product-catalog
创建并激活我们的项目虚拟环境
在python中,为任何需要安装新包的项目创建一个虚拟环境也是很重要的,这可以确保这些包对项目来说是唯一的,不会导致你在本地机器上更新其他项目的包,从而破坏你的工作项目。
让我们运行下面的命令:
$ python -m venv env
这里我把我的新环境称为env,它在一个目录env中创建了我们的python环境。
接下来,我们需要激活这个环境,让我们在这里工作:
$ . env/bin/activate
在我们的环境中安装Django
现在我们有了环境,我们需要在其中安装Django,现在安装任何版本的Django都很方便,而且不会影响我们本地机器上的其他项目的版本。 让我们通过运行以下命令来安装Django:
$ pip install django
创建项目
现在我们已经安装了Django,现在让我们继续通过运行以下命令来创建我们的项目:
$ django-admin startproject product_catalog
这里我们使用Django命令行工具django-admin来创建我们的项目,该项目将被创建在一个名为product_catalog的目录中。
接下来,我们需要通过运行以下命令导航到 product_catalog 目录中:
$ cd product_catalog
其中我们有一个类似于的目录结构:
+-- _product_catalog
|   +-- __init__.py
|   +-- settings.py
|   +-- urls.py
|   +-- wsgi.py+-- manage.py
创建我们的目录应用程序
Django项目的各个部分被称为应用程序,大规模的Django项目可以有尽可能多的应用程序。我们将需要为我们的产品目录调用目录创建一个应用程序。所以我们将通过运行以下命令来进行:
$ django-admin startapp catalog
该命令创建了一个目录call catalog,结构如下
+-- _catalog
|   +-- _migration
|       +-- __init__.py
|   +-- __init__.py
|   +-- admin.py
|   +-- apps.py
|   +-- models.py
|   +-- tests.py
|   +-- views.py
现在整个项目结构应该是这样的
+-- _product_catalog
|   +-- __init__.py
|   +-- settings.py
|   +-- urls.py
|   +-- wsgi.py
+-- _catalog
|   +-- _migration
|       +-- __init__.py
|   +-- __init__.py
|   +-- admin.py
|   +-- apps.py
|   +-- models.py
|   +-- tests.py
|   +-- views.py
+-- manage.py
接下来让我们构建我们的目录应用程序模型。在catelog文件夹内的models.py文件中,让我们添加以下代码
from django.db import models
# Create your models here.
class Category(models.Model):
    name = models.CharField(max_length=255, unique=True)
    description = models.TextField(max_length=255)

    def __str__(self):
        return self.name

class Product(models.Model):
    name = models.CharField(max_length=255)
    description = models.TextField()
    price = models.DecimalField(max_digits=10, decimal_places=2)
    quantity = models.IntegerField()
    category = models.ForeignKey(Category, on_delete=models.CASCADE, related_name="products")

    def __str__(self):
        return self.name
在这里我们定义了Category模型来组织产品的分类,然后我们的Product模型也与Category有关系。
我们需要在我们的网站管理中注册这些模型,所以打开目录应用程序中的admin.py文件并添加以下代码:
from django.contrib import admin
from .models import Category, Product
# Register your models here.

admin.site.register(Category)
admin.site.register(Product)
这里我们只是做了一个基本的注册,并允许Django用默认设置来处理渲染。
接下来,我们需要通过在settings.py文件的INSTALLED_APPS列表中注册,使我们的应用被项目知道:
INSTALLED_APPS = [
    ...
    'catalog',
]
由于我们所做的项目是一个简单的项目,我们将坚持使用Django的默认数据库配置,使用SQLite数据库。接下来是用于准备通过运行以下命令来迁移我们的目录应用表:
$ python manage.py makemigrations catalog
接下来,我们通过运行下面的迁移命令来迁移我们的数据库
$ python manage.py migrate
这将把我们的目录模型和Django相关的模型一起迁移到数据库中。
接下来,我们要为Django管理仪表盘创建超级用户,使我们能够在仪表盘上创建一些类别和产品。现在运行下面的命令并按照下面的指示操作:
$ python manage.py createsuperuser
接下来,我们通过运行以下命令来启动我们的开发服务器:
$ python manage.py runserver
默认情况下,Django在8000端口启动我们的服务器,但你可以在命令后面加上一个端口号
$ python manage.py runserver 8001
现在在浏览器上访问http://127.0.0.1:8001/,看看我们的应用程序是否正在运行
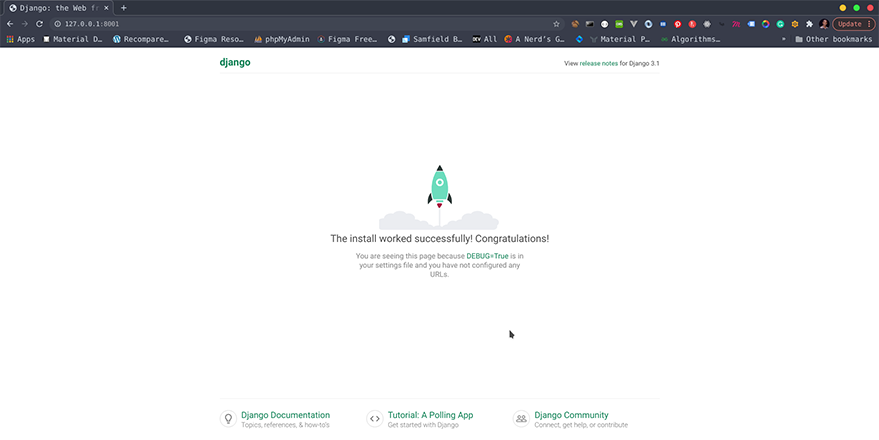
应用程序主页
你可以使用我们在上面创建超级用户步骤中设置的凭证,导航到 http://127.0.0.1:8001/admin ,访问管理站点。
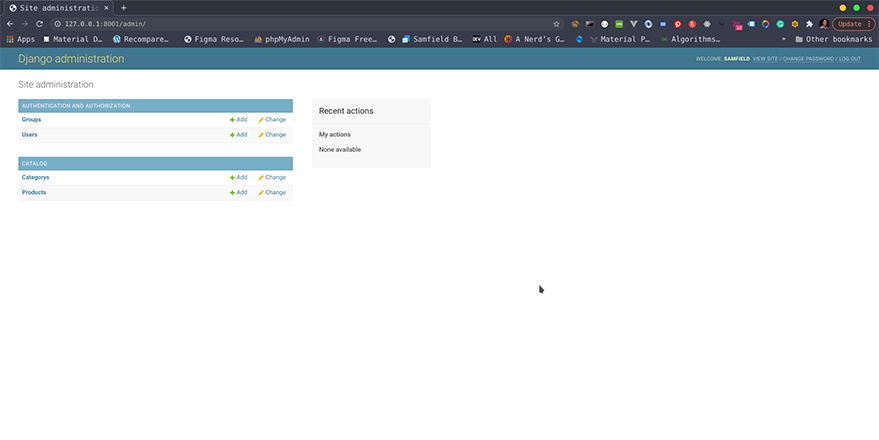
Django管理网站你可以继续添加一些类别和产品到应用程序。
集成GraphQL
现在我们将把Graphql集成到项目中,以查询我们的产品。我们将使用一个名为Graphene-Django的软件包。
让我们继续安装Graphene-Django,在终端上运行以下命令:
注意:验证你的环境仍然处于活动状态。
$ pip install graphene-django
接下来,我们需要在 settings.py 的 INSTALLED_APPS 列表中注册新安装的软件包。
INSTALLED_APPS = [
...
"django.contrib.staticfiles", # Required for GraphiQL
"graphene_django"
]
如果你注意到我们还注册了django.contrib.staticfiles,这是Graphene-Django所需要的,用于渲染。
接下来,我们要为我们的图创建一个入口点。所以让我们在urls.py中添加以下几行。
...
from graphene_django.views import GraphQLView
urlpatterns = [
      ...
      path("graphql", GraphQLView.as_view(graphiql=True)),
]
看上面的代码,我们设置了graphiql=True,这将为我们的图形启用浏览器API,但如果你不希望浏览器用于我们的图形,你可以将其设置为False。
接下来是告诉graphene-Django在哪里可以找到我们的模式。架构就像我们的图的结构。 在我们的settings.py中添加以下代码
GRAPHENE = { "SCHEMA": "catalog.schema.schema"}
这将指向我们将在目录应用中创建的schema.py文件。
接下来,在我们的目录应用文件夹中创建schema.py文件,内容如下:
import graphene
from graphene_django import DjangoObjectType
from .models import Category, Product

class CategoryType(DjangoObjectType):
    class Meta:
        model = Category
        fields = ("id", "name", "description", "products")

class ProductType(DjangoObjectType):
    class Meta:
        model = Product
        fields = ("id", "name", "description", "category", 'price', 'quantity')

class Query(graphene.ObjectType):
    products = graphene.List(
        ProductType,  category=graphene.String(required=False))
    categories = graphene.List(CategoryType)

    def resolve_products(root, info, category=None):
        if category:
            return Product.objects.filter(category__name=category)
       # We can easily optimize query count in the resolve method
        return Product.objects.select_related("category").all()

    def resolve_categories(root, info):
        return Category.objects.all()

schema = graphene.Schema(query=Query)
在这里,我们通过创建两个继承自graphene_django模块中DjangoObjectType的类,为Category和Product模型创建了我们的模式,提供了我们想要在Graphql中公开的模型和模型域。
接下来,我们创建了一个继承自graphene.ObjectType类的Query类,并为我们的Graphql查询提供了配置。在这里,我们打开了产品和类别,这些产品和类别是由类的resolve_products和resolve_categories方法解决的。这些方法接受两个必要的参数(root和info),而resolve_products接受一个额外的参数category,用于按类别进行简单的产品过滤。
测试我们的应用程序
接下来,如果我们的应用程序已经被关闭,我们再次启动它,运行
$ python manage.py runserver 8001
在你的浏览器上访问http://120.0.0.1:8001/graphql,看看我们的Graphql的交互式屏幕。
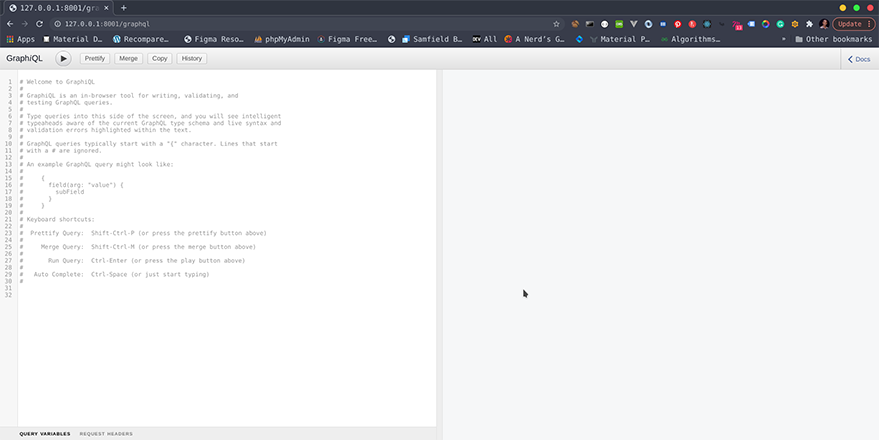
Graphql预览你可以玩玩下面的一些命令,查询通过管理网站添加的数据。
{
  products {
    id
    name,
    price,
    quantity,
    category {
      id
      name
    }
  }
}
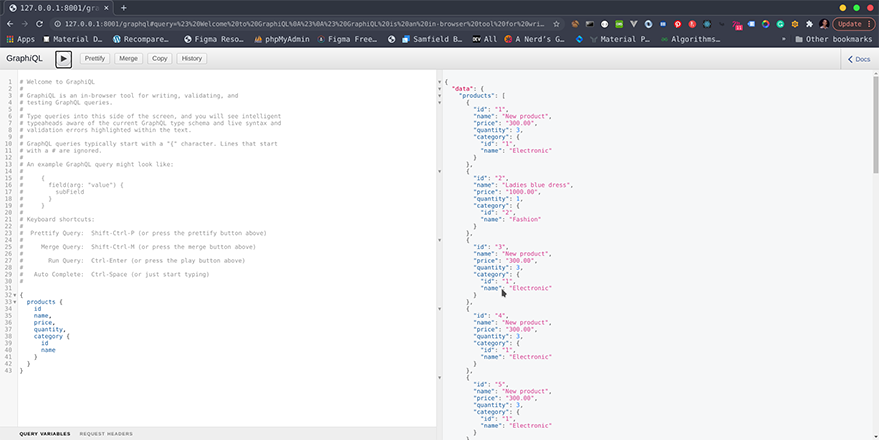
Graphql响应预览其他可以尝试的命令包括:
{
categories {
   name,
   products
  }
}
{
products(category:'category name from previous query ') {
  id,
  name,
  description,
  price
 }
}
在这里,我们在查询中添加了一个过滤器,以查询某个特定类别的产品。
创建和更新
现在我们只能查询,但可以创建或更新。我们可以通过更新我们的schema.py代码,在ProductType类之后添加创建和更新功能到我们的集成:
...

class UpdateCategory(graphene.Mutation):
    class Arguments:
        # The input arguments for this mutation
        name = graphene.String(required=True)
        id = graphene.ID()

    # The class attributes define the response of the mutation
    category = graphene.Field(CategoryType)

    @classmethod
    def mutate(cls, root, info, name, id):
        category = Category.objects.get(pk=id)
        category.name = name
        category.save()
        # Notice we return an instance of this mutation
        return UpdateCategory(category=category)


class CreateCategory(graphene.Mutation):
    class Arguments:
        # The input arguments for this mutation
        name = graphene.String(required=True)

    # The class attributes define the response of the mutation
    category = graphene.Field(CategoryType)

    @classmethod
    def mutate(cls, root, info, name):
        category = Category()
        category.name = name
        category.save()
        # Notice we return an instance of this mutation
        return CreateCategory(category=category)

class ProductInput(graphene.InputObjectType):
    name = graphene.String()
    description = graphene.String()
    price = graphene.Float()
    quantity = graphene.Int()
    category = graphene.Int()


class CreateProduct(graphene.Mutation):
    class Arguments:
        input = ProductInput(required=True)

    product = graphene.Field(ProductType)

    @classmethod
    def mutate(cls, root, info, input):
        product = Product()
        product.name = input.name
        product.description = input.description
        product.price = decimal.Decimal(input.price)
        product.quantity = input.quantity
        product.category_id = input.category
        product.save()
        return CreateProduct(product=product)


class UpdateProduct(graphene.Mutation):
    class Arguments:
        input = ProductInput(required=True)
        id = graphene.ID()

    product = graphene.Field(ProductType)

    @classmethod
    def mutate(cls, root, info, input, id):
        product = Product.objects.get(pk=id)
        product.name = input.name
        product.description = input.description
        product.price = decimal.Decimal(input.price)
        product.quantity = input.quantity
        product.category_id = input.category
        product.save()
        return UpdateProduct(product=product)

class Mutation(graphene.ObjectType):
    update_category = UpdateCategory.Field()
    create_category = CreateCategory.Field()
    create_product = CreateProduct.Field()
    update_product = UpdateProduct.Field()

...


schema = graphene.Schema(query=Query, mutation=Mutation)
这里我们引入六个新的类来处理我们的突变。类的名字是不言自明的,它将做什么。最后一个类Mutation是注册突变动作的地方,然后我们继续在我们的Schema构造函数中注册我们的突变:
schema = graphene.Schema(query=Query, mutation=Mutation)
我们可以通过这些查询来测试出我们的突变。创建和更新类别:
mutation {
 create_category:createCategory(name: "Books") {
  category {
   id,
   name,
  }
 }
}
mutation {
 update_category: updateCategory(name: "Electronic", id: 1) {
  category {
  id,
  name
  }
 }
}
创建和更新产品
mutation {

create_product: createProduct(input: {name:"New product",description:"a brief description", price: 300.00, quantity:3, category:1 }){
product {
id,
name,
description,
price,
quantity

}
}
}
mutation {
update_product: updateProduct(input: {name:"New product",description:"a brief description", price: 300.00, quantity:3, category:1 }, id:1){
product {
id,
name,
description,
price,
quantity
}
}
}
总结
在这个简短的教程结束时,我们已经能够使用Graphene-Django包将Graphql集成到Django中。这个包有很多我们在本教程中无法介绍的功能,删除信息和Graphql提供的许多其他功能。为了让你的项目能更好地利用这个包,你可以在这里查看这个包的官方文档。如果你不熟悉Graphql的丰富特性和功能,你也可以阅读更多关于Graphql的内容。 本教程的源代码可以在Github上获取。谢谢你的阅读和练习。
