

如果你是一名网络开发人员,对你来说,拥有一个个人作品集网站是很重要的--尤其是在你申请工作的时候。
如果你有一个漂亮的在线作品集网站,你会比没有更有机会得到招聘人员的关注。
与其发送你的简历并要求招聘人员看一看,一个作品集网站可以帮助你脱颖而出,直接展示你的技能、项目、教育和你的个人品牌。
你可以用你的作品集来展示你的项目,你的教育,与世界分享可重用的代码片断,提供有用的资源,并写你自己的博客。你可以用你自己的网站做无数的事情。
我建立了一个模板,你可以用它来创建、编辑和部署你自己的投资组合网站,并在短时间内免费在互联网上发布。如果你想从头开始建立你自己的版本,我会在这篇文章中告诉你如何做。
因此,让我们深入了解一下--我将向你展示我使用了什么技术,我是如何构建投资组合的,我将按章节进行分解,以便你能看到每个部分是如何工作的。
技术栈
让我们来谈谈我用来建立这个模板的技术栈:
- Next.js--一个React框架,用于构建速度极快的网站以及服务器端的渲染,这使得人们更容易在互联网上找到你的网站。
- tailwindcss- 一个CSS框架,可以让你快速建立网络应用的原型和样式。
- Rough Notation- 一个在Hero部分使用的样式库,非常适用于突出网页上的重要文本。
为什么是Next.js ?因为它是一个带有Server-Side Rendering 的React框架,这对SEO有好处(如果我们在谷歌上被找到,对我们有好处,对吗?)。
此外,Next.js还能帮助我们建立速度极快的网站,同时还有图像优化等好处。
为什么tailwindcss ?因为TailwindCSS是一个框架,它减少了大量的样式设计工作。它有低级别的CSS类,你可以直接嵌入到HTML代码中。
不仅如此,它还对响应性提供了惊人的支持。例如,<div className="text-sm md:text-xl"></div> 标志着文本在小屏幕上将是small ,而在中到大屏幕上将是xl 。
最后,我们将在Vercel上部署该应用程序。Vercel为我们提供了一个简单的方法来部署我们的应用程序与CI/CD。代码被推送到一个远程的GitHub仓库,每次推送都会被部署。
投资组合网站的功能
该网站包括我认为是你的投资组合网站应该具备的绝对最低限度的功能,以及一些很酷的额外功能:
Dark Mode- 配备了黑暗模式支持。拨动模式按钮可以在黑暗和光明模式之间切换。Built with Next.js- 该网站是用Next.js建立的,它具有开箱即用的强大功能,如图像优化和SEO支持。Customizable styling- 使用TailwindCSS,我以这样的方式建立了这个网站,你可以根据你的需要定制主色调,改变网站的外观。Custom Meta Component- 每个页面都包裹着一个Meta Component标签,你可以用它来为你创建的每个独立页面提供元信息。Responsive Design- 页面在所有的设备上看起来都很漂亮--桌面、平板电脑和手机。
我们将建立的组合页面
我们将包括你的作品集网站应该有的所有必要页面,例如:
Homepage- 访客的登陆页面。这是他们登陆你的网站时将看到的内容。About- 一个简短的介绍,包括你的工作,你的技术能力,以及你的社会链接。Experience- 一个你的工作历史,你所承担的个人项目,以及你的相关项目。Projects- 一个你所建立的所有项目的网格。Contact- 一个招聘者/终端用户可以与你联系的表格。
组件和布局
整个网站被划分为组件--小块的可重复使用的代码,你可以在网页的任何地方使用。文件夹结构非常简单,不言自明:
components是所有组件的位置,如英雄部分、导航栏和布局。public是所有静态资产的位置,如图片、字体和/或任何用于生成动态网站地图的外部脚本。styles是你的全局风格的所在。我们将在这里整合Tailwind的基础库。pages是你的所有路线所在的地方,它是Next.js的最佳功能之一。只要在 文件夹中创建一个新文件,它就可以作为一个新的路由。pages
容器块
<ContainerBlock /> 是所有组件的母体。它为用户提供了一种为每个页面定制元标签的方法。我设计的布局使它接受道具为 ,并为每个页面提供一个 , 标签,和 。children Navbar <meta> Footer
import React from "react";
import Head from "next/head";
import { useRouter } from "next/router";
import Navbar from "./Navbar";
import Footer from "./Footer";

export default function ContainerBlock({ children, ...customMeta }) {
  const router = useRouter();

  const meta = {
    title: "Manu Arora - Developer, Writer, Creator and YouTuber",
    description: `I've been developing websites for 5 years straight. Get in touch with me to know more.`,
    image: "/avatar.png",
    type: "website",
    ...customMeta,
  };
  return (
    <div>
      <Head>
        <title>{meta.title}</title>
        <meta name="robots" content="follow, index" />
        <meta content={meta.description} name="description" />
        <meta
          property="og:url"
          content={`https://yourwebsite.com${router.asPath}`}
        />
        <link
          rel="canonical"
          href={`https://yourwebsite.com${router.asPath}`}
        />
        <meta property="og:type" content={meta.type} />
        <meta property="og:site_name" content="Manu Arora" />
        <meta property="og:description" content={meta.description} />
        <meta property="og:title" content={meta.title} />
        <meta property="og:image" content={meta.image} />
        <meta name="twitter:card" content="summary_large_image" />
        <meta name="twitter:site" content="@mannupaaji" />
        <meta name="twitter:title" content={meta.title} />
        <meta name="twitter:description" content={meta.description} />
        <meta name="twitter:image" content={meta.image} />
        {meta.date && (
          <meta property="article:published_time" content={meta.date} />
        )}
      </Head>
      <main className="dark:bg-gray-800 w-full">
        <Navbar />
        <div>{children}</div>
        <Footer />
      </main>
    </div>
  );
}
在创建ContainerBlock.js ,你可以简单地将你的页面组件包裹在一个ContainerBlock 标签中,为title 、description 和image 提供元标签:
import Head from "next/head";
import styles from "../styles/Home.module.css";
import ContainerBlock from "../components/ContainerBlock";
import FavouriteProjects from "../components/FavouriteProjects";
import LatestCode from "../components/LatestCode";
import Hero from "../components/Hero";

export default function Home() {
  return (
    <ContainerBlock
      title="Manu Arora - Developer, Writer, Creator"
      description="Building a template with Next.js and Tailwindcss - for FreeCodeCamp users."
    >
      <Hero />
      <FavouriteProjects />
      <LatestCode />
    </ContainerBlock>
  );
}
如何启用黑暗模式
黑暗模式支持由一个名为next-themes 的npm 包提供。其目的是用一个提供者ThemeProvider 来包装父容器,通过它,theme 在任何时候都可以对子容器使用。
_app.js
import "../styles/globals.css";
import { ThemeProvider } from "next-themes";

function MyApp({ Component, pageProps }) {
  return (
    <ThemeProvider defaultTheme="light" attribute="class">
      <Component {...pageProps} />
    </ThemeProvider>
  );
}

export default MyApp;

为了在光明模式和黑暗模式之间切换主题,我们需要一个按钮。你可以在应用程序的任何地方重复使用这个按钮,但我们要把它集成到Navbar ,这样它就可以随时为最终用户所用。
Navbar.js
import React, { useEffect, useState } from "react";
import Link from "next/link";
import { useTheme } from "next-themes";
import { useRouter } from "next/router";

export default function Navbar() {
  const router = useRouter();
  console.log(router.asPath);
  const { theme, setTheme } = useTheme();
  const [mounted, setMounted] = useState(false);

  useEffect(() => {
    setMounted(true);
  }, []);

  return (
    <div className="max-w-6xl  mx-auto px-4 py-10 md:py-20">
      <div className="flex  md:flex-row justify-between items-center">
        {/* Logo / Home / Text */}
		 // Rest of the code
          <button
            aria-label="Toggle Dark Mode"
            type="button"
            className="w-10 h-10 p-3 rounded focus:outline-none"
            onClick={() => setTheme(theme === "dark" ? "light" : "dark")}
          >
            {mounted && (
              <svg
                xmlns="http://www.w3.org/2000/svg"
                viewBox="0 0 24 24"
                fill="currentColor"
                stroke="currentColor"
                className="w-4 h-4 text-yellow-500 dark:text-yellow-500"
              >
                {theme === "dark" ? (
                  <path
                    strokeLinecap="round"
                    strokeLinejoin="round"
                    strokeWidth={2}
                    d="M12 3v1m0 16v1m9-9h-1M4 12H3m15.364 6.364l-.707-.707M6.343 6.343l-.707-.707m12.728 0l-.707.707M6.343 17.657l-.707.707M16 12a4 4 0 11-8 0 4 4 0 018 0z"
                  />
                ) : (
                  <path
                    strokeLinecap="round"
                    strokeLinejoin="round"
                    strokeWidth={2}
                    d="M20.354 15.354A9 9 0 018.646 3.646 9.003 9.003 0 0012 21a9.003 9.003 0 008.354-5.646z"
                  />
                )}
              </svg>
            )}
          </button>
        </div>
      </div>
     //Rest of the code
  );
}
一旦按钮被点击,主题就会改变。很酷,对吗?😍
如何构建英雄部分

英雄部分让你抓住人们的注意力。如果你做得好,它可以帮助你找到你的第一份工作。
我使用了react-rough-notation ,这个库可以用不同的颜色和延时来动态地突出文本。
这种效果的好处是,终端用户会立即注意到被高亮的文字。你可以在这里把你最好的一面展现出来,告诉他们你是谁,你做什么。
rough-notation 的代码很简单:我们把要突出显示的文本包在<RoughNotationGroup> 和<RoughNotation> 标签中,并附加一些参数,如颜色和延迟。
在这里,我将创建一个名为RainbowHighlight 的自定义组件,它接收一种颜色并突出显示所包围的文本,可以在任何地方使用。
RainbowHighlight.js
import React from "react";
import { RoughNotation } from "react-rough-notation";

export const RainbowHighlight = ({ color, children }) => {
  // Change the animation duration depending on length of text we're animating (speed = distance / time)
  const animationDuration = Math.floor(30 * children.length);

  return (
    <RoughNotation
      type="highlight"
      multiline={true}
      padding={[0, 2]}
      iterations={1}
      animationDuration={animationDuration}
      color={color}
    >
      {children}
    </RoughNotation>
  );
};
Hero.js
import React from "react";
import { RoughNotation, RoughNotationGroup } from "react-rough-notation";
import { RainbowHighlight } from "./RainbowHighlight";

export default function Hero() {
  const colors = ["#F59E0B", "#84CC16", "#10B981", "#3B82F6"];
  return (
    <div className="flex flex-row justify-center items-start overflow-hidden">
      {/* Text container */}

      <div className="w-full md:w-1/2 mx-auto text-center md:text-left lg:p-20">
        <RoughNotationGroup show={true}>
          <RainbowHighlight color={colors[0]}>
            <h1 className="text-4xl md:text-8xl font-bold text-gray-700 dark:text-gray-200 my-2">
              Developer.
            </h1>
          </RainbowHighlight>
       <RoughNotationGroup>
     </div>
     ....
     ....
     ....
   );
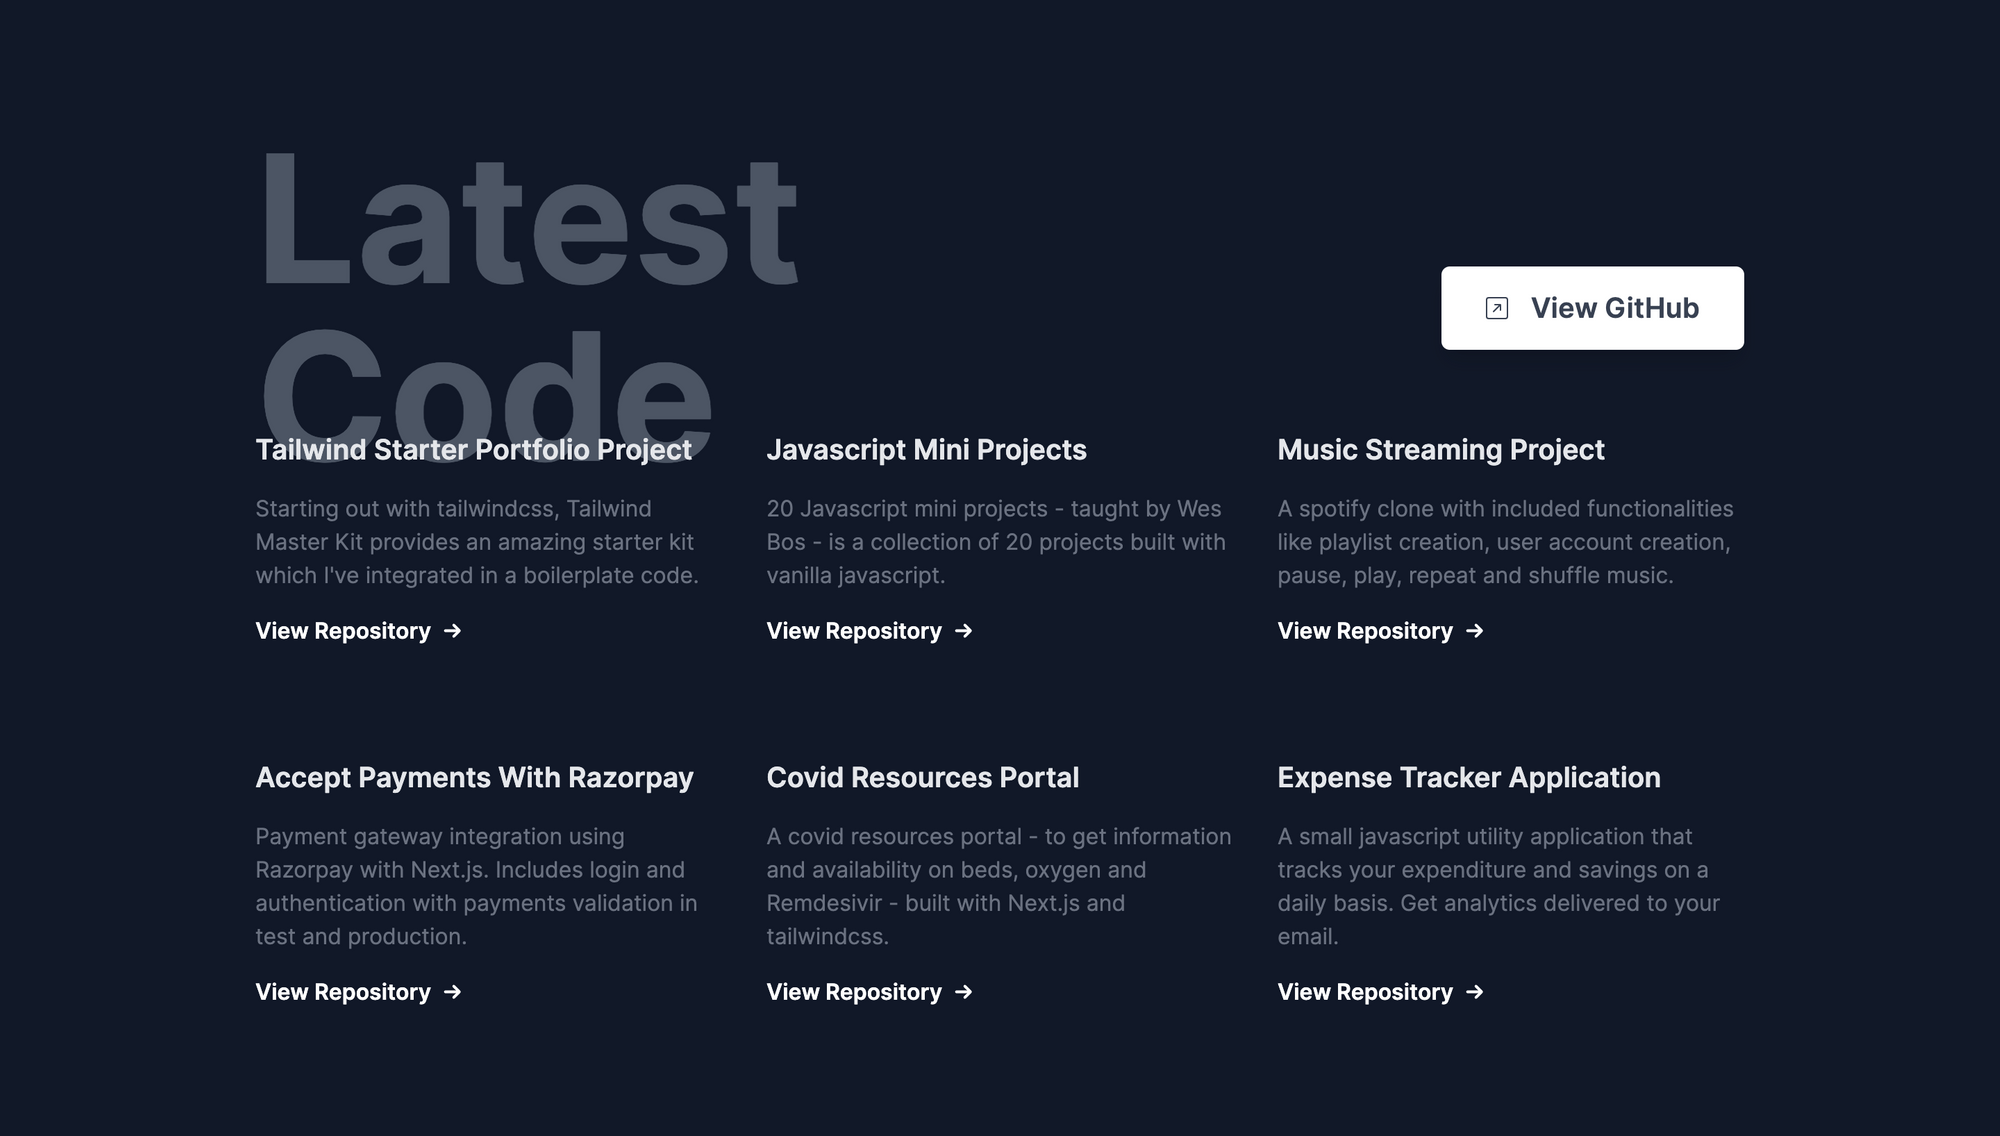
如何从GitHub上获取最新的存储库

用GitHub的API来获取仓库是非常容易的。
GitHub的API有一个规定,可以通过降序updated_time ,这样我们就可以得到最新的仓库。
 const res = await axios.get(
      `https://api.github.com/search/repositories?q=user:${username}+sort:author-date-asc`
    );
一旦我们获取了最新的仓库,我们splice 数组,只考虑到最近的6个仓库。
let repos = res.data.items;
    let latestSixRepos = repos.splice(0, 6);
    return latestSixRepos;
所以整个函数看起来像这样。
getLatestRepos.js
import axios from "axios";

const getLatestRepos = async (data) => {
  console.log("data", data);
  try {
    const username = data.githubUsername;

    const res = await axios.get(
      `https://api.github.com/search/repositories?q=user:${username}+sort:author-date-asc`
    );

    let repos = res.data.items;
    let latestSixRepos = repos.splice(0, 6);
    return latestSixRepos;
  } catch (err) {
    console.log(err);
  }
};

export default getLatestRepos;
一旦从函数中获取了数据,我们就可以在我们的React Component<GetReposCard /> 中使用它,并传递相应的参数:
<div className="grid grid-cols-1 md:grid-cols-2 lg:grid-cols-3 gap-8 max-w-6xl mx-auto px-10 lg:-mt-10 gap-y-20">
        {/* Single github Repo */}

        {repos &&
          repos.map((latestRepo, idx) => (
            <GithubRepoCard latestRepo={latestRepo} key="idx" />
          ))}
      </div>
const GithubRepoCard = ({ latestRepo }) => {
return (
<div className="github-repo">
<h1 className="font-semibold text-xl dark:text-gray-200 text-gray-700">
{latestRepo.name}
</h1>
<p className="text-base font-normal my-4 text-gray-500">
{latestRepo.description}
</p>
<a
href={latestRepo.clone_url}
className="font-semibold group flex flex-row space-x-2 w-full items-center"
>
<p>View Repository </p>
<div className="transform group-hover:translate-x-2 transition duration-300">
→
</div>
</a>
</div>
);
};
这里有一个小问题--GitHub的API只为每个IP地址提供了有限的调用次数。
为了解决这个问题,可以创建一个GitHub应用程序并生成Auth Tokens ,我们可以将其与GitHub API请求一起嵌入,这样每个IP地址就可以得到更多请求。你可以阅读这里的文档,了解更多相关信息。
如何将项目纳入你的投资组合中
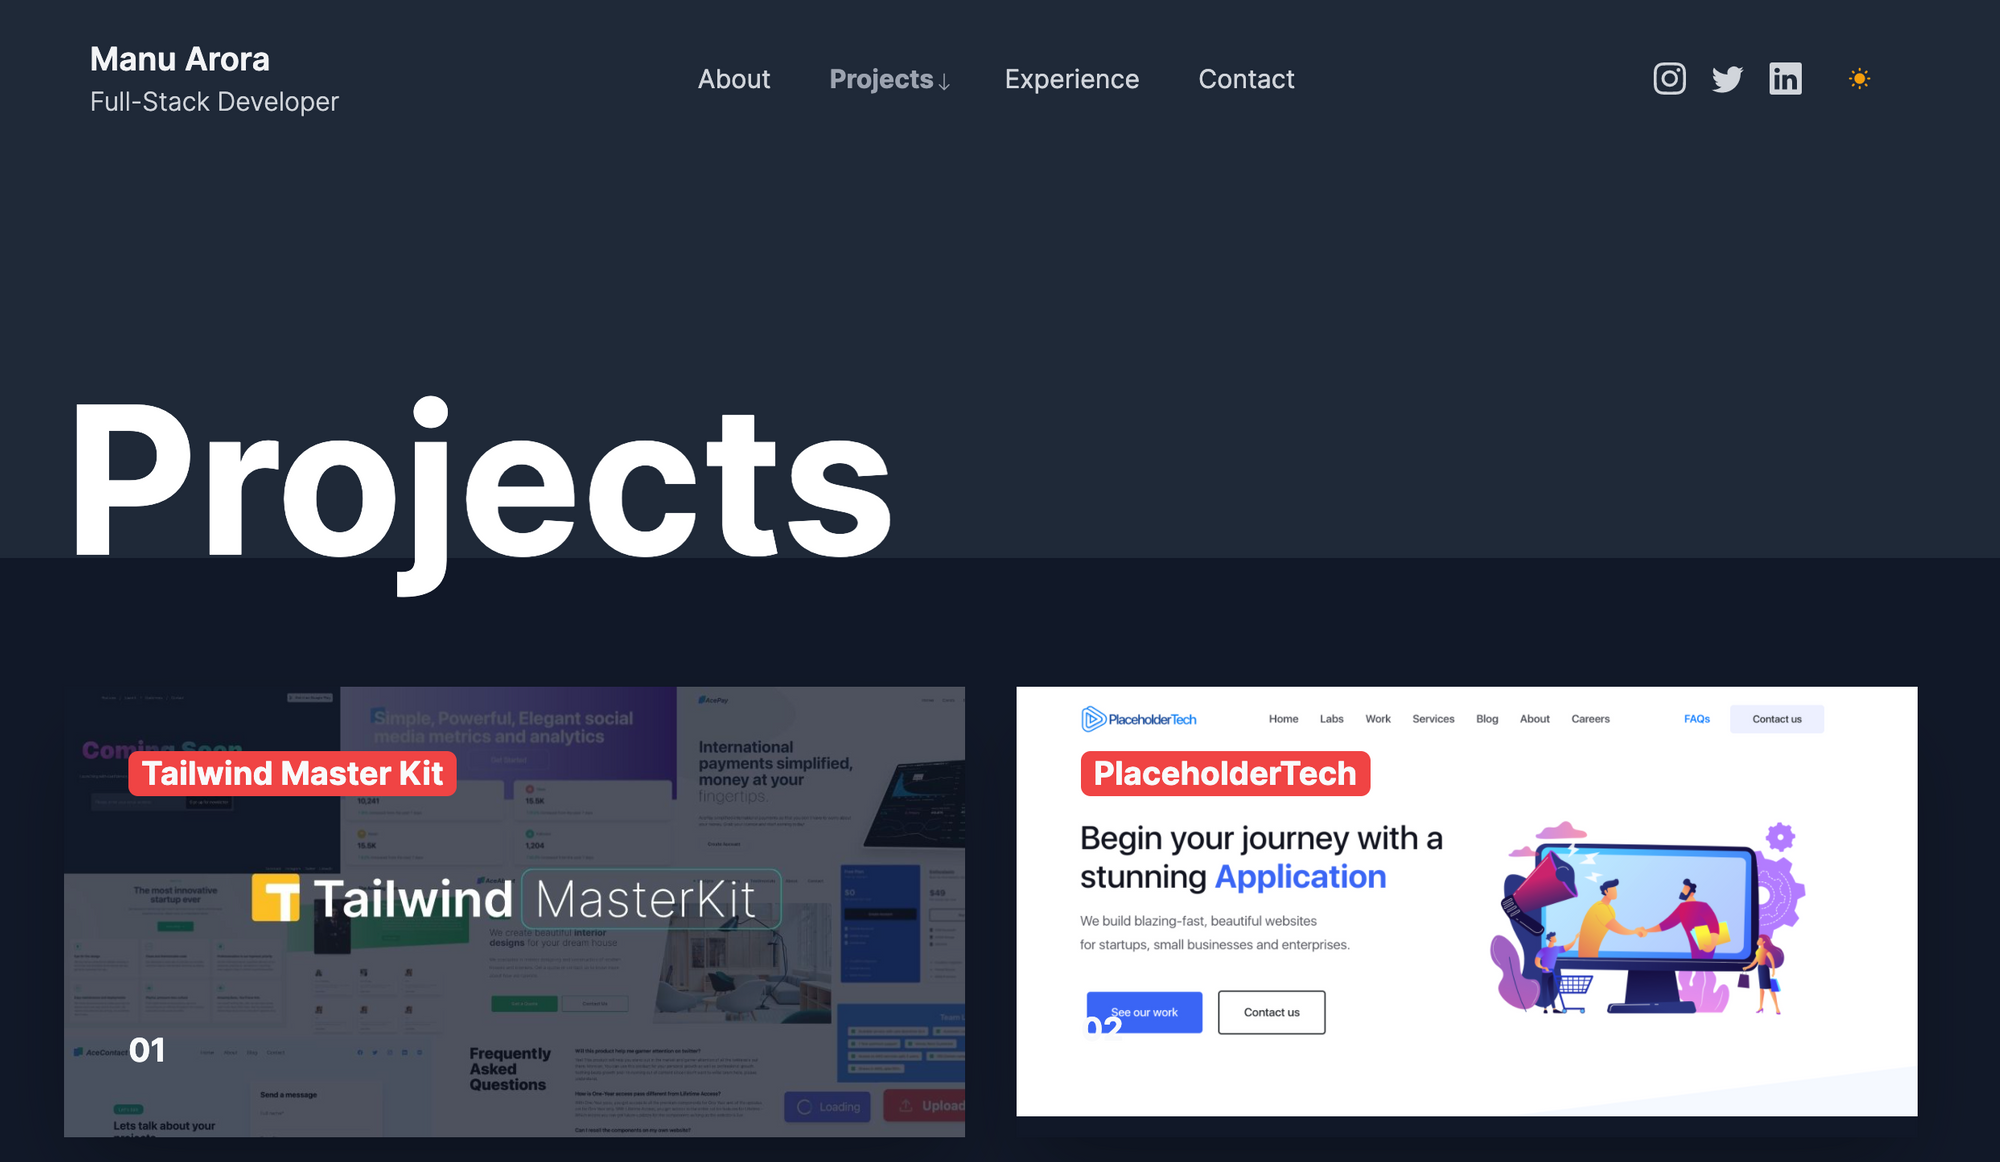
我让项目部分尽可能简单,有一个巨大的图片区域,因为招聘者/最终用户最感兴趣的是看到你做过什么。如果它看起来不错,你就已经有了一个优势。
我把页面分成两列的Tailwindgrids ,在移动屏幕上分成1列。
图片容器包含一个标题文本,显示项目的名称和底部的数字。
图片上的悬停动画是微妙的。图像缓慢地放大以吸引用户的注意力。一旦点击,它就会把用户带到项目的实时网站/GitHub仓库。
import React from "react";

export default function Projects() {
  return (
    <section className="bg-white dark:bg-gray-800">
      <div className="max-w-6xl mx-auto h-48 bg-white dark:bg-gray-800">
        <h1 className=" text-5xl md:text-9xl font-bold py-20 text-center md:text-left">
          Projects
        </h1>
      </div>
      {/* Grid starts here */}
      <div className="bg-[#F1F1F1] dark:bg-gray-900">
        <div className="max-w-6xl mx-auto grid grid-cols-1 md:grid-cols-2 gap-8 py-20 pb-40">
          {/* Single card */}
          <a
            href="https://tailwindmasterkit.com"
            className="w-full block shadow-2xl"
          >
            <div className="relative overflow-hidden">
              <img
                src="/tmk.jpg"
                alt="portfolio"
                className="transform hover:scale-125 transition duration-2000 ease-out"
              />
              <h1 className="absolute top-10 left-10 text-gray-50 font-bold text-xl bg-red-500 rounded-md px-2">
                Tailwind Master Kit
              </h1>
              <h1 className="absolute bottom-10 left-10 text-gray-50 font-bold text-xl">
                01
              </h1>
            </div>
          </a>
        </div>
      </div>
    </section>
    ...
    ...
    ...
  );
如何建立联系页面

我直接从Tailwind Master Kit中提取了联系部分,这是一个针对Tailwind网络应用项目的组件和模板市场。我不想自己花更多的时间来设计一个联系表格的样式,所以使用了一些帮助。
该组件是完全免费的,你可以很容易地将其嵌入到Tailwind相关网站中。
Contact.js
import React from "react";

export default function Contact() {
  return (
    <section>
      <div className="max-w-6xl mx-auto h-48 bg-white dark:bg-gray-800 antialiased">
        <h1 className=" text-5xl md:text-9xl font-bold py-20 text-center md:text-left">
          Contact
        </h1>
      </div>
      <div className="relative z-10 rounded-md shadow-md bg-[#02044A] p-4 md:p-10 lg:p-20 max-w-6xl mx-auto mb-20 -mt-4">
        <div className="grid grid-cols-1 md:grid-cols-2 gap-4">
          <div className="md:ml-4">
            <header className="">
              <h1 className="text-gray-50 font-semibold text-2xl">
                Get in touch, let's talk.
              </h1>
              <p className="font-light text-base text-gray-200 mt-2">
                Fill in the details and I'll get back to you as soon as I can.
              </p>
            </header>
            <div className="icons-container inline-flex flex-col my-20">
              <div className="flex flex-row items-center space-x-6 rounded-md border border-[#02044A] hover:border hover:border-blue-500 p-4">

                <p className="text-gray-50 font-light text-sm">
                  +91 9987384723
                </p>
              </div>
              <div className="flex flex-row items-center space-x-6 rounded-md border border-[#02044A] hover:border hover:border-blue-500 p-4">
                ....
                ....
                <p className="text-gray-50 font-light text-sm">
                  contact@yourwebsite.com
                </p>
              </div>
              <div className="flex flex-row items-center space-x-6 rounded-md border border-[#02044A] hover:border hover:border-blue-500 p-4">
                ....
                ....
          <form className="form rounded-lg bg-white p-4 flex flex-col">
            <label htmlFor="name" className="text-sm text-gray-600 mx-4">
              {" "}
              Your Name
            </label>
            <input
              type="text"
              className="font-light rounded-md border focus:outline-none py-2 mt-2 px-1 mx-4 focus:ring-2 focus:border-none ring-blue-500"
              name="name"
            />
            <label htmlFor="email" className="text-sm text-gray-600 mx-4 mt-4">
              Email
            </label>
            <input
              type="text"
              className="font-light rounded-md border focus:outline-none py-2 mt-2 px-1 mx-4 focus:ring-2 focus:border-none ring-blue-500"
              name="email"
            />
            <button
              type="submit"
              className="bg-blue-500 rounded-md w-1/2 mx-4 mt-8 py-2 text-gray-50 text-xs font-bold"
            >
              Send Message
            </button>
          </form>
        </div>
      </div>
    </section>
  );
}
如何部署该组合
部署应用程序是相当简单的,只需要8个简单的步骤。
- 克隆资源库
git clone https://github.com/manuarora700/simple-developer-portfolio-website
- 安装依赖项
npm install
- 启动本地开发服务器
npm run dev
-
对网站进行修改。你应该包括你所有的项目、教育、社会链接和Meta信息。
-
推送代码到你的远程版本库
git add *
git commit -m "add changes to the cloned repo"
git push
-
创建一个Vercel账户(或登录你的Vercel账户)
-
添加新创建的GitHub仓库,并推送修改内容,Vercel将自动为你在链接上进行部署。
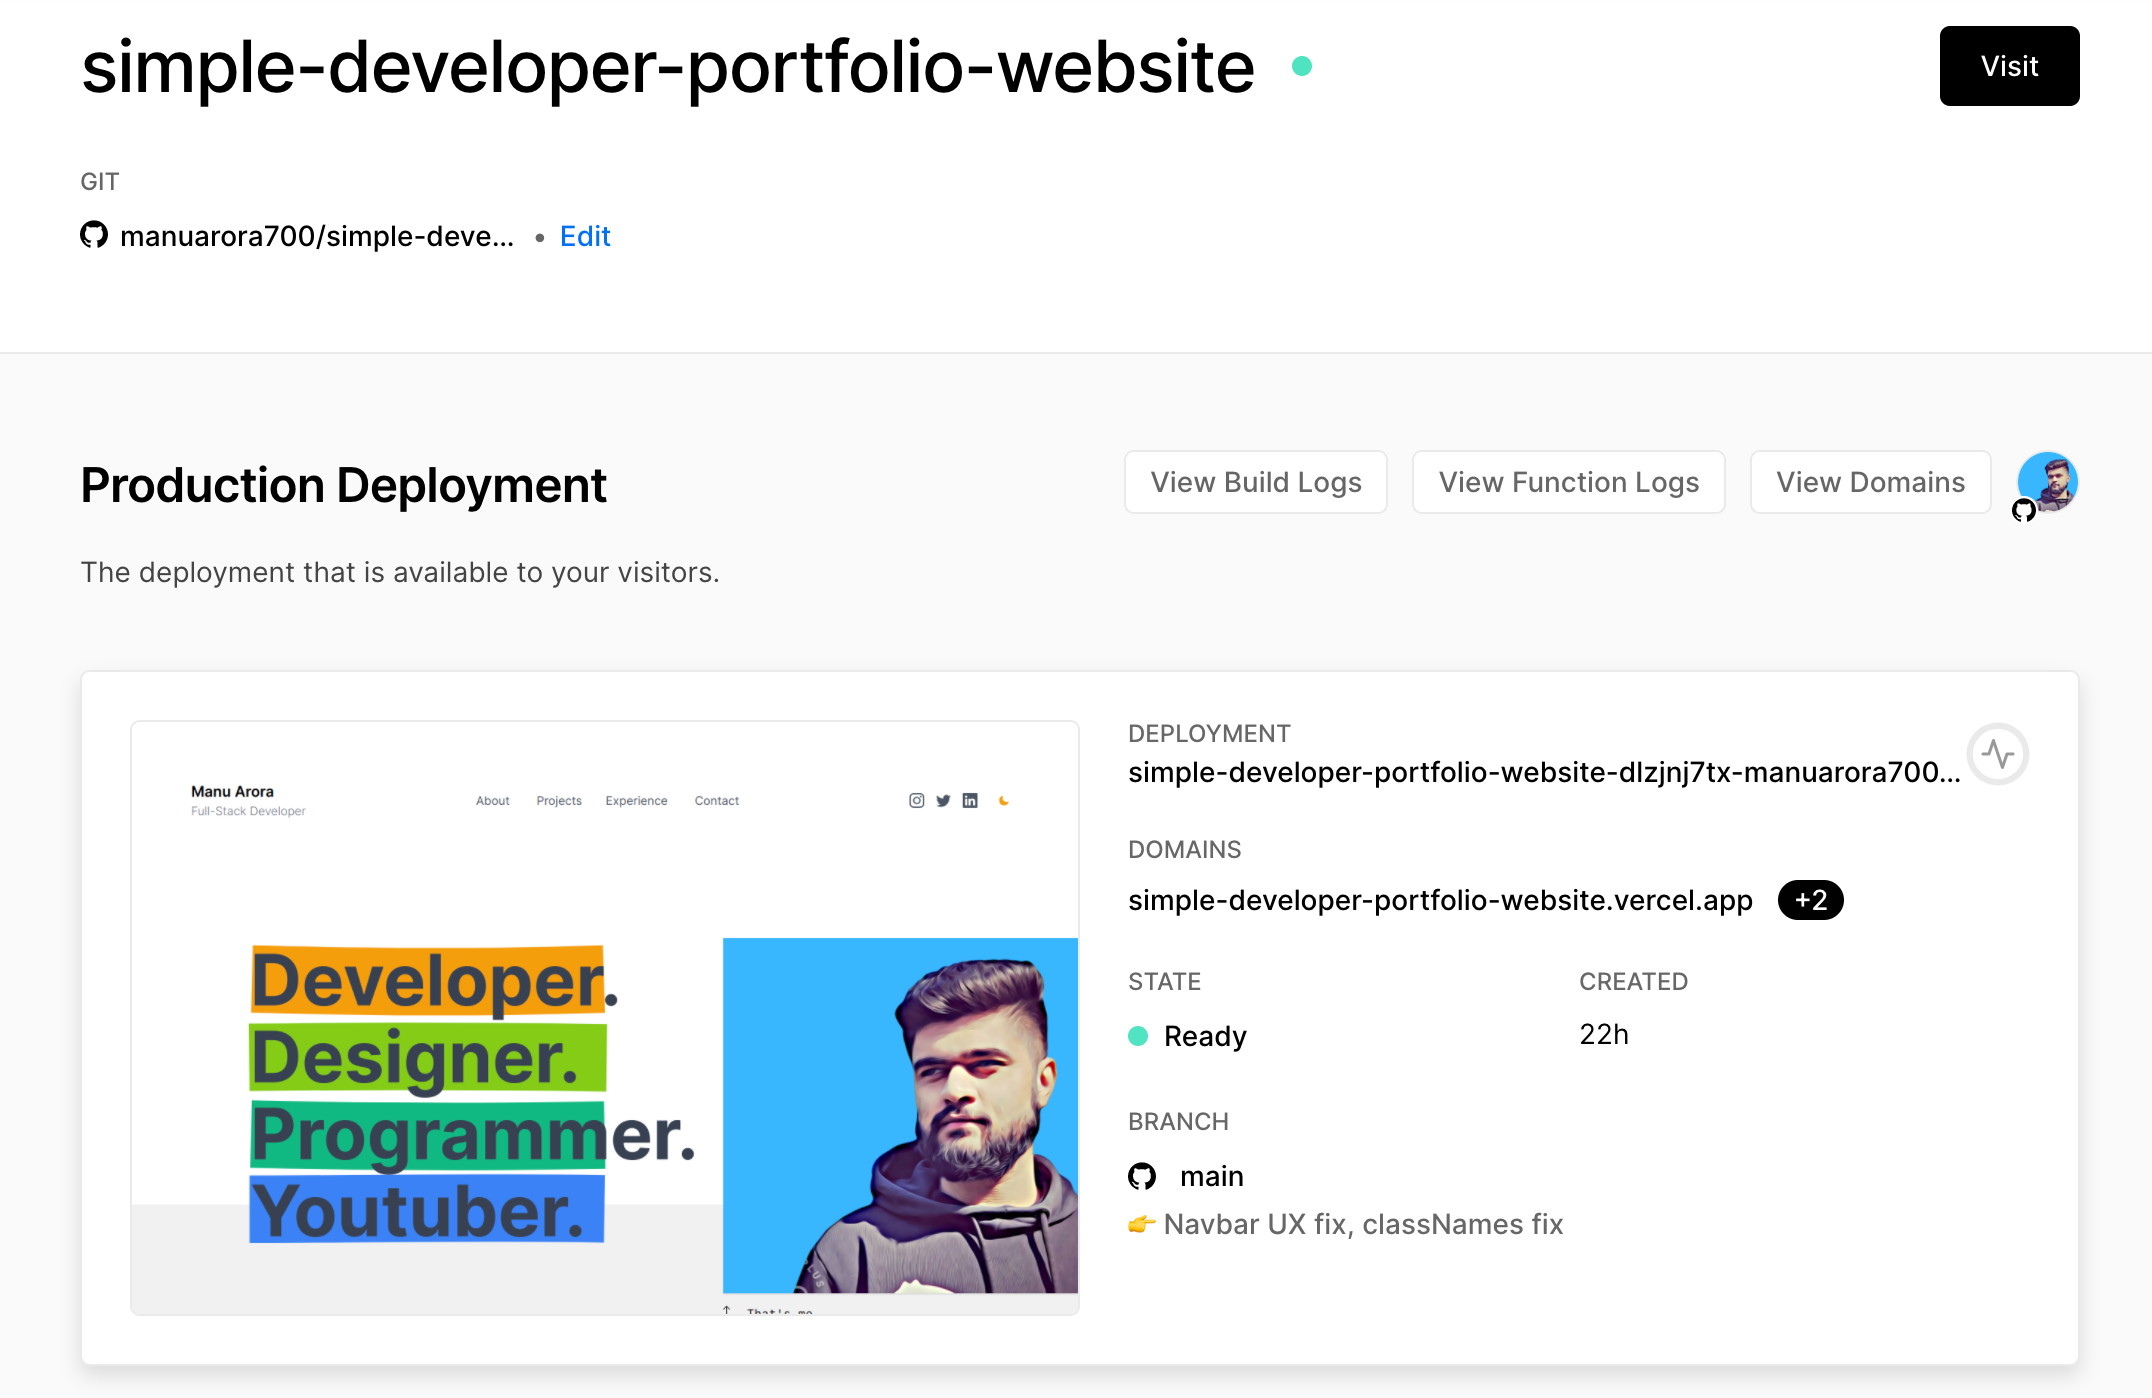
- 一旦网站上线,与你的朋友分享测试链接,或将其添加到你的履历表中。你也可以去连接一个自定义域名,使其更加专业。
结论
这个作品集网站将给招聘者或访问者提供他们想要的一切,如果他们想了解更多关于你和你的工作。你的作品集的目标应该是以最好的方式展示你的技能。
另外,我们用Next.js ,这表明你对React及其框架很熟悉。(招聘人员正在寻找你!😍)
该网站使用tailwindcss 进行样式设计,这表明你可以使用CSS框架并减少样式设计时间。
组件是细化的,每个组件都有自己的用途。文件夹结构很简单,容易理解。
你可以用任何你喜欢的方式来定制网站--我已经把它开源了,代码链接到下面的GitHub repo。
我的个人网站帮助我获得了大型科技公司的面试机会,它是我能够获得工作的主要原因之一(还有在freeCodeCamp上练习和学习如何编码)。
我真的很喜欢建立这个网站。如果你喜欢它,请在GitHub repo上留下一颗星,并帮助传播这个消息。⭐️
