

在处理训练数据时,你经常需要根据你想使用的机器学习模型的架构,将图像调整到一个固定的大小。
在Tensorflow中,我们可以使用tf.image.resize()来将图像调整到不同的分辨率。
tf.image.resize(
    images,
    size,
    method=ResizeMethod.BILINEAR,
    preserve_aspect_ratio=False,
    antialias=False,
    name=None
)
该方法控制了我们可以用于调整大小的不同算法。你可以在Tensorflow API中看到一个完整的选项列表。
学习如何使用tf.image.resize的最好方法是通过实例学习。因此,为了学习如何调整图像的大小,我们将使用Mnist数据集。MNIST数据集是一个流行的手写数字数据集,用于教育机器学习项目。
使用Tensorflow可以很容易地下载这个数据集。
让我们下载数据集,用Matplotlib将其可视化。
import tensorflow as tf
import tensorflow_datasets as tfds
from PIL import Image
import PIL
import matplotlib.pyplot as plt

ds = tfds.load('mnist', split='train', shuffle_files=True)
#  create batches of 32 images each
ds_batch = ds.shuffle(1024).batch(32).prefetch(tf.data.AUTOTUNE)

columns = 8
rows = 4

# visualise the first batch
for example in ds_batch.take(1):
  images, label = example["image"], example["label"]
  fig = plt.figure(figsize=(8, 8))

  for i in range(1, columns*rows):
      fig.add_subplot(rows, columns, i)
      # matplotlib.pyplot.imshow doesn't like the
      # alpha channel, so we drop it
      plt.imshow(images[i][:,:,-1])
      # we add a label to each image.
      plt.title(label[i].numpy())
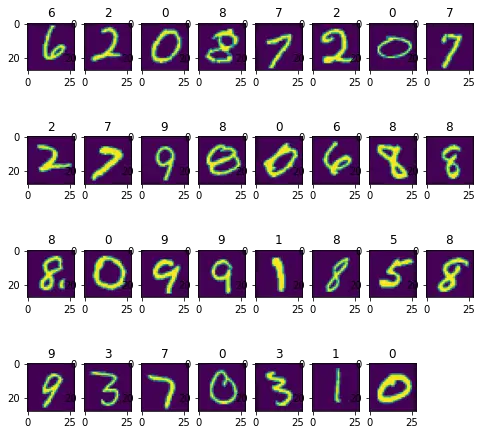
现在我们已经知道我们的数据集是什么样子的了。
忽略这样一个事实:为了更容易实现可视化,在使用matplotlib显示图像时,我们增加了每张图像的大小,并将图像着色。实际的MNIST图像是灰阶的,而且很小。
我们的数据集所返回的所有图像都以形状为(28, 28, 1)的张量形式返回
# Construct a tf.data.Dataset
ds = tfds.load('mnist', split='train', shuffle_files=True)
for example in ds.take(1):
image, label = example["image"], example["label"]
print(image.shape)
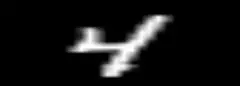
image_pil = tf.keras.utils.array_to_img(image)
# display image in original size
display(image_pil)
(28, 28, 1)

这已经很微小了。
让我们把图像的大小调整为一半大小
resizedImage = tf.image.resize(image, (14, 14))
resized_image_pil = tf.keras.utils.array_to_img(resizedImage)

resized_image_pil

这真是太小了。
与其减少尺寸,不如尝试增加尺寸。
resizedImage = tf.image.resize(image, (86, 86))
resized_image_pil = tf.keras.utils.array_to_img(resizedImage)

resized_image_pil

我们的图像现在大了很多
请注意,如果我们不保持与原始图像相同的长宽比,调整后的图像就会被扭曲。
resizedImage = tf.image.resize(image, (86, 240))
resized_image_pil = tf.keras.utils.array_to_img(resizedImage)

resized_image_pil
我们可以通过将参数preserve_aspect_ratio设置为 True 来防止失真。但这样我们就不会总是有相同的宽度和高度了。
resizedImage = tf.image.resize(image, (86, 240),preserve_aspect_ratio=True)
resized_image_pil = tf.keras.utils.array_to_img(resizedImage)

resized_image_pil

如果我们不想扭曲图像,但仍想固定宽度和高度,我们可以使用其他函数,如tf.image.crop_and_resize()或tf.image.resize_with_pad。
resizedImage = tf.image.resize_with_pad(image, 86, 240)
resized_image_pil = tf.keras.utils.array_to_img(resizedImage)

resized_image_pil

resizedImage = tf.image.resize_with_crop_or_pad(image, 14, 28)
resized_image_pil = tf.keras.utils.array_to_img(resizedImage)

resized_image_pil

