

在本教程中,你将学习如何用jQuery和PHP实现Bootstrap模态表单提交。
模态或对话框在任何网络应用中都有重要作用。模态允许在同一页面上处理额外的功能,而不使用任何额外的空间。
Bootstrap模版对用户非常友好,易于集成。模板可用于不同的需求,如在同一页面显示任何特定的细节,或处理表单提交以处理用户输入。
因此,如果你正在寻找实现Bootstrap模态与表单提交处理表单值的解决方案,那你就来对地方了。在本教程中,你将学习如何用输入显示Bootstrap表单,用jQuery处理Bootstrap表单提交,并在PHP中处理表单提交后的值。
本教程用简单的步骤解释了Bootstrap表单提交功能的现场演示,并提供了下载现场演示源代码的链接。
所以,让我们开始编码,我们将有以下的文件结构来处理Bootstrap表单提交与jQuery的例子:
- index.php
- contact.js
- saveContact.php
步骤1:包括Bootstrap和jQuery文件
首先,我们将在head 标签中包括Bootstrap和jQuery库文件,在index.php 文件。我们还将包括contact.js 文件,其中使用jQuery处理表单提交。
<link rel="stylesheet" href="https://maxcdn.bootstrapcdn.com/bootstrap/3.3.5/css/bootstrap.min.css">
<link rel="stylesheet" href="https://maxcdn.bootstrapcdn.com/bootstrap/3.3.5/css/bootstrap-theme.min.css">
<script src="https://ajax.googleapis.com/ajax/libs/jquery/2.1.3/jquery.min.js"></script>
<script src="https://maxcdn.bootstrapcdn.com/bootstrap/3.3.5/js/bootstrap.min.js"></script>
<script type="text/javascript" src="js/contact.js"></script>
第二步:设计Bootstrap联系表单
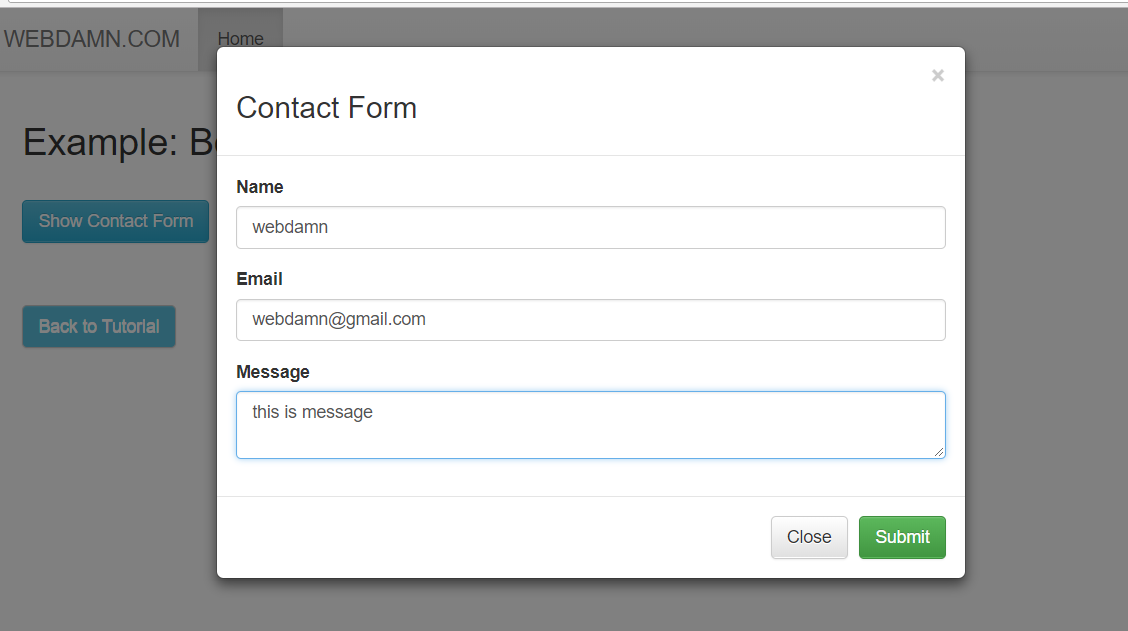
在index.php 文件中,我们将设计带有输入字段和提交按钮的Bootstrap联系表单。当点击显示联系表格按钮时,模态将被打开。
<div id="contact"><button type="button" class="btn btn-info btn" data-toggle="modal" data-target="#contact-modal">Show Contact Form</button></div>
<div id="contact-modal" class="modal fade" role="dialog">
	<div class="modal-dialog">
		<div class="modal-content">
			<div class="modal-header">
				<a class="close" data-dismiss="modal">×</a>
				<h3>Contact Form</h3>
			</div>
			<form id="contactForm" name="contact" role="form">
				<div class="modal-body">
					<div class="form-group">
						<label for="name">Name</label>
						<input type="text" name="name" class="form-control">
					</div>
					<div class="form-group">
						<label for="email">Email</label>
						<input type="email" name="email" class="form-control">
					</div>
					<div class="form-group">
						<label for="message">Message</label>
						<textarea name="message" class="form-control"></textarea>
					</div>
				</div>
				<div class="modal-footer">
					<button type="button" class="btn btn-default" data-dismiss="modal">Close</button>
					<input type="submit" class="btn btn-success" id="submit">
				</div>
			</form>
		</div>
	</div>
</div>
Step3: 处理Bootstrap联系表单的提交
在contact.js 文件中,我们将处理表单提交的jQuery.submit() 函数,返回false,不直接提交给动作。我们将通过调用函数submitForm() ,用Ajax处理表单提交值。
$(document).ready(function(){
	$("#contactForm").submit(function(event){
		submitForm();
		return false;
	});
});
在函数submitForm() ,我们将用表单提交值向saveContact.php 发出Ajax请求,以便在服务器端处理表单值。
function submitForm(){
	 $.ajax({
		type: "POST",
		url: "saveContact.php",
		cache:false,
		data: $('form#contactForm').serialize(),
		success: function(response){
			$("#contact").html(response)
			$("#contact-modal").modal('hide');
		},
		error: function(){
			alert("Error");
		}
	});
}
步骤4:在服务器端处理联系表单提交值
现在最后在saveContact.php 文件中,我们将处理表单提交的$_POST 值。
<?php
if (isset($_POST['email'])) {
	$name = strip_tags($_POST['name']);
	$email = strip_tags($_POST['email']);
	$message = strip_tags($_POST['message']);
}
?>
