

Rhai是一种高级脚本语言,允许你在脚本中编写应用程序的逻辑。这些脚本可以被嵌入到Rust程序中并在其中执行。
由于Rhai脚本比Rust更容易理解,它们可以使创建更复杂的程序变得更容易。
在这篇文章中,你将学习如何在Rust中嵌入Rhai脚本,并使用Rhai和Actix Web框架构建RESTful API,以及以下内容。
- 什么是Rhai?
- 在Rust中使用Rhai的好处
- 在Rust中运行Rhai脚本的指南
- 为Rust设置Actix Web框架
- 使用Actix Web的简单Rust REST API示例
- 带有动态路由的Rust REST API示例
- 带有多个参数的函数的例子
- 使用REST API来扩展Rust中的复杂功能,以便在Rhai中运行
要了解这篇文章,你应该熟悉Rust、Rhai和RESTful APIs。
什么是Rhai?
Rhai,或RhaiScript,是一种小型、快速、可嵌入的脚本语言,可以集成到Rust程序中。Rust程序在运行时可以执行Rhai脚本,这使得你可以在一个易于理解的脚本中实现复杂的算法。
Rhai "这个名字的灵感来自Chai,一种C++的脚本语言。就像Rhai可以嵌入到Rust中一样,Chai也可以嵌入到C++中,并允许你在一个易于理解的脚本中抽象出复杂的算法。
ChaiScript和RhaiScript使用类似JavaScript的语法。这些脚本语言提供了一种安全的方式来将脚本添加到各自的编程语言中。
在Rust中使用Rhai的好处
Rhai有很多好处。例如,与Rust的其他脚本语言相比,Rhai脚本的速度更快,包括像JavaScript、Lua和Python这样的流行选项。它们也是动态类型的,这允许灵活性并降低复杂性。
此外,Rhai是一种比Rust更高级的语言,这使得开发者很容易在Rust程序中实现复杂的算法。Rhai脚本可以很容易地嵌入到Rust程序中,与程序的变量进行交互,并在沙盒环境中发挥作用。
最后,Rhai脚本是内存安全的,不能影响Rust程序。这是因为它们在一个受控的环境中运行,没有能力改变沙盒外的环境。
在Rust中运行Rhai脚本的指南
要在你的Rust程序中执行Rhai脚本,你需要遵循以下步骤。
首先,将Rhai库添加到你的Cargo.toml 文件中。
[dependencies]
rhai = "1.6.1"
接下来,用下面的命令构建项目以下载该库。
cargo build
你还需要设置好你的Rust项目。你可以用下面的命令创建一个空的项目。
cargo init rhai_tutorial --bin
在建立项目后,你可以开始编写你的Rhai脚本。在接下来的步骤中,我们将设置一个 "Hello world "程序,作为一个使用Rhai脚本的Rust程序的简单例子。
首先,把下面的内容复制到你的main.rs 文件。
// import the scripting engine
use rhai::{ Engine };

fn main() {
    // Create the scripting engine
    let engine = Engine::new();

    // Run the script at "src/my_script.rhai"
    let result = engine.eval_file::<String>("src/my_script.rhai".into()).unwrap();

    // print the results of the script
    println!("{}", result);
}
上面的程序会执行我们将在下一步创建的脚本,然后打印出脚本的返回值。
接下来,在src 文件夹中创建一个名为my_script.rhai 的新文件,并将下面的内容复制到其中。这个脚本将 "Hello, World!"返回给Rust。
// a simple function that appends "Hello, "
// to the beginning of the argument
fn hello(name) {
    return "Hello, " + name;
}

// Rhai return the value of the last expression
hello("World!");
为了运行这个程序,在src/main.rs 文件中编写Rust程序,在src/my_script.rhai 文件中编写Rhai脚本。
使用上面的步骤创建了这个例子后,用下面的命令运行它。
$ cargo run
   Compiling rhai_tutorial v0.1.0 (..../rhai_tutorial)
    Finished dev [unoptimized + debuginfo] target(s) in 19.09s
     Running `target/debug/example`
Hello, World!
在Rhai脚本中,hello(); 函数接收一个字符串,将"Hello, " 附加到字符串的开头,然后返回结果。
在Rust执行Rhai脚本后,它收到的是该脚本最后一行的值。在这个例子中,Rust从Rhai脚本中接收 "Hello, World!"并将其打印到终端。
你也可以编写可以从Rhai脚本中调用的Rust函数。这对于创建需要访问某些Rust功能的Rhai脚本是很有用的。让我们在下一个例子中看看如何完成这个任务。
首先,把下面的内容复制到你的main.rs 文件中。
// import the scripting engine
use rhai::{Engine};

fn main() {
    // Create scripting engine
    let mut engine = Engine::new();

    // create a hello function using an anonymous function
>   let hello = |name: String| -> String {
>       let mut text = String::from("Hello, ");
>       text.push_str(&name);
>       return text;
>   };

    // register the function in the engine
>   engine.register_fn("hello", hello);

    // Run the script at "my_script.rhai"
    let result = engine.eval_file::<String>("src/my_script.rhai".into()).unwrap();

    // print the results of the script
    println!("{}", result);
}
接下来,将下面的内容复制到你的my_script.rhai 文件中。
// Rhai return the value of the last expression
hello("World!");
现在,如果你运行这个程序,你应该像以前一样看到 "Hello, World!" 。但是,我们没有在你的Rhai脚本中写这个函数,而是通过写一个Rust函数,从Rhai脚本中调用来完成的。
为Rust设置Actix Web框架
代表性状态传输(REST)API是为了促进客户端和服务器之间的通信。由于客户端独立于服务器工作,他们使用API作为接口来发送和接收请求。
Actix Web框架是一个常用的框架,用于构建REST API。Rust网络框架提供了你在Rust中快速构建大型、可扩展和高效的REST API所需的工具。
要设置这个框架,请按照下面的步骤进行。
首先,在你的项目的Cargo.toml 文件中添加下面的依赖性。
[dependencies]
actix-web = "4.0.1"
接下来,使用下面的命令构建项目以下载该库。
cargo build
安装该库后,你就可以开始在Rust中创建RESTful APIs。要跟上下面的例子,你应该在你的main.rs 文件中工作。
使用Actix Web的简单Rust REST API例子
下面是一个使用Actix Web框架的API的简单例子。
// import the the necessary modules from the library
use actix_web::{
  HttpServer,
  App,
  get,
  Responder,
};

// create a "/" route that
// responds with "Hello, World"

#[get("/")]
async fn greet() -> impl Responder {
  "Hello, World!"
}

#[actix_web::main]
async fn main() -> std::io::Result<()> {
  // create the server
  HttpServer::new(|| {
    App::new()
      .service(greet)
  })
    .bind(("127.0.0.1", 8080))  // bind the server to localhost:8080
    .unwrap()                // unwrap the result of the bind trait
    .run()                    // run the server
    .await
}
当你运行上面的程序并向http://localhost:8080/,它的反应是 "Hello, World!"
示例Rust REST API与动态路由
下面是另一个你可以使用这个框架创建API的例子。在这个例子中,程序创建了一个动态路由,对一个URL的最后一段的参数值说 "Hello"。
use actix_web::{
  HttpServer,
  App,
  get,
  Responder,
  web,
};

// if you send a request to /users, you get "Hello, users".

#[get("/{name}")]
async fn greet(path: web::Path<(String, )>) -> impl Responder {
  // assign the first of the path's parameter to "name"
  let name = path.into_inner().0;

  // Append "Hello, " to the beginning of the string,
  // and return it
  format!("Hello, {name}!")
}

#[actix_web::main]
async fn main() -> std::io::Result<()> {
  HttpServer::new(|| {
    App::new()
      .service(greet)
  })
    .bind(("127.0.0.1", 8080))   // bind the server to localhost:8080
    .unwrap()                // unwrap the result of the bind trait
    .run()                    // run the server
    .await
}
动态路由是有一个或多个灵活的URL段的路由。在Rust中,你通过它们相对于其他灵活段的位置来引用灵活段。在Actix Web中,这个位置使用了一个零索引:第一个出现在零,第二个出现在一。
URL段是位于斜线之间的路线的一部分。例如,在URLexample.com/path/to/res…中,这些段是 "path"、"to "和 "resource"。
假设你向这个例子的URL发送了一个请求:http://localhost:8080/humans
作为我们刚刚创建的程序的结果,你会得到一个 "你好,人类!"的响应。这是因为最后一个URL段指定了 "人类",然后在程序中分配给name 。
带有多个参数的greet 函数的例子
让我们把前面的例子再往前推一步。下面是一个带有一个、两个或三个参数的greet 函数的例子。
让我们像以前一样,从一个参数开始。将下面的代码复制到你的文件中。
#[get("/{name}")]
async fn greet(path: web::Path<(String, )>) -> impl Responder {
  let name = path.into_inner().0;
  format!("Hello, {name}")
}
现在让我们使用两个参数:name 和age 。用下面的代码替换你文件中的内容。
#[get("/{name}/{age}")]
async fn greet(path: web::Path<(String, i32)>) -> impl Responder {
  let name: String = path.into_inner().0;
  let age: i32 = path.into_inner().1;
  format!("Hello, {name} you are {age} years")
}
现在,我们将添加第三个参数:hair_color 。对于这三个参数,使用下面的代码。
#[get("/{name}/{age}/{hair_color}")]
async fn greet(path: web::Path<(String, i32, String)>) -> impl Responder {
  let name: String = path.into_inner().0;
  let age: i32 = path.into_inner().1;
  let hair_color: String = path.into_inner().2;
  format!("Hello, {name} you are {age} with {hair_color} hair")
}
你可以在一个单一的URL上有任何数量的灵活段。这样,你可以添加逻辑来处理API运行前不知道的路由。
使用REST APIs来扩展Rust中的复杂功能,以便在Rhai中运行
Rhai是一个评估引擎,这意味着你不能运行复杂的功能,如数据库操作。为了使用这些复杂的功能,你需要从Rust中扩展它们。
在下面的REST API项目中,API和路由是用Rust创建的,而Rhai处理逻辑。
用于构建这种类型的API的库是actix-web 和rhai 。按照下面的步骤来安装这些库。
首先,在你的项目的Cargo.toml 文件中添加以下依赖项。
[dependencies]
actix-web = "4.0.1"
rhai = "1.6.1"
接下来,我们来构建项目。用下面的命令在项目中安装这些库。
cargo build
现在我们准备开始了。
用Rust注册项目的端点
本节中的例子项目有两个端点。
端点/multiply/{num1}/{num2} ,用于两个数字的相乘。例如,如果你向http://localhost:8080/multiply/5/10 发送一个GET请求,你会得到 "50 "作为响应。
同时,/add/{num1}/{num2} ,用于两个数字相加。如果你向http://localhost:8080/add/5/10 发送一个GET请求,你会得到 "15 "作为响应。
下面的程序将被写在我们的main.rs 文件中。
use actix_web::{
    HttpServer,
    get,
    App,
    web::Path,
    Responder,
};
use rhai::Engine;

#[get("/multiply/{num1}/{num2}")]
async fn multiply(path: Path<(i64, i64)>) -> impl Responder {
    // get the numbers from the url path
    let (num1, num2) = path.into_inner();

    // create an instance of the rhai engine
    let mut engine = Engine::new();

    // register an API that exposes the numbers to Rhai
    engine.register_fn("num1", move || num1);
    engine.register_fn("num2", move || num2);

    // run the script
    let result = engine.eval_file::<i64>("src/multiply.rhai".into()).unwrap();

    // return the result
    format!("{result}")
}

#[get("/add/{num1}/{num2}")]
async fn add(path: Path<(i64, i64)>) -> impl Responder {
    // get the numbers from the url path
    let (num1, num2) = path.into_inner();

    // create an instance of the rhai engine
    let mut engine = Engine::new();

    // register an API that exposes the numbers to Rhai
    engine.register_fn("num1", move || num1);
    engine.register_fn("num2", move || num2);

    // run the script
    let result = engine.eval_file::<i64>("src/add.rhai".into()).unwrap();

    // return the result
    format!("{result}")
}

// When Rust executes the Rhai script, Rhai returns the result of the last expression

#[actix_web::main]
async fn main() -> std::io::Result<()> {

    HttpServer::new(|| {
        App::new()
            .service(multiply)
            .service(add)
    })
        .bind(("127.0.0.1", 8080))
        .unwrap()
        .run()
        .await
}
复制了上面的代码后,你现在可以在Rhai引擎中使用multiply 和add 函数。在src 文件夹中创建两个文件。
multiply.rhai,执行/multiply路线的逻辑。add.rhai, 执行/add端点的逻辑。
把下面的脚本复制到multiply.rhai 文件中。
fn multiply(num1, num2) {
  return num1 * num2;
}

let num1 = num1();
let num2 = num2();

multiply(num1, num2);
将下面的脚本复制到add.rhai 文件中。
fn add(num1, num2) {
  return num1 + num2;
}

let num1 = num1();
let num2 = num2();

add(num1, num2);
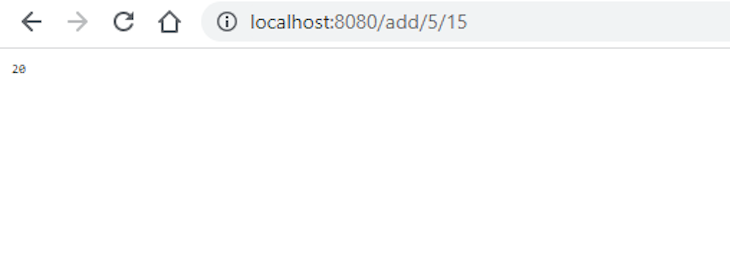
编译并执行Rust程序后,在浏览器中打开一个例子,如http://localhost:8080/add/5/15,以测试结果。这个例子的结果应该类似于下面的内容。
结论
在这篇文章中,我们介绍了创建Rhai脚本,使用Actix Web构建后端API,以及在后端API中使用Rhai脚本。
Rhai是一个非常有用的构建Rust程序的工具,它可以帮助开发者把复杂的代码写在更容易理解的脚本中,然后可以嵌入到Rust程序中。
