

当你在为一个应用程序添加授权时,有两个关键问题。
- 不该访问的用户是否真的不在?
- 应该有访问权的用户是否真的进入了?
如果你不能肯定地回答这两个问题,你怎么能说自己有一个安全的应用程序呢?这是你可以手动测试的东西,但更好的选择是测试自动化。具体来说,我认为最好的方法是使用测试驱动开发(TDD)来达到这个目的。
这篇文章是关于通过遵循TDD将授权添加到Ruby on RailsAPI。你可以查看这篇文章,详细了解如何用Auth0保护Rails API。此外,你还可以关注这篇文章和这个资源库。
TDD周期
从本质上讲,TDD是一个循环,其三个步骤如下图所示。
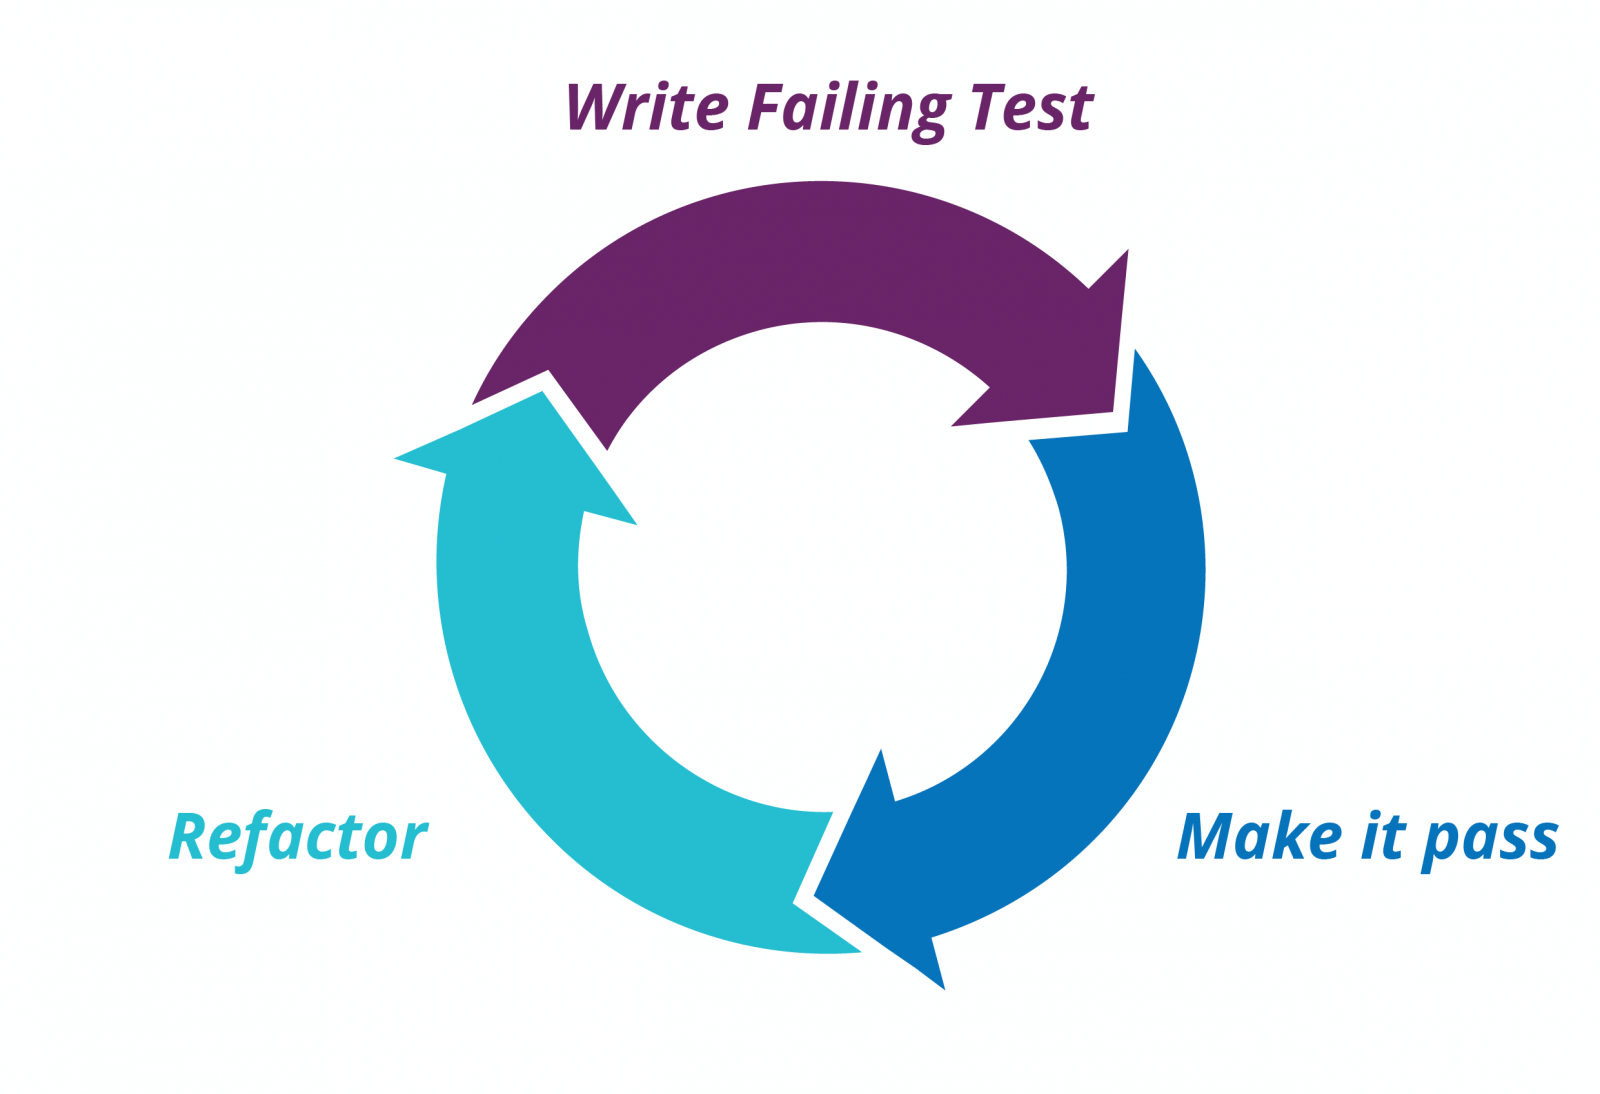
[来源。思想工作室]
- 首先,你为一个新功能做一个测试。起初,测试会失败。
- 然后,你写出能使测试通过的最小代码量。
- 最后,你重构代码,使其实现更稳固。
很简单,不是吗?它创造了一个反馈循环,在这个循环中,你渐渐地编写代码来完成手头的任务。此外,它确保你建立可测试性,也就是说,你写的代码可以被测试。
为了展示如何使用TDD,让我们从测试开始,一步一步地将授权添加到我们的应用程序中。我将使用OAuth通过Auth0来授权对API的请求。正如我在之前的文章中解释的,你可以注册一个免费的Auth0账户。查看一下,以获得关于设置Auth0的所有细节。
开始的应用程序
我们的旅程从一个用Rails 6引导的API开始。它有三条路线,需要不同级别的保护。
/api/messages/public:公共路线。/api/messages/protected:需要一个有效的访问令牌。/api/messages/admin:需要一个有效的访问令牌。由于Auth0使用JWT作为其访问令牌格式,我们可以检查它,并确保它有一个permissions,其中包含范围read:admin-messages.
这个分支是正确的起点。这些是三条路由的基线测试。
# spec/api/messages_controller_spec.rb
require 'rails_helper'

describe Api::MessagesController, type: :controller do
  describe '#public' do
    subject { get :public, params: { format: :json } }

    it 'returns an accepted answer for the public endpoint' do
      subject

      expect(response).to be_ok

      message = 'The API doesn\'t require an access token to share this message.'
      expect(json_response!).to include('message' => message)
    end
  end

  describe '#protected' do
    subject { get :protected, params: { format: :json } }

    it 'returns an accepted answer for the protected endpoint' do
      subject

      expect(response).to be_ok

      message = 'The API successfully validated your access token.'
      expect(json_response!).to include('message' => message)
    end
  end

  describe '#admin' do
    subject { get :admin, params: { format: :json } }

    it 'returns an accepted answer for the admin endpoint' do
      subject

      expect(response).to be_ok

      message = 'The API successfully recognized you as an admin.'
      expect(json_response!).to include('message' => message)
    end
  end
end
我们还没有强制执行授权。这些请求可以正常工作,但这很快就会改变。
要启动测试,请在项目的根文件夹中移动并运行以下命令。
./go test
go 脚本允许你执行不同的任务,但我们将在这里使用它来运行我们的测试。
现在,我们有一个愉快的绿色测试列表,你可以在下面的截图中看到。
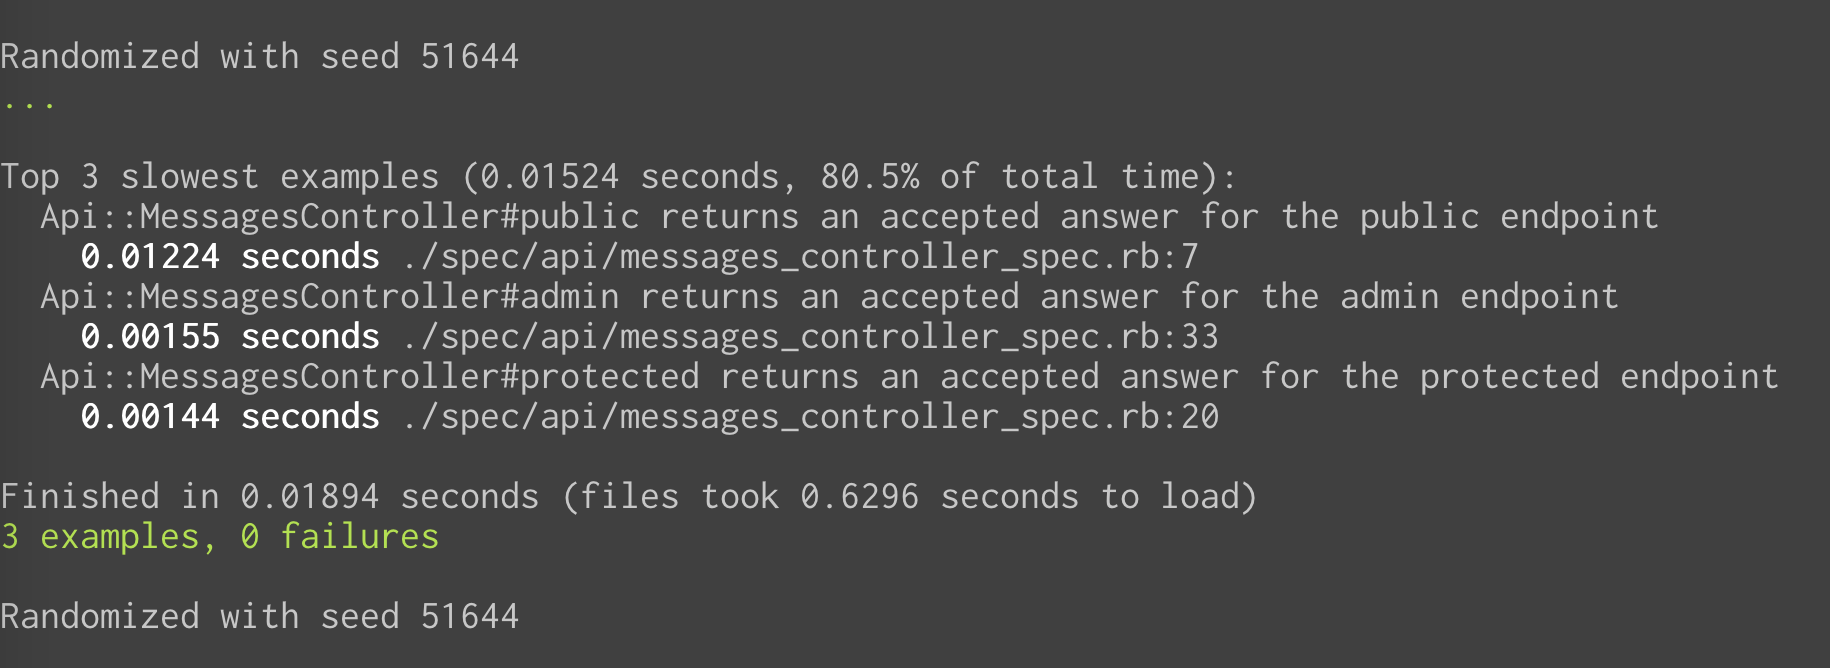
初始测试
让我们首先对我们从Auth0得到的JWT格式的访问令牌进行解码。我们正在利用优秀的jwtgem。我们不想测试这个库的工作情况,所以我们的测试要相对稀少一些。我们要确保不正确的请求会失败。因此,在spec 文件夹下创建一个lib 文件夹,并添加一个名为 json_web_token_spec.rb的文件,内容如下。
# spec/lib/json_web_token_spec.rb
require 'rails_helper'

require 'json_web_token'

describe JsonWebToken do
  subject { described_class }

  describe '.verify' do
    before do
      allow(Net::HTTP).to receive(:get).and_return(jwks_raw)
    end

    it 'raises exception if the token is incorrect' do
      expect { subject.verify('') }.to raise_exception(JWT::DecodeError)
    end

    it 'raises exception if the token is expired' do
      expect { subject.verify(token) }.to raise_exception(JWT::DecodeError)
    end
  end
end
为了在我们的应用程序中整合它,我们必须用一点代码来包装jwt库。为此目的,在根目录下的 文件夹中添加一个名为 json_web_token.rb的文件到项目根目录下的lib 。把下面的代码放在该文件中。
# lib/json_web_token.rb
require 'jwt'
require 'net/http'

class JsonWebToken
  class << self
    def verify(token)
      JWT.decode(token, nil,
                 true, # Verify the signature of this token
                 algorithm: algorithm,
                 iss: issuer,
                 verify_iss: true) do |header|
        key(header)
      end
    end

    def algorithm
      'RS256'
    end

    def key(header)
      jwks_hash[header['kid']]
    end

    def jwks_hash
      jwks_raw = Net::HTTP.get URI("#{issuer}.well-known/jwks.json")
      jwks_keys = Array(JSON.parse(jwks_raw)['keys'])
      jwks_keys.map do |k|
        [
          k['kid'],
          OpenSSL::X509::Certificate.new(Base64.decode64(k['x5c'].first)).public_key
        ]
      end.to_h
    end

    def issuer
      "https://#{Rails.application.config.x.auth0.issuerUri}/"
    end
  end
end
我们用我们要解码的令牌来调用库。decode 方法期望收到正确的密钥作为块的参数。key 方法调用jwks_hash 帮助器,它又从 .well-knownURL中获取钥匙列表。为了更容易找到正确的键,我们使用id (kid)作为标识符将列表转换为哈希值。
这里棘手的部分是我们需要传递实际的令牌,否则库会直接拒绝它们。
测试授权
让我们从建立我们的测试开始,以验证受保护的端点是否如预期那样工作。
使用测试令牌
我已经设置了一堆令牌来用于我们的测试。它们存在于fixtures文件夹中。它们指定了不同的条件,如过期或使用错误的受众。这使得测试比直接使用mocks更有弹性。
我正在定义一个帮助器,以便在请求中包含这些标记之一。所以,添加一个 token_helper.rb文件到 spec/support文件夹,内容如下。
# spec/support/token_helper.rb
module TokenHelper
  def read_token(name)
    path = File.expand_path(File.join(File.dirname(__FILE__), '..', 'fixtures', name))
    @token ||= File.read(path)
  end

  def authorize!(name)
    request.headers['Authorization'] = "Bearer #{read_token(name)}"
  end
end

RSpec.configure do |c|
  c.include TokenHelper
end
现在,我把正确的token附加到受保护的请求中。
# spec/api/messages_controller_spec.rb
require 'rails_helper'

describe Api::MessagesController, type: :controller do
     # ...existing code...

     subject { get :protected, params: { format: :json } }

     it 'returns an accepted answer for the protected endpoint' do
       # 👇 new code
       authorize! 'validToken'
       # 👆 new code

       subject

       expect(response).to be_ok
     end

     # ...existing code...

     subject { get :admin, params: { format: :json } }

     it 'returns an accepted answer for the admin endpoint' do
       # 👇 new code
       authorize! 'validWithPermissionsToken'
       # 👆 new code

       subject

       expect(response).to be_ok
     end

     # ...existing code...
end
这些测试将防止在我们执行授权时出现退步。让我们添加一些测试来定义我们想在受保护的路由中执行的期望。
# spec/api/messages_controller_spec.rb
require 'rails_helper'

describe Api::MessagesController, type: :controller do
  # ...existing code...

  describe '#protected' do
    it 'returns error for the protected endpoint if there is no token' do
      can_authenticate

      subject

      expect(response).to be_unauthorized
    end

    it 'returns error for the protected endpoint if the token is expired' do
      authorize! 'expiredToken'

      subject

      expect(response).to be_unauthorized
    end

    it 'returns error for the protected endpoint if the token has the wrong issuer' do
      authorize! 'wrongIssuerToken'

      subject

      expect(response).to be_unauthorized
    end
  end

  # ...existing code...
end
由于空间的原因,我把它们分组,但为了更接近TDD的精神,你应该一个一个地添加它们。看看它们是如何失败的。
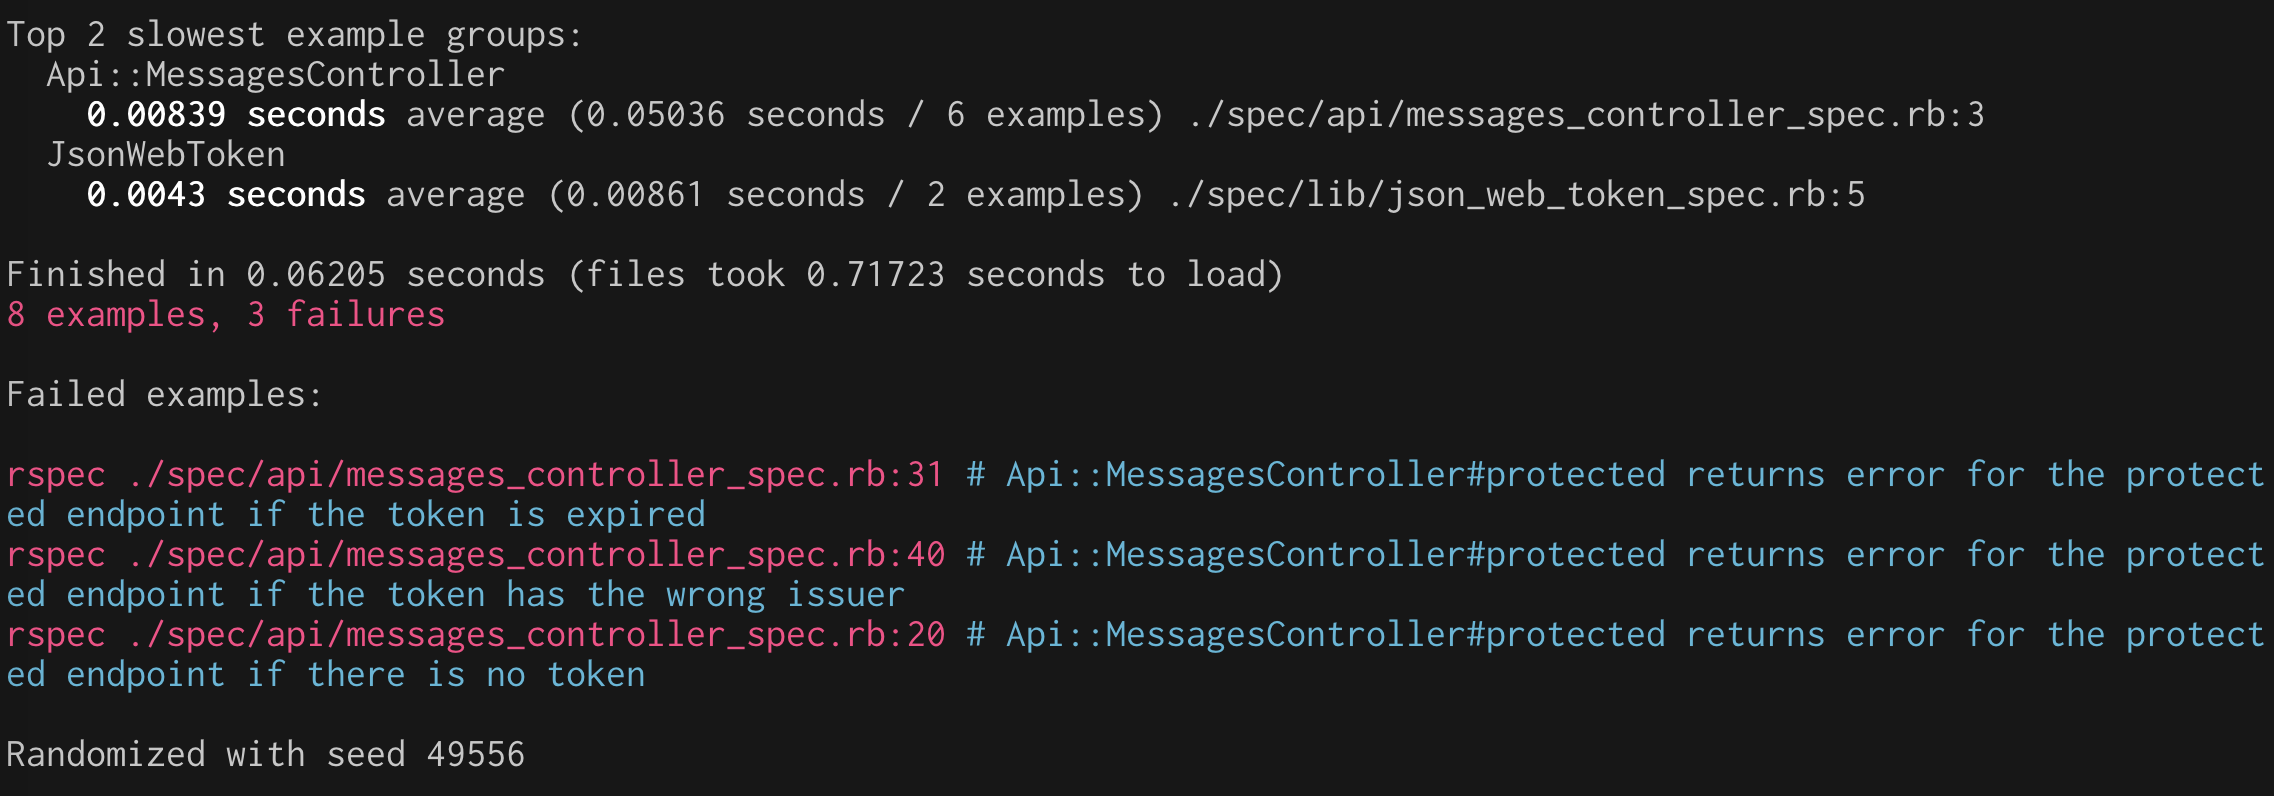
实现授权
为了实现授权,我们使用了一个before_action回调。我们从头文件中挑出令牌,然后用我们的库来验证它。传统上,这种类型的辅助方法是在ApplicationController ,它是我们所有控制器的基类。这里是代码。
# app/controllers/application_controller.rb
require 'json_web_token'

class ApplicationController < ActionController::API
  def authorize!
    valid, result = verify(raw_token(request.headers))

    head :unauthorized unless valid
    @token ||= result
  end

  private

  def verify(token)
    payload, = JsonWebToken.verify(token)
    [true, payload]
  rescue JWT::DecodeError => e
    [false, e]
  end

  def raw_token(headers)
    return headers['Authorization'].split.last if headers['Authorization'].present?

    nil
  end
end
而且我们确保它只用于我们想要的路由。
# app/controllers/api/messages_controller.rb
module Api
  class MessagesController < ApplicationController
    before_action :authorize!, except: %i[public]
  end
end
现在我们看到测试通过了。
自定义消息
接下来,我们想在响应的有效载荷中得到一个更详细的错误信息。我们需要在我们写的测试中增加一些断言。
# spec/api/messages_controller_spec.rb
describe Api::MessagesController, type: :controller do
       subject

       expect(response).to be_unauthorized

       # 👇 new code
       message = 'Nil JSON web token'
       expect(json_response!).to include('message' => message)
       # 👆 new code
     end

     it 'returns error for the protected endpoint if the token is expired' do
       subject

       expect(response).to be_unauthorized
       # 👇 new code
       expect(json_response!['message']).to include('Signature has expired')
       # 👆 new code
     end

     it 'returns error for the protected endpoint if the token has the wrong issuer' do
       subject

       expect(response).to be_unauthorized
       # 👇 new code
       expect(json_response!['message']).to include('Invalid issuer')
       # 👆 new code
     end

     it 'returns error for the protected endpoint if the token has the wrong audience' do
为了实现这种能力,我们需要在错误发生时在响应中传递消息。
# app/controllers/application_controller.rb
class ApplicationController < ActionController::API
   def authorize!
     valid, result = verify(raw_token(request.headers))

     # 👇 old code
     # head :unauthorized unless valid
     # 👇 new code
     render json: { message: result }.to_json, status: :unauthorized unless valid

     @token ||= result
   end
验证受众
我们的代码有一个严重的缺陷:它没有验证JWT中的受众。让我们来解决这个问题,以确保应用程序是令牌的预期用户。一个新的测试对该行为进行编码。
# spec/api/messages_controller_spec.rb
require 'rails_helper'

describe Api::MessagesController, type: :controller do
  # ...existing code...

  describe '#protected' do
    subject { get :protected, params: { format: :json } }

    it 'returns error for the protected endpoint if the token has the wrong audience' do
      authorize! 'wrongAudienceToken'

      subject

      expect(response).to be_unauthorized
      expect(json_response!['message']).to include('Invalid audience')
    end
  end

  # ...existing code...
end
方便的是,这个变化发生在我们依赖的 JWT.decode方法中,我们依靠它。
# lib/json_web_token.rb
require 'jwt'
require 'net/http'

class JsonWebToken
  class << self
    def verify(token)
      JWT.decode(token, nil,
                 true, # Verify the signature of this token
                 algorithm: algorithm,
                 iss: Rails.application.config.x.auth0.issuerUri,
                  # 👇 new code
                  verify_iss: true,
                  aud: Rails.application.config.x.auth0.audience,
                  verify_aud: true) do |header|
                  # 👆 new code
        key(header)
      end
    end

    # ...existing code...
end
测试权限
在这一点上,我们已经覆盖了受保护的路线。现在,我们将专注于管理路线。下一步是检查令牌中是否有正确的permission 要求。我们的普通令牌没有这个要求,所以它应该不能通过测试。
# spec/api/messages_controller_spec.rb
require 'rails_helper'

describe Api::MessagesController, type: :controller do
  # ...existing code...

  describe '#admin' do
    subject { get :admin, params: { format: :json } }

    it 'returns error for the admin endpoint if the token does not have permissions' do
      authorize! 'validToken'

      subject

      expect(response).to be_unauthorized
      expect(json_response!['message']).to include('Access is denied')
    end
  end

  # ...existing code...
end
现在,让我们在控制器中实现权限检查。
# app/controllers/application_controller.rb
require 'json_web_token'

class ApplicationController < ActionController::API
  # ...existing code...

  def can_read_admin_messages!
    check_permissions(@token, 'read:admin-messages')
  end

  def check_permissions(token, permission)
    permissions = token['permissions'] || []
    permissions = permissions.split if permissions.is_a? String

    unless permissions.include?(permission)
      render json: { message: 'Access is denied' }.to_json,
             status: :unauthorized
    end
  end

  # ...existing code...
end
为了确保检查适用于正确的路由,我们采用了与之前类似的方法,基于before_action 。
# app/controllers/api/messages_controller.rb
module Api
  class MessagesController < ApplicationController
    # ...existing code...

    before_action :can_read_admin_messages!, only: %i[admin]
end
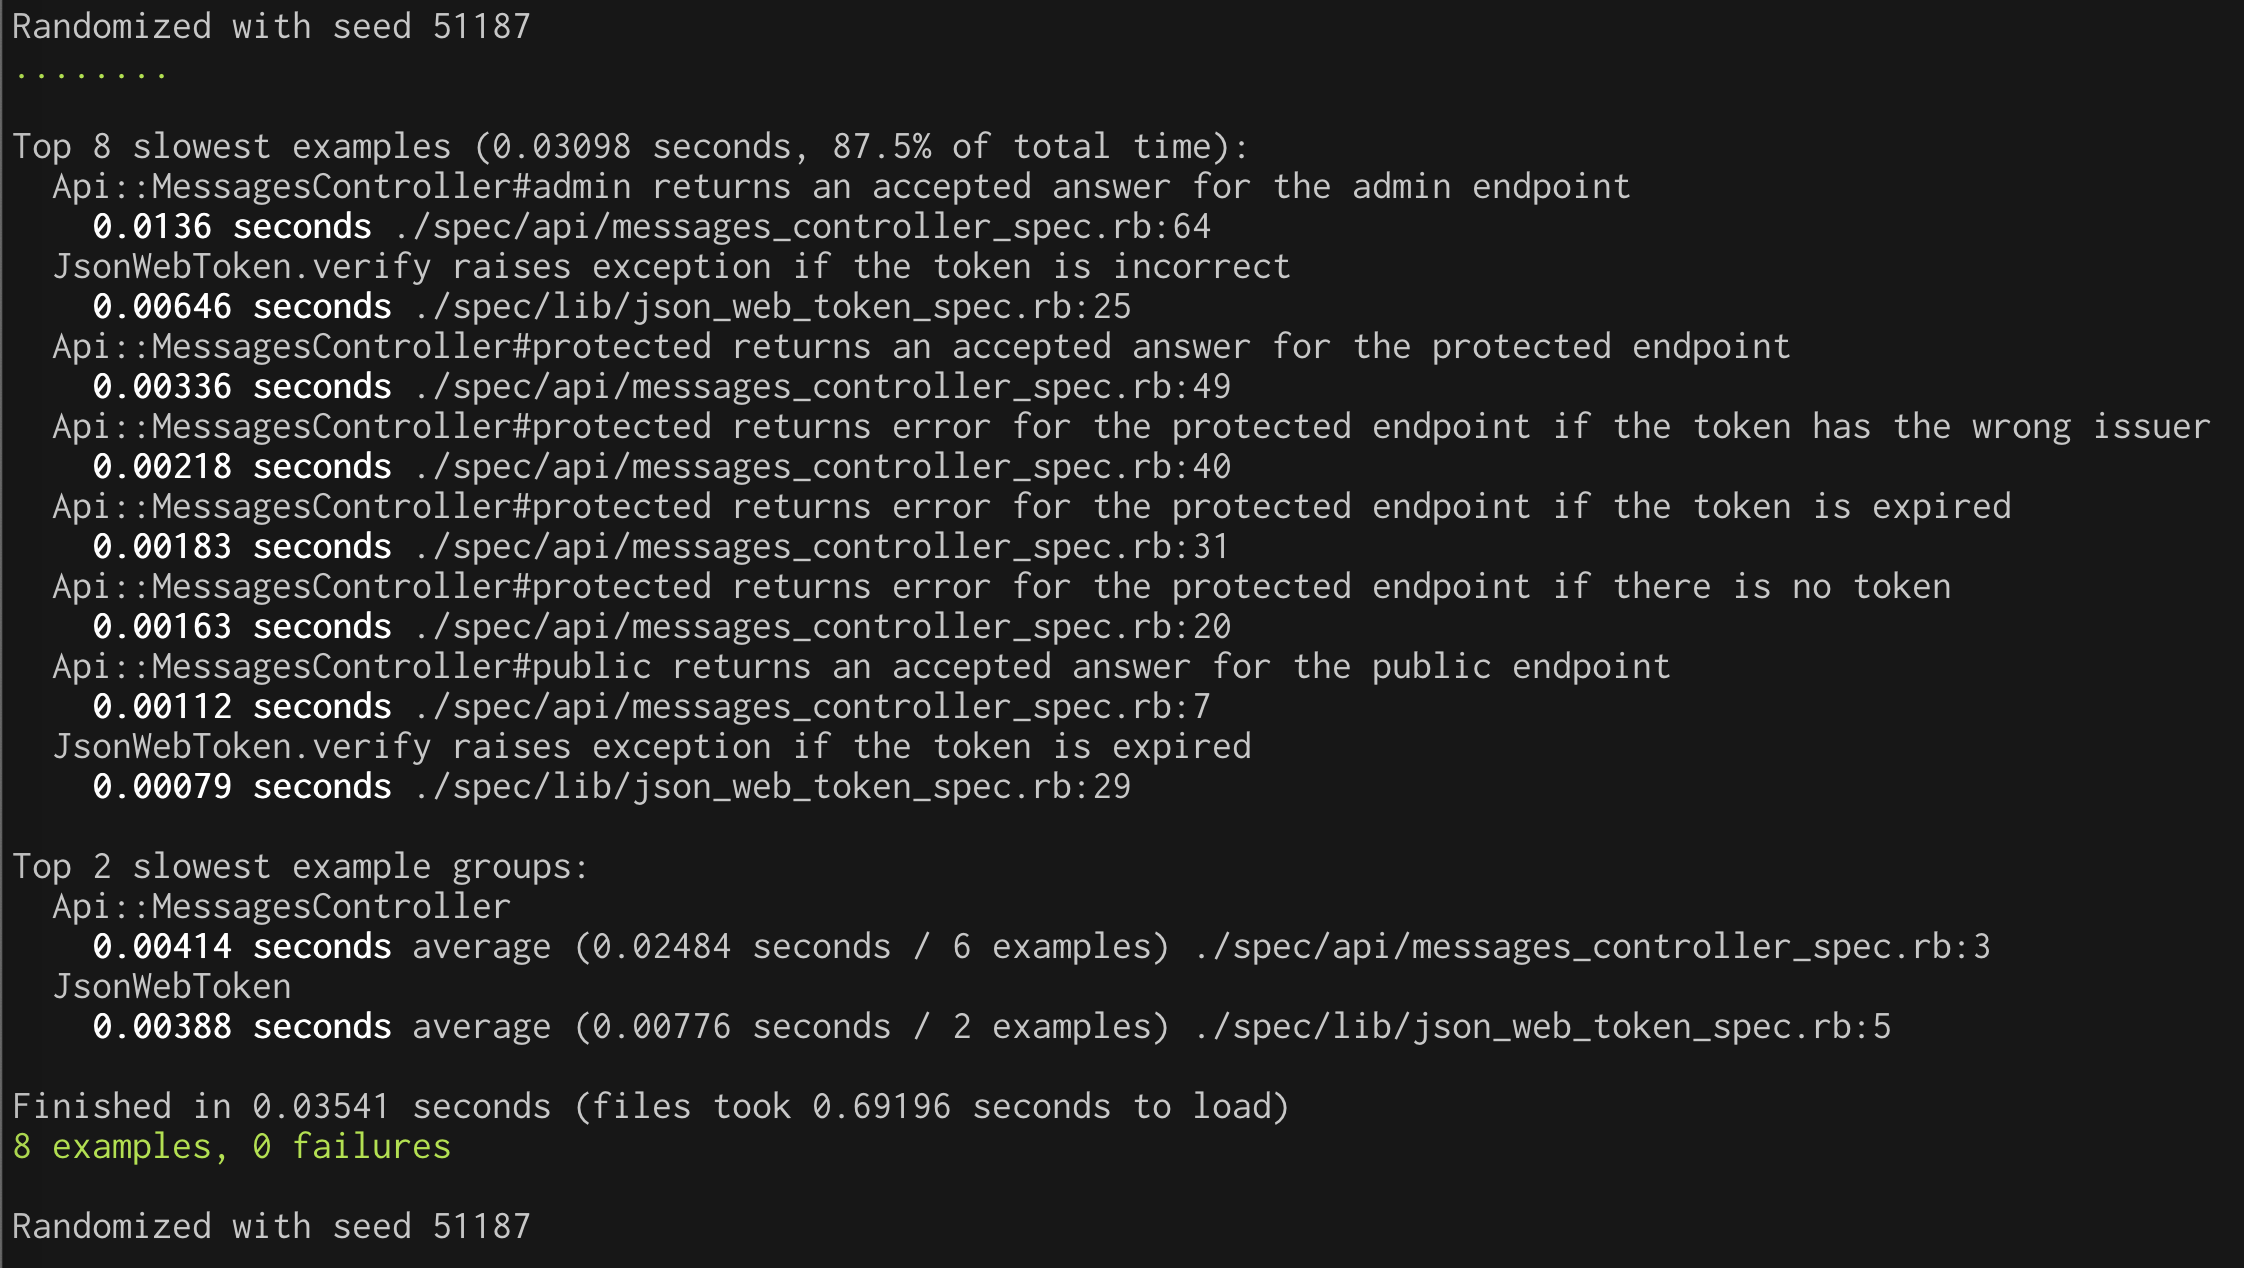
现在你可以运行测试,以确保一切按预期工作。
我们成功了!
按照TDD编写代码就是要有一个紧密的反馈回路。由于有大量的小改动,这不容易用书面形式表现出来,但我希望我已经给了你一个很好的启示。
使用TDD带来了几个好处。
- 我们已经确认了我们的实现,你知道的,是可行的
- 我们的测试套件以一种可执行的方式描述了应用程序的行为,而不是潜在的误导性文档
- 我们从一开始就把可测试性纳入了我们的代码中
- 通常情况下,我们倾向于构建我们可能需要的东西,而这些东西的未来永远不会到来。如果你把你的期望编码为测试,这就变得更加明显,而且有助于防止它的发生。
也许不是你写的每一行代码都需要被测试所覆盖。然而,对可测试性的关注有助于更可靠地交付更好的产品。
你可以从这个GitHub资源库中下载本文所示的示例项目。
