

位置感知的应用程序,可以简化定位附近的企业和服务,在现代网络开发中越来越普遍。例如,想想Uber和Airbnb等流行的应用程序。Uber通过实现地理定位功能,将用户的位置与他们数据库中所有司机的位置进行比较,从而能够将用户与最近的司机联系起来。
在这些类型的应用程序中实现地理定位功能时,大部分的工作在于编码位置比较逻辑,根据一些预先定义的标准返回一组结果。例如,你可以返回一个离用户当前位置最多 100 米的餐厅列表。
为了避免为这种位置比较编写自定义逻辑,我们可以使用Typesense。在本教程中,我们将亲身学习如何使用Typesense并使其抽象出位置比较任务。我们将建立一个简单的附近酒店网络应用,列出离用户位置最近的酒店。让我们开始吧!
什么是Typesense?
Typesense是一个搜索解决方案,它允许你将搜索功能整合到你的项目中,而不需要编写你自己的自定义搜索逻辑。你基本上是把你的项目中的这一部分外包了。
例如,当你把你的代码部署到Heroku时,你允许第三方来处理你的基础设施问题,而你则专注于编写代码。同样,当你在你的项目中使用Firebase认证时,你也是让一个外部代理来处理你的整个认证逻辑,而你则专注于其他事情。
Typesense使用了一个类似的模型。当你把Typesense添加到你的项目中时,你就允许Typesense在你的项目中实现搜索。尽管用户提交查询的搜索栏或过滤器图标会在你的应用程序中存在,但Typesense会处理查询并返回所需的结果。
当第三方代表你实现你的项目的某些组件时,它主要被称为X作为服务模式,其中X是被实现的组件。例如,Heroku将计算作为一种服务模式运行,因为它代表你实现了基础设施。Typesense将搜索作为一种服务模式,提供一个开箱即用的搜索解决方案,你可以将其插入你的项目中。
其他搜索服务产品包括Algolia、Elasticsearch、Amazon Elasticsearch、Azure Search等等。然而,Typesense提供的功能组合是无可比拟的。它是开源的、轻量级的、无情的、快速的,而且容易集成。
构建附近酒店的网络应用
前提条件
-
-
- 具备JavaScript的基本知识
- 有Vue的经验
- 本地安装了Node.js
- 安装Vue和Vue CLI
- 任何你选择的IDE。我将使用VS Code
-
你可以在GitHub上找到本教程的完整源代码。
启动Typesense服务器
使用Typesense有两个步骤。首先,我们将创建一个集群,这基本上是Typesense上我们可以存储和访问数据的空间。然后,我们将用户要搜索的数据添加到第一步配置的集群中,在我们的例子中,是一个酒店的列表。
我们将创建一个集群,存储我们平台上的所有酒店的列表。除了持久化我们的数据外,我们的集群还将允许我们通过REST API端点来检索和更新我们的数据。
我们可以使用Typesense的官方Docker镜像或通过他们的云服务启动我们的集群。在本指南中,我们将使用他们的云服务,因为在我看来,这更容易操作。
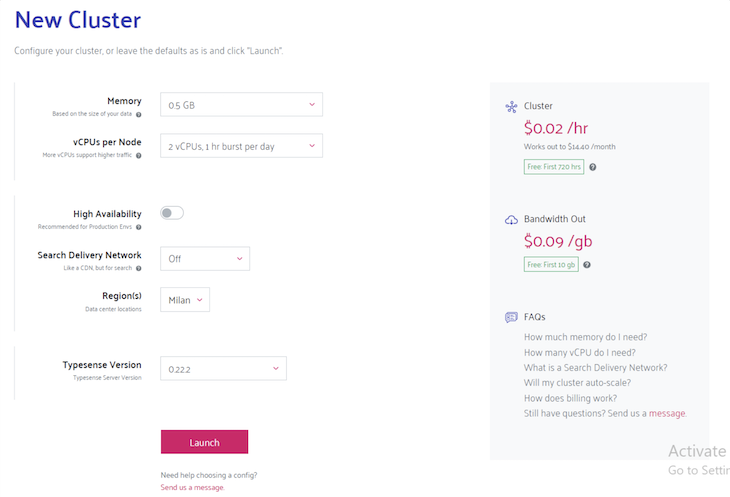
前往Typesense云,用GitHub登录。点击启动按钮,配置一个新的集群。使用集群的默认设置,如下图所示。启动集群可能需要一些时间,所以你可以放松,等待系统做它的事情。
一旦配置完成,你应该看到屏幕上显示的内容如下图所示。点击顶部的生成API密钥按钮,这将下载一个文本文件,你需要把它放在安全的地方。
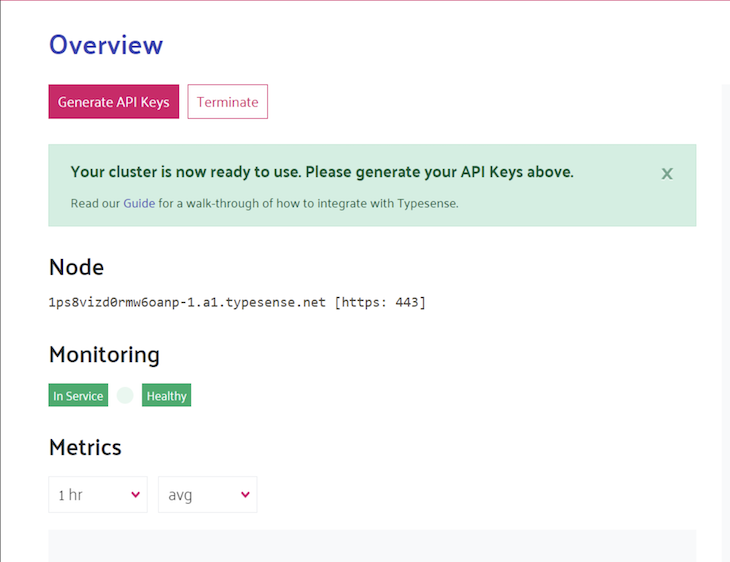
我们以后会需要生成的API密钥。这样,我们就完成了Typesense服务器的启动。
设置我们的Vue开发环境
让我们来初始化一个新的Vue项目。启动你的系统的终端窗口,导航到你想创建Vue项目的任何目录。在你的终端中运行命令vue create nearby-hotels 。在该命令中,nearby-hotels 是我们项目的名称,但你可以把它改成任何你想要的东西。
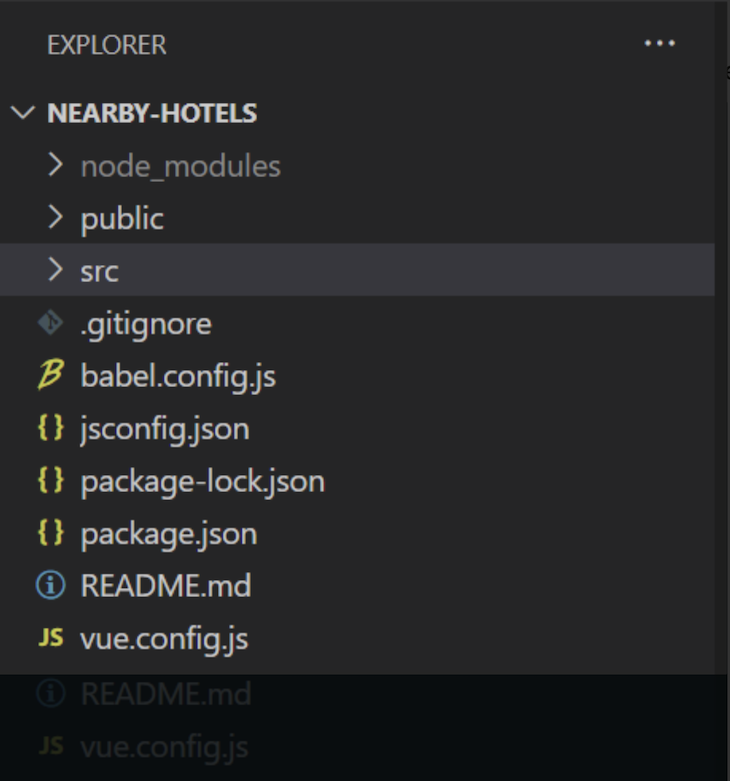
通过上面的命令,你会被提示配置某些东西。继续,选择默认值,并将Vue Router添加到项目中。一个具有下图所示结构的项目将为你生成。
在你项目的根目录下运行命令vue run serve ,启动Vue的开发服务器并进行测试。
用我们的酒店列表填充我们的Typesense服务器
现在我们有了Typesense集群和我们的项目在本地设置,我们可以把我们需要的数据添加到我们的集群。在搜索引擎方面,这个步骤被称为索引。我们将我们的索引任务分解成三个子任务。
-
-
- 连接到我们的Typesense服务器
- 准备要上传的数据,在我们的案例中,就是我们的酒店列表。
- 上传准备好的数据
-
连接到我们的Typesense服务器
为了与我们的Typesense服务器通信,我们需要创建一个Typesense客户端实例,并使用我们在前一步下载的文本文件中的秘密密钥。通过运行npm i typesense 命令来安装typesense 包。然后,在你的项目根目录下创建一个名为typesense.js 的文件,并在其中添加以下内容。
import 'dotenv/config';
import { Client } from 'typesense';

// Create a new client
const client = new Client({
        nodes: [
          {
                        host: "your typesense host here. starts with xxx.a1.typesense.net",
                        port: 443,
                        protocol: "https",
          },
        ],
        apiKey: "your typesense admin key here",
        connectionTimeoutSeconds: 2,
});
export default client;
我们已经使用我们的Typesense凭证来初始化Typesense客户端。因为我们导出了客户端,所以我们应该能够在项目的任何文件中访问它。我们将使用这个客户端来连接我们的Typesense服务器;它拥有所有API操作的方法。
准备要上传的数据
在你项目的根目录下创建一个hotels.jsonl 文件,我们将在其中存储我们想要上传到Typesense服务器的酒店列表。把这个文件的内容复制到你新创建的文件中。不要编辑内容,只需按原样复制和粘贴。
上传准备好的数据
为了将准备好的数据上传到我们的Typesense服务器,我们将使用一个脚本。进入你的项目根目录,创建一个名为indexer.js 的新文件,并添加以下代码。
import * as fs from "fs";
import * as readline from "readline";

import client from "./typesense.js";

const hotelsSchema = {
  name: "hotels",
  fields: [
    { name: "hotel_name", type: "string" },
    { name: "address", type: "string" },
    { name: "coordinates", type: "geopoint" },
  ],
};
在Typesense中,一组存储的数据被称为一个集合。集合中的每个数据都被称为一个文档。在我们的案例中,我们将有一个酒店的集合,该集合中的每个酒店都是一个文档。请注意,一个集合中的所有文档都遵循相同的结构,有相同数量的字段和字段类型。为了执行这个约束,我们需要预先定义我们集合的结构。
我们将根据我们用client.collections().create(hotelsSchema 定义的结构来创建一个集合。接下来,我们从我们的hotels.json 文件中读取每一行,并根据该行的内容在我们的Typesense集合中创建一个文档,代码为client.collections('hotels').documents().create(hotelDocument); 。
client
  .collections()
  .create(hotelsSchema)
  .then(function () {
    readline
      .createInterface({
        input: fs.createReadStream("hotels.jsonl"),
        terminal: false,
      })
      .on("line", function (line) {
        let hotelDocument = JSON.parse(line);

        client.collections("hotels").documents().create(hotelDocument);
      });
  });
在你的项目根目录下运行命令node indexer.js ,以执行你的脚本。如果你的CLI中没有显示错误信息,你的脚本就已经成功执行了。为了确认,请登录你的Typesense仪表盘,点击导航栏上的cluster。你应该看到下面的屏幕。
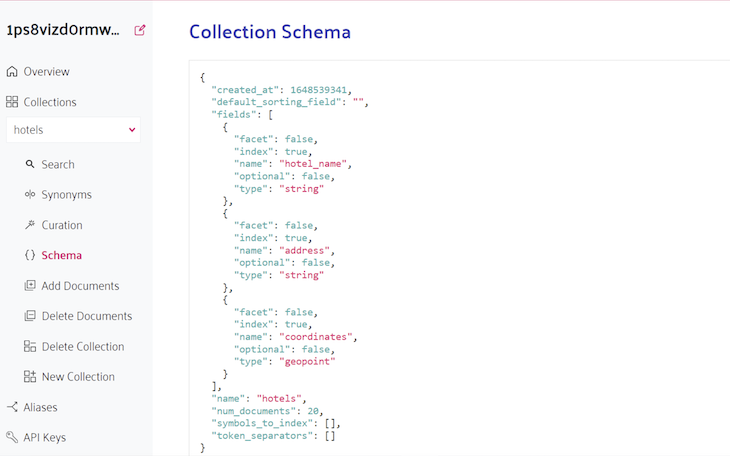
注意Typesense报告说我们的酒店集合中有20个文件,这是很准确的。
就这样,我们完成了数据的索引。
构建界面
为了得到一个完整的工作界面,我们将创建三个Vue组件。
-
-
HomePage:我们的索引页Hotel:用于将每个酒店渲染到DOM中NearbyHotelsPage:显示离用户最近的十家酒店的列表。Hotel组件将被导入并用于该组件中
-
HomePage 组件
首先到public/index.html ,在head 标签之间添加下面的内容。不要覆盖head 标签的内容。
<!-- Bootstrap CSS -->
<link
      crossorigin="anonymous"
      href="<https://stackpath.bootstrapcdn.com/bootstrap/4.1.1/css/bootstrap.min.css>"
      integrity="sha384-WskhaSGFgHYWDcbwN70/dfYBj47jz9qbsMId/iRN3ewGhXQFZCSftd1LZCfmhktB"
      rel="stylesheet"
 />

 <link
        rel="stylesheet"
        href="<https://use.fontawesome.com/3b7fb1f2e6.css>"
 />
我们从各自的CDN导入Bootstrap 4和Font Awesome库。接下来,删除src/views 中的所有文件,在该目录下创建一个HomePage.vue 文件,内容如下。
<template>
  <div class="container-fluid">
    <div class="row text-center mt-5 mb-5 px-5">
      <div class="col-12 col-md-6 mr-md-auto ml-md-auto">
        <h1>Welcome to Our Nearby Hotels Application</h1>
      </div>
    </div>

    <div class="row text-left mt-5 px-5">
      <div class="col-12 col-md-6 mr-md-auto ml-md-auto">
        <button class="btn-block shadow text-center">
          <div class="text">
            <i class="fa fa-map-marker" aria-hidden="true"></i>
            view nearby hotels
          </div>
        </button>
      </div>
    </div>
  </div>
</template>

<style scoped>
button {
  background-color: #1da462;
  color: white !important;
  font-weight: bold;
  font-size: 1.5rem;
  color: white;
  border: none;
  border-radius: 1rem;
  cursor: pointer;
}
</style>

<script>
export default {
  name: "home-page",
};
</script>
用以下内容覆盖src/router/index.js 的内容。
import Vue from "vue";
import VueRouter from "vue-router";
import HomeView from "../views/HomePage.vue";

Vue.use(VueRouter);

const routes = [
  {
    path: "/",
    name: "home",
    component: HomeView,
  },
];

const router = new VueRouter({
  mode: "history",
  base: process.env.BASE_URL,
  routes,
});

export default router;
用下面的内容覆盖src/App.vue 的内容。
<template>
  <div id="app">
    <router-view />
  </div>
</template>

<style>
#app {
  font-family: Avenir, Helvetica, Arial, sans-serif;
  min-height: 100vh;
  display: flex;
  flex-direction: column;
  justify-content: center;
  align-items: center;
  color: #2c3e50;
}
</style>
现在,运行你的开发服务器,将你的浏览器指向localhost:8080 。你应该看到如下图所示的页面。
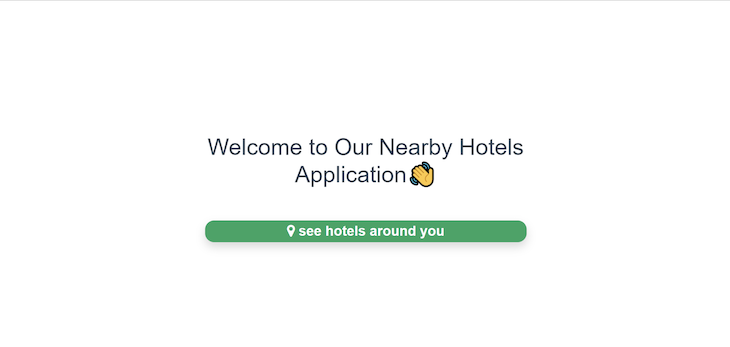
这就是我们对HomePage 组件的全部需求。接下来,我们将对我们的Hotel 组件进行工作。
Hotel 组件
首先,删除src/components 中的所有文件,在该目录下创建一个Hotel.vue 文件,内容如下。
<template>
  <div class="m-3">
    <div id="HotelImageBackground">
      <img
        src="../assets/hotel.jpg"
        class="img-fluid"
        :alt="hotel.name + ' image'"
      />
    </div>

    <div class="text-left mt-2">
      <div>
        <span id="hotelName">{{ hotel.hotel_name }}</span>
      </div>
      <div>
        <span id="address" class="mt-0">
          <i class="fa fa-map-marker" aria-hidden="true"></i>
          {{ hotel.address }}
        </span>
      </div>
    </div>
  </div>
</template>

<script>
export default {
  name: "hotel-single",

  props: {
    hotel: {
      type: Object,
      required: true,
    },
  },
};
</script>

<style scoped>
#address {
  font-weight: 400;
  font-size: 0.9rem;
  color: #bfc1c2;
}

#hotelName {
  font-size: 1.2rem;
  font-weight: bolder;
}

#hotelImageBackground {
  height: 300px;
  overflow: hidden;
  display: flex;
  justify-content: center;
  flex-flow: column;
  background-color: #dcdcdc;
}

@media only screen and (max-width: 640px) {
  #hotelName {
    font-size: 1rem;
    font-weight: bold;
  }
  #address {
    font-size: 0.8rem;
    font-weight: 400;
    color: #bfc1c2;
  }
}
</style>
在这里下载图片,并把它移到src/assets 。我们在上面的代码中使用该图片。我们将在即将创建的NearbyHotelsPage 组件中使用这个组件。
NearbyHotelsPage 组件
在src/views 中创建一个名为NearbyHotelsPage.vue 的组件,内容如下。
<template>
  <div class="container">
    <div class="row text-center mt-5 mb-5 px-5">
      <div class="col-12 col-md-6 mr-md-auto ml-md-auto">
        <h1>Hotels Around You</h1>
        <small>
          <router-link to="/">Back to Home</router-link>
        </small>
      </div>
    </div>

    <div class="row" id="card-wrapper">
      <div
        class="col-md-3 col-12 border shadow-sm m-2"
        v-for="hotel in hotels"
        :key="hotel.document.id"
        id="card"
      >
        <Hotel :hotel="hotel.document" />
      </div>
    </div>
  </div>
</template>

<script>
import Hotel from "@/components/Hotel.vue";
import client from "../../typesense.js";

export default {
  name: "nearby-hotels",

  data() {
    return {
      hotels: [],

      // Lagos, Nigeria Coordinates
      userLatitude: 6.465422,
      userLongitude: 3.406448,

      // New York Coordinates
      // userLatitude: 40.71427,
      // userLongitude: -74.00597,
    };
  },

  components: {
    Hotel,
  },

  methods: {
    getHotels() {
      const searchParams = {
        q: "*",
        query_by: "hotel_name",
        filter_by: `coordinates:(${this.userLatitude}, ${this.userLongitude}, 1000 km)`,
        sort_by: `coordinates(${this.userLatitude}, ${this.userLongitude}):asc`,
      };

      client
        .collections("hotels")
        .documents()
        .search(searchParams)
        .then((results) => {
          console.log(`server response: ${results}`);
          this.hotels = results["hits"];
          console.log(`hotels: ${this.hotels}`);
        })
        .catch((error) => {
          console.log(error);
        });
    },
  },

  mounted() {
    this.getHotels();
  },
};
</script>

<style>
#card-wrapper {
  min-height: 50vh;
  display: flex;
  justify-content: center;
  align-items: center;
}
</style>
让我们把上面的组件中的一些东西弄明白。
data() {
    return {
      hotels: [],

      // Lagos, Nigeria Coordinates
      userLatitude: 6.465422,
      userLongitude: 3.406448,

      // New York Coordinates
      // userLatitude: 40.71427,
      // userLongitude: -74.00597,
    };
  }
在我们组件的data() 部分,我们已经初始化了三个变量:userLatitude,UserLongitude, 和hotels 。
请记住,我们的目标是获得与用户所在地一定距离内的酒店列表。userLatitude 和userLongitude 变量指定了用户的当前位置。
在生产场景中,我们不会对其进行硬编码。hotels 数组是我们将存储从Typesense检索到的酒店列表的地方。
const searchParams = {
        q: "*",
        query_by: "hotel_name",
        filter_by: `coordinates:(${this.userLatitude}, ${this.userLongitude}, 1000 km)`,
        sort_by: `coordinates(${this.userLatitude}, ${this.userLongitude}):asc`,
      };
我们在上面的getHotels() 方法中声明了searchParams 这个变量。我们将向Typesense传递searchParams ,这是我们告诉Typesense我们的查询条件的方式。
例如,SearchParams 中的filter_by: coordinates:(${this.userLatitude}, ${this.userLongitude}, 1000 km) 告诉Typesense抓取距离所传递的坐标1000公里以内的酒店,this.userLatitude and this.userLongitude 。
在过滤完成后,searchParams 中传递的sort_by: coordinates(${this.userLatitude}, ${this.userLongitude}):asc 告诉Typesense将过滤后的酒店列表按照它们与用户传递给Typesense的坐标的距离排序。
client
        .collections("hotels")
        .documents()
        .search(searchParams)
        .then((results) => {
          console.log(`server response: ${results}`);
          this.hotels = results["hits"];
          console.log(`hotels: ${this.hotels}`);
        })
        .catch((error) => {
          console.log(error);
        });
    },
在上面的代码片段中,我们对Typesense服务器进行了实际调用,并将结果存储在我们最初声明的hotels 。
NearbyHotelsPage 组件中的其他东西都是样式和HTML。然而,我们需要注意的一件事是在下面的代码中。
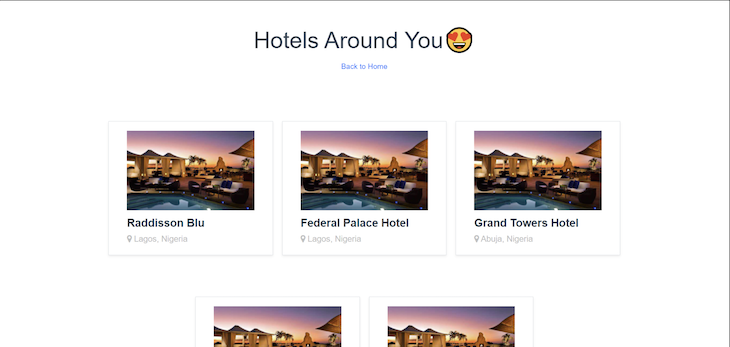
// Lagos, Nigeria Coordinates
userLatitude: 6.465422,
userLongitude: 3.406448,
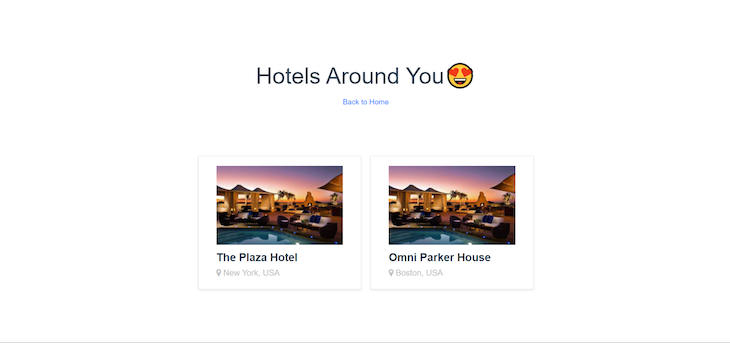
// New York Coordinates
// userLatitude: 40.71427,
// userLongitude: -74.00597,
我们目前正在传递Lagos坐标作为用户的位置。如果你用npm run serve 启动你的开发服务器,并导航到附近的酒店页面,你应该看到一个尼日利亚的酒店列表,从拉各斯的酒店开始,如下图所示。
如果你选择使用纽约的坐标,注释掉第一组坐标,那么你应该看到美国的酒店,从纽约的酒店开始,如下图所示。
现在,我们有了一个可以工作的附近酒店应用程序。耶!
真实世界应用的注意事项
在我们的基本应用中,有一些事情是我们不敢在一个真正被人们使用的应用中做的。
我们肯定会改变的主要事情是我们如何处理用户的坐标。它目前是硬编码的,但理想情况下,我们会有一些逻辑来自动检测和更新用户的当前坐标。
接下来,我们将有一个用户界面,而不是使用脚本来索引预定义的酒店列表,酒店业主或系统管理员可以通过这个用户界面向我们的Typesense服务器添加新酒店。你可以选择直接向Typsense发布新酒店,也可以先将数据发送到你的后台,然后在Typsense上创建一个数据副本。
最后,如前所述,我们需要将我们的秘密密钥保存在一个.env 文件中,例如。
总结
在本指南中,我们解释了Typesense是如何从根本上成为一个搜索即服务的解决方案,以及搜索即服务的含义。然后,我们通过建立一个基本的附近酒店网络应用来探索Typesense的地理定位功能。
目的是向你展示你如何利用Typesense的地理定位功能来建立你的定制的、位置感知的应用程序,而不需要设置你自己的后台组件来处理所有与地理空间有关的逻辑。
