

在这个循序渐进的教程中,我们将使用iOS和Android的React Native,用最少的代码创建一个新闻源应用程序。我们的应用程序将由两个屏幕组成,第一个是Home 屏幕或Feed 屏幕。第二个Detail 屏幕将处理加载单篇文章,加载选定类别的新闻,或用特定关键词搜索新闻。
你可以在这个资源库中找到这篇文章的完整源代码。让我们开始吧!
- 设置一个News API账户
- 应用程序预览
- 创建一个新的React Native项目
- 从API中获取新闻
- 设计新闻文章卡
- 持久保存商店数据
- 将新闻类别标签添加到feed中
- 用特定关键词搜索新闻
- 添加共享过渡导航
设置一个News API账户
为了用新闻文章填充我们的应用程序,我们将使用News API作为我们的后端。News API为我们提供了一个REST API,我们可以用它来获取世界各地的最新的、突发的新闻头条。
在你开始使用新闻API之前,你需要从网站上获得一个API令牌。转到 G开始页面,点击获取API密钥。一旦你点击该按钮,你将被重定向到注册页面。在页面上填写你的详细资料并注册成功后,你就可以得到你的API令牌。现在,让我们用API转一转,测试一下它所提供的一切。
为了测试API,我们将使用Postman,但你可以使用你选择的API平台。另外,你也可以在你的终端中简单地使用curl。你可以在你的操作系统上使用独立的Postman应用程序,或者简单地使用他们的Web应用程序,这是我喜欢的。
对于Feed ,我们将使用顶级头条的端点,所以让我们先测试一下。
我们使用下面的URL。
https://newsapi.org/v2/top-headlines?category=technology&language=en
我们向URL传递两个查询参数。
category=technology:获取所有技术类别的头条新闻language=en:确保我们只得到用英语写的新闻文章
对News API URL的每次调用都必须包含一个apiKey ,它用于验证发送请求的用户,并用于分析目的。
我们可以通过两种方式之一在API调用中添加我们的API密钥。其一,你可以直接把它作为URL本身的查询参数来发送。
https://newsapi.org/v2/top-headlines?category=technology&language=en&apiKey=<YOUR_API_KEY>
然而,这种方法并不安全,因此不推荐使用。但是,你可以用它来测试。另外,我们可以尝试使用X-Api-key ,在请求头中发送API_KEY 。如果你使用curl,你可以添加一个类似下面的请求头。
 curl https://newsapi.org/v2/top-headlines?category=technology&language=en
   -H "X-Api-key: <YOUR_API_KEY>"
如果你使用的是Postman,那么只要到 **Headers**``request ,然后添加一个key 和value ,如上面的截图。
现在我们有了一个来自API的响应对象,让我们分析一下,看看它为我们提供了什么。响应有一个articles ,这是一个objects 的数组,每个对象是一篇新闻文章。
下面给出了一个news 对象的例子。
{
    "source": {
        "id": null,
        "name": "digitalspy.com"
    },
    "author": "Joe Anderton",
    "title": "Walking Dead's Norman Reedus reveals Death Stranding 2 existence - Digital Spy",
    "description": "The Walking Dead star Norman Reedus reveals Death Stranding 2 existence.",
    "url": "https://www.digitalspy.com/tech/a40064850/walking-dead-norman-reedus-death-stranding-2/",
    "urlToImage": "https://hips.hearstapps.com/digitalspyuk.cdnds.net/16/28/1468254183-screen-shot-2016-07-11-at-171152.jpg?crop=1xw:0.8929577464788733xh;center,top&resize=1200:*",
    "publishedAt": "2022-05-21T10:12:41Z",
    "content": "The Walking Dead star Norman Reedus has seemingly revealed the existence of Death Stranding 2.\r\nThe actor played leading character Sam Porter Bridges in the PlayStation and PC game from Metal Gear So… [+2088 chars]"
}
正如你所看到的,我们为一篇新闻文章得到了很多数据,但我们将使用title,url,urlToImage,publishedAt, 和content 。现在我们的后端都已经设置好了,让我们开始着手开发移动应用程序。
应用程序预览
在我们真正为我们的应用程序写代码之前,让我们讨论一下我们想要建立的功能。首先,我们需要一个主屏幕或feed,在那里我们将显示所有最新的新闻文章。在列表的顶部,将有一个横向的新闻类别标签列表,当选择它时,将加载该特定类别的新闻。
我们需要在屏幕的顶部有一个搜索栏,用户可以用特定的关键词来搜索新闻。我们还将实现共享过渡导航。当用户点击任何新闻文章时,将出现News Detail 的屏幕。
我们将使用Redux来管理我们应用程序中的状态。我们希望在应用生命周期之间持久化数据,所以我们将使用Redux Persist。
应用程序的用户界面将同时支持黑暗和光明模式。我们最终构建的UI将看起来像以下图片。
饲料
类别
搜索功能
深色/浅色模式
创建一个新的React Native项目
让我们先创建一个新的React Native项目,如下所示。
npx react-native init <App-Name-Here> --template react-native-template-typescript
我将使用TypeScript,但请随意使用JavaScript。如果你在创建TypeScript模板项目时面临任何问题,你可以参考文档。
设置好我们的项目后,让我们开始编写我们的代码。首先,删除App.tsx 中所有的模板代码,然后添加下面的代码。
import React from 'react';
import {Text} from 'react-native';

const App: React.FC = () => {
  return <Text>This is Feed Screen</Text>;
};

export default App;
让我们开始在我们的应用程序中加入状态管理。我们需要安装一些库,将Redux纳入我们的项目。
yarn add @reduxjs/toolkit react-redux redux
或者,如果你喜欢npm,使用以下命令。
npm i @reduxjs/toolkit react-redux redux
在上面的步骤中,我们正在安装@reduxjs/toolkit 、react-redux 、和redux 。在Redux v6中,createStore 方法已被废弃,我们需要使用Redux Toolkit的configureStore 方法来代替。
现在,让我们创建一个Redux商店,并将一些actions 和reducers 挂到它上面。在项目的根目录下创建一个新的文件夹,命名为src 。我们将在这里保留所有的应用程序代码。在里面添加redux 文件夹,然后在里面创建三个文件:actions.ts,reducers.ts, 和store.ts 。
现在的目录结构应该如下所示。
我们将创建一个动作函数,从API中获取新闻文章,并将其存储在我们的商店中。现在,让我们只是返回一个空数组。
export const GET_NEWS_FEED = 'GET_NEWS_FEED';

export const getNewsFeed =
() => (dispatch) => {
      dispatch({
        type: GET_NEWS_FEED,
        payload: [],
      });
};
让我们为我们的newsFeed 创建feedReducer 。
import {GET_NEWS_FEED} from './actions';

const initialState = {
  newsFeed: [],
};

const feedReducer = (
  state = initialState,
  action: {type: String; payload: any},
) => {
  switch (action.type) {
    case GET_NEWS_FEED:
      return {...state, newsFeed: action.payload};
    default:
      return state;
  }
};
export default feedReducer;
在还原器中,我们有一个状态变量newsFeed ,它最初是一个空数组。当我们收到GET_NEWS_FEED 动作时,我们把它的值设置为传入动作的payload 。
现在我们有了actions 和reducers 作为我们的状态,让我们创建一个Redux存储,并用以下值初始化它。
创建store.ts 文件并添加以下代码。
import {configureStore} from '@reduxjs/toolkit';
import {combineReducers} from 'redux';
import feedReducer from './reducers';

const rootReducer = combineReducers({
  feedReducer: feedReducer,
});

export const store = configureStore({
  reducer: rootReducer,
});
我们已经成功地设置了redux 存储,现在,我们只需要把它传递到我们的应用程序中。在你的App.tsx 文件中添加以下代码。
import React from 'react';
import {Text} from 'react-native';
import {Provider} from 'react-redux';
import {store} from './src/redux/store';

const App: React.FC = () => {
  return (
    <Provider store={store}>
      <Text>This is feed screen</Text>
    </Provider>
  );
};

export default App;
从API中获取新闻
到目前为止,我们有一个工作的Redux商店。让我们用新闻文章来填充它。为了实现网络调用,我们将使用Axios,所以让我们把它添加到项目中。
yarn add axios
我们需要创建一个axios 实例,这样我们就不需要在每次进行API调用时处理请求头。在src 中创建一个名为api 的新文件夹,并在其中添加一个名为index.ts 的文件。
我们将在index.ts 文件中创建一个axios 实例,并将其作为一个apiClient 变量导出。
import axios from 'axios';
const BASE_URL = 'https://newsapi.org/v2/';

export const apiClient = axios.create({
  baseURL: BASE_URL,
  timeout: 10000,
  headers: {
    'X-Api-key': '<Add-your-api-token-here>',
  },
});
现在,让我们在我们的getNewsFeed 行动中利用这个apiClient 。在你的actions.ts 文件中做如下修改。
export const getNewsFeed = () => async (dispatch: Function) => {
  try {
    const res = await apiClient.get(
      'top-headlines?language=en&category=business',
    );
    if (res.status === 200) {
      dispatch({
        type: GET_NEWS_FEED,
        payload: res?.data?.articles,
      });
    } else {
      console.warn('Something went wrong');
    }
  } catch (error) {
    console.error(error);
  }
};
在上面的代码中,我们进行了一个API调用,以获得business 类别中的顶级头条。如果我们从API收到一个成功的响应,那么我们用收到的新的articles ,更新newsFeed 状态。
现在,我们需要在我们的App 第一次渲染时调用这个action 。我们还将显示一个文章标题的列表。在我们填充我们的newsFeed ,让我们为我们应用程序中的不同屏幕创建文件。
在src 中创建一个screens 文件夹,并在其中创建一个名为Feed 的新文件夹。然后,在Feed 文件夹中添加两个文件,名为index.tsx 和styles.ts 。
为了处理iPhone上的槽口,我们将使用一个名为 [react-native-iphone-x-helper](https://github.com/ptelad/react-native-iphone-x-helper).使用下面的命令安装它。
yarn add react-native-iphone-x-helper
让我们为我们的屏幕添加一些样式。在你的feed/styles.ts 中做如下修改。
import {StyleSheet} from 'react-native';
import {getStatusBarHeight, isIphoneX} from 'react-native-iphone-x-helper';

export default StyleSheet.create({
  container: {
    flex: 1,
    flexGrow: 1,
    paddingTop: isIphoneX() ? getStatusBarHeight() + 20 : 20,
  },
  list: {
    flex: 1,
    flexGrow: 1,
    paddingVertical: 8,
  },
});
然后,在你的feed/index.tsx 文件中添加以下代码。
import React, {useEffect} from 'react';
import {Text, useColorScheme, View} from 'react-native';
import {useDispatch, useSelector} from 'react-redux';
import {getNewsFeed} from '../../redux/actions';
import styles from './styles';

export const Feed: React.FC = () => {
  const {newsFeed} = useSelector((state: any) => state.feedReducer);
  const dispatch: Function = useDispatch();

  useEffect(() => {
    dispatch(getNewsFeed());
  }, [dispatch]);
  const backgroundColor = useColorScheme() === 'dark' ? '#000' : '#fff';
  return (
    <View style={[styles.container, {backgroundColor}]}>
      {newsFeed?.map((item: any) => (
        <Text>{item.title}</Text>
      ))}
    </View>
  );
};
现在,我们需要在我们的App 组件中渲染feed 组件。在你的App.tsx 文件中做如下修改。
import React from 'react';
import {Provider} from 'react-redux';
import {store} from './src/redux/store';
import {Feed} from './src/screens/feed';

const App: React.FC = () => {
  return (
    <Provider store={store}>
      <Feed />
    </Provider>
  );
};
export default App;
现在,你的用户界面应该看起来像下面的图片。
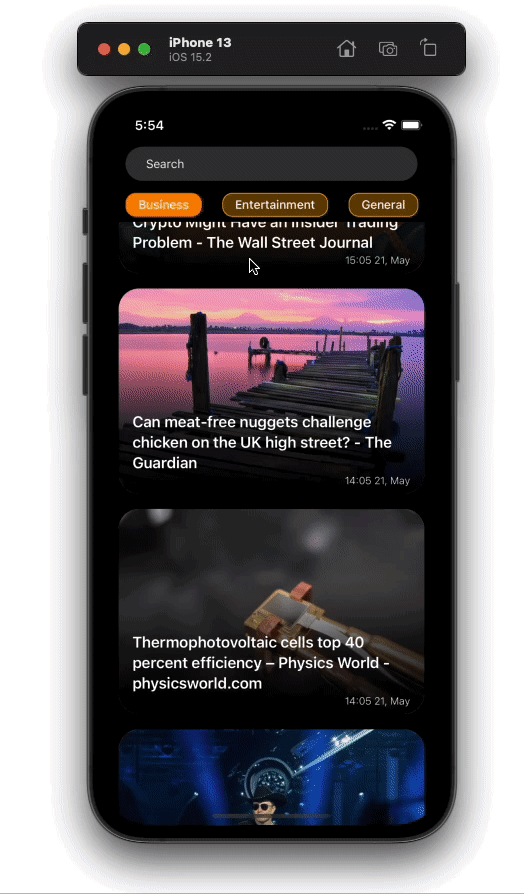
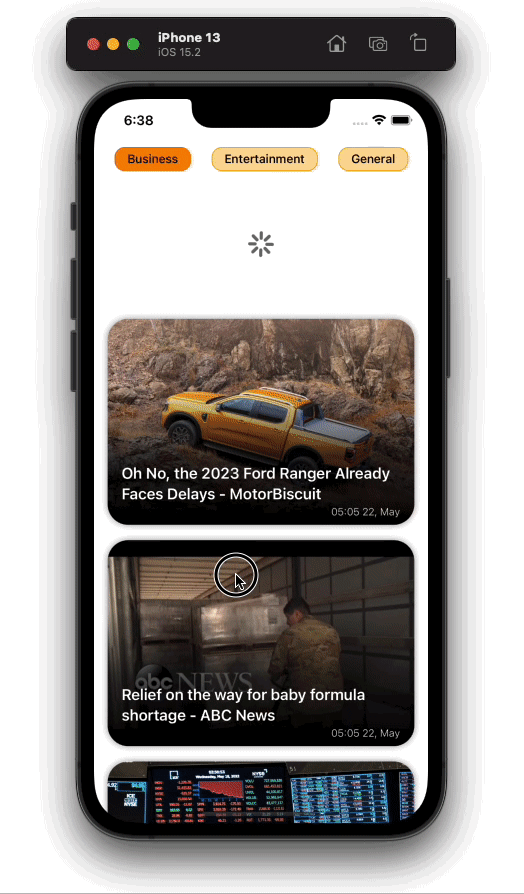
我们现在能够从世界各地获取最新的新闻列表,并将其显示在屏幕上。接下来,我们将添加一些UI设计。
设计新闻文章卡
目前,我们在屏幕上显示的是新闻的title 。我们需要更新它以显示article 。在它上面,我们将显示文章的title 。在底部,我们将显示特定news/article 的timestamp 。
让我们用一个Flatlist 替换我们在feed/index.tsx 中的map 函数。在你跳到实现用户界面之前,你首先需要添加一些库,我们将用这些库来设计我们的用户界面。
yarn add react-native-uuid react-native-linear-gradient moment
我们将使用 react-native-uuid来为每个新闻文章组件生成一个唯一的密钥,并使用 [react-native-linear-gradient](https://github.com/react-native-linear-gradient/react-native-linear-gradient)来在图片上创建一个半透明到透明的覆盖层,我们将在上面显示文章的title 。
最后,我们用 moment 将 从 API 收到的 timestamp 转换 为人类可读的格式。 对feed/index.tsx 做如下修改。
import uuid from 'react-native-uuid';
....
return (
  <View style={[styles.container, {backgroundColor}]}>
    <FlatList
      keyExtractor={() => uuid.v4()}
      showsVerticalScrollIndicator={false}
      data={newsFeed}
      renderItem={({item, index}: any) => (
        <NewsArticle post={item} />
      )}
      style={styles.list}
    />
  </View>
);
在上面的代码中,你可以注意到我们正在为Flatlist 组件渲染的每个项目分配一个唯一的键。因此,React对每个article ,而且在UI中不应该有重叠。如果这一点现在还说不通,那么以后当我们的UI逻辑变得更复杂时,就会说得通了。
上面的代码也会抛出一个错误,说 "NewsArticle 没有定义"。让我们通过为我们的新闻文章创建一个新的组件来解决这个问题。
在你的项目的src 目录中,创建一个名为components 的新文件夹,它将包含我们将在整个应用程序中使用的所有UI组件。现在,创建一个名为NewsArticle 的新文件夹,并在其中添加两个文件,名为index.tsx 和styles.ts 。
将以下代码添加到styles.ts 。
import {Platform, StyleSheet} from 'react-native';

const boxShadow: any = Platform.select({
  ios: {
    shadowColor: '#000',
    shadowOffset: {
      width: 0,
      height: 0,
    },
    shadowOpacity: 0.4,
    shadowRadius: 4,
  },
  android: {elevation: 6},
});

export default StyleSheet.create({
  container: {
    height: 240,
    marginBottom: 18,
    backgroundColor: '#eee',
    borderRadius: 24,
    marginHorizontal: 16,
    ...boxShadow,
  },
  imageContainer: {flex: 1},
  image: {
    flex: 1,
    borderRadius: 24,
    height: 300,
  },
  titleContainer: {
    position: 'absolute',
    bottom: 0,
    width: '100%',
    borderBottomLeftRadius: 24,
    borderBottomRightRadius: 24,
    height: 160,
    paddingLeft: 16,
    paddingRight: 10,
    justifyContent: 'flex-end',
    alignItems: 'flex-start',
  },
  text: {
    fontSize: 18,
    fontWeight: '600',
    lineHeight: 24,
    color: '#fff',
    paddingBottom: 24,
  },
  timestamp: {
    position: 'absolute',
    color: '#eee',
    fontSize: 12,
    fontWeight: '300',
    right: 16,
    bottom: 8,
  },
});
这些只是一些基本的样式,我们将用它们来设计我们的NewsArticle 组件。在你的index.tsx 文件中添加以下代码。
import moment from 'moment';
import React from 'react';
import {Image, Text, TouchableOpacity} from 'react-native';
import LinearGradient from 'react-native-linear-gradient';
import styles from './styles';

type Post = {
  title: string;
  urlToImage: string;
  publishedAt: string;
  url: string;
  author: string;
};

export const NewsArticle: React.FC<{
  post: Post;
}> = ({post}) => {
  return (
    <TouchableOpacity activeOpacity={1} style={styles.container}>
      <Image
        source={{
          uri: post?.urlToImage ?? 'https://picsum.photos/800',
          cache: 'force-cache',
        }}
        resizeMode={'cover'}
        style={styles.image}
      />
      <LinearGradient
        colors={['#0000', '#000A', '#000']}
        style={styles.titleContainer}>
        <Text style={styles.text}>{post?.title}</Text>
        <Text style={styles.timestamp}>
          {moment(post?.publishedAt).format('HH:MM DD, MMMM')}
        </Text>
      </LinearGradient>
    </TouchableOpacity>
  );
};
在上面的代码中,我们已经声明了NewsArticle 组件,它接收了一个post 的道具,这个道具是type Post 。Post 的定义在该组件上方给出。
对于用户界面,我们将整个组件包裹在TouchableOpacity 内,我们将在本教程的后面使用它来引导用户进入NewsDetail 。然后,在整个view ,显示一个Image 。如果我们没有从API 得到任何urlToImage ,那么我们就显示一个随机的占位符图片。
Image对于text ,我们把Text 组件放在一个LinearGradient 组件内,该组件被定位在absolute 上,使用户可以阅读文本,并保持文本用户界面中的contrast ratio 。我们还使用moment 来格式化article 的publishedAt 属性,最后显示格式化的值。
在你的代码中实现了上面的改变后,你的应用程序UI应该看起来像下面这样。
我们现在有了一个有效的、可读的新闻源。让我们添加功能,当用户在屏幕上拉起时刷新页面。值得庆幸的是,这有一个相当直接的实现。我们只需要使用Flatlist 组件的道具RefreshControl 。
在你的feed/index.tsx 中做以下突出的修改。
import React, {useCallback, useEffect, useState} from 'react';
import {FlatList, RefreshControl, useColorScheme, View} from 'react-native';
import {useDispatch, useSelector} from 'react-redux';
import {NewsArticle} from '../../components';
import {getNewsFeed} from '../../redux/actions';
import styles from './styles';
import uuid from 'react-native-uuid';

export const Feed: React.FC = () => {
  const {newsFeed} = useSelector((state: any) => state.feedReducer);
  const dispatch: Function = useDispatch();
  const [isLoading, setIsLoading] = useState(false);

  useEffect(() => {
    dispatch(getNewsFeed(setIsLoading));
  }, [dispatch]);

  const handleRefresh = useCallback(() => {
    dispatch(getNewsFeed(setIsLoading));
  }, [dispatch]);
  const backgroundColor = useColorScheme() === 'dark' ? '#000' : '#fff';
  return (
    <View style={[styles.container, {backgroundColor}]}>
      <FlatList
        keyExtractor={() => uuid.v4()?.toString()}
        showsVerticalScrollIndicator={false}
        data={newsFeed}
        renderItem={({item}: any) => <NewsArticle post={item} />}
        refreshControl={
          <RefreshControl refreshing={isLoading} onRefresh={handleRefresh} />
        }
        style={styles.list}
      />
    </View>
  );
};
在上面的代码中,我们已经添加了一个state isLoading ,当news 通过getNewsFeed 方法获取的时候,它就是true 。然后,我们在Flatlist 中添加了RefreshControl 组件,当isLoading 是true ,以及当用户拉起列表刷新数据时,它将被显示。然后,handleRefresh 方法将被触发。
注意,我们在getNewsFeed 方法里面添加了一个setIsLoading 参数。但是,我们还没有改变方法的定义。让我们接下来做这个;在你的actions.ts 文件中添加突出显示的代码。
export const getNewsFeed =
  (setIsLoading: Function) => async (dispatch: Function) => {
    try {
      setIsLoading(true);
      const res = await apiClient.get(
        'top-headlines?language=en&category=business',
      );
      setIsLoading(false);
      if (res.status === 200) {
        dispatch({
          type: GET_NEWS_FEED,
          payload: res?.data?.articles,
        });
      } else {
        console.warn('Something went wrong');
      }
    } catch (error) {
      console.error(error);
    }
};
输出结果将类似于下面的图片。

持久存储数据
我们现在有一个工作的新闻源,但有一个小问题。你可能会注意到,当应用程序首次加载时,屏幕会有一段时间是空白的。为了解决这个问题,我们将使用Redux Persist,它是Redux商店的一种中间件,可以持久化商店数据,对其进行补水和填充。
实现Redux Persist后,当用户关闭并打开应用程序时,他们会看到之前的feed,而不是一个空白的屏幕。如果有任何新的feed,那么就会被加载。
首先,将依赖项添加到你的项目中。要做到这一点,执行下面的命令。
yarn add @react-native-community/async-storage redux-persist
我们需要添加Async Storage ,因为我们所有的商店数据都将存储在其中。当应用程序再次打开时,商店将使用它里面的数据进行补水。基本上,Redux Persist在React Native中使用AsyncStorage 进行存储。
一旦添加了依赖性,我们需要在我们的store.ts 文件中做一些修改。
import AsyncStorage from '@react-native-community/async-storage';
import {configureStore} from '@reduxjs/toolkit';
import {combineReducers} from 'redux';
import feedReducer from './reducers';
import {persistReducer, persistStore} from 'redux-persist';

const persistConfig = {
  key: 'root',
  storage: AsyncStorage,
  whitelist: ['newsFeed'],
};

const rootReducer = combineReducers({
  feedReducer: persistReducer(persistConfig, feedReducer),
});

export const store = configureStore({
  reducer: rootReducer,
  middleware: getDefaultMiddleware =>
    getDefaultMiddleware({
      serializableCheck: false,
    }),
});

export const persistor = persistStore(store);
在上面的代码中,我们创建了一个persistConfig 对象,它负责Redux Persist的配置。在这个对象里面,有两个主要的key 对象,storage 和whitelist 。
我们将使用storage ,作为Redux商店数据的存储,而whitelist 是一个字符串的array 。这些是我们要持久化的还原器的名字。如果我们传递一个空数组给whitelist ,那么我们所有的还原器都将被持久化。
接下来,我们使用Redux Persist的persistReducer 方法创建一个持久化的还原器,并将persistConfig 作为第一个参数。然后,我们传入我们想要持久化的实际还原器。
我们在configureStore 的middleware 关键中传递serializableCheck: false ,以抑制当我们在Redux v6中使用Redux Persist时抛出的一个警告。
最后,我们使用persistStore 方法创建一个持久化的存储副本,并将其导出为persistor 。我们将在下一步中使用它。
最后,为了向我们的应用程序提供持久化的数据,我们需要在我们的App.tsx 文件中,就在Redux商店Provider 组件之后传递它。
在App.tsx 文件中添加以下代码。
import React from 'react';
import {ActivityIndicator} from 'react-native';
import {Provider} from 'react-redux';
import {PersistGate} from 'redux-persist/integration/react';
import {persistor, store} from './src/redux/store';
import {Feed} from './src/screens/feed';

const App: React.FC = () => {
  return (
    <Provider store={store}>
      <PersistGate
        loading={<ActivityIndicator size={'large'} color={'#000'} />}
        persistor={persistor}>
        <Feed />
      </PersistGate>
    </Provider>
  );
};
export default App;
我们通过PersistGate 组件传递持久化的存储数据,而持久化的存储来自于persistor 。在PersistGate 组件中有一个loading 的道具,它接受任何JSX组件作为参数,并且该JSX组件会被显示出来,直到存储被补水。
就这样,我们已经持久化了我们的商店数据。现在,如果你关闭应用程序并再次打开它,你将不会看到空白的屏幕。
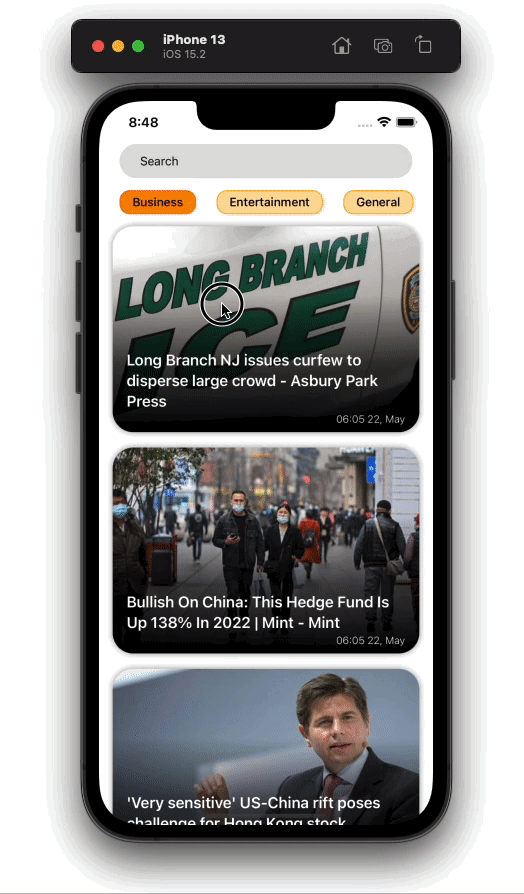
在feed中添加新闻分类标签
接下来,我们将实现分类标签。我们的应用程序将有一个预定义的新闻类别的水平列表,用户可以查看。当用户点击任何类别标签时,那么新闻提要应该更新并只显示与该特定类别相关的新闻。
让我们开始为categories 创建一个数据源。在你项目的src 文件夹中创建一个名为constants.ts 的文件,然后在其中添加以下代码。
interface NewsCategoryTypes {
  [key: string]: string;
}

export const NewsCategory: NewsCategoryTypes = {
  business: 'business',
  entertainment: 'entertainment',
  general: 'general',
  health: 'health',
  science: 'science',
  sports: 'sports',
  technology: 'technology',
};
现在,让我们在Feed 屏幕上的articles 列表上方显示一个类别列表。在feed/index.tsx 文件中添加下面的代码。
import {NewsArticle, NewsTags} from '../../components';
import {NewsCategory} from '../../constants';
....
export const Feed: React.FC = () => {
  const [isLoading, setIsLoading] = useState(false);
  const [selectedCategory, setSelectedCategory] = useState(
    NewsCategory.business,
  );
  ....
  useEffect(() => {
    dispatch(getNewsFeed(setIsLoading, selectedCategory));
  }, [dispatch, selectedCategory]);

  const handleRefresh = useCallback(() => {
    dispatch(getNewsFeed(setIsLoading, selectedCategory));
  }, [dispatch, selectedCategory]);

  return (
    <View style={[styles.container, {backgroundColor}]}>
      <NewsTags
          selectedCategory={selectedCategory}
          setSelectedCategory={setSelectedCategory}
      />
      ....
    </View>
  );
};
在上面的代码中,我们引入了一个名为selectedCategory 的新状态,并给它一个初始值NewsCategory.business 。我们现在还在我们的getNewsFeed 动作中传递selectedCategory ,最后,我们正在渲染NewsTags 组件,我们还没有创建它。
现在让我们来做这件事。创建一个名为NewsTags 的新文件夹,并在其中添加两个文件:styles.ts 和index.tsx 。
在styles.ts 文件中添加下面的代码。
import {StyleSheet} from 'react-native';
export default StyleSheet.create({
  list: {
    maxHeight: 40,
  },
  contentContainer: {
    paddingHorizontal: 24,
    alignItems: 'center',
    justifyContent: 'center',
  },
});
为了显示categories 的水平列表,在NewsTags/index.tsx 文件中添加以下代码。
import React from 'react';
import {FlatList} from 'react-native';
import {NewsCategory} from '../../constants';
import {Tag} from '../Tag';
import styles from './styles';

export const NewsTags: React.FC<{
  selectedCategory: String;
  setSelectedCategory: Function;
}> = ({selectedCategory, setSelectedCategory}) => {
  return (
    <FlatList
      horizontal
      showsHorizontalScrollIndicator={false}
      data={Object.keys(NewsCategory)}
      keyExtractor={(item: string) => item}
      renderItem={({item}: any) => (
        <Tag
          category={item}
          selectedCategory={selectedCategory}
          setSelectedCategory={setSelectedCategory}
        />
      )}
      style={styles.list}
      contentContainerStyle={styles.contentContainer}
    />
  );
};
在上面的代码中,我们在NewsCategory 对象中渲染了所有的keys 。在renderItem 里面,我们已经传递了Tag 组件,我们还没有创建它。现在让我们来创建它。在组件中添加一个名为Tag 的文件夹,并创建两个文件,如下图所示。
将下面的代码粘贴到styles.ts 文件中。
import {StyleSheet} from 'react-native';
export default StyleSheet.create({
  container: {
    borderWidth: 1,
    borderColor: '#FFA500',
    borderRadius: 12,
    height: 28,
    paddingHorizontal: 14,
    justifyContent: 'center',
    alignItems: 'center',
    marginRight: 24,
    backgroundColor: '#FFA50066',
  },
  text: {
    fontSize: 14,
    fontWeight: '500',
  },
  selected: {
    backgroundColor: '#FF8800',
    borderColor: '#FF6600',
  },
});
要实际渲染一个Tag 组件,在index.tsx 文件中添加以下代码。
import React, {useCallback} from 'react';
import {Text, TouchableOpacity, useColorScheme} from 'react-native';
import styles from './styles';

export const Tag: React.FC<{
  category: String;
  selectedCategory: String;
  setSelectedCategory: Function;
}> = ({category, selectedCategory, setSelectedCategory}) => {
  const textColor = useColorScheme() === 'dark' ? '#fff' : '#000';
  const handlePress = useCallback(() => {
    setSelectedCategory(category);
  }, [category, setSelectedCategory]);
  return (
    <TouchableOpacity
      style={[
        styles.container,
        selectedCategory === category && styles.selected,
      ]}
      onPress={handlePress}>
      <Text style={[styles.text, {color: textColor}]}>{`${
        category.charAt(0).toUpperCase() + category.slice(1)
      }`}</Text>
    </TouchableOpacity>
  );
};
上面的代码是一个简单的view ,渲染一个category 名称文本。当按下时,它将selectedCategory 设置为该category 。
最后,我们将修改getNewsFeed 动作方法,使其返回一个选定的新闻类别的新闻源。像下面这样修改actions.ts 中的getNewsFeed 方法。
export const getNewsFeed =
  (setIsLoading: Function, category: String = NewsCategory.business) =>
  async (dispatch: Function) => {
    try {
      setIsLoading(true);
      const res = await apiClient.get(
        `top-headlines?language=en&category=${category}`,
      );
      setIsLoading(false);
      if (res.status === 200) {
        dispatch({
          type: GET_NEWS_FEED,
          payload: res?.data?.articles,
        });
      } else {
        console.warn('Something went wrong');
      }
    } catch (error) {
      console.error(error);
    }
};
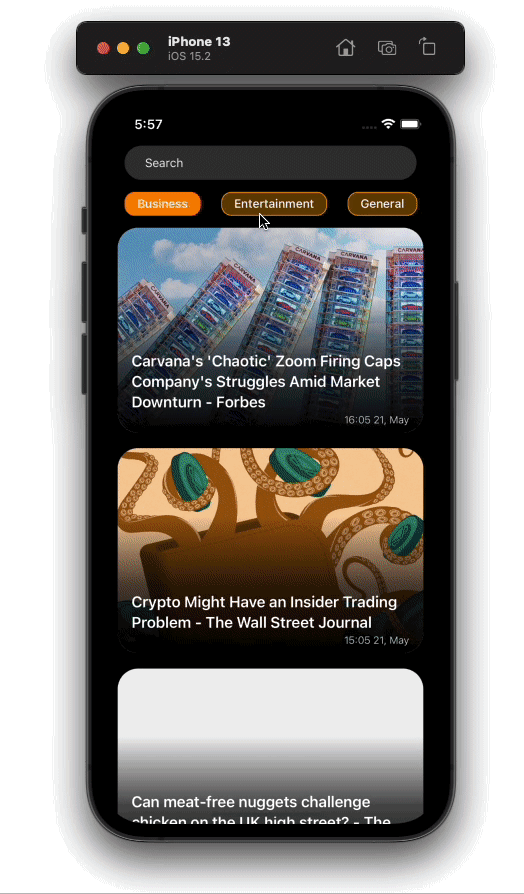
现在,我们可以选择一个特定的新闻category ,我们想看到这个新闻。输出结果将如下图所示。
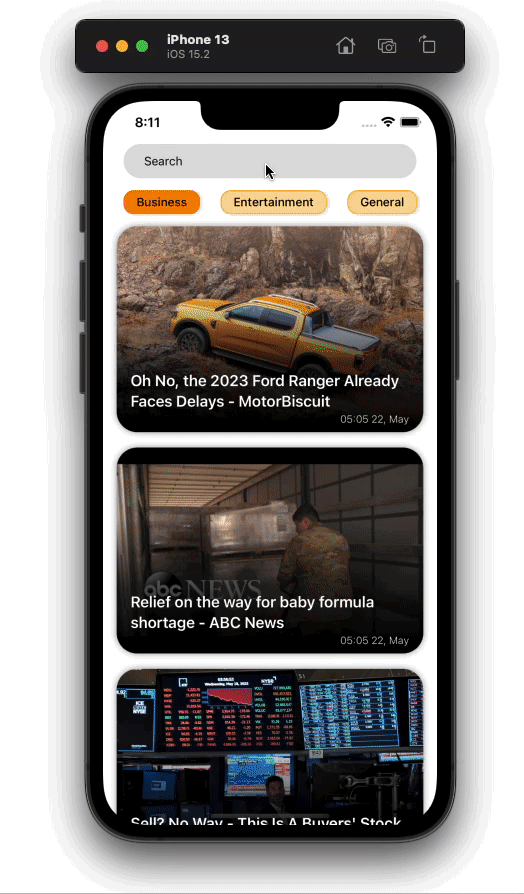
用特定关键词搜索新闻
我们将在我们的应用程序中实现的最后一个功能是使用string 的搜索查询来搜索某条特定新闻。这个逻辑非常简单。我们将在屏幕的顶部有一个TextInput 。当用户在TextInput ,我们将查询NewsAPI搜索端点以获得搜索结果,然后将其显示在feed上。
首先,让我们添加所需的redux actions 。添加以下代码到你的actions.ts 。
export const searchNews =
  (searchTerm: string = '', setIsLoading: Function = () => {}) =>
  async (dispatch: Function) => {
    try {
      setIsLoading(true);
      const res = await apiClient.get(`everything?q=${searchTerm}`);
      setIsLoading(false);
      if (res.status === 200) {
        dispatch({
          type: SEARCH_NEWS,
          payload: res?.data?.articles,
        });
      } else {
        console.warn('Something went wrong');
      }
    } catch (error) {
      console.error(error);
    }
};

export const resetSearchResults = () => (dispatch: Function) => {
  dispatch({
    type: RESET_SEARCH_RESULTS,
  });
};
我们还需要给我们的还原器添加一些额外的状态。将下面的代码添加到你的reducers.ts 。
import {GET_NEWS_FEED, RESET_SEARCH_RESULTS, SEARCH_NEWS} from './actions';

const initialState = {
  newsFeed: [],
  searchResults: [],
};
const feedReducer = (
  state = initialState,
  action: {type: String; payload: any},
) => {
  switch (action.type) {
    case GET_NEWS_FEED:
      return {...state, newsFeed: action.payload};
    case SEARCH_NEWS:
      return {...state, searchResults: action.payload};
    case RESET_SEARCH_RESULTS:
      return {...state, searchResults: []};
    default:
      return state;
  }
};
export default feedReducer;
现在我们的状态已经设置好了,让我们来实现搜索功能。在你的feed/index.tsx 中添加下面的代码。
import React, {useCallback, useEffect, useState} from 'react';
import {FlatList, RefreshControl, useColorScheme, View} from 'react-native';
import uuid from 'react-native-uuid';
import {useDispatch, useSelector} from 'react-redux';
import {NewsArticle, NewsTags, SearchInput} from '../../components';
import {NewsCategory} from '../../constants';
import {getNewsFeed} from '../../redux/actions';
import styles from './styles';

export const Feed: React.FC = () => {
  const {newsFeed, searchResults} = useSelector(
    (state: any) => state.feedReducer,
  );
  const [isLoading, setIsLoading] = useState(false);
  const [selectedCategory, setSelectedCategory] = useState(
    NewsCategory.business,
  );
  const [searchText, setSearchText] = useState('');
  const dispatch: Function = useDispatch();
  useEffect(() => {
    dispatch(getNewsFeed(setIsLoading, selectedCategory));
  }, [dispatch, selectedCategory]);
  const handleRefresh = useCallback(() => {
    dispatch(getNewsFeed(setIsLoading, selectedCategory));
  }, [dispatch, selectedCategory]);
  const backgroundColor = useColorScheme() === 'dark' ? '#000' : '#fff';
  return (
    <View style={[styles.container, {backgroundColor}]}>
      <SearchInput
        searchText={searchText}
        setSearchText={setSearchText}
        setIsLoading={setIsLoading}
      />
      {!searchText?.trim() && (
        <NewsTags
          selectedCategory={selectedCategory}
          setSelectedCategory={setSelectedCategory}
        />
      )}
      <FlatList
        keyExtractor={() => uuid.v4()?.toString()}
        showsVerticalScrollIndicator={false}
        data={searchText?.trim() ? searchResults : newsFeed}
        renderItem={({item, index}: any) => (
          <NewsArticle post={item} />
        )}
        refreshControl={
          <RefreshControl refreshing={isLoading} onRefresh={handleRefresh} />
        }
        style={styles.list}
      />
    </View>
  );
};
注意,我们已经添加了一个新的组件,叫做SearchInput 。让我们在我们的代码中创建它。在components 文件夹内,创建一个名为SearchInput 的文件夹,并将其中的文件命名为styles.ts 和index.tsx 。
将下面的代码添加到styles.ts 文件中。
import {StyleSheet} from 'react-native';

export default StyleSheet.create({
  container: {
    height: 40,
    marginHorizontal: 24,
    marginBottom: 8,
    borderRadius: 20,
    paddingHorizontal: 24,
    fontWeight: '400',
  },
});
在编写SearchInput 的代码之前,我们首先需要安装一个库。
yarn add lodash
我们要用lodash 来实现searchInput'sonChangeText 方法上的debounce 方法。最后,在SearchInput/index.tsx 文件中添加以下代码。
import React, {useCallback} from 'react';
import {TextInput, useColorScheme} from 'react-native';
import {useDispatch} from 'react-redux';
import {resetSearchResults, searchNews} from '../../redux/actions';
import styles from './styles';
import {debounce} from 'lodash';

export const SearchInput: React.FC<{
  searchText: string;
  setSearchText: Function;
  setIsLoading: Function;
}> = ({searchText, setSearchText, setIsLoading}) => {
  const backgroundColor = useColorScheme() === 'dark' ? '#333' : '#ddd';
  const placeholderColor = useColorScheme() === 'dark' ? '#eee' : '#111';
  const color = useColorScheme() === 'dark' ? '#fff' : '#000';
  const dispatch: Function = useDispatch();
  const searchForText = useCallback(
    debounce((text: string) => {
      if (text?.trim().length > 0) {
        dispatch(searchNews(text, setIsLoading));
      } else {
        dispatch(resetSearchResults());
      }
    }, 1000),
    [setSearchText, dispatch, setIsLoading],
  );
  return (
    <TextInput
      placeholder={'Search'}
      placeholderTextColor={placeholderColor}
      style={[styles.container, {backgroundColor, color}]}
      value={searchText}
      onChangeText={(text: string) => {
        setSearchText(text);
        searchForText(text);
      }}
      maxLength={40}
      returnKeyType={'search'}
    />
  );
};
就这样,我们已经在我们的新闻源应用程序中实现了搜索功能。输出将看起来像下面的gif。
添加共享过渡导航
我们的应用程序几乎已经完成。我们只是缺少一样东西,即NewsDetail 屏幕。
正如你在上面的输出中可能看到的,共享的过渡效果是在两个屏幕之间用 react-navigation-shared-element.
首先,让我们把所有需要的依赖性添加到项目中。
yarn add @react-navigation/native @react-navigation/stack react-native-safe-area-context react-native-screens
现在,实现共享过渡。
yarn add react-navigation-shared-element react-native-shared-element
为了在我们的应用程序中设置导航,在项目的根部创建一个名为navigation.tsx 的新文件,并在其中添加以下代码。
import {NavigationContainer} from '@react-navigation/native';
import React from 'react';
import {createSharedElementStackNavigator} from 'react-navigation-shared-element';
import {Feed} from './src/screens/feed';
import {NewsDetails} from './src/screens/NewsDetails';

const Stack = createSharedElementStackNavigator();

export const RootNavigation = () => {
  return (
    <NavigationContainer>
      <Stack.Navigator
        initialRouteName="Feed"
        screenOptions={{headerShown: false}}>
        <Stack.Screen name="Feed" component={Feed} />
        <Stack.Screen
          name="NewsDetails"
          component={NewsDetails}
          options={{
            cardStyleInterpolator: ({current: {progress}}) => {
              return {
                cardStyle: {
                  opacity: progress,
                },
              };
            },
          }}
        />
      </Stack.Navigator>
    </NavigationContainer>
  );
};
注意,我们在SharedElementsStackNavigator 中添加了两个屏幕。第一个是我们默认的Feed 屏幕,另一个是NewsDetails 屏幕,我们还没有创建。
让我们创建NewsDetails 屏幕,并为其组件添加shared elements 映射。在screens 文件夹中创建一个名为NewsDetails 的新文件夹,并向其添加以下两个文件。
在styles.ts 文件中添加以下代码。
import {StyleSheet} from 'react-native';

export default StyleSheet.create({
  container: {
    flex: 1,
  },
  contentContainer: {
    paddingBottom: 120,
  },
  image: {
    height: 500,
    width: '100%',
    borderBottomLeftRadius: 50,
    borderBottomRightRadius: 50,
  },
  crossContainer: {
    position: 'absolute',
    top: 60,
    left: 30,
    zIndex: 9,
  },
  cross: {
    height: 34,
    width: 34,
  },
  title: {
    fontSize: 24,
    fontWeight: '600',
    lineHeight: 30,
    paddingHorizontal: 24,
    marginVertical: 18,
  },
  content: {
    fontSize: 16,
    fontWeight: '400',
    lineHeight: 22,
    paddingHorizontal: 24,
  },
  readMoreContainer: {
    position: 'absolute',
    paddingTop: 14,
    paddingBottom: 28,
    paddingHorizontal: 24,
    bottom: 0,
    width: '100%',
  },
  readMoreText: {
    fontSize: 13,
    fontWeight: '300',
    lineHeight: 22,
  },
  link: {
    color: '#00beff',
    textDecorationLine: 'underline',
    textDecorationStyle: 'solid',
    textDecorationColor: '#00beff',
  },
});
为了在屏幕上显示新闻细节,在index.tsx 中粘贴以下代码。
import {useNavigation} from '@react-navigation/native';
import React, {useCallback} from 'react';
import {
  Image,
  Linking,
  ScrollView,
  Text,
  TouchableOpacity,
  useColorScheme,
  View,
} from 'react-native';
import {SharedElement} from 'react-navigation-shared-element';
import {Back} from '../../../assets';
import styles from './styles';

interface Route {
  params: {
    article: {
      author: string;
      title: string;
      urlToImage: string;
      publishedAt: string;
      url: string;
      content: string;
    };
    articleIndex: number;
  };
}
export const NewsDetails: React.FC<{route: Route}> = ({route}) => {
  const {article, articleIndex} = route?.params;
  const navigation = useNavigation();
  const goBack = useCallback(() => {
    navigation.goBack();
  }, [navigation]);
  const backgroundColor = useColorScheme() === 'dark' ? '#000' : '#fff';
  const color = useColorScheme() === 'dark' ? '#fff' : '#000';
  const contentColor = useColorScheme() === 'dark' ? '#bbb' : '#444';
  const readMoreBgColor = useColorScheme() === 'dark' ? '#222' : '#ddd';
  const handleURLPress = useCallback(() => {
    Linking.openURL(article?.url);
  }, [article]);

  return (
    <>
      <TouchableOpacity style={styles.crossContainer} onPress={goBack}>
        <Image style={styles.cross} source={Back} />
      </TouchableOpacity>
      <ScrollView
        bounces={false}
        showsVerticalScrollIndicator={false}
        style={[styles.container, {backgroundColor}]}
        contentContainerStyle={styles.contentContainer}>
        <SharedElement id={`article#${articleIndex}-Image`}>
          <Image
            style={styles.image}
            source={{uri: article?.urlToImage ?? 'https://picsum.photos/1000'}}
            resizeMode={'cover'}
          />
        </SharedElement>
        <Text style={[styles.title, {color}]}>{article?.title}</Text>
        <Text style={[styles.content, {color: contentColor}]}>
          {article?.content}
        </Text>
      </ScrollView>
      <View
        style={[styles.readMoreContainer, {backgroundColor: readMoreBgColor}]}>
        <Text style={[styles.readMoreText, {color}]} numberOfLines={2}>
          Read more at{' '}
          <Text style={styles.link} onPress={handleURLPress}>
            {article?.url}
          </Text>
        </Text>
      </View>
    </>
  );
};

(NewsDetails as any).sharedElements = (route: any) => {
  const {articleIndex} = route.params;
  return [`article#${articleIndex}-Image`];
};
我们只需要从feed屏幕上传递正确的共享元素映射。但是,在此之前,我们需要在App.tsx 文件中渲染navigation ,而不是Feed 组件。添加以下代码到App.tsx 。
import React from 'react';
import {ActivityIndicator} from 'react-native';
import {Provider} from 'react-redux';
import {PersistGate} from 'redux-persist/integration/react';
import {RootNavigation} from './Navigation';
import {persistor, store} from './src/redux/store';

const App: React.FC = () => {
  return (
    <Provider store={store}>
      <PersistGate
        loading={<ActivityIndicator size={'large'} color={'#000'} />}
        persistor={persistor}>
        <RootNavigation />
      </PersistGate>
    </Provider>
  );
};
export default App;
现在,让我们转到NewsArticle 组件。在NewsArticle/index.tsx 文件中做突出显示的修改。
import {useNavigation} from '@react-navigation/native';
import moment from 'moment';
import React, {useCallback} from 'react';
import {Image, Text, TouchableOpacity} from 'react-native';
import LinearGradient from 'react-native-linear-gradient';
import {SharedElement} from 'react-navigation-shared-element';
import styles from './styles';

type Post = {
  title: string;
  urlToImage: string;
  publishedAt: string;
  url: string;
  author: string;
};

export const NewsArticle: React.FC<{
  post: Post;
  index: number;
}> = ({post, index}) => {
  const navigation: any = useNavigation();
  const handleNavigate = useCallback(() => {
    navigation.navigate('NewsDetails', {article: post, articleIndex: index});
  }, [index, navigation, post]);
  return (
    <TouchableOpacity
      activeOpacity={1}
      style={styles.container}
      onPress={handleNavigate}>
      <SharedElement
        style={styles.imageContainer}
        id={`article#${index}-Image`}>
        <Image
          source={{
            uri:
              post?.urlToImage ??
              `https://picsum.photos/${Math.floor(Math.random() * 1000)}`,
            cache: 'force-cache',
          }}
          resizeMode={'cover'}
          style={styles.image}
        />
      </SharedElement>
      <LinearGradient
        colors={['#0000', '#000A', '#000']}
        style={styles.titleContainer}>
        <Text style={styles.text}>{post?.title}</Text>
        <Text style={styles.timestamp}>
          {moment(post?.publishedAt).format('HH:MM DD, MMMM')}
        </Text>
      </LinearGradient>
    </TouchableOpacity>
  );
};
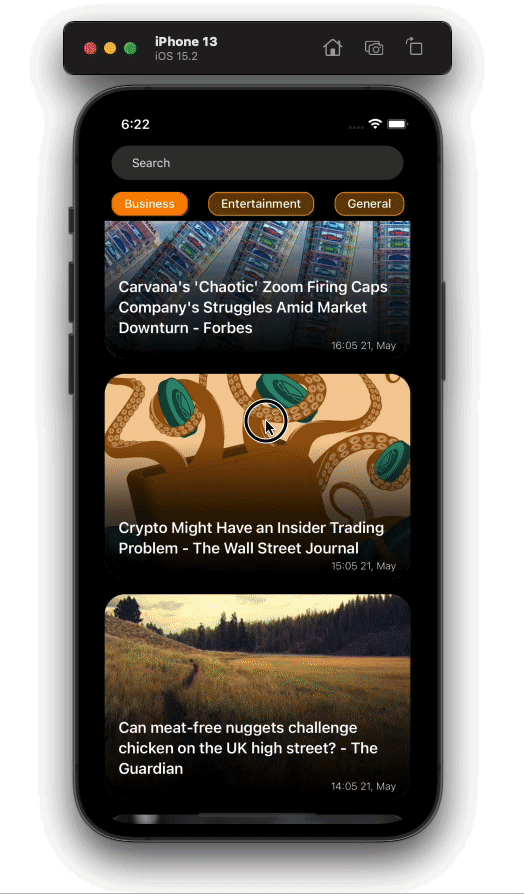
在上面的代码中,我们将Image 包裹在SharedElement 中,并给它传递了一个ID,这个ID将在两个屏幕上通用。在实施所有相应的修改后,我们的应用程序将看起来像下面的图片。
结论
正如你在教程中看到的,使用React Native创建一个新闻源应用程序是相当容易的。这篇文章只是一个演示,解释了我们如何与REST API交互,但你可以走得更远,比如使用WebSockets进行实时更新或使用GraphQL API。
webview 如果你想让这个应用更有用,你可以在应用的NewsDetail ,当用户按下链接阅读更多文章时,你可以直接在webview ,而不是在外部浏览器中打开链接。我希望你喜欢这篇文章,并祝你编码愉快!
The postHow to create a news feed in React Nativeappeared first onLogRocket Blog.
