1.form 表单
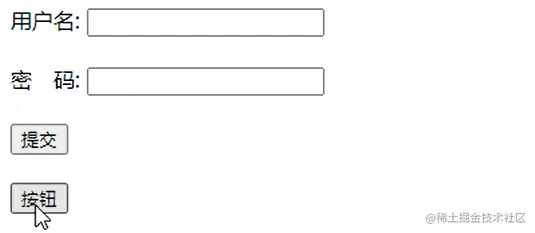
网页中采集数据的表单由三个部分组成,分别是:表单标签(form)、表单域(input、textarea、select)、表单按钮(submit或者reset)
表单的作用就是收集数据
表单域
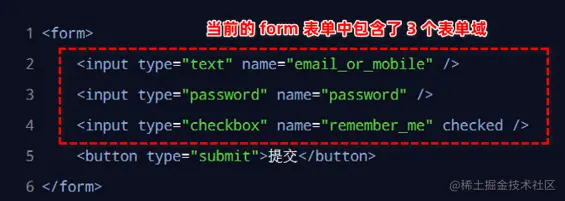
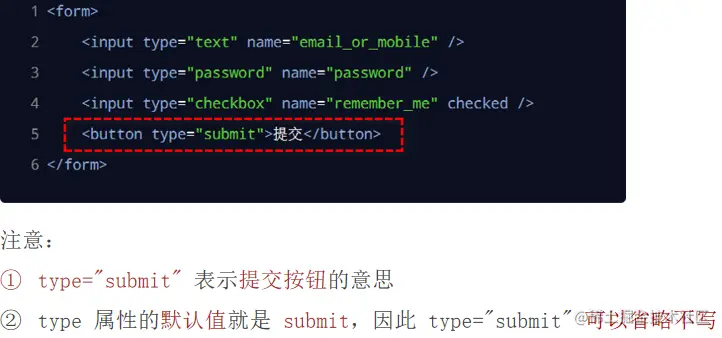
表单按钮
2. 标签的属性一览表
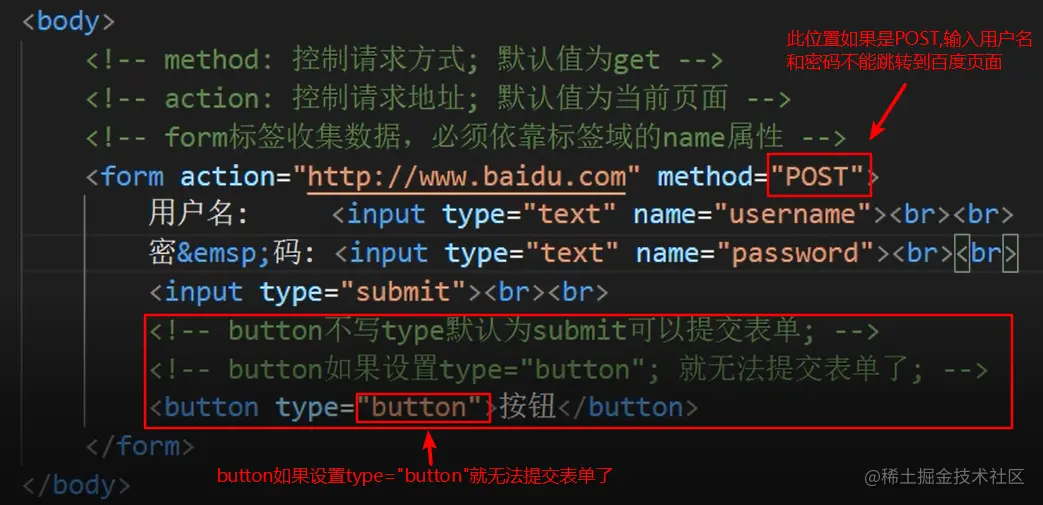
<form> 标签最重要的 3 个属性分别是 action、method 和 enctype

<body>
<form action="http://www.baidu.com" method="POST">
用户名: <input type="text" name="username"><br><br>
密 码: <input type="text" name="password"><br><br>
<input type="submit"><br><br>
<button type="button">按钮</button>
</form>
</body>

以 GET 方式提交表单数据
在 <form> 标签上,通过 action 属性指定提交的 URL 地址,通过 method 属性指定提交的方式为 GET
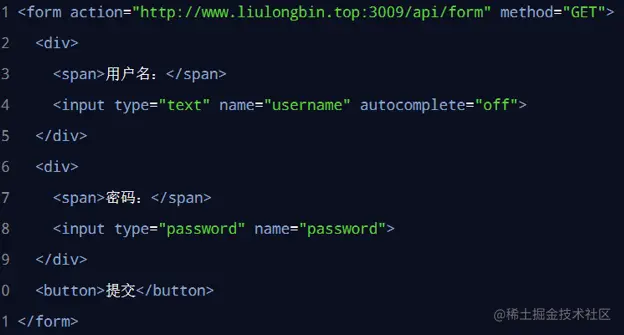
注意:由于 method 属性的默认值就是 GET,因此上述的 method="GET" 可以被省略!
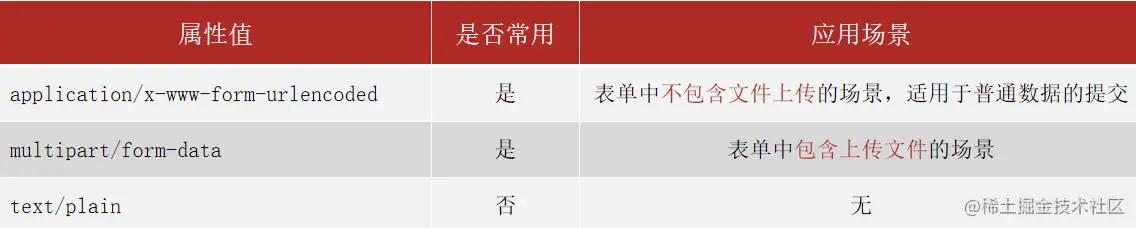
enctype 三个可选值之间的区别
只有 method 属性的值等于 POST 时,才有必要设置 enctype 属性
3.表单的提交事件和阻止默认行为
<body>
<form action="http://www.baidu.com" method="POST">
用户名: <input type="text" name="username"><br><br>
密 码: <input type="text" name="password"><br><br>
<input type="submit"><br><br>
</form>
<script>
document.querySelector('form').onsubmit = function (e) {
e.preventDefault();
console.log('表单提交方法');
}
</script>
</body>
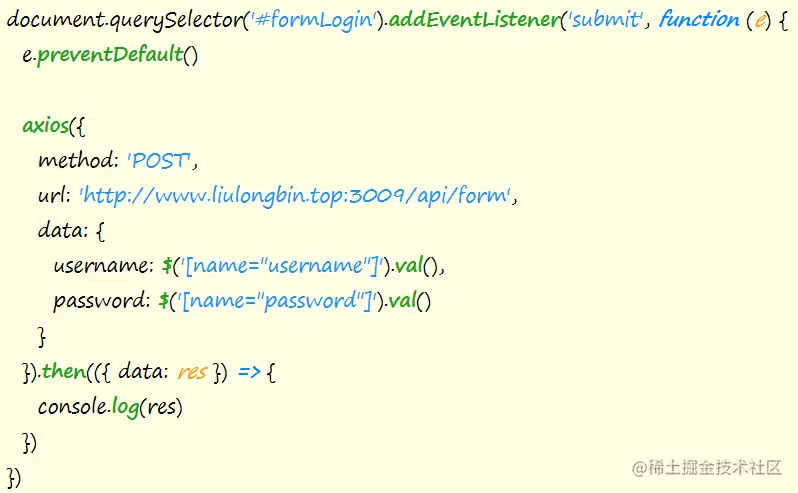
案例:form标签发送ajax请求
<body>
<form action="http://www.baidu.com" method="POST">
用户名: <input type="text" name="username"><br><br>
密 码: <input type="text" name="password"><br><br>
<input type="submit"><br><br>
</form>
<script src="./lib/axios.js"></script>
<script>
document.querySelector('form').addEventListener('submit', function (e) {
e.preventDefault();
axios({
method: 'POST',
url: 'http://www.liulongbin.top:3009/api/form',
data: {
username: document.querySelector('[name="username"]').value,
password: document.querySelector('[name="password"]').value,
}
}).then(({ data: res }) => {
console.log(res);
});
})
</script>
</body>

4.jQuery库介绍
1.  $( 选择器 )   获取元素;  类似 document.querySelector() / querySelectorAll()
2.  $( 选择器 ) .on(事件,函数);  绑定事件;    类似  addEventListener();
3.  $( 选择器 ) .show() ;  显示;  类似   div.style.display = “block”;
4.  $( 选择器 ) .hide();   隐藏;    类似   div.style.display = “none”;
jQuery 的 serialize() 函数

示例代码如下:
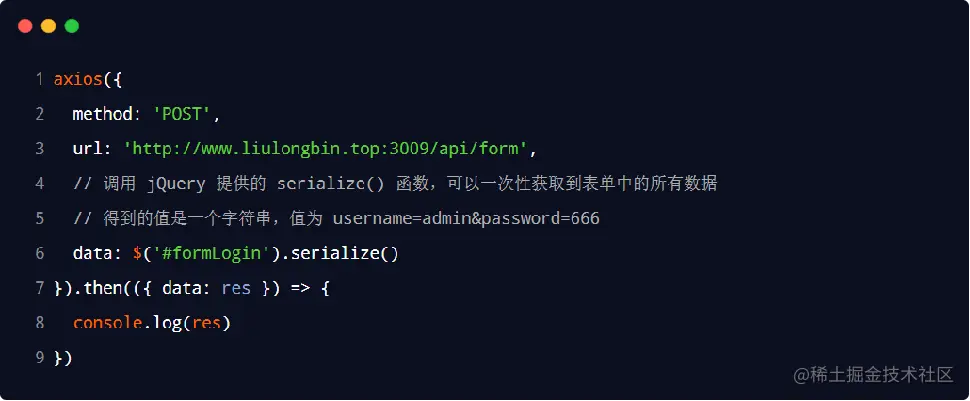

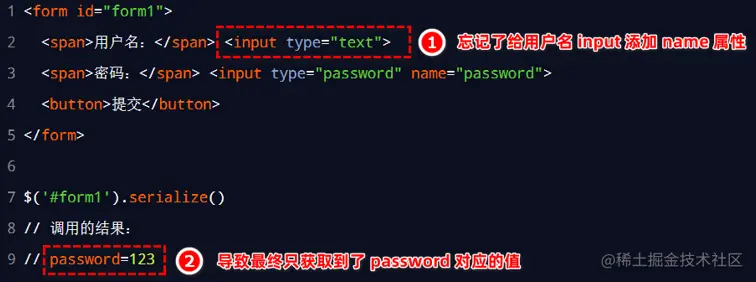
serialize() 函数的使用注意点
在使用 serialize() 函数快速获取表单数据时,必须为每个表单域添加 name 属性
serialize() 函数案例
<body>
<form action="http://www.baidu.com" method="POST">
用户名: <input type="text" name="username"><br><br>
密 码: <input type="text" name="password"><br><br>
<input type="submit"><br><br>
</form>
<script src="./lib/axios.js"></script>
<script src="./lib/jquery-v3.6.0.js"></script>
<script>
document.querySelector('form').addEventListener('submit', function (e) {
e.preventDefault();
axios({
method: 'POST',
url: 'http://www.liulongbin.top:3009/api/form',
data: $("form").serialize()
那么参数类型为 JSON 格式的字符串! enctype: application/json
}).then(({ data: res }) => {
console.log(res);
});
})
</script>

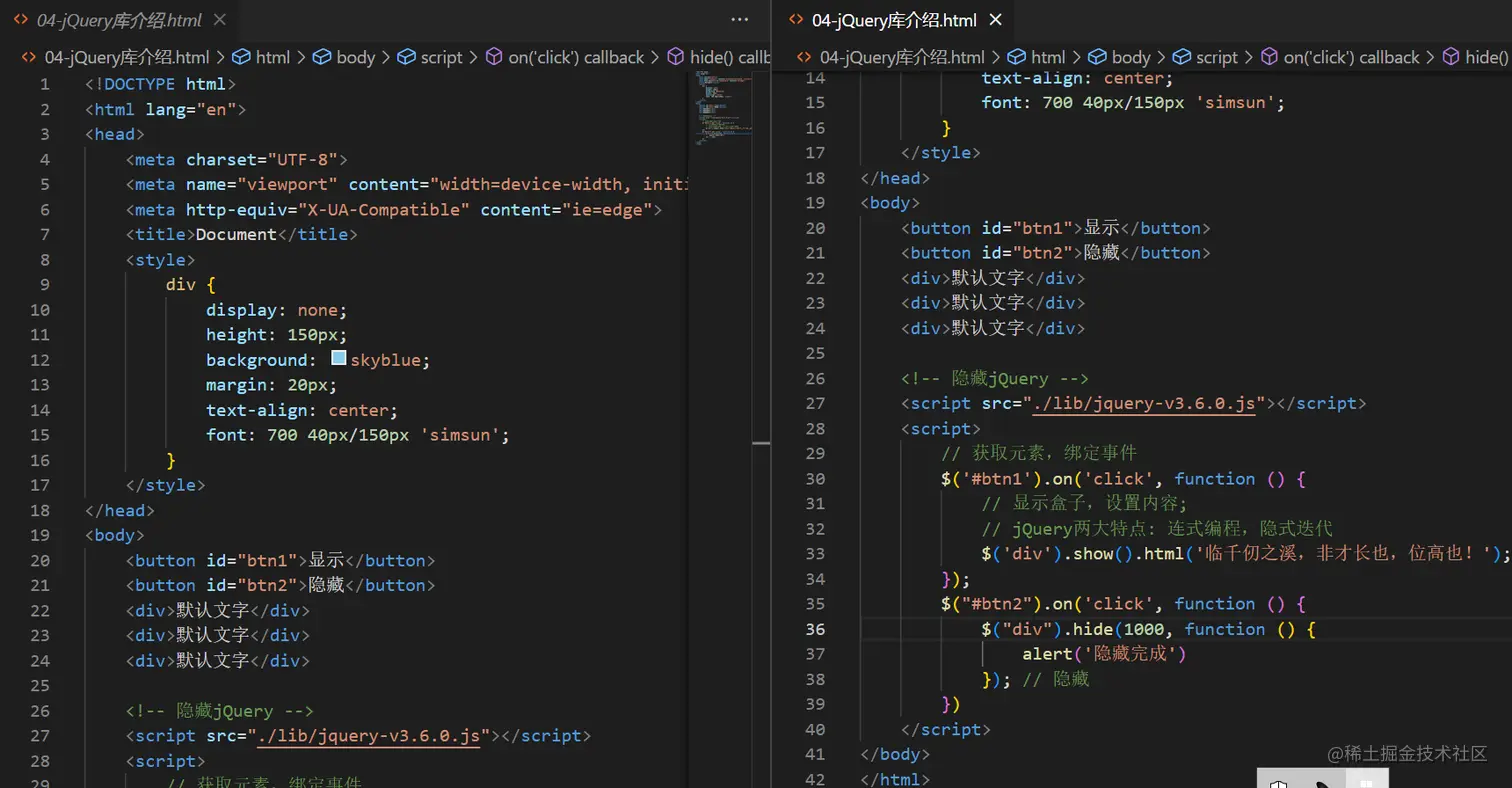
jQuery案例
<style>
div {
display: none;
height: 150px;
background: skyblue;
margin: 20px;
text-align: center;
font: 700 40px/150px 'simsun';
}
</style>
</head>
<body>
<button id="btn1">显示</button>
<button id="btn2">隐藏</button>
<div>显示隐藏文字</div>
<div>显示隐藏文字</div>
<div>显示隐藏文字</div>
<script src="./lib/jquery-v3.6.0.js"></script>
<script>
$('#btn1').on('click', function () {
$('div').show().html('王候将相')
})
$('#btn2').on('click', function () {
$('div').hide(1000, function () {
alert('显示完成')
})
})
</script>
</body>
5.axios 请求方法的别名
  为了简化开发者的使用过程,axios 为所有支持的请求方法提供了别名:
    axios.get(url[, config])
    axios.delete(url[, config])
    axios.post(url[, data[, config]])
    axios.put(url[, data[, config]])
    axios.patch(url[, data[, config]])
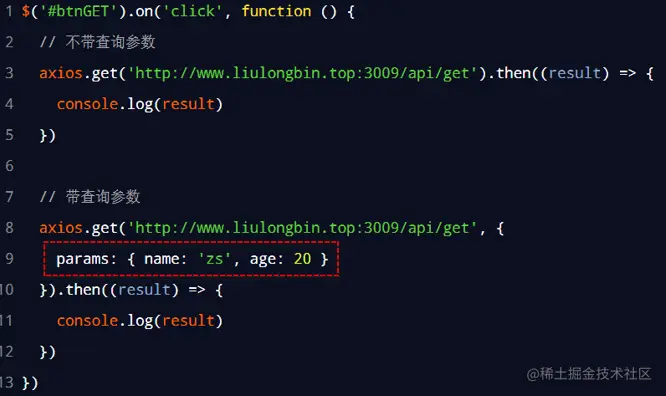
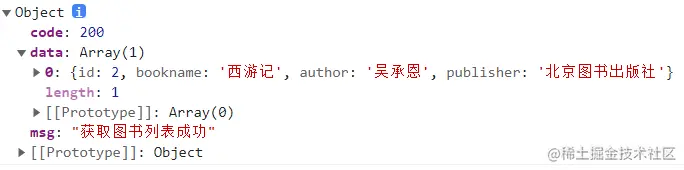
6.体验 axios.get() 的用法
<body>
   <script src="./lib/axios.js"></script>
<script>
   let url = 'http://www.liulongbin.top:3009/api/getbooks'
   axios.get(url, {
    params: {
    id: 2
  }

}).then(({
  data: res
}) => {
  console.log(res);
})
</script>
</body>
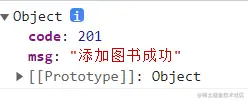
7.体验 axios.post() 的用法
<body>
     <script src="./lib/axios.js"></script>
<script>
      let url = 'http://www.liulongbin.top:3009/api/addbook'
      axios.post(url, {
      bookname: '打印',
      author: '张三',
      publisher: '武汉人民出版社'
    }).then(({
      data: res
    }) => {
     console.log(res);
   })
   </script>
   </body>
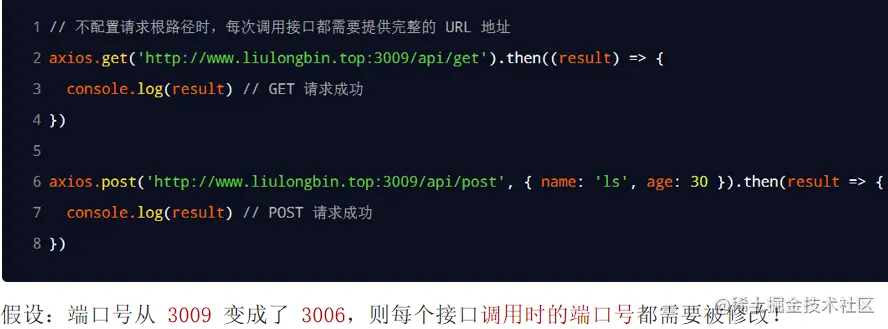
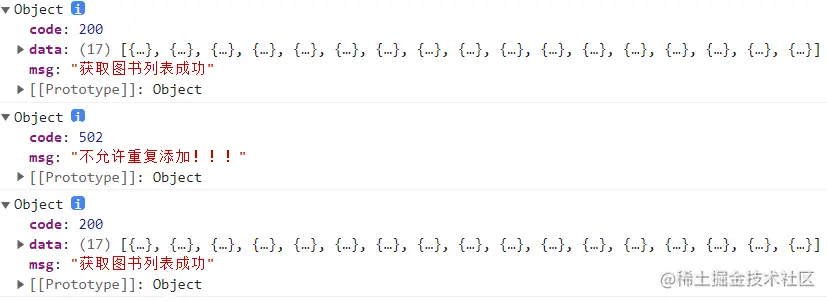
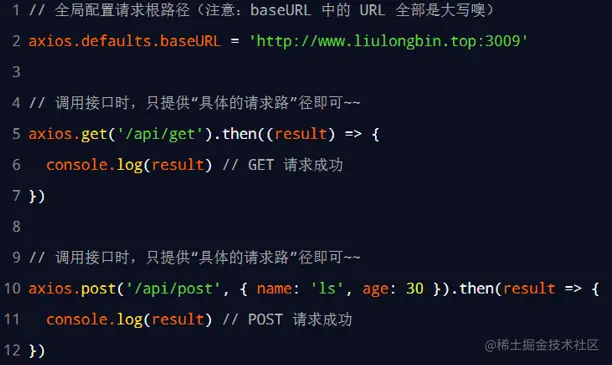
8.全局配置请求根路径
 <body>
      <script src="./lib/axios.js"></script>
  <script>
      axios.defaults.baseURL = 'http://www.liulongbin.top:3009'
      axios.get('/api/getbooks').then(({
        data: res
      }) => {
       console.log(res);
      })
         axios.post('/api/addbook', {
         bookname: '打印',
         author: '张三',
         publisher: '武汉人民出版社'
     }).then(({
        data: res
     }) => {
       console.log(res);
     })
        axios({
              method: 'get',
              url: '/api/getbooks'
     }).then(({
          data: res
     }) => {
        console.log(res);
     })
    </script>
    </body>
9.全局配置请求根路径 - 语法格式
axios.defaults.baseURL = '请求根路径'
10.拦截器
拦截器(interceptors)用来全局拦截 axios 的每一次请求与响应。
好处:可以把每个请求中,某些重复性的业务代码封装到拦截器中,提高代码的复用性
axios 请求拦截器
axios.interceptors.request.use(function (config) {
return config;
}, function (error) {
return Promise.reject(error);
})
注意:一部分请求拦截器因为所有请求,无须逻辑判断,都要执行操作,所以记性了全局的 axios 默认值
axios.defaults.baseURL = 'https://api.example.com';
axios.defaults.headers.common['Authorization'] = AUTH_TOKEN;
axios.defaults.headers.post['Content-Type'] = 'application/x-www-form-urlencoded';
axios 响应拦截器
axios.interceptors.response.use(function (response) {
return response;
}, function (error) {
return Promise.reject(error);
});
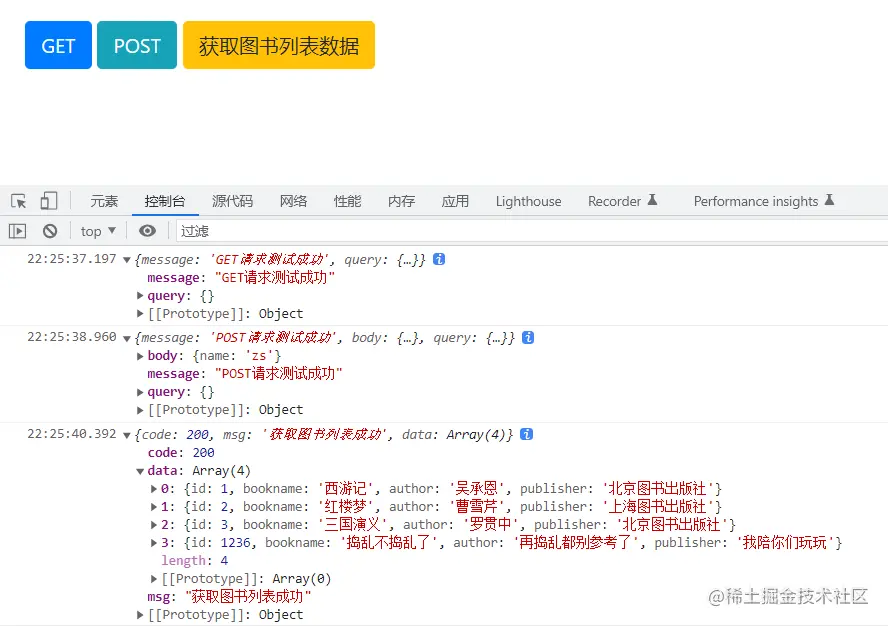
loading效果-带拦截器
<link rel="stylesheet" href="./lib/bootstrap-v4.6.0.css">
<style>
body {
padding: 20px;
}
.loading-box {
position: fixed;
top: 30%;
left: 50%;
transform: translateX(-50%);
background-color: rgba(0, 0, 0, 0.1);
border-radius: 10px;
box-shadow: 1px 1px 3px #efefef;
display: none;
}
</style>
</head>
<body>
<button class="btn btn-primary" id="btnGET">GET</button>
<button class="btn btn-info" id="btnPOST">POST</button>
<button class="btn btn-warning" id="btnBooks">获取图书列表数据</button>
<div class="loading-box">
<div class="spinner-border m-5 text-primary" role="status">
<span class="sr-only">Loading...</span>
</div>
</div>
<script src="./lib/jquery-v3.6.0.js"></script>
<script src="./lib/axios.js"></script>
<script>
axios.interceptors.request.use(function (config) {
document.querySelector(".loading-box").style.display = 'block';
return config;
}, function (error) {
return Promise.reject(error);
});
axios.interceptors.response.use(function (response) {
document.querySelector(".loading-box").style.display = 'none';
return response;
}, function (error) {
return Promise.reject(error);
});
axios.defaults.baseURL = 'http://www.liulongbin.top:3009'
$(function () {
$('#btnGET').on('click', function () {
axios.get('/api/get').then(function (res) {
console.log(res.data)
})
})
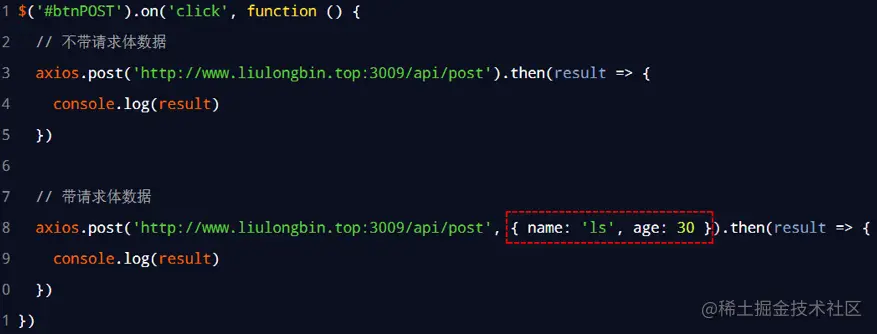
$('#btnPOST').on('click', function () {
axios.post('/api/post', { name: 'zs' }).then(function (res) {
console.log(res.data)
})
})
$('#btnBooks').on('click', function () {
axios.get('/api/getbooks').then(function (res) {
console.log(res.data)
})
})
})
</script>
</body>
11.文件上传
FormData的概念
 概念:FormData 是浏览器提供的一个 WebAPI,它以键值对的方式存储数据。
 作用:FormData 配合 Ajax 技术,能够向服务器发送 multipart/form-data 格式的请求体数据
 场景:FormData + Ajax 技术实现文件上传的功能
 注意:Ajax 实现文件上传的时候,请求体的编码格式必须是 multipart/form-data
FormData 的基本用法
FormData 是一个构造函数,new FormData() 即可得到 FormData 对象:
const fd = new FormData()
调用 FormData 对象的 append(键, 值) 方法,可以向空白的 FormData 中追加键值对数据,其中
键表示数据项的名字,必须是字符串
值表示数据项的值,可以是任意类型的数据
fd.append('username', '张三')
fd.append('age', 20)
fd.append('avatar', 图片文件)
发送普通的 FormData 数据
const fd = new FormData() ;
fd.append('username', '张三')
fd.append('age', 20)
fd.append('avatar', 图片文件)
$('#btn').on('click', function (){
axios.post('http://www.liulongbin.top:3006/api/formdata', fd).then(({data: res}) => {
console.log(res);
});
})
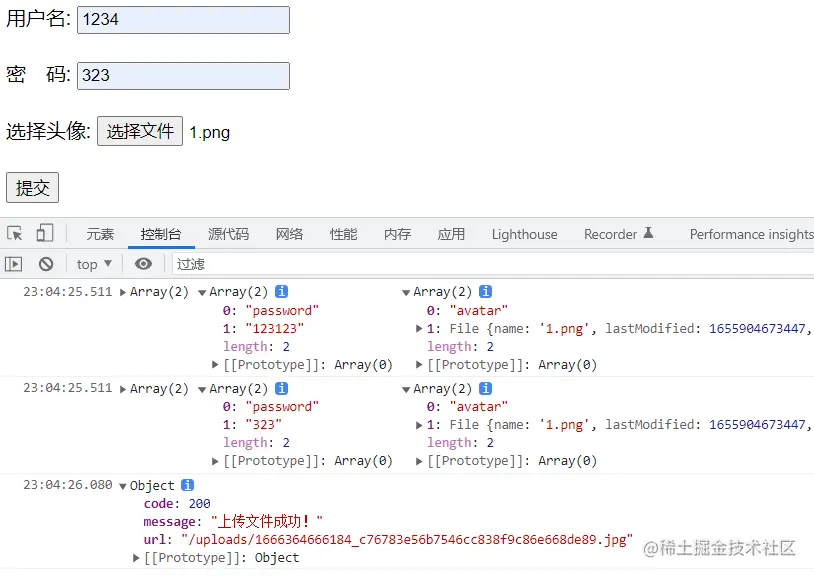
FormData对象语法
<body>
<form action="http://www.baidu.com" method="POST">
用户名: <input type="text" name="username"><br><br>
密 码: <input type="text" name="password"><br><br>
选择头像: <input type="file" name="avatar"><br><br>
<input type="submit"><br><br>
</form>
<script src="./lib/axios.js"></script>
<script>
const form = document.querySelector('form');
form.addEventListener('submit', function (e) {
e.preventDefault();
const fd1 = new FormData();
fd1.append('username', 'lvchao');
fd1.append('password', '123123');
let input = document.querySelector('[name="avatar"]');
fd1.append('avatar', input.files[0]);
console.log(...fd1);
const fd2 = new FormData(form);
console.log(...fd2);
axios({
method: 'post',
url: 'http://www.liulongbin.top:3009/api/upload/avatar',
data: fd2
}).then(({data: res}) => {
console.log(res);
});
})
</script>
</body>
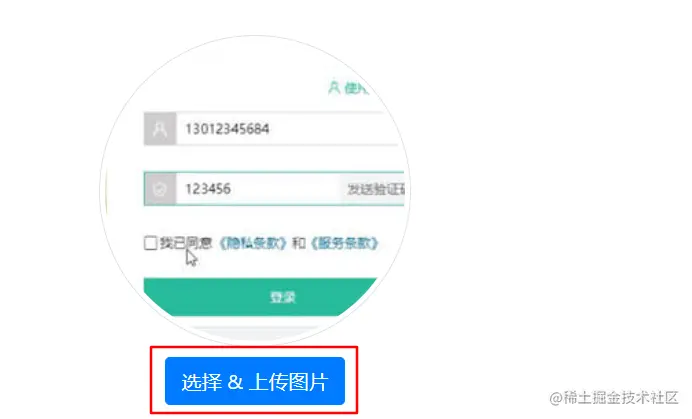
头像上传案例:
<link rel="stylesheet" href="./lib/bootstrap-v4.6.0.css">
<style>
.thumb-box {
text-align: center;
margin-top: 50px;
}
.thumb {
width: 250px;
height: 250px;
object-fit: cover;
border-radius: 50%;
}
</style>
</head>
<body>
<div class="thumb-box">
<img src="./images/cover.jpg" class="img-thumbnail thumb" alt="">
<div class="mt-2">
<input type="file" id="iptFile" accept="image/*" style="display: none">
<button class="btn btn-primary" id="btnChoose">选择 & 上传图片</button>
</div>
</div>
<script src="./lib/jquery-v3.6.0.js"></script>
<script src="./lib/axios.js"></script>
<script>
const input = document.querySelector("#iptFile");
const button = document.querySelector("#btnChoose");
const img = document.querySelector("img");
button.onclick = function () {
input.click();
}
input.onchange = function () {
const fd = new FormData();
fd.append('avatar', input.files[0]);
axios.post('http://www.liulongbin.top:3009/api/upload/avatar', fd)
.then(({data: res}) => {
if (res.code != 200) {
return alert(res.message);
}
alert('恭喜您,上传头像成功!');
img.src = "http://www.liulongbin.top:3009" + res.url;
});
}
</script>
</body>