

记录安装Fastdfs的过程
Centos7上安装FastDfs
首先下载三个需要的包,可以直接在github上下 github.com/happyfish10…
- libfatscommon:FastDFS分离出的一些公用函数包
- FastDFS:FastDFS本体
- fastdfs-nginx-module:FastDFS和nginx的关联模块 先安装所需的环境
yum install -y gcc gcc-c++
yum -y install libevent
- 先解压libfatscommon,安装
./make.sh
./make.sh install
- 先解压fastdfs主程序文件
vim make.sh 可以看到FastDfs的目录
./make.sh
./make.sh install
完成后查看
/usr/bin 中包含了可执行文件;
/etc/fdfs下包含了配置文件
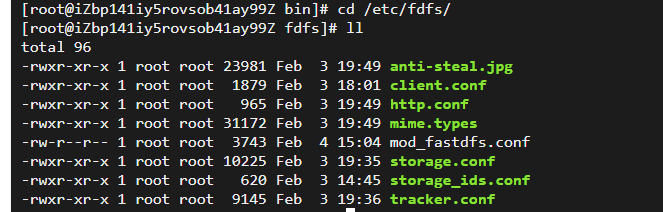 将fastdfs解压目录中配置,全部cp到/etc/fdfs/中
cp /root/sofware/fastdfs/conf/* /etc/fdfs/
/etc/fdfs下都是一些配置文件,配置tracker即可
修改tracker配置文件,此为tracker的工作目录,保存数据以及日志
进入/usr/bin下,启动fdfs_trackerd
fdfs_trackerd /etc/fdfs/tracker.conf start
#可选修改组名
group_name= group1
#修改storage的工作空间
base_path=/root/sofware/fastdfs/storage
#修改storage的存储空间
store_path0=/root/sofware/fastdfs/storage/file
#修改tracker的地址和端口号,用于心跳,此处用了配置hosts
tracker_server=file.cjj.com:22122
#后续结合nginx的一个对外服务端口号
http.server_port=80
创建目录
/root/sofware/fastdfs/storage
启动storage
fdfs_storaged /etc/fdfs/storage.conf start
修改的client配置文件
 base_path=/root/sofware/fastdfs/client
 tracker_server=file.cjj.com:22122
03.最后配置 nginx fastdfs 模块 拷贝fastdfs-nginx-module模块中配置文件到/etc/fdfs目录中并编辑
connect_timeout=2
base_path=/tmp(默认为/tmp)
tracker_server=file.cjj.com:22122
storage_server_port=23000(默认配置为23000)
url_have_group_name = true
store_path0=/root/sofware/fastdfs/storage/file
group_name=group1(默认配置为group1)
安装nginx依赖库
yum install -y pcre-devel zlib-devel
安装模块
cd /etc/software/nginx-1.18.0
/configure --prefix=/usr/local/nginx/sbin/nginx/ --add-module=/root/sofware/fastdfs/fastdfs-nginx-module-master/src
测试上传即可 参考文章
www.imooc.com/article/270… Nginx配置FastDFS模块 blog.csdn.net/libiao1994l… Centos7上安装fastdfs
总结
提示:之前已经安装了一遍,但是忘记记录了,今天简单回忆了一下安装的过程,方便下次参考
