

前端开发最令人兴奋的事情是能够立即提供让人兴奋的东西。我们看到对伟大的用户体验的需求每天都在增长,而开发人员正在很好地追赶他们。
增强现实(AR)和虚拟现实(VR)是一些增长最快的用户界面。AR和VR技术的应用是无限的,尤其是在教育、医疗和工程等领域。值得庆幸的是,随着我们的进步,跨平台AR体验的开发变得越来越容易。
ViroReact是一个为想要快速构建AR和VR体验的开发者准备的库。它允许代码在所有移动VR(包括谷歌Daydream、三星Gear VR和谷歌Cardboard的iOS和Android)和AR(iOS ARKit和Android ARCore)平台上原生运行。它建立在React Native上,使React开发者能够快速适应这种新技术。
今天,我们正在用ViroReact构建一个样本菜单应用程序,它将在 "AR空间 "中显示食品项目,这意味着它们将在用户通过手机摄像头观看时出现在房间里。
具体来说,当我们的用户专注于菜单中的奶昔时,应用程序应该显示一个带有一些雪花的3D奶昔。
设置和安装
ViroReact最初由 Viro Media公司开发,但在2019年开放了源代码。2020年末, Viro社区成立,以帮助维护和推进该项目,更新它,使其能够与现代版本的React Native一起运行,同时能够添加新的功能。
在这个演示中,我们将利用Viro社区的入门套件来保持简单。你也可以将ViroReact集成到你现有的应用程序中。
我们将从以下命令开始。
git clone https://github.com/ViroCommunity/starter-kit.git
cd starter-kit
npm install
npx pod-install # (iOS)
npx react-native run-android # or npx react-native run-ios
请注意,AR应用的开发和调试最好在特定的设备上完成。你将需要一个具有AR功能的设备。
构建一个AR应用
让我们来玩玩通过ViroReact提供的一些很酷的AR元素。这个练习会让我们对AR应用程序的动态更熟悉一些。
热身
作为热身,让我们创建一个带有纹理和一些动画的简单盒子。
这里是代码。
import React from 'react';
import {StyleSheet} from 'react-native';
import {
  ViroARScene,
  ViroARSceneNavigator,
  ViroMaterials,
  ViroAnimations,
  ViroBox,
} from '@viro-community/react-viro';

/**
 * Every 3D object will require materials to display texture on body.
 * We have to create all materials before we use them with our elements.
 */
ViroMaterials.createMaterials({
  /**
   * Material in its simplest form is just diffused color
   */
  white: {
    diffuseColor: 'rgba(255,255,255,1)',
  },
  /**
   * We can also diffuse a texture here.
   */
  grid: {
    diffuseTexture: require('./res/grid_bg.jpg'),
  },
});

ViroAnimations.registerAnimations({
  /** To begin with we have added simple rotation animation */
  rotate: {
    properties: {
    rotateY: '+=90',
    },
    duration: 2500, //.25 seconds
  },
});

const BoxTexture = () => {
  const onInitialized = (arSceneState, reason) => {
    console.log(reason);
  };

  return (
    /** ViroARScene will open up AR enabled camera in your scene */
    <ViroARScene onTrackingUpdated={onInitialized}>
    {/**
    * Here us our ViroBox a 3D element with position in AR space
    */}
    <ViroBox
        position={[0, -0.5, -1]}
        animation={{name: 'rotate', run: true, loop: true}} // We have defined our animation at the top;
        scale={[0.3, 0.3, 0.1]}
        materials={['grid']} // We have defined material at the top;
    />
    </ViroARScene>
  );
};

export default () => {
  // All AR scene will reside in ViroARSceneNavigator:
  return (
    <ViroARSceneNavigator
    autofocus={true}
    initialScene={{
        scene: BoxTexture,
    }}
    style={styles.f1}
    />
  );
};

const styles = StyleSheet.create({
  f1: {
    flex: 1,
  },
});
这里我们添加了一个ViroBox 元素,这是一个由宽度、高度和长度定义的3D盒子。我们在三维空间中定位了这个盒子,并在它上面添加了材质。材料是与动画一起单独定义的。Box ,作为许多三维元素的构建块。
你可以在ViroReact文档中阅读关于盒子、材料和动画的内容。
添加3D模型
让我们为我们的基本AR应用添加一些很酷的3D模型。
三维物体不像二维图像那么简单,它们通常是一个定义了几何形状的模型(VRX或OBJ)文件的网格,再加上一些定义纹理的图像,嵌入在上面。
下面是我们的奶昔模型现在的样子。
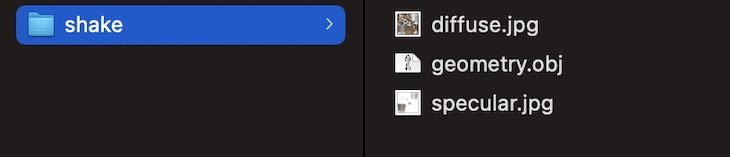
正如你所看到的,它包括一个对象文件、一个漫反射纹理和一个镜面纹理。所有这些组件结合在一起,提供了最好的3D体验。
在这里,我们将使用Viro3DObject 组件来在我们的应用程序中显示一个3D模型。
ViroMaterials.createMaterials({
  shake: {
    diffuseTexture: require('./res/shake/diffuse.jpg'),
    specularTexture: require('./res/shake/specular.jpg'),
  },
});

...
<Viro3DObject
source={require('./res/shake/geometry.obj')}
position={[0, 0.2, 0]}
scale={[0.2, 0.2, 0.2]}
type="OBJ"
lightReceivingBitMask={3}
shadowCastingBitMask={2}
transformBehaviors={['billboardY']}
resources={[
    require('./res/shake/diffuse.jpg'),
            require('./res/shake/specular.jpg'),
      ]}
materials={['shake']}
/>
添加平面和阴影
这不仅仅是在空间中放置3D物体。最好的体验是当这些物体被嵌入到一个场景中,就像它们是真实世界的一部分。
阴影在使我们的场景更接近真实世界方面起着重要作用。让我们添加一些灯光和平面,使我们的物体看起来更加真实。
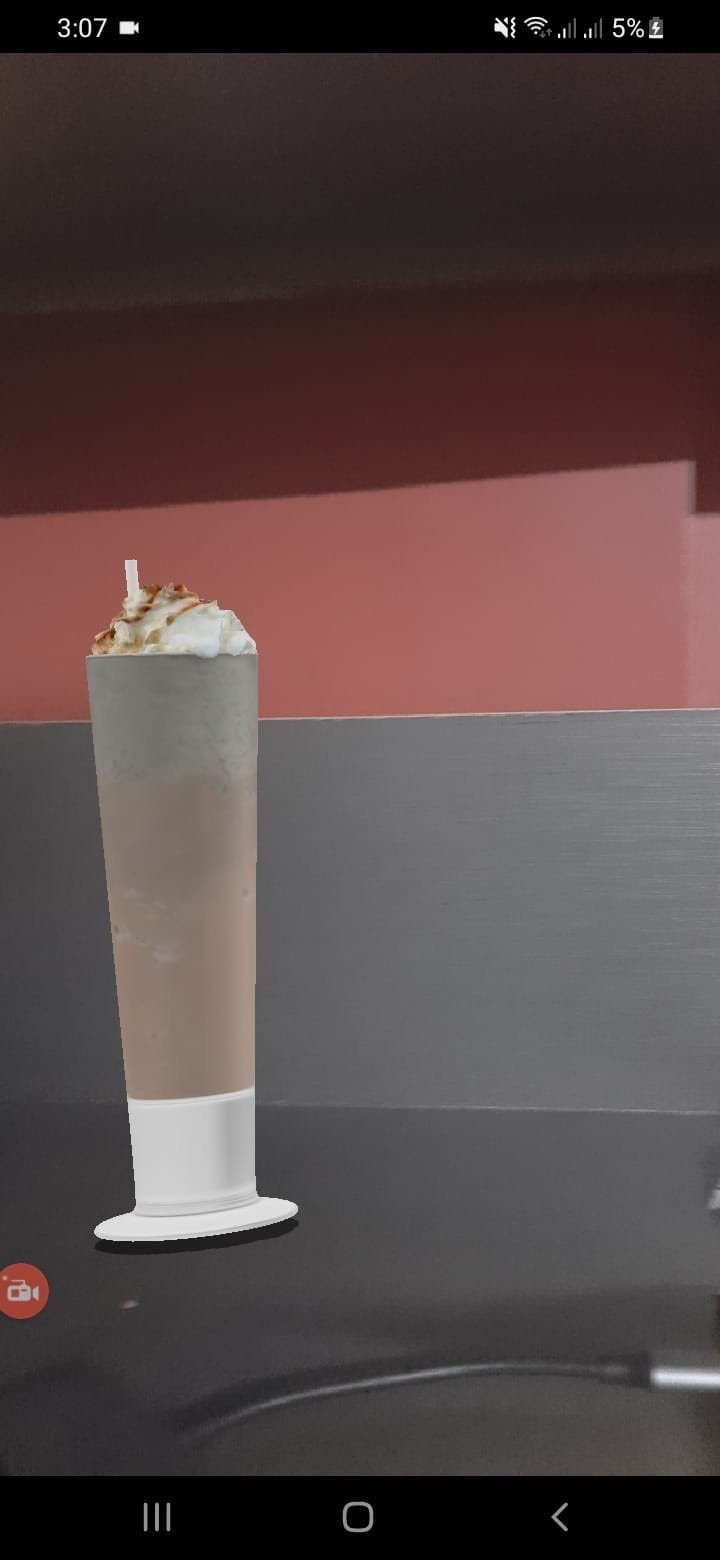
下面是我们如何将我们的奶昔模型包裹在我们的场景中。
<ViroNode
       position={[0, -0.5, -1]}
       dragType="FixedToWorld"
       animation={{name: 'appear', run: true, loop: true}} // We have defined our animation at the top;
       onDrag={() => {}}>
       {/* Spotlight to cast light on the object and a shadow on the surface, see
             the Viro documentation for more info on lights & shadows */}
       <ViroSpotLight
         innerAngle={5}
         outerAngle={45}
         direction={[0, -1, -0.2]}
         position={[0, 3, 0]}
         color="#ffffff"
         castsShadow={true}
         influenceBitMask={4}
         shadowMapSize={2048}
         shadowNearZ={2}
         shadowFarZ={5}
         shadowOpacity={0.7}
       />
       <Viro3DObject
         source={require('./res/shake/geometry.obj')}
         position={[0, 0.01, 0]}
         scale={[0.03, 0.03, 0.03]}
         type="OBJ"
         lightReceivingBitMask={5}
         shadowCastingBitMask={4}
         // transformBehaviors={['billboardY']}
         resources={[
           require('./res/shake/diffuse.jpg'),
           require('./res/shake/specular.jpg'),
         ]}
         materials={['shake']} // We have defined material at the top;
       />
       <ViroQuad
         rotation={[-90, 0, 0]}
         width={0.5}
         height={0.5}
         arShadowReceiver={true}
         lightReceivingBitMask={4}
       />
     </ViroNode>
现在我们的奶昔模型被包裹在ViroNode ,它表现为一个子场景。在这个节点中,我们有ViroSpotLight ,在我们的三维物体上投射光和影。这个阴影由ViroQuad 。
下面是现在的结果。
添加动画
我们的静态场景现在看起来非常酷,但我们可以添加一些动画来使事情看起来更真实。
早些时候,我们在我们的盒子上添加了一个简单的动画。基于同样的原则,我们将为我们的奶昔杯添加一个小的渐变动画。下面是它的外观。
ViroAnimations.registerAnimations({
 appear: {
   properties: {
     opacity: 1,
   },
   duration: 2000,
 },
});
添加3D交互
如何移动这个杯子呢?让我们通过实现捏、拖和旋转,在我们的3D对象上添加一些交互功能。
这和处理其他React交互一样简单;我们将从状态变量中提供我们对象的比例、位置和旋转,并在我们的回调方法中改变它们。下面是代码的样子。
 /*
  Pinch scaling should be relative to its last value *not* the absolute value of the
  scale factor. So while the pinching is ongoing set scale through setNativeProps
  and multiply the state by that factor. At the end of a pinch event, set the state
  to the final value and store it in state.
  */
 const _onPinch = useCallback(
   (pinchState, scaleFactor, source) => {
     console.log('_onPinch');
     var newScale = scale.map(x => {
       return x * scaleFactor;
     });

     if (pinchState === 3) {
       setScale(newScale);
       return;
     }
     arNodeRef.current.setNativeProps({scale: newScale});
     spotLightRef.current.setNativeProps({shadowFarZ: 6 * newScale[0]});
   },
   [scale],
 );
添加粒子
让我们把我们的环境变得更有品位。通过ViroReact,我们可以创建一些很酷的粒子发射器,使我们的奶昔看起来更神奇。
下面是如何做的。
<ViroParticleEmitter
       position={[0, 4.5, 0]}
       duration={2000}
       visible={true}
       delay={0}
       run
       loop={true}
       fixedToEmitter={true}
       image={{
         source: require('./res/particle_snow.png'),
         height: 0.01,
         width: 0.01,
         bloomThreshold: 1.0,
       }}
       spawnBehavior={{
         particleLifetime: [5000, 5000],
         emissionRatePerSecond: [snowSpawnRate, snowSpawnRate],
         spawnVolume: {
           shape: 'box',
           params: [20, 1, 20],
           spawnOnSurface: false,
         },
         maxParticles: 2000,
       }}
       particleAppearance={{
         opacity: {
           initialRange: [0, 0],
           factor: 'Time',
           interpolation: [
             {endValue: 1.0, interval: [0, 500]},
             {endValue: 0.0, interval: [4000, 5000]},
           ],
         },
         rotation: {
           initialRange: [0, 360],
           factor: 'Time',
           interpolation: [{endValue: 1080, interval: [0, 5000]}],
         },
         scale: {
           initialRange: [
             [5, 5, 5],
             [10, 10, 10],
           ],
           factor: 'Time',
           interpolation: [
             {endValue: [6, 6, 6], interval: [0, 1000]},
             {endValue: [10, 10, 10], interval: [3000, 5000]},
             {endValue: [5, 5, 5], interval: [4000, 5000]},
           ],
         },
       }}
       particlePhysics={{
         velocity: {
           initialRange: [
             [-2 * windShear, -0.5, 0],
             [2 * windShear, -3.0 * fallSpeed, 0],
           ],
         },
       }}
     />
在这段代码中,我们利用了ViroParticleEmitter ,它将一个简单的png图片显示为一个粒子,同时还有一些参数来控制发射的频率和粒子在屏幕上的停留时间。
下面是结果。
添加图像识别
现在是施展魔法的时候了。通过ViroReact,我们可以在我们的AR体验中结合图像识别(IR)。正如我们的需求所提到的,那个奶昔只有在我们的用户将摄像头对准带有奶昔照片的菜单时才会出现在屏幕上。
我们将在ViroReact中添加ViroARImageMarker ,以处理所有的红外内容。下面是我们的代码的样子。
首先,就像动画和材料一样,我们必须注册我们的红外目标。
ViroARTrackingTargets.createTargets({
 shake: {
   source: require('./res/shake.png'),
   orientation: 'Up',
   physicalWidth: 0.05, // real world width in meters
 },
});

<ViroARImageMarker
       target={'shake'}
       onAnchorFound={() =>
         setAnchorFound(true)
       }
>
...
</ViroARImageMarker
正如你所看到的,ViroARImageMarker ,需要一个已经在ViroReact注册的目标。该目标只是一个我们想要识别的物体的png图像。当摄像机指向目标时,我们开始显示我们的场景。
接下来是什么?
想象力永远不会停止,我们对提供惊人体验的渴望也是如此。有了像ViroReact这样的工具供我们使用,创造最好的AR体验比以往任何时候都要容易。请在评论中告诉我,你用ViroReact创造了哪些了不起的东西。
The postHow to build an AR/VR app with ViroReactappeared first onLogRocket Blog.
