

在本教程中,我们将向你展示如何在React Native应用中安全地存储用户凭证,并使用这些凭证来验证用户。
当你在应用中实现你的登录系统时,你需要一种方法来保存登录凭证。例如,你可能想保存一个用户登录令牌或刷新令牌,以避免在用户打开应用程序时重新输入用户名和密码。
那么问题来了,我们在哪里可以保存登录凭证?有人会说,"让我们把这些信息保存在AsyncStorage ,"但相信我,你不应该把关键信息保存在一个简单、朴素、不安全的环境中。
要在本地安全地存储信息,你应该使用react-native-keychain。
想知道如何在你的React Native应用中使用 react-native-keychain吗?要理解一件事,最好的办法是通过实例来学习。
所以我们要做一个模拟登录流程的小型基本应用,它将告诉你如何安全地保存令牌并使用令牌来验证用户。
构建一个基本的用户界面
首先,让我们为登录屏幕建立一个基本的用户界面。请看下面的图片,了解我们的登录屏幕将是什么样子。
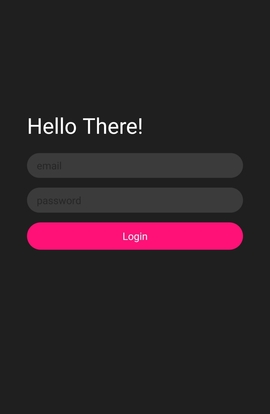
一个相当基本的带有黑暗主题的登录界面(P.S.:我喜欢黑暗主题 )。
)。
下面是这个用户界面的代码。
// App.js
import React from "react";
import { StyleSheet, Text, TextInput, View, Dimensions } from "react-native";

export default function App() {

  return (
    <View style={styles.container}>
        <View>
          <Text style={styles.helloText}>Hello There!</Text>
          <TextInput placeholder="email" style={styles.textInput} />
          <TextInput
            placeholder="password"
            secureTextEntry
            style={styles.textInput}
          />
          <Text style={styles.loginBtn}>
            Login
          </Text>
        </View>
    </View>
  );
}
const screenWidth = Dimensions.get("screen").width;
const styles = StyleSheet.create({
  container: {
    flex: 1,
    backgroundColor: "#1f1f1f",
    alignItems: "center",
    paddingTop: 250,
  },
  helloText: {
    color: "white",
    marginBottom: 20,
    fontSize: 30,
  },
  textInput: {
    padding: 5,
    paddingStart: 15,
    backgroundColor: "#3b3b3b",
    width: screenWidth * 0.8,
    borderRadius: 25,
    marginBottom: 15,
    color: "white",
    fontWeight: "600",
  },
  loginBtn: {
    paddingHorizontal: 25,
    paddingVertical: 10,
    backgroundColor: "#ff1178",
    borderRadius: 25,
    color: "white",
    textAlign: "center",
  }
});
安装 react-native-keychain
我们有了登录界面;现在,让我们安装钥匙链来安全地存储登录凭证。
要安装,在你项目的根目录下运行这个命令。
yarn add react-native-keychain
或者,如果你使用npm。
npm i -S react-native-keychain
安装完 react-native-keychain 后,我们可以继续实现登录系统。
实现 react-native-keychain
这个钥匙链提供了许多方法,我们可以在各种情况下使用,但为了简单起见,我们将使用三种主要方法来保存、检索和删除凭证。
这些方法是。
setGenericPasswordgetGenericPasswordresetGenericPassword
这些方法的作用是不言而喻的。但是,我将给出一个简单的概述。
为了存储凭证,我们使用setGenericPassword 方法并传递两个参数。第一个参数是一个用户名,第二个参数是一个令牌或密码。
要读取存储的凭证的值,我们可以使用getGenericPassword 方法,不需要任何参数。
最后,要删除证书,我们可以使用没有任何参数的resetGenericPassword 方法。
让我们来存储用户的凭证。
// App.js
import React, { useEffect, useState } from "react";
import { StyleSheet, Text, TextInput, View, Dimensions } from "react-native";
import * as Keychain from "react-native-keychain";
export default function App() {
  const [isLoggedIn, setIsLoggedIn] = useState(false);
  const [userDetails, setUserDetails] = useState({});

  const handleLogin = async () => {
    // login api call here
    const token =
      "eyJhbGciOiJIUzI1NiIsInR5cCI6IkpXVCJ9.eyJzdWIiOiIxMjM0NTY3ODkwIiwibmFtZSI6IkpvaG4gRG9lIiwiaWF0IjoxNTE2MjM5MDIyfQ.SflKxwRJSMeKKF2QT4fwpMeJf36POk6yJV_adQssw5c";
    const username = "Akshay";
    await Keychain.setGenericPassword(username, token);
    setIsLoggedIn(true);
    setUserDetails({token, username});
  };

  return (
    <View style={styles.container}>
        <View>
          <Text style={styles.helloText}>Hello There!</Text>
          <TextInput placeholder="email" style={styles.textInput} />
          <TextInput
            placeholder="password"
            secureTextEntry
            style={styles.textInput}
          />
          <Text style={styles.loginBtn} onPress={handleLogin}>
            Login
          </Text>
        </View>
    </View>
  );
}
const screenWidth = Dimensions.get("screen").width;
const styles = StyleSheet.create({
  container: {
    flex: 1,
    backgroundColor: "#1f1f1f",
    alignItems: "center",
    // justifyContent: 'center',
    paddingTop: 250,
  },
  helloText: {
    color: "white",
    marginBottom: 20,
    fontSize: 30,
  },
  textInput: {
    padding: 5,
    paddingStart: 15,
    backgroundColor: "#3b3b3b",
    width: screenWidth * 0.8,
    borderRadius: 25,
    marginBottom: 15,
    color: "white",
    fontWeight: "600",
  },
  loginBtn: {
    paddingHorizontal: 25,
    paddingVertical: 10,
    backgroundColor: "#ff1178",
    borderRadius: 25,
    color: "white",
    textAlign: "center",
  }
});
正如你所看到的,在上面的代码中,我已经创建了一个handleLogin 函数,并将其设置为登录文本的onPress 。
在handleLogin 函数中,我们还没有实现一个完整的登录系统,但我们假设用户已经被授权,并且登录服务器返回了用户的详细信息和一个令牌。
所以,我们将把这些信息保存在安全存储中。
请注意,我们保存的是用户令牌,而不是密码本身。在客户端保存用户密码并不是一个好的做法。始终使用有一定有效期的令牌。
为了保存信息,我们使用了setGenericPassword 方法,并将用户名和令牌作为参数传递。
在成功保存后,我们正在更新我们的状态,将登录屏幕改为欢迎屏幕。
建立一个欢迎屏幕
登录后,我们将显示一个带有用户名的欢迎屏幕。我们的欢迎屏幕将看起来像这样。
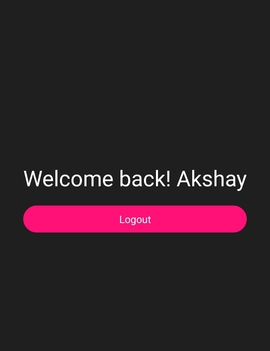
只有一条欢迎词,后面是用户名和一个注销按钮。
基于isLoggedIn 的状态变化,我们将显示一个欢迎界面并隐藏登录界面。
我们的代码将看起来像这样。
// App.js
import React, { useEffect, useState } from "react";
import { StyleSheet, Text, TextInput, View, Dimensions } from "react-native";
import * as Keychain from "react-native-keychain";
export default function App() {
  const [isLoggedIn, setIsLoggedIn] = useState(false);
  const [userDetails, setUserDetails] = useState({});
  useEffect(() => {
    (async () => {
      try {
        const credentials = await Keychain.getGenericPassword();
        if (credentials) {
          setIsLoggedIn(true);
          setUserDetails(credentials);
        } else {
          console.log("No credentials stored");
        }
      } catch (error) {
        console.log("Keychain couldn't be accessed!", error);
      }
    })();
  }, []);
  const handleLogin = async () => {
    // login api call here
    const token =
      "eyJhbGciOiJIUzI1NiIsInR5cCI6IkpXVCJ9.eyJzdWIiOiIxMjM0NTY3ODkwIiwibmFtZSI6IkpvaG4gRG9lIiwiaWF0IjoxNTE2MjM5MDIyfQ.SflKxwRJSMeKKF2QT4fwpMeJf36POk6yJV_adQssw5c";
    const username = "Akshay";
    await Keychain.setGenericPassword(username, token);
    setIsLoggedIn(true);
    setUserDetails({token, username});
  };
  const handleLogout = async()=>{
    const logout = await Keychain.resetGenericPassword();
    console.log({logout});
    if(logout){
      setIsLoggedIn(false);
      setUserDetails({});
    }
  }
  return (
    <View style={styles.container}>
      {!isLoggedIn ? (
        <View>
          <Text style={styles.helloText}>Hello There!</Text>
          <TextInput placeholder="email" style={styles.textInput} />
          <TextInput
            placeholder="password"
            secureTextEntry
            style={styles.textInput}
          />
          <Text style={styles.loginBtn} onPress={handleLogin}>
            Login
          </Text>
        </View>
      ) : (
        <View>
          <Text style={styles.welcomeText}>
            Welcome back! {userDetails.username}
          </Text>
          <Text style={styles.logoutBtn} onPress={handleLogout} >Logout</Text>
        </View>
      )}
    </View>
  );
}
const screenWidth = Dimensions.get("screen").width;
const styles = StyleSheet.create({
  container: {
    flex: 1,
    backgroundColor: "#1f1f1f",
    alignItems: "center",
    // justifyContent: 'center',
    paddingTop: 250,
  },
  helloText: {
    color: "white",
    marginBottom: 20,
    fontSize: 30,
  },
  textInput: {
    padding: 5,
    paddingStart: 15,
    backgroundColor: "#3b3b3b",
    width: screenWidth * 0.8,
    borderRadius: 25,
    marginBottom: 15,
    color: "white",
    fontWeight: "600",
  },
  loginBtn: {
    paddingHorizontal: 25,
    paddingVertical: 10,
    backgroundColor: "#ff1178",
    borderRadius: 25,
    color: "white",
    textAlign: "center",
  },
  welcomeText: {
    color: "white",
    marginBottom: 20,
    fontSize: 30,
  },
  logoutBtn: {
    paddingHorizontal: 25,
    paddingVertical: 10,
    backgroundColor: "#ff1178",
    borderRadius: 25,
    color: "white",
    textAlign: "center",
  },
});
我们的整个代码将是这样的。
首先,我们的状态isLoggedIn 在初始阶段被设置为false 。所以,我们将显示我们的登录界面,当用户成功登录后,我们将把证书保存在安全存储中,并更新登录状态和用户细节状态。
在状态更新后,我们将显示一个带有用户名的欢迎界面和一个注销按钮。
在注销按钮上,我们添加了一个handleLogout 函数。在这个函数中,我们正在重设或从我们的安全存储中删除用户的凭证,并将我们的状态设置为初始数据。
你可能已经注意到有一个useEffect 钩子也被写入。在这个钩子中,我们正在从安全存储中检索用户的凭证,并在用户回到应用程序时根据这些信息更新状态。
如果用户将他们的信息保存在存储器中,那么我们将向他们显示欢迎界面。否则,我们将向他们显示登录界面,告诉他们他们还没有登录。
这就是你如何在不影响用户安全的情况下,轻松地存储和读取用户的凭证。
总结
在本教程中,你已经学会了如何使用react-native-keychain安全地将用户的信息保存在他们的设备上而不影响其安全性。现在你可以在你的应用程序中实现你自己的完整的登录系统。
The post Storing credentials using react-native-keychainappeared first onLogRocket Blog.
