

谷歌拥有大量的API,我们可以与之互动。在撰写本文时,有200多个API可用,包括YouTube、谷歌日历和Gmail,以及更多。
为了与谷歌的API集成,有必要对谷歌进行认证并获得一个证书。在本教程中,我们将指导你如何使用TypeScript与谷歌进行认证。
对于一个实际的例子,我们将演示如何使用获得的刷新令牌来访问谷歌日历API。你可以应用同样的方法来访问任何其他公开策划的谷歌API。
在谷歌云平台上创建一个OAuth 2.0客户端ID
首先,到谷歌云平台上创建一个项目。项目的名称并不重要,尽管将项目的名称与你打算使用的API相一致可能会有帮助。这就是我们在这里要做的,因为我们计划与谷歌日历API集成。
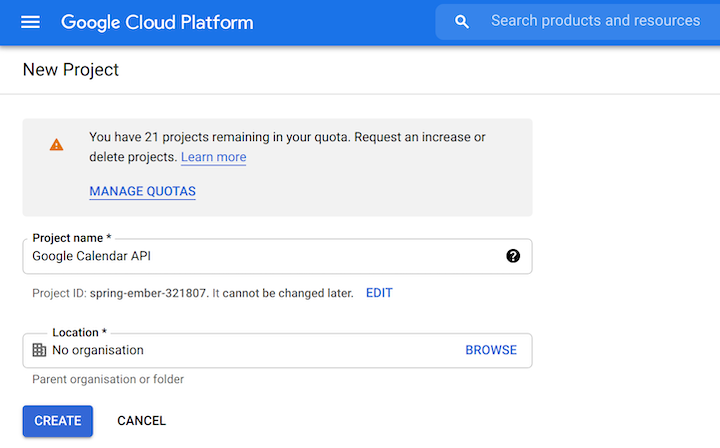
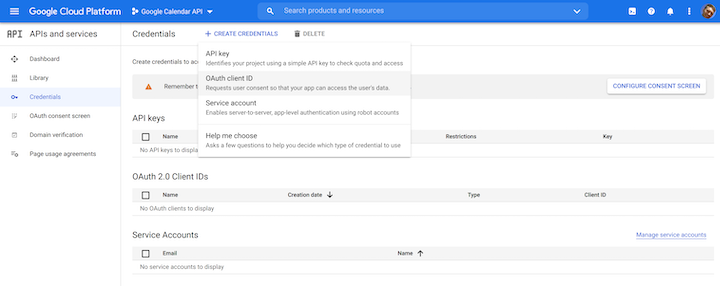
该项目是一个容器,OAuth 2.0客户端ID将被放置在其中。现在我们已经创建了项目,让我们去凭证界面,使用创建凭证下拉菜单创建一个OAuth客户端ID。
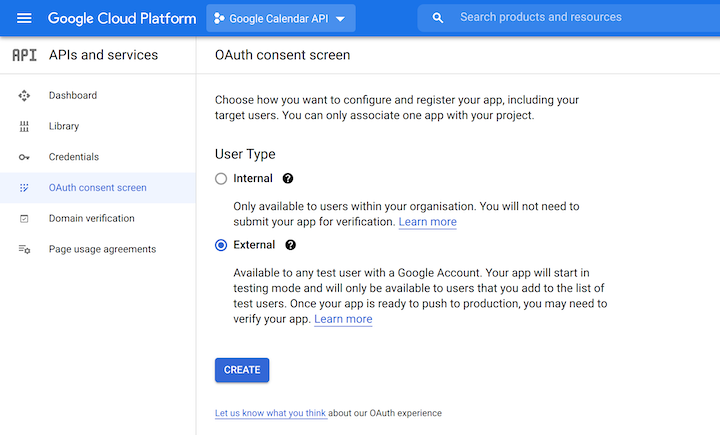
在创建OAuth客户端ID之前,你可能要先创建一个OAuth同意界面。这样做感觉有点令人生畏;有许多问题必须回答,因为同意屏幕可以用于我们今天所看到的API认证之外的各种目的。
当受到挑战时,你一般可以接受默认值并继续。你需要的用户类型将是外部的。
你还会被提示创建一个应用程序注册。这里真正需要的是一个名字(可以是任何东西)和你的电子邮件地址。
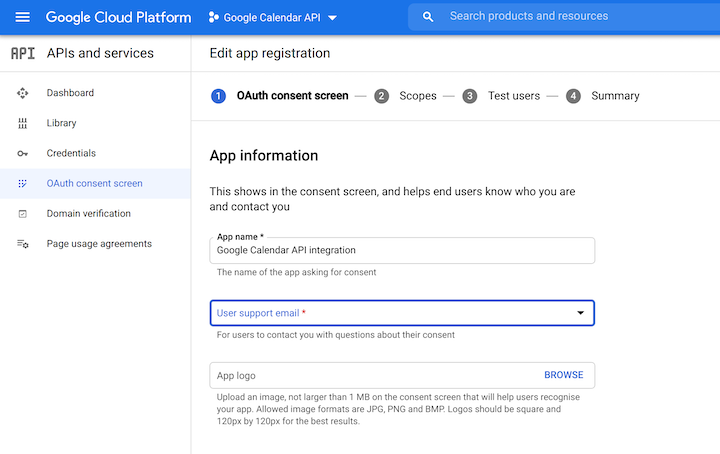
你不需要担心范围问题。你可以计划发布应用程序,或将自己设置为测试用户;你需要做其中之一,以验证应用程序。继续走到最后,你应该会看到OAuth同意界面,然后你需要创建OAuth客户端ID。
创建OAuth客户端ID略显混乱,因为需要的应用类型是电视和有限输入设备。
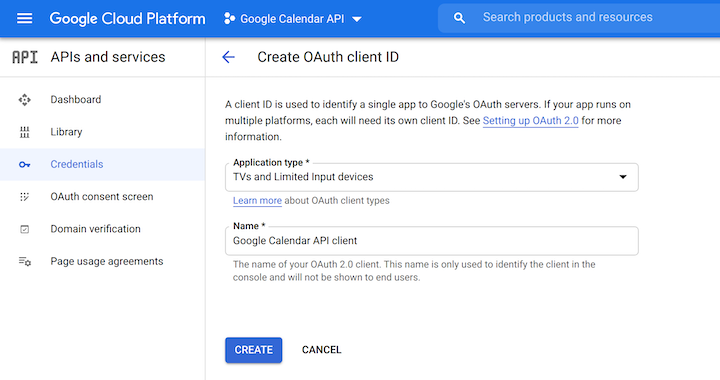
我们使用这种类型的应用程序,是因为我们想获得一个刷新令牌,将来我们可以用它来获得访问谷歌API的令牌。
一旦它被创建,你就可以从谷歌云平台上下载客户端ID。

当你下载它时,它应该看起来像这样。
{
  "installed": {
    "client_id": "CLIENT_ID",
    "project_id": "PROJECT_ID",
    "auth_uri": "https://accounts.google.com/o/oauth2/auth",
    "token_uri": "https://oauth2.googleapis.com/token",
    "auth_provider_x509_cert_url": "https://www.googleapis.com/oauth2/v1/certs",
    "client_secret": "CLIENT_SECRET",
    "redirect_uris": ["urn:ietf:wg:oauth:2.0:oob", "http://localhost"]
  }
}
你将需要client_id,client_secret, 和redirect_uris 。把它们放在一个安全的地方,不要把client_id 和client_secret 提交到源代码控制。
获得一个刷新令牌
现在我们已经有了我们的client_id 和client_secret ,我们准备写一个简单的节点命令行应用程序,我们可以用它来获得一个刷新令牌。这是一个多阶段的过程,最终会是这样的。
- 向谷歌认证提供者提供
client_id和client_secret。作为回报,它将提供一个认证URL - 在浏览器中打开认证URL并授予同意。提供者将交出一个代码
- 向谷歌认证提供商提供
client_id、client_secret和代码。它将获得并向用户提供一个刷新令牌
让我们开始编码。我们将像这样初始化一个TypeScript Node项目。
mkdir src
cd src
npm init -y
npm install googleapis ts-node typescript yargs @types/yargs @types/node
npx tsc --init
我们已经添加了一些依赖项,这将使我们能够编写TypeScript Node命令行应用程序。我们还添加了一个依赖性的 googleapis包,它对自己的描述如下。
用于使用谷歌API的Node.js客户端库。包括对OAuth 2.0、API密钥和JWT令牌的授权和认证的支持。
我们将利用OAuth 2.0的部分。我们将通过创建一个名为google-api-auth.ts 的文件开始我们的旅程。
import { getArgs, makeOAuth2Client } from "./shared";

async function getToken() {
  const { clientId, clientSecret, code } = await getArgs();
  const oauth2Client = makeOAuth2Client({ clientId, clientSecret });

  if (code) await getRefreshToken(code);
  else getAuthUrl();

  async function getAuthUrl() {
    const url = oauth2Client.generateAuthUrl({
      // 'online' (default) or 'offline' (gets refresh_token)
      access_type: "offline",

      // scopes are documented here: https://developers.google.com/identity/protocols/oauth2/scopes#calendar
      scope: ["https://www.googleapis.com/auth/calendar", "https://www.googleapis.com/auth/calendar.events"],
    });

    console.log(`Go to this URL to acquire a refresh token:\n\n${url}\n`);
  }

  async function getRefreshToken(code: string) {
    const token = await oauth2Client.getToken(code);
    console.log(token);
  }
}

getToken();
和一个名为shared.ts 的普通文件,google-api-auth.ts 将其导入,我们将在后面重新使用。
import { google } from "googleapis";
import yargs from "yargs/yargs";
const { hideBin } = require("yargs/helpers");

export async function getArgs() {
  const argv = await Promise.resolve(yargs(hideBin(process.argv)).argv);

  const clientId = argv['clientId'] as string;
  const clientSecret = argv['clientSecret'] as string;

  const code = argv.code as string | undefined;
  const refreshToken = argv.refreshToken as string | undefined;
  const test = argv.test as boolean;

  if (!clientId) throw new Error('No clientId ');
  console.log('We have a clientId');

  if (!clientSecret) throw new Error('No clientSecret');
  console.log('We have a clientSecret');

  if (code) console.log('We have a code');
  if (refreshToken) console.log('We have a refreshToken');

  return { code, clientId, clientSecret, refreshToken, test };
}

export function makeOAuth2Client({
  clientId,
  clientSecret,
}: {
  clientId: string;
  clientSecret: string;
}) {
  return new google.auth.OAuth2(
    /* YOUR_CLIENT_ID */ clientId,
    /* YOUR_CLIENT_SECRET */ clientSecret,
    /* YOUR_REDIRECT_URL */ "urn:ietf:wg:oauth:2.0:oob"
  );
}
上面的getToken 函数做两件事。
- 如果给定一个
client_id和client_secret,它将获得一个认证URL - 如果给定一个
client_id、client_secret和code,它将获得一个刷新令牌(范围是访问谷歌日历API)。
我们将在我们的package.json ,这将使我们能够运行我们的控制台应用程序。
"google-api-auth": "ts-node google-api-auth.ts"
现在我们准备获取刷新令牌。我们将运行下面的命令,把适当的值替换进去。
npm run google-api-auth -- --clientId CLIENT_ID --clientSecret CLIENT_SECRET
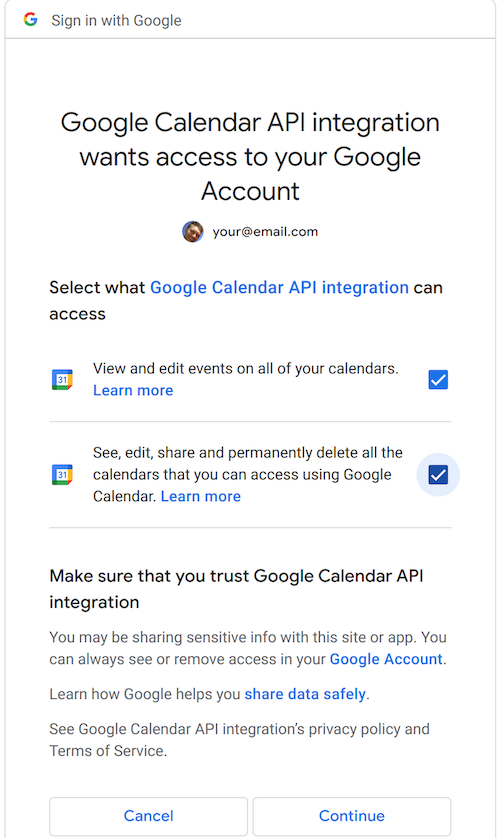
点击在控制台中生成的URL。它应该在浏览器中打开一个同意屏幕,看起来像这样。
验证并授予同意,你应该得到一个代码。
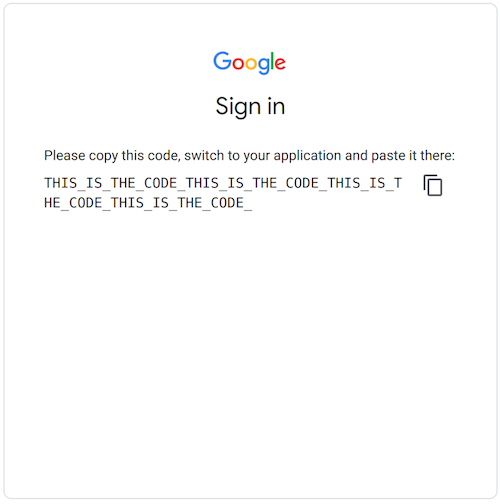
然后(快速)将获得的代码粘贴到以下命令中。
npm run google-api-auth -- --clientId CLIENT_ID --clientSecret CLIENT_SECRET --code THISISTHECODE
refresh_token (以及其他很多东西)将被打印到控制台。抓住它并把它放在安全的地方。再次强调,不要存储在源码控制中
值得花点时间来思考我们所做的事情。我们获得了一个刷新令牌,这涉及到一定程度的人际互动。我们不得不运行一个控制台命令,在浏览器中做一些工作,然后运行另一个命令。
你不会想重复这样做,因为它涉及到人类的互动。有意的是,它不能被自动化。然而,一旦你获得了刷新令牌,你可以反复使用它,直到它过期(可能永远不会,或至少在未来几年)。
一旦你有了刷新令牌,并且安全地存储了它,你就有了实现API交互自动化所需的东西。
例子。访问谷歌日历API
让我们通过尝试访问谷歌日历API来测试我们的刷新令牌。我们将创建一个calendar.ts 文件。
import { google } from "googleapis";
import { getArgs, makeOAuth2Client } from "./shared";

async function makeCalendarClient() {
  const { clientId, clientSecret, refreshToken } = await getArgs();
  const oauth2Client = makeOAuth2Client({ clientId, clientSecret });
  oauth2Client.setCredentials({
    refresh_token: refreshToken
  });

  const calendarClient = google.calendar({
    version: "v3",
    auth: oauth2Client,
  });
  return calendarClient;
}


async function getCalendar() {
  const calendarClient = await makeCalendarClient();

  const { data: calendars, status } = await calendarClient.calendarList.list();

  if (status === 200) {
    console.log('calendars', calendars);
  } else {
    console.log('there was an issue...', status);
  }

}

getCalendar();
上面的getCalendar 函数使用client_id,client_secret, 和refresh_token 来访问 Google Calendar API 并检索日历列表。
我们将在我们的package.json 中添加一个条目,这将使我们能够运行这个函数。
"calendar": "ts-node calendar.ts",
现在我们准备测试一下calendar.ts 。我们将运行下面的命令,把适当的值替换进去。
npm run calendar -- --clientId CLIENT_ID --clientSecret CLIENT_SECRET --refreshToken REFRESH_TOKEN
当我们第一次运行时,我们可能会遇到一个自我解释的信息,告诉我们需要为我们的应用程序启用日历API。
(node:31563) UnhandledPromiseRejectionWarning: Error: Google Calendar API has not been used in project 77777777777777 before or it is disabled. Enable it by visiting https://console.developers.google.com/apis/api/calendar-json.googleapis.com/overview?project=77777777777777 then retry. If you enabled this API recently, wait a few minutes for the action to propagate to our systems and retry.
一旦启用,我们就可以第一次成功运行。我们应该看到像这样的东西在控制台中显示出来。
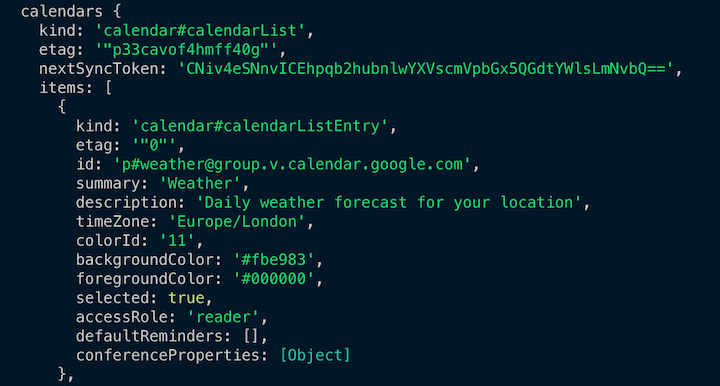
这表明我们正在使用我们的刷新令牌成功地与谷歌API集成。
与其他Google APIs集成
我们已经演示了如何与谷歌日历API集成,但这并不是我们能做的极限。正如我们前面所讨论的,谷歌有200多个API,我们可以按照本教程中概述的相同的认证步骤与之互动。
例如,如果你想与YouTube API或Gmail API集成,你可以简单地按照上述步骤使用相应的范围并针对该API建立一个集成。本教程概述的方法是与众多谷歌API集成的关键。祝你集成愉快!
How to authenticate and access Google APIs using OAuth 2.0一文出现在LogRocket博客上。
