

git多账户管理
最近抽空给自己的办公电脑和家用电脑配置了一下一天的多账户,虽然别人的文章看了很多次了,但是实际操作起来还是会遇上各种问题的。 下面记录一下实际的操作步骤:
-
设置一个全局的git账户
 git config --global user.email 'mygit@163.com'
 git config --global user.name mygit
生成公钥:
ssh-keygen -t rsa复制生成的公钥,配置到git远端;
将生成的公钥添加的系统参数上:
ssh-add baidu_id_rsa (后边的baidu_id_rsa就是上一步生成的密钥)到这一步就可以在全局的本地代码库中修改并提交代码了
-
参考上一步再生成一个局部密钥,供另外一个账号使用;
区别就是这一步的配置git账号和邮箱在复制好的代码库中配置本地参数:
 git config --local user.emai another@163.com
 git config --local user.name another
生成密钥 -> 添加到git
-
配置config文件
在生成密钥的目录下创建一个config文件并修改配置
cd ~/.ssh && vim config // iCode Host xxx.git.com HostName xxx.git.com PreferredAuthentications publickey IdentityFile ~/.ssh/baidu_id_rsa //GitHub Host github.com HostName github.com PreferredAuthentications publickey IdentityFile ~/.ssh/github_id_rsa -
以上就完成了多账号的配置,
ssh -T git@github.com 测试是否可以正常链接到git ssh -vT git@github.com debug测试了链接 -
提交代码 首次提交代码可能会有以下提示: 1)
设置远端地址:
git remote rm origin git remote add origin github.com/baidumapapi… // 事实证明用https的链接访问和代码提交都比较快
2)本地与远程不一致,提示需要更新
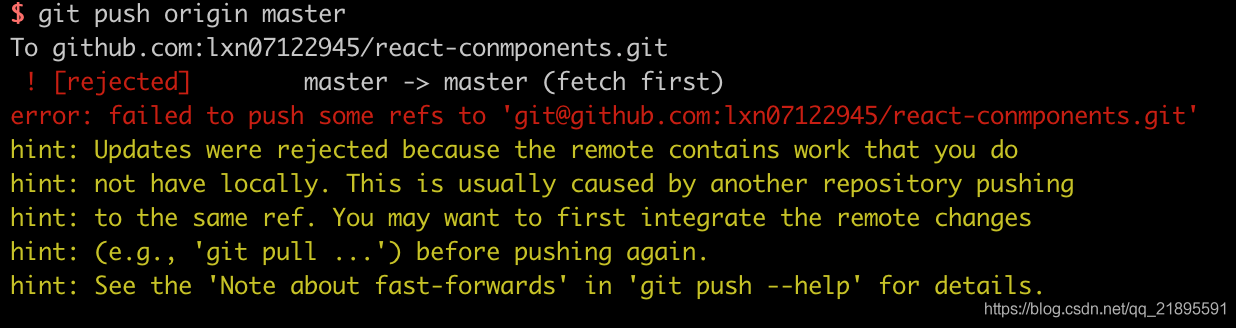
1、强制更新
2、merge
git pull --rebase origin master
git push origin master
3、新建分支、推送到新的分支上
