

这是我参与2022首次更文挑战的第9天,活动详情查看:2022首次更文挑战
使用Android代码发送HTTP POST请求
1、创建URL对象
URL url = new URL("http://xxx");
2、创建HttpURLConnection对象
conn = url.openConnection()
3、设置消息方式和消息头
conn.setRequestMethod("POST");
conn.setRequestProperty("Content-Type","application/x-www-form-urlencoded");

(multipart/form-date)
4、设置开启输出流,使用输出流输出请求参数
conn.setDoOutput(true);
os = conn.getOutputStream();
os.write("date=2016&number=00001".getBytes());
os.flush();
5、调用conn.getInputStream()发送请求并获取响应
is = conn.getInputStream()
6、解析响应数据,获取响应文本
is转换为String
我们在上一节的栗子上将请求由 GET 修改为 POST
//使用Get方式发送请求 获取航班数据
    private void findFlightsByPost() throws IOException {
        //1、URL
        URL url = new URL("http://192.168.3.208:8080/android_jsp/flight_index.jsp");
        //2、HttpURLConnection
        HttpURLConnection conn =  (HttpURLConnection)url.openConnection();
        //3、setRequestMethod() setRequestProperty()
        conn.setRequestMethod("POST");
        conn.setRequestProperty("Content-Type","application/x-www-form-urlencoded");
        //4、doOutput(true)
        conn.setDoOutput(true);
        String d = et_date.getText().toString();
        String param = "date="+d;
        OutputStream os = conn.getOutputStream();
        os.write(param.getBytes("utf-8"));
        os.flush();
        //5、conn.InputStream
        InputStream is = conn.getInputStream();
        //6、is转成String
        BufferedReader reader = new BufferedReader(new InputStreamReader(is));
        StringBuilder sb = new StringBuilder();
        String line = "";
        while ((line=reader.readLine())!=null){
            sb.append(line);
        }
        Log.d("info",sb.toString());
    }
运行程序,输入日期,点击按钮
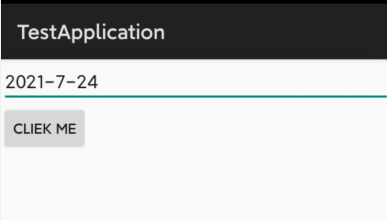
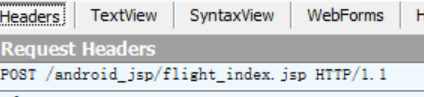
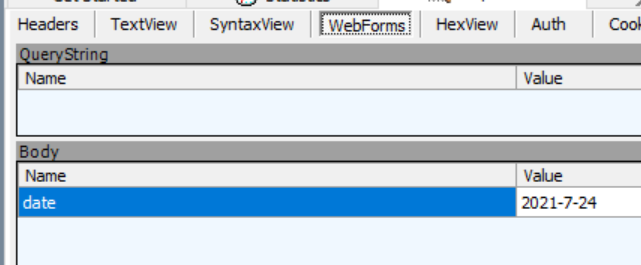
查看 Fiddler 上的信息,可以看到请求为 POST
参数为 date = 2021-7-24
Json
【如何解析 JSONObject】
一段 json
{"name":"Errol","age":21,"hobby":["读书","手工","滑雪"],"school":{"name":"Central South University","address":"HuNan"}}
使用 在线解析后  那么我们使用程序如何解析这段 json 呢
JSONObject obj = new JSONObject(json);
String name = obj.getString("name");
obj.getInt("age");
JSONArray = ary = obj.getJSONArray("hobby");
obj.getJSONObject("school").getString("address");
解析 JSONArray(形如 [{ },{ },{ }])
ary.length(); 数组长度
ary.getString(0); 获取下标为0的字符
遍历
for(int i=0;i<ary.length();i++){
	ary.getJSONObject(i);
}
我们来实践一下,查看接口文档
增加权限
<uses-permission android:name="android.permission.INTERNET" />
public class TestActivity extends Activity {

    private Button btn_login;
    private EditText et_name;
    private EditText et_password;

    private Handler handler = new Handler() {
        @Override
        public void handleMessage(Message msg) {
            switch (msg.what) {
                case ADD_CARD_SUCCESS:
                    Toast.makeText(TestActivity.this, "登录成功", Toast.LENGTH_SHORT).show();
                    break;
                case ADD_CARD_FAIL:
                    Toast.makeText(TestActivity.this, "登录失败:" + msg.obj, Toast.LENGTH_SHORT).show();
                    break;
            }
        }
    };

    public static final int ADD_CARD_SUCCESS = 1;
    public static final int ADD_CARD_FAIL = 2;

    @Override
    protected void onCreate(Bundle savedInstanceState) {
        super.onCreate(savedInstanceState);
        setContentView(R.layout.activity_test);

        setViews();
    }


    private void setViews() {
        et_name = findViewById(R.id.et_name);
        et_password = findViewById(R.id.et_psw);
        btn_login = findViewById(R.id.btn_login);
        btn_login.setOnClickListener(v -> new Thread() {
            @Override
            public void run() {
                try {
                    addCard();
                } catch (IOException e) {
                    e.printStackTrace();
                } catch (JSONException e) {
                    e.printStackTrace();
                }
            }
        }.start());
    }

    private void addCard() throws IOException, JSONException {
        //1、URL
        URL url = new URL("http://域名/site/login");
        //2、HttpURLConnection
        HttpURLConnection conn = (HttpURLConnection) url.openConnection();
        //3、setRequestMethod  setRequestProperty()
        conn.setRequestMethod("POST");
        conn.setRequestProperty("Content-Type", "application/x-www-form-urlencoded");
        //4、doOutPut
        conn.setDoInput(true);
        OutputStream os = conn.getOutputStream();
        //5、构建参数
        String user_name = et_name.getText().toString();
        String password = et_password.getText().toString();
        String param = "user_name=" + user_name + "&password=" + password;
        os.write(param.getBytes("utf-8"));
        os.flush();
        //6、inputStream
        InputStream is = conn.getInputStream();
        //7、is转换成String
        BufferedReader reader = new BufferedReader(new InputStreamReader(is));
        StringBuilder sb = new StringBuilder();
        String line = "";
        while ((line = reader.readLine()) != null) {
            sb.append(line);
        }

        String json = sb.toString();
        //7、解析json
        JSONObject obj = new JSONObject(json);
        String res = obj.getString("code");
        //8、发消息给Handler
        if (res.equals("0")) {
            //成功
            handler.sendEmptyMessage(ADD_CARD_SUCCESS);
        } else {
            //失败
            Message msg = new Message();
            msg.what = ADD_CARD_FAIL;
            msg.obj = obj.getString("message");
            handler.sendMessage(msg);
        }
    }
}
