

0x01 开发背景
在原生开发中,可以使用Android Studio中的Draw 9-patch工具,创建能够自动调整大小以适应视图内容和屏幕尺寸的位图图像。图像的选定部分可以根据图像内绘制的指示器在水平或竖直方向上调整比例。(引自 Android Developers)
在项目开发中,有类似微信聊天界面的需求,这里需要注意可以输入任意数量的文字,效果大致如下图,这里背景图片要达到原生使用.9图片的效果。
0x02 基本使用
在flutter当中,虽然无法直接使用.9文件,但是可以通过DecorationImage来设置centerSlice用任何图片来达到9-patch的效果。具体方式如下:
import 'package:flutter/material.dart';

class ImageExamplesPage extends StatefulWidget {
  const ImageExamplesPage({Key? key}) : super(key: key);

  @override
  _ImageExamplesPageState createState() => _ImageExamplesPageState();
}

class _ImageExamplesPageState extends State<ImageExamplesPage> {
  var testString = "这是测试";
  @override
  Widget build(BuildContext context) {
    return Scaffold(
      body: Column(
        mainAxisAlignment: MainAxisAlignment.center,
        children: [
          Container(
            margin: EdgeInsets.only(left: 9),
            decoration: BoxDecoration(
                image: DecorationImage(
                  centerSlice: Rect.fromLTRB(4, 20, 70, 40),
                  image: AssetImage(
                    "assets/image_examples_bg.png",
                  ),
                )),
            constraints: BoxConstraints(maxWidth: 257),
            padding: EdgeInsets.only(left: 12, right: 15, top: 12, bottom: 12),
            child: Text(testString),
          ),
          Padding(
            padding: EdgeInsets.all(32),
            child: TextField(
              maxLines: 4,
              minLines: 1,
              onChanged: (value){
                setState(() {
                  testString = value;
                });
              },
            ),
          )
        ],
      ),
    );
  }
}
这里centerSlice属性相当于是.9文件的中心图案,是可以拉伸的部分。
0x03 字少就会报错?
在使用中发现,当文字少的时候,会发现很容易出现如下图的报错
0x04 解决问题
-
首先抛出问题,咨询同事是否遇到过相似情况,未果。
-
在google上面搜索一下,看其他开发者是否碰到类似的情况
-
在这里看到有类似的开发这碰到一样的情况,但是并没有什么结论就关闭了issues。
-
在这里看到有开发这的解决办法是在外层加上最小的高度minHeight,使用之后可以解决这个问题,但是和需求有一些出入,文字距四边的距离不好掌握了。
-
最后决定自己深入源码查看原因。
定位代码到这里
  Size outputSize = rect.size;
  Size inputSize = Size(image.width.toDouble(), image.height.toDouble());
  Offset? sliceBorder;
  if (centerSlice != null) {
    sliceBorder = inputSize / scale - centerSlice.size as Offset;
    outputSize = outputSize - sliceBorder as Size;
    inputSize = inputSize - sliceBorder * scale as Size;
  }
  fit ??= centerSlice == null ? BoxFit.scaleDown : BoxFit.fill;
  assert(centerSlice == null || (fit != BoxFit.none && fit != BoxFit.cover));
  final FittedSizes fittedSizes = applyBoxFit(fit, inputSize / scale, outputSize);
  final Size sourceSize = fittedSizes.source * scale;
  Size destinationSize = fittedSizes.destination;
  if (centerSlice != null) {
    outputSize += sliceBorder!;
    destinationSize += sliceBorder;
    // We don't have the ability to draw a subset of the image at the same time
    // as we apply a nine-patch stretch.
    assert(sourceSize == inputSize, 'centerSlice was used with a BoxFit that does not guarantee that the image is fully visible.');
  }
从这里得出结论
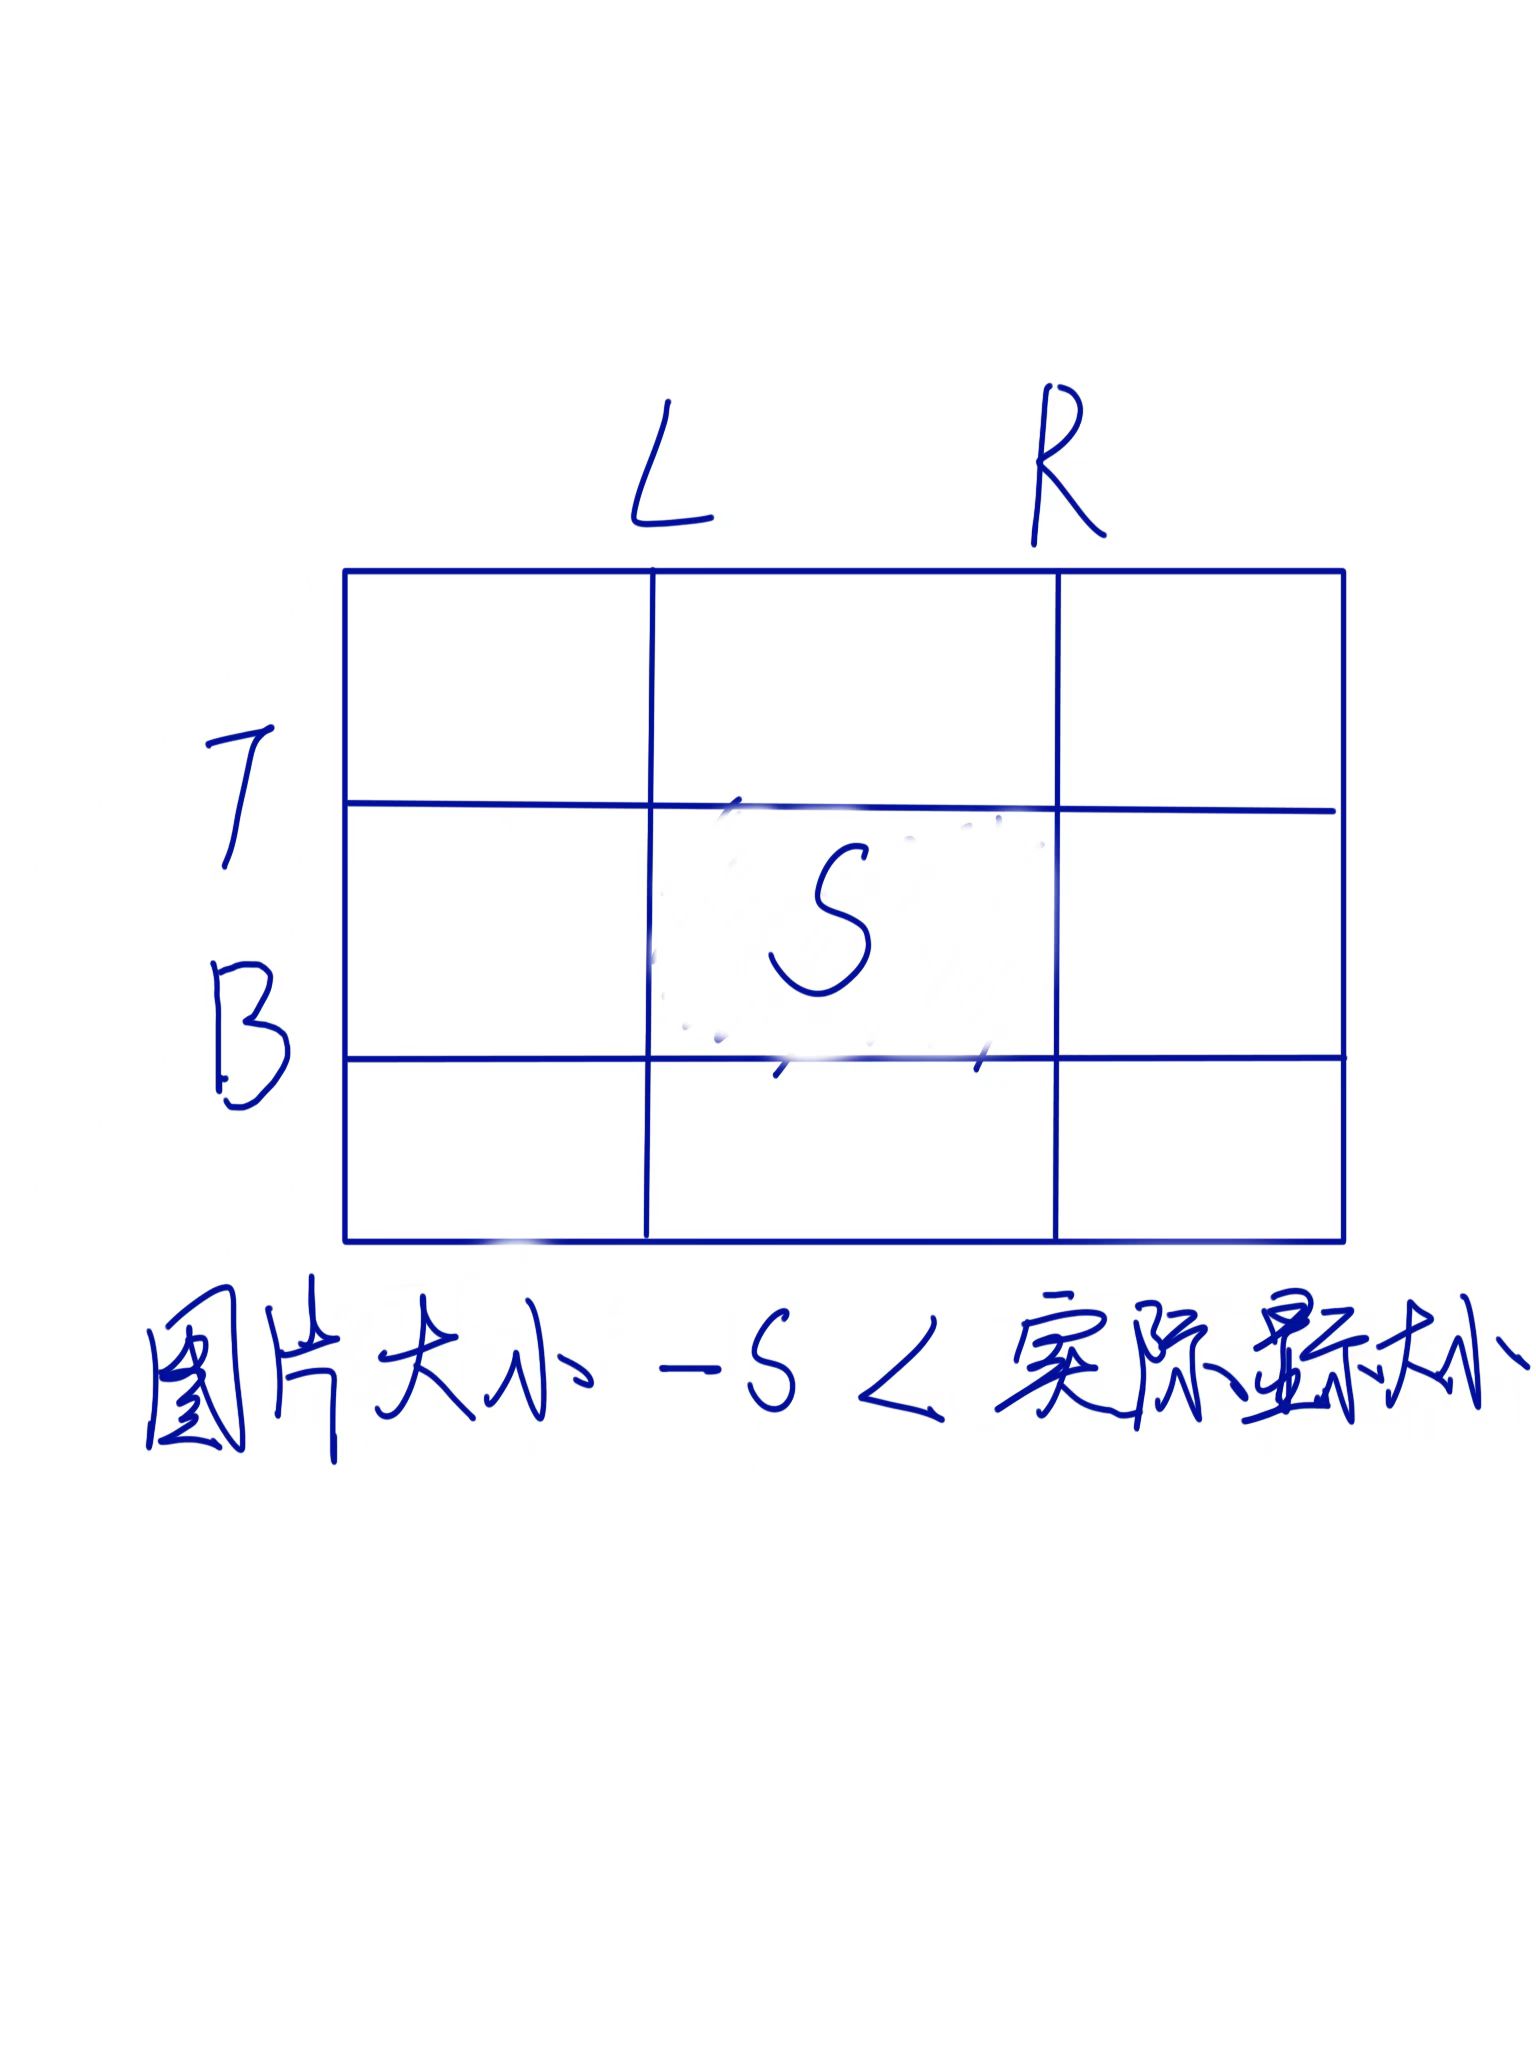
-
其中s为centerSlice的范围,所以最根本的原因还是centerSlice的大小,需要找到一个合适的大小,就可以达到设置无论几个字都不会出现这个错误。
0x05 总结&思考
在开发过程当中碰到棘手问题,个人感觉首先要在团队内部暴露出来,看其他同事在开发当中是否也遇到过同样的问题,然后是在网络上看是否其他开发者遇到过同样的问题。如果这两步都无法解决的话,就需要自己深入源码,捋清楚源码逻辑以及问题发生点,做好笔记,开源到互联网上,在其他开发者碰到相同的问题时,可以节约他人的时间,我为人人,人人为我。
最后在github上面把自己的理解分享了出去。
