前言
大家好,这里是 CSS 兼 WebGL 魔法使——alphardex。
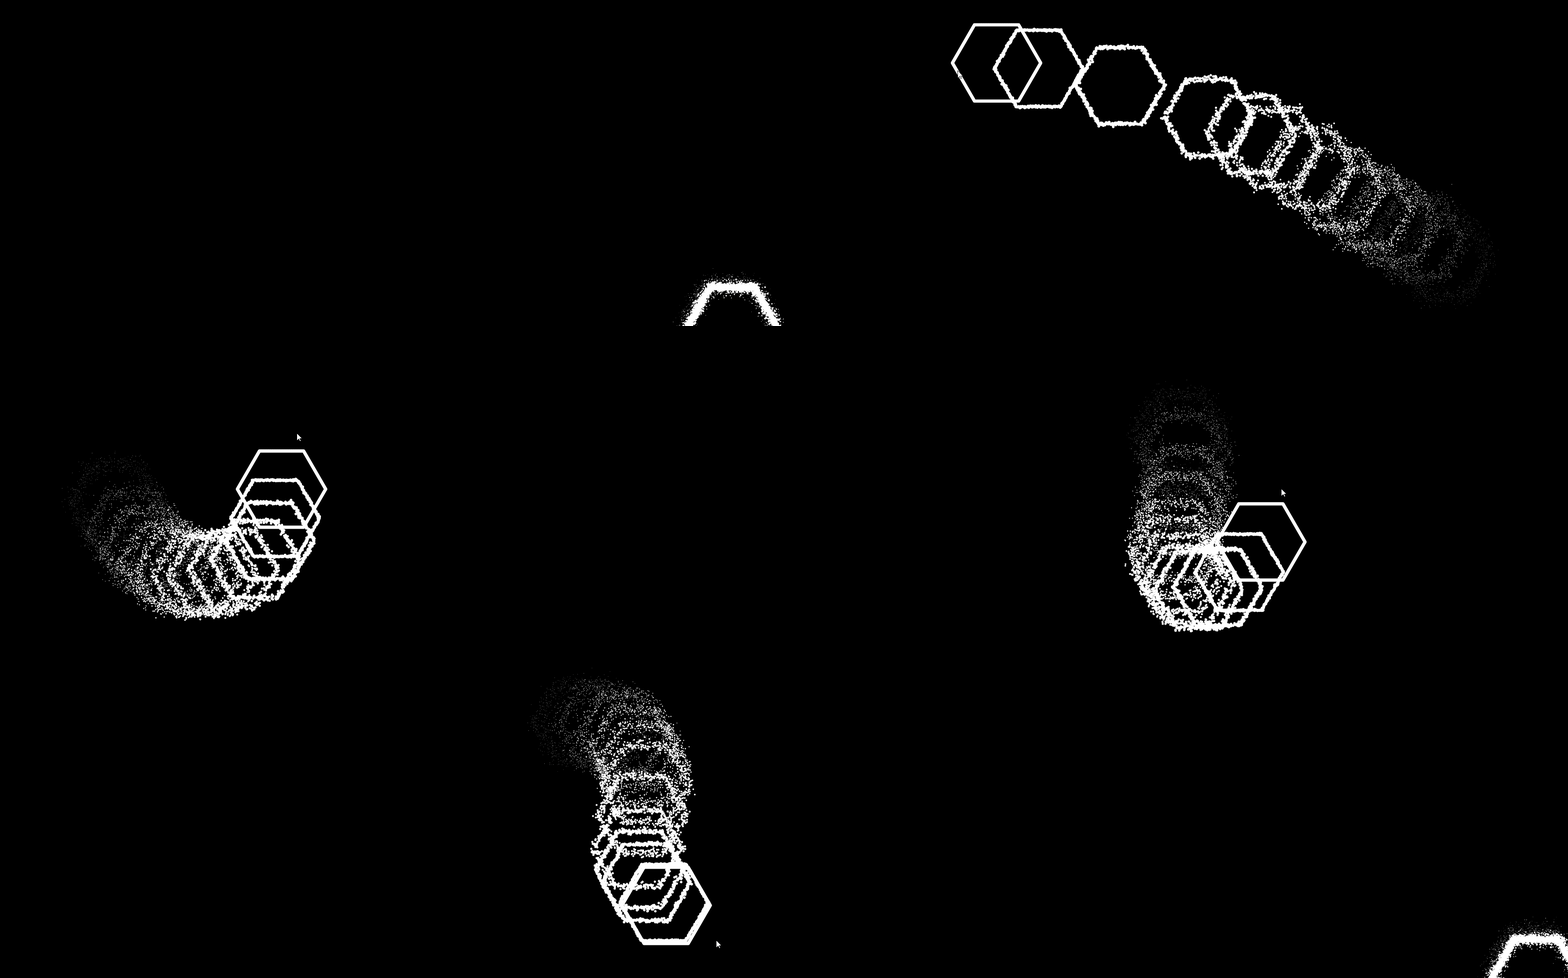
最近开始玩起了 p5.js,发现这是一个很有意思的库,用它能创作出各种新奇有趣的特效,本文我们将一起来实现下图的鼠标移动特效。
让我们开始吧!
准备工作
笔者的 p5.js 模板,点击右下角可以 fork 一份
创作开始
创建点类
在开始前,让我们创建一个最简单的点类,只有 2 个参数:x 坐标和 y 坐标
class Point {
  x: number; // x坐标
  y: number; // y坐标
  constructor(x: number, y: number) {
    this.x = x;
    this.y = y;
  }
}
由微粒组成的线
我们都知道:两点确定一条直线。
但是,如果点不止 2 个呢,能确定一条直线吗?答案当然是能,只要将这些点均匀排在一条线上,不久看起来是一条直线了吗,其实这种分割思想也是实现许多微粒特效的基本思想。
创建一个 PointLine 类,表示由微粒组成的线
- 用
dist函数求出 2 点的距离,用ceil取整,即是两点间的点数 - 用
map函数将点数映射到点 AB 的 xy 坐标,就获得了两点间的点的坐标 - 用
ellipse函数将两点间的点全部描绘处来
class PointLine {
  s: p5;
  p1: Point; // 点A
  p2: Point; // 点B
  thickness: number; // 线段粗细程度
  dotCount: number; // 点的总数
  constructor(s: p5, p1: Point, p2: Point, thickness = 1) {
    this.s = s;
    this.p1 = p1;
    this.p2 = p2;
    this.thickness = thickness;
    let dotCount = s.dist(p1.x, p1.y, p2.x, p2.y);
    this.dotCount = s.ceil(dotCount);
  }
  draw() {
    for (let i = 0; i < this.dotCount; i++) {
      let x = this.s.map(i, 0, this.dotCount, this.p1.x, this.p2.x);
      let y = this.s.map(i, 0, this.dotCount, this.p1.y, this.p2.y);
      this.s.ellipse(x, y, this.thickness, this.thickness);
    }
  }
}
const sketch = (s: p5) => {
  const draw = () => {
    ...

    s.translate(s.width / 2, s.height / 2);

    const p1 = new Point(0, 0);
    const p2 = new Point(50, 50);
    const line = new PointLine(s, p1, p2, 6);
    line.draw();
  };
};
由线组成的任意多边形
创建一个 PointShape 类,表示由线组成的任意多边形
- 创建一个圆,接受 xy 坐标和半径 r
- 尝试将这个圆分割为多边形
- 圆的参数方程为
x=a+rcosθ;y=b+rsinθ;,利用这个可算出线段所有点的坐标
class PointShape extends PointLine {
  x: number; // x坐标
  y: number; // y坐标
  r: number; // 半径
  edgeCount: number; // 边长数
  lines: PointLine[]; // 边长数组
  constructor(
    s: p5,
    x: number,
    y: number,
    r: number,
    edgeCount: number,
    thickness = 1
  ) {
    super(s, new Point(x, y), new Point(x, y), thickness);
    this.x = x;
    this.y = y;
    this.r = r;
    this.edgeCount = edgeCount;
    this.lines = [];
    for (let i = 0; i < this.edgeCount; i++) {
      const x1 =
        this.x + this.r * this.s.cos((this.s.TWO_PI * i) / this.edgeCount);
      const y1 =
        this.y + this.r * this.s.sin((this.s.TWO_PI * i) / this.edgeCount);
      const x2 =
        this.x +
        this.r * this.s.cos((this.s.TWO_PI * (i + 1)) / this.edgeCount);
      const y2 =
        this.y +
        this.r * this.s.sin((this.s.TWO_PI * (i + 1)) / this.edgeCount);
      const p1 = new Point(x1, y1);
      const p2 = new Point(x2, y2);
      const line = new PointLine(this.s, p1, p2, thickness);
      this.lines.push(line);
    }
  }
  draw() {
    this.lines.forEach((line) => {
      line.draw();
    });
  }
}
const sketch = (s: p5) => {
  const draw = () => {
    ...

    const shape = new PointShape(s, 0, 0, 80, 6, 6);
    shape.draw();
  };
};
高斯随机函数
由于线和图形都是由微粒组成的,我们可以尝试让微粒动起来,在 p5.js 中,常用的随机函数有高斯随机函数randomGaussian,可以对微粒的 x,y 加上用这个函数生成的偏移量,来产生微粒随机运动的效果
- 创建一个修改 xy 坐标的函数
- 创建模糊函数
blur,将点数和粗细加上对应的模糊值,并对 x,y 坐标加上高斯随机函数生成的偏移量
class PointLine {
  ...
  modifyFunc: Function; // 修改函数,这里用来修改微粒的xy坐标
  constructor(s: p5, p1: Point, p2: Point, thickness = 1) {
    ...
    const modifyFunc = (x: number, y: number) => [x, y];
    this.modifyFunc = modifyFunc;
  }
  draw() {
    for (let i = 0; i < this.dotCount; i++) {
      let x = this.s.map(i, 0, this.dotCount, this.p1.x, this.p2.x);
      let y = this.s.map(i, 0, this.dotCount, this.p1.y, this.p2.y);
      [x, y] = this.modifyFunc(x, y);
      this.s.ellipse(x, y, this.thickness, this.thickness);
    }
  }
  blur(seed = 0, amount = 0) {
    const blurPower = 1 + this.s.sq(amount);
    this.dotCount *= blurPower;
    const blurPower2 = 1 - amount;
    this.thickness *= blurPower2;
    this.modifyFunc = (x: number, y: number) => {
      x += seed * amount * this.s.randomGaussian(0, 1);
      y += seed * amount * this.s.randomGaussian(0, 1);
      return [x, y];
    };
  }
}

class PointShape extends PointLine {
  ...
  blur(seed = 0, amount = 0) {
    this.lines.forEach((line) => {
      line.blur(seed, amount);
    });
  }
}
const sketch = (s: p5) => {
  const draw = () => {
    ...

    const shape = new PointShape(s, 0, 0, 80, 6, 6);
    shape.blur(10, 0.5);
    shape.draw();
  };
};
跟随鼠标移动
- 创建一个数组,用来保存鼠标的坐标,设置一个保存的上限(这里是 12 个)
- 每画一次,就添加一个当前的鼠标坐标,如果超限,则将之前添加的坐标删除
- 根据当前的鼠标坐标勾画出图形
const sketch = (s: p5) => {
  let mousePositions: Point[] = [];
  const maxPos = 12;

  ...

  const draw = () => {
    ...

    // s.translate(s.width / 2, s.height / 2);

    const mousePos = new Point(s.mouseX, s.mouseY);

    mousePositions.unshift(mousePos);
    if (mousePositions.length > maxPos) {
      mousePositions.pop();
    }

    mousePositions.forEach((pos, i) => {
      const ratio = i / mousePositions.length;
      const shape = new PointShape(s, pos.x, pos.y, 80, 6, 6);
      shape.blur(10, ratio);
      shape.draw();
    });
  };
};
炫起来!
- 应用
HSB色彩模式,并为每个图形填充不同的颜色 - 应用
ADD混合模式,产生炫光的效果
const sketch = (s: p5) => {
  ...

  const setup = () => {
    ...
    s.colorMode(s.HSB, 1);
  };

  const draw = () => {
    ...

    mousePositions.forEach((pos, i) => {
      s.blendMode(s.ADD);
      const ratio = i / mousePositions.length;
      s.fill(0.5 + ratio, 0.7, 0.25);
      const shape = new PointShape(s, pos.x, pos.y, 80, 6, 6);
      shape.blur(10, ratio);
      shape.draw();
      s.blendMode(s.BLEND);
    });
  };
};
