

在这篇文章中,我们将用Next.js建立一个支持两个或多个作者的博客。我们将把每篇帖子归属于一个作者,并将他们的名字和照片与帖子一起显示出来。每个作者也会有一个简介页,列出他们贡献的所有文章。它看起来会是这样的。

我们将把所有信息保存在本地文件系统的文件中。两种类型的内容,帖子和作者,将使用不同类型的文件。文本量大的帖子将使用Markdown,这样可以使编辑过程更容易。因为关于作者的信息比较轻,我们将把它放在JSON文件中。辅助函数将使读取不同的文件类型和组合它们的内容更容易。
Next.js让我们毫不费力地从不同来源和不同类型的数据中读取。由于其动态路由和next/link ,我们可以快速建立和导航到我们网站的各个页面。我们还可以通过next/image 包免费获得图像优化。
通过选择 "包含电池 "的Next.js,我们可以专注于我们的应用程序本身。我们不需要在新项目经常出现的重复性基础工作上花费任何时间。我们可以依赖经过测试和验证的框架,而不是手工构建一切。Next.js背后庞大而活跃的社区使得我们在使用过程中遇到问题时可以很容易得到帮助。
读完这篇文章后,你将能够在一个Next.js项目中添加许多种类的内容。你也将能够在它们之间建立关系。这使你能够把作者和帖子、课程和课程、或演员和电影等东西联系起来。
本文假设你对Next.js有基本的熟悉。如果你以前没有使用过它,你可能想先阅读一下它是如何处理页面和为它们获取数据的。
在这篇文章中,我们将不涉及造型,而是专注于使其全部运作。你可以在GitHub上获得结果。如果你想跟上这篇文章,也有一个样式表可以放到你的项目中。要获得相同的框架,包括导航,用这个文件替换你的pages/_app.js 。
设置
首先,我们使用以下方法建立一个新的项目 create-next-app建立一个新的项目,并切换到它的目录。
$ npx create-next-app multiauthor-blog
$ cd multiauthor-blog
我们稍后将需要读取Markdown文件。为了使之更容易,我们还在开始之前增加了一些依赖项。
multiauthor-blog$ yarn add gray-matter remark remark-html
一旦安装完成,我们可以运行dev 脚本来启动我们的项目。
multiauthor-blog$ yarn dev
我们现在可以探索我们的网站。在你的浏览器中,打开http://localhost:3000。你应该看到由create-next-app添加的默认页面。

稍后,我们将需要一个导航来到达我们的页面。我们可以在页面存在之前就在pages/_app.js 中添加它们。
import Link from 'next/link'

import '../styles/globals.css'

export default function App({ Component, pageProps }) {
  return (
    <>
      <header>
        <nav>
          <ul>
            <li>
              <Link href="/">
                <a>Home</a>
              </Link>
            </li>

            <li>
              <Link href="/posts">
                <a>Posts</a>
              </Link>
            </li>

            <li>
              <Link href="/authors">
                <a>Authors</a>
              </Link>
            </li>
          </ul>
        </nav>
      </header>

      <main>
        <Component {...pageProps} />
      </main>
    </>
  )
}
在这篇文章中,我们将添加这些导航指向的缺失页面。让我们首先添加一些帖子,这样我们就有东西可以在博客概览页面上使用了。
创建帖子
为了使我们的内容与代码分开,我们将把我们的帖子放在一个叫做_posts/ 的目录中。为了使写作和编辑更容易,我们将把每个帖子创建为一个Markdown文件。每个帖子的文件名将作为我们以后的路由中的slug。例如,文件_posts/hello-world.md 将可以在/posts/hello-world 下访问。
一些信息,如完整的标题和简短的摘录,将放在文件开头的前言中。
---
title: "Hello World!"
excerpt: "This is my first blog post."
createdAt: "2021-05-03"
---
Hey, how are you doing? Welcome to my blog. In this post, …
多加几个这样的文件,这样博客一开始就不会是空的。
multi-author-blog/
├─ _posts/
│  ├─ hello-world.md
│  ├─ multi-author-blog-in-nextjs.md
│  ├─ styling-react-with-tailwind.md
│  └─ ten-hidden-gems-in-javascript.md
└─ pages/
   └─ …
你可以添加自己的文件,或者从GitHub资源库中抓取这些样本文章。
列出所有帖子
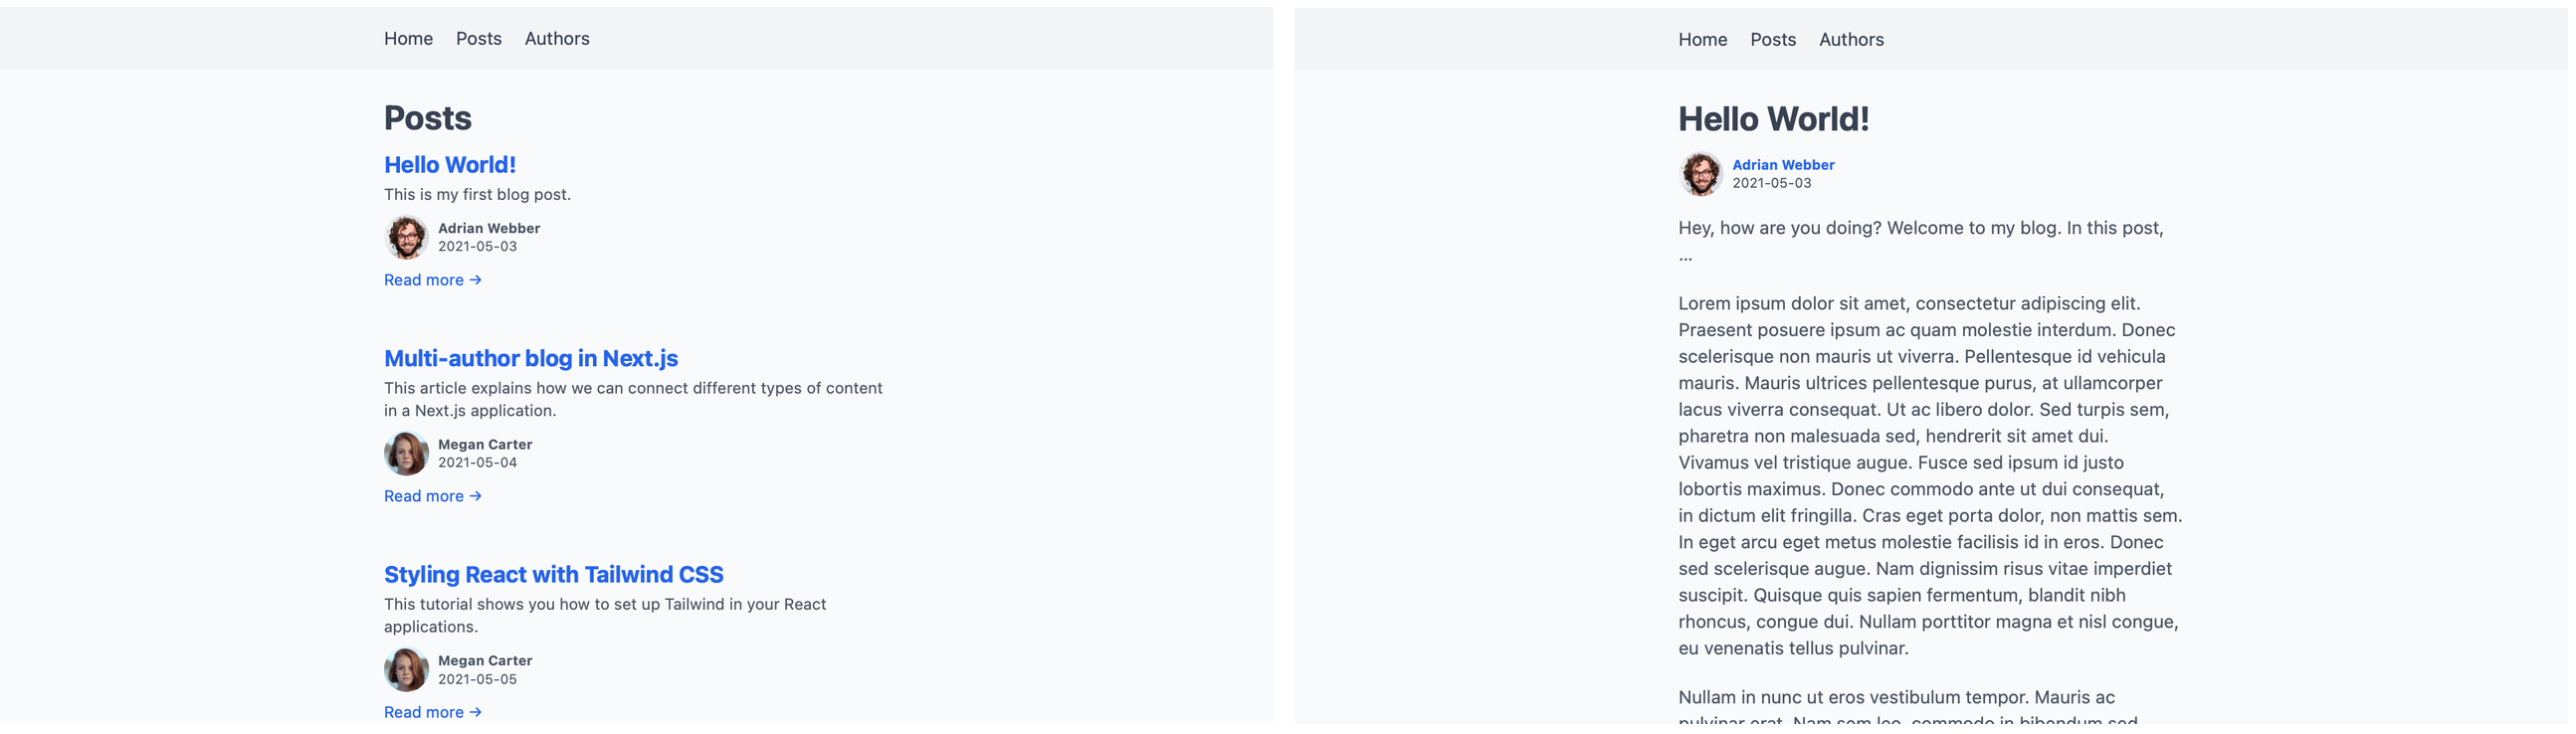
现在我们有了一些帖子,我们需要一种方法来把它们放到我们的博客上。让我们从添加一个列出所有帖子的页面开始,作为我们博客的索引。
在Next.js中,在pages/posts/index.js 下创建的一个文件将在我们的网站上作为/posts 。该文件必须导出一个函数,作为该页面的主体。它的第一个版本看起来像这样。
export default function Posts() {
  return (
    <div className="posts">
      <h1>Posts</h1>

      {/* TODO: render posts */}
    </div>
  )
}
我们没有走得很远,因为我们还没有办法读取Markdown文件。我们已经可以导航到http://localhost:3000/posts,但我们只看到标题。

我们现在需要一种方法来让我们的帖子出现在那里。Next.js使用一个名为getStaticProps() 的函数,将数据传递给一个页面组件。该函数将返回对象中的props 作为道具传递给组件。
从getStaticProps() ,我们将把帖子作为一个叫做posts 的道具传给组件。在这第一步中,我们将硬编码两个占位符帖子。通过这种方式开始,我们定义了以后要接收的真实帖子的格式。如果一个辅助函数以这种格式返回,我们可以在不改变组件的情况下切换到它。
帖子概览不会显示帖子的全文。对于这个页面,每个帖子的标题、摘要、固定链接和日期就足够了。
 export default function Posts() { … }

+export function getStaticProps() {
+  return {
+    props: {
+      posts: [
+        {
+          title: "My first post",
+          createdAt: "2021-05-01",
+          excerpt: "A short excerpt summarizing the post.",
+          permalink: "/posts/my-first-post",
+          slug: "my-first-post",
+        }, {
+          title: "My second post",
+          createdAt: "2021-05-04",
+          excerpt: "Another summary that is short.",
+          permalink: "/posts/my-second-post",
+          slug: "my-second-post",
+        }
+      ]
+    }
+  }
+}
为了检查连接情况,我们可以从道具中抓取帖子,并在Posts 组件中显示它们。我们将包括标题、创建日期、摘录和一个帖子的链接。现在,这个链接还不会指向任何地方。
+import Link from 'next/link'

-export default function Posts() {
+export default function Posts({ posts }) {
   return (
     <div className="posts">
       <h1>Posts</h1>

-      {/ TODO: render posts /}
+      {posts.map(post => {
+        const prettyDate = new Date(post.createdAt).toLocaleString('en-US', {
+          month: 'short',
+          day: '2-digit',
+          year: 'numeric',
+        })
+
+        return (
+          <article key={post.slug}>
+            <h2>
+              <Link href={post.permalink}>
+                <a>{post.title}</a>
+              </Link>
+            </h2>
+
+            <time dateTime={post.createdAt}>{prettyDate}</time>
+
+            <p>{post.excerpt}</p>
+
+            <Link href={post.permalink}>
+              <a>Read more →</a>
+            </Link>
+          </article>
+        )
+      })}
     </div>
   )
 }

 export function getStaticProps() { … }
在浏览器中重新加载页面后,现在显示这两个帖子。

我们不想把所有的博客文章永远硬编码在getStaticProps() 。毕竟,这就是我们先前在_posts/ 目录中创建所有这些文件的原因。我们现在需要一种方法来读取这些文件并将其内容传递给页面组件。
我们有几种方法可以做到这一点。我们可以在getStaticProps() 中直接读取这些文件。因为这个函数运行在服务器上,而不是客户端,我们可以在其中访问本地Node.js模块,如fs 。我们可以在保留页面组件的同一个文件中读取、转换,甚至操作本地文件。
为了保持文件的简短和专注于一项任务,我们将把这些功能移到一个单独的文件中。这样一来,Posts 组件只需要显示数据,而不需要自己去读取这些数据。这给我们的项目增加了一些分离和组织。
按照惯例,我们将把读取数据的功能放在一个叫做lib/api.js 的文件中。该文件将保存所有为显示内容的组件抓取内容的函数。
对于帖子概览页面,我们需要一个函数来读取、处理并返回所有的帖子。我们将其称为getAllPosts() 。在这个函数中,我们首先使用path.join() 来建立通往_posts/ 目录的路径。然后我们使用fs.readdirSync() 读取该目录,这就给了我们其中所有文件的名称。对这些名字进行映射,然后我们依次读取每个文件。
import fs from 'fs'
import path from 'path'

export function getAllPosts() {
  const postsDirectory = path.join(process.cwd(), '_posts')
  const filenames = fs.readdirSync(postsDirectory)

  return filenames.map(filename => {
    const file = fs.readFileSync(path.join(process.cwd(), '_posts', filename), 'utf8')

    // TODO: transform and return file
  })
}
读取文件后,我们得到它的内容是一个长字符串。为了将前言与文章的文本分开,我们通过gray-matter 。我们还将通过删除文件名末尾的.md ,来获取每个帖子的lug。我们需要这个lug来建立一个URL,以便以后可以访问这个帖子。由于我们不需要这个功能的帖子的Markdown正文,我们可以忽略其余的内容。
import fs from 'fs'
 import path from 'path'
+import matter from 'gray-matter'

 export function getAllPosts() {
   const postsDirectory = path.join(process.cwd(), '_posts')
   const filenames = fs.readdirSync(postsDirectory)

   return filenames.map(filename => {
     const file = fs.readFileSync(path.join(process.cwd(), '_posts', filename), 'utf8')

-    // TODO: transform and return file
+    // get frontmatter
+    const { data } = matter(file)
+
+    // get slug from filename
+    const slug = filename.replace(/.md$/, '')
+
+    // return combined frontmatter and slug; build permalink
+    return {
+      ...data,
+      slug,
+      permalink: /posts/${slug},
+    }
   })
 }
注意我们是如何将...data 到返回的对象中的。这让我们以后可以从它的正面内容中获取数值,即{post.title} ,而不是{post.data.title} 。
回到我们的帖子概览页面,我们现在可以用这个新函数替换占位符帖子。
+import { getAllPosts } from '../../lib/api'

 export default function Posts({ posts }) { … }

 export function getStaticProps() {
   return {
     props: {
-      posts: [
-        {
-          title: "My first post",
-          createdAt: "2021-05-01",
-          excerpt: "A short excerpt summarizing the post.",
-          permalink: "/posts/my-first-post",
-          slug: "my-first-post",
-        }, {
-          title: "My second post",
-          createdAt: "2021-05-04",
-          excerpt: "Another summary that is short.",
-          permalink: "/posts/my-second-post",
-          slug: "my-second-post",
-        }
-      ]
+      posts: getAllPosts(),
     }
   }
 }
重新加载浏览器后,我们现在可以看到真正的帖子,而不是之前的占位符。
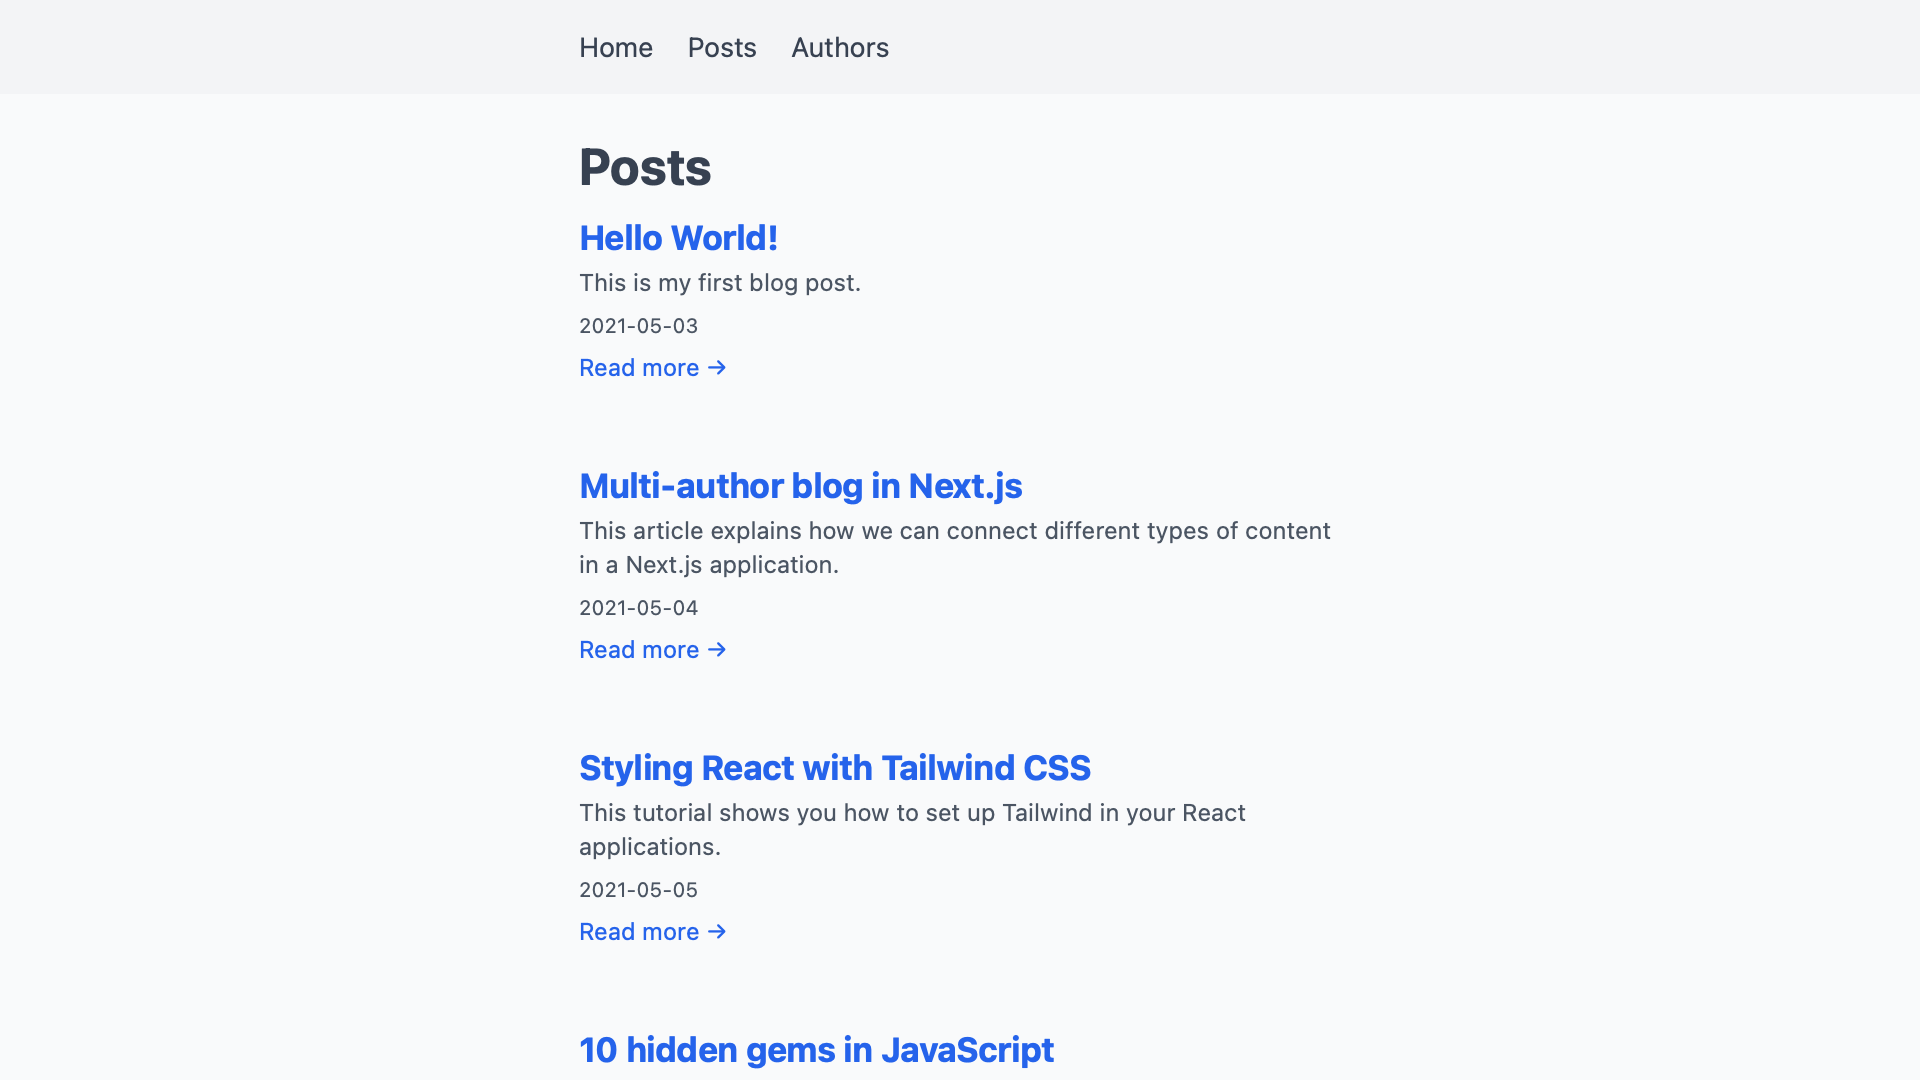
添加单个帖子页面
我们为每个帖子添加的链接还没有指向任何地方。现在还没有像/posts/hello-world 那样对URL作出反应的页面。通过动态路由,我们可以添加一个匹配所有路径的页面,就像这样。
一个创建为pages/posts/[slug].js 的文件将匹配所有看起来像/posts/abc 的URL。在URL中出现的代替[slug] 的值将作为一个查询参数提供给页面。我们可以在相应页面的getStaticProps() ,作为params.slug ,调用一个辅助函数。
作为getAllPosts() 的对应函数,我们将调用该辅助函数getPostBySlug(slug) 。它将返回一个与我们传给它的lug相匹配的帖子,而不是所有的帖子。在一个帖子的页面上,我们还需要显示基础文件的Markdown内容。
单个帖子的页面看起来像帖子概览的页面。在getStaticProps() ,而不是把posts ,我们只传递一个post 。在我们研究如何将帖子的Markdown内容转化为可用的HTML之前,让我们先做一下总体设置。我们将在这里跳过占位符帖子,使用我们将在下一步立即添加的辅助函数。
import { getPostBySlug } from '../../lib/api'

export default function Post({ post }) {
  const prettyDate = new Date(post.createdAt).toLocaleString('en-US', {
    month: 'short',
    day: '2-digit',
    year: 'numeric',
  })

  return (
    <div className="post">
      <h1>{post.title}</h1>

      <time dateTime={post.createdAt}>{prettyDate}</time>

      {/ TODO: render body /}
    </div>
  )
}

export function getStaticProps({ params }) {
  return {
    props: {
      post: getPostBySlug(params.slug),
    },
  }
}
我们现在要把函数getPostBySlug(slug) 添加到我们的辅助文件lib/api.js 。它和getAllPosts() ,有一些明显的不同。因为我们可以从slug中得到帖子的文件名,所以我们不需要先读取整个目录。如果slug是'hello-world' ,我们将读取一个叫做_posts/hello-world.md 的文件。如果该文件不存在,Next.js将显示一个404错误页面。
与getAllPosts() 的另一个区别是,这一次我们还需要读取帖子的Markdown内容。我们可以先用remark 来处理它,将其作为可渲染的HTML而不是原始的Markdown来返回。
 import fs from 'fs'
 import path from 'path'
 import matter from 'gray-matter'
+import remark from 'remark'
+import html from 'remark-html'

 export function getAllPosts() { … }

+export function getPostBySlug(slug) {
+  const file = fs.readFileSync(path.join(process.cwd(), '_posts', ${slug}.md), 'utf8')
+
+  const {
+    content,
+    data,
+  } = matter(file)
+
+  const body = remark().use(html).processSync(content).toString()
+
+  return {
+    ...data,
+    body,
+  }
+}
理论上,我们可以在getPostBySlug(slug) 中使用函数getAllPosts() 。我们首先会得到所有带有它的帖子,然后我们可以搜索与给定lug相匹配的帖子。这将意味着我们总是需要在得到一个帖子之前阅读所有的帖子,这是不必要的工作。getAllPosts() 也没有返回帖子的Markdown内容。我们可以更新它以做到这一点,在这种情况下,它将做更多的工作,而不是目前需要的。
因为这两个辅助函数做了不同的事情,我们要把它们分开。这样一来,我们就可以将这些函数集中在我们需要它们各自做的工作上,而且是唯一的工作。
使用动态路由的页面可以在其getStaticProps() 旁边提供一个getStaticPaths() 。这个函数告诉Next.js要为哪些动态路径段的值建立页面。我们可以通过使用getAllPosts() ,并返回一个定义每个帖子的slug 的对象列表来提供这些。
-import { getPostBySlug } from '../../lib/api'
+import { getAllPosts, getPostBySlug } from '../../lib/api'

 export default function Post({ post }) { … }

 export function getStaticProps({ params }) { … }

+export function getStaticPaths() {
+  return {
+    fallback: false,
+    paths: getAllPosts().map(post => ({
+      params: {
+        slug: post.slug,
+      },
+    })),
+  }
+}
由于我们在getPostBySlug(slug) 中解析了Markdown的内容,我们现在可以在页面上渲染它。我们需要在这一步使用dangerouslySetInnerHTML ,这样Next.js就可以在post.body 后面渲染HTML了。尽管它的名字是这样的,但在这种情况下使用该属性是安全的。因为我们可以完全控制我们的帖子,他们不太可能会注入不安全的脚本。
 import { getAllPosts, getPostBySlug } from '../../lib/api'

 export default function Post({ post }) {
  const prettyDate = new Date(post.createdAt).toLocaleString('en-US', {
    month: 'short',
    day: '2-digit',
    year: 'numeric',
  })

   return (
     <div className="post">
       <h1>{post.title}</h1>

       <time dateTime={post.createdAt}>{prettyDate}</time>

-      {/ TODO: render body /}
+      <div dangerouslySetInnerHTML={{ __html: post.body }} />
     </div>
   )
 }

 export function getStaticProps({ params }) { … }

 export function getStaticPaths() { … }
如果我们从帖子概览中找到一个链接,我们现在就可以进入该帖子自己的页面。
添加作者
现在我们已经有了帖子,我们需要为我们的作者重复同样的步骤。这一次,我们将使用JSON而不是Markdown来描述他们。只要有意义,我们可以在同一个项目中混合不同类型的文件。我们用来读取文件的辅助函数为我们处理了任何差异。页面可以使用这些函数,而不需要知道我们用什么格式存储内容。
首先,创建一个名为_authors/ 的目录,并在其中添加一些作者文件。就像我们对帖子所做的那样,用每个作者的词条来命名这些文件。我们以后会用它来查找作者。在每个文件中,我们在一个JSON对象中指定一个作者的全名。
{
  "name": "Adrian Webber"
}
现在,在我们的项目中有两个作者就足够了。
为了让他们更有个性,我们也为每个作者添加一张简介图片。我们将把这些静态文件放在public/ 目录中。通过用相同的蛞蝓来命名这些文件,我们可以仅用隐含的惯例来连接它们。我们可以在每个作者的JSON文件中加入图片的路径,将两者联系起来。通过用蛞蝓命名所有的文件,我们可以管理这种连接,而不需要把它写出来。JSON对象只需要保存我们无法用代码构建的信息。
当你完成后,你的项目目录应该看起来像这样。
multi-author-blog/
├─ _authors/
│  ├─ adrian-webber.json
│  └─ megan-carter.json
├─ _posts/
│  └─ …
├─ pages/
│  └─ …
└─ public/
   ├─ adrian-webber.jpg
   └─ megan-carter.jpg
和帖子一样,我们现在需要辅助函数来读取所有的作者和获取单个作者。新的函数getAllAuthors() 和getAuthorBySlug(slug) 也放在lib/api.js 中。它们的作用与帖子的对应函数几乎完全相同。因为我们使用JSON来描述作者,我们不需要用remark 来解析任何Markdown。我们也不需要gray-matter 来解析frontmatter。相反,我们可以使用JavaScript的内置 JSON.parse()来把我们文件的文本内容读成对象。
const contents = fs.readFileSync(somePath, 'utf8')
// ⇒ looks like an object, but is a string
//   e.g. '{ "name": "John Doe" }'

const json = JSON.parse(contents)
// ⇒ a real JavaScript object we can do things with
//   e.g. { name: "John Doe" }
有了这些知识,我们的辅助函数看起来就像这样。
 export function getAllPosts() { … }

 export function getPostBySlug(slug) { … }

+export function getAllAuthors() {
+  const authorsDirectory = path.join(process.cwd(), '_authors')
+  const filenames = fs.readdirSync(authorsDirectory)
+
+  return filenames.map(filename => {
+    const file = fs.readFileSync(path.join(process.cwd(), '_authors', filename), 'utf8')
+
+    // get data
+    const data = JSON.parse(file)
+
+    // get slug from filename
+    const slug = filename.replace(/.json/, '')
+
+    // return combined frontmatter and slug; build permalink
+    return {
+      ...data,
+      slug,
+      permalink: /authors/${slug},
+      profilePictureUrl: ${slug}.jpg,
+    }
+  })
+}
+
+export function getAuthorBySlug(slug) {
+  const file = fs.readFileSync(path.join(process.cwd(), '_authors', ${slug}.json), 'utf8')
+
+  const data = JSON.parse(file)
+
+  return {
+    ...data,
+    permalink: /authors/${slug},
+    profilePictureUrl: /${slug}.jpg,
+    slug,
+  }
+}
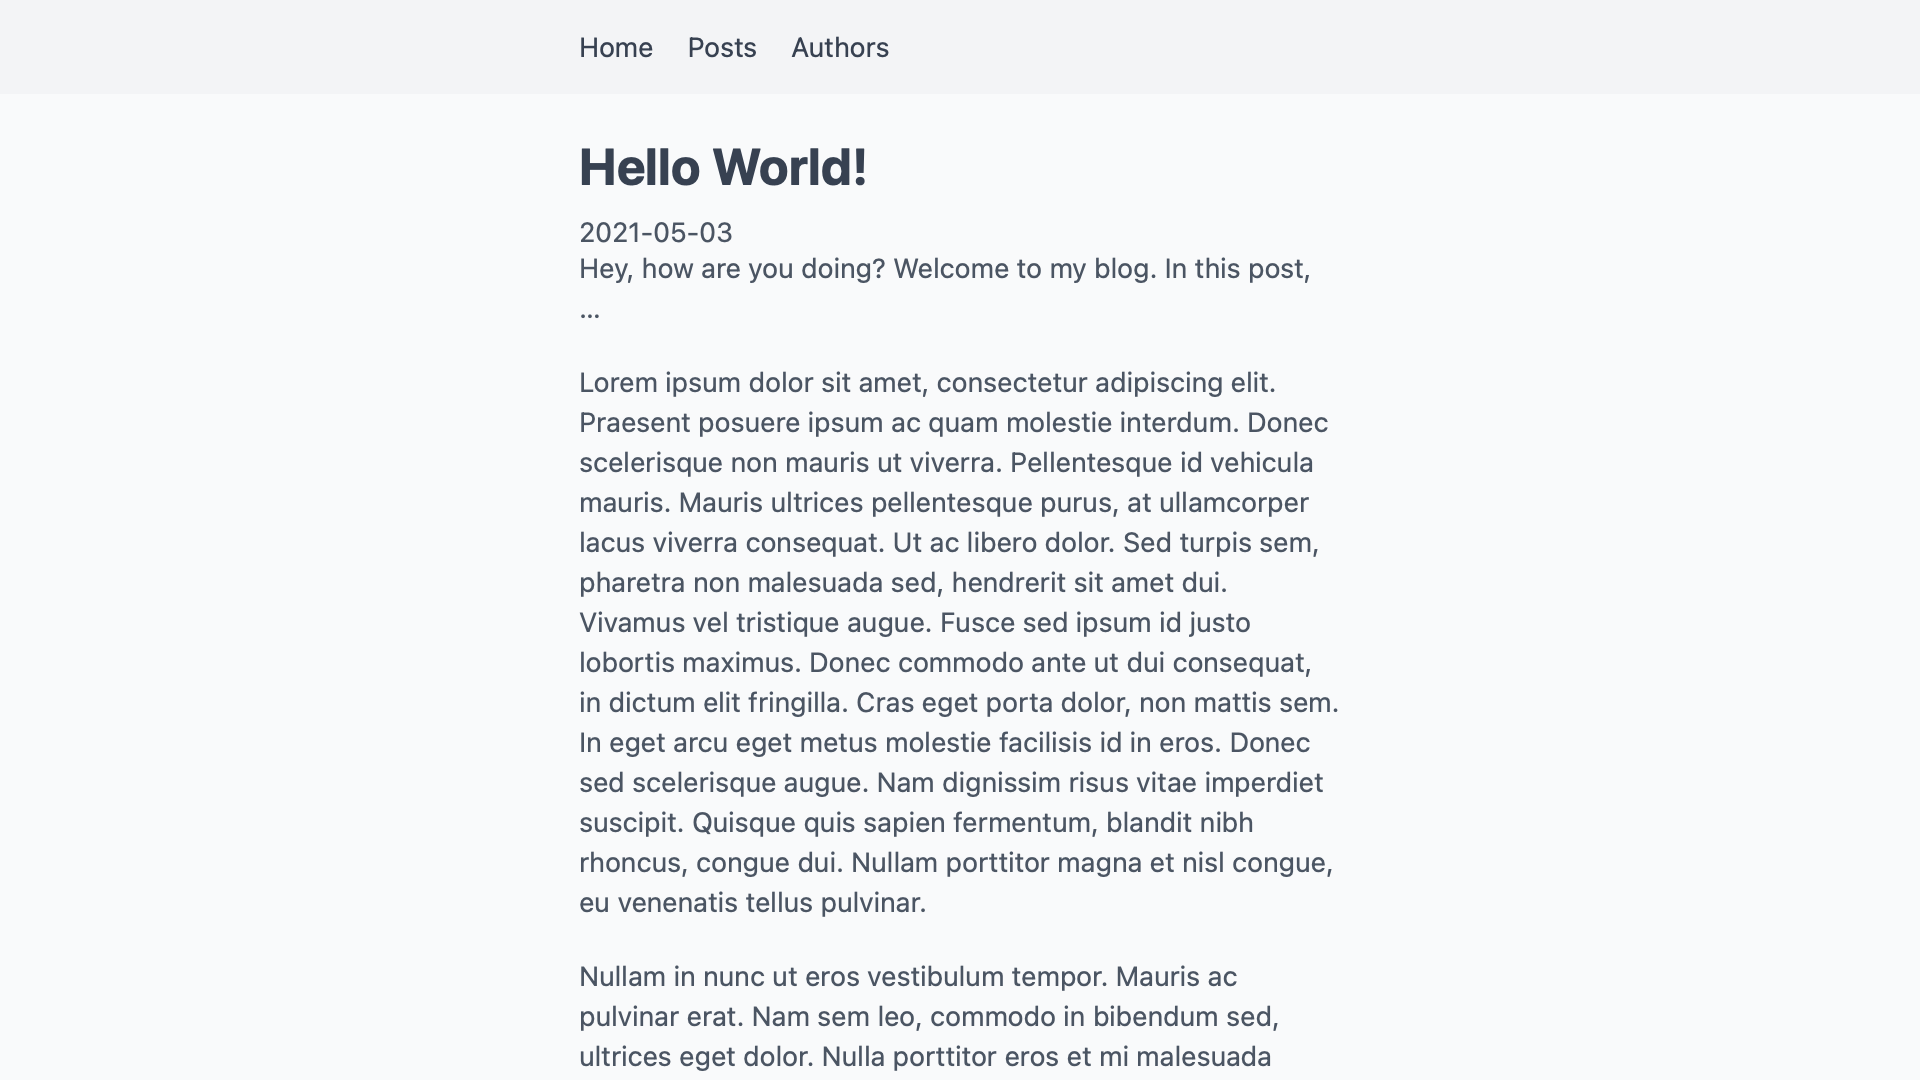
有了在我们的应用程序中读取作者的方法,我们现在可以添加一个列出所有作者的页面。在pages/authors/index.js 下创建一个新的页面,我们的网站就有了/authors 页面。
助手函数为我们处理读取文件的问题。这个页面组件不需要知道作者是文件系统中的JSON文件。它可以使用getAllAuthors() ,而不需要知道它在哪里或如何获得数据。只要我们的辅助函数以我们可以使用的格式返回数据,格式并不重要。像这样的抽象让我们在我们的应用程序中混合不同类型的内容。
作者的索引页看起来很像帖子的索引页。我们在getStaticProps() 中获得所有的作者,并将其传递给Authors 组件。该组件对每个作者进行映射,并列出他们的一些信息。我们不需要从slug中建立任何其他链接或URL。帮助函数已经以可用的格式返回作者。
import Image from 'next/image'
import Link from 'next/link'

import { getAllAuthors } from '../../lib/api/authors'

export default function Authors({ authors }) {
  return (
    <div className="authors">
      <h1>Authors</h1>

      {authors.map(author => (
        <div key={author.slug}>
          <h2>
            <Link href={author.permalink}>
              <a>{author.name}</a>
            </Link>
          </h2>

          <Image alt={author.name} src={author.profilePictureUrl} height="40" width="40" />

          <Link href={author.permalink}>
            <a>Go to profile →</a>
          </Link>
        </div>
      ))}
    </div>
  )
}

export function getStaticProps() {
  return {
    props: {
      authors: getAllAuthors(),
    },
  }
}
如果我们访问我们网站上的/authors ,我们会看到所有作者的列表,包括他们的名字和图片。
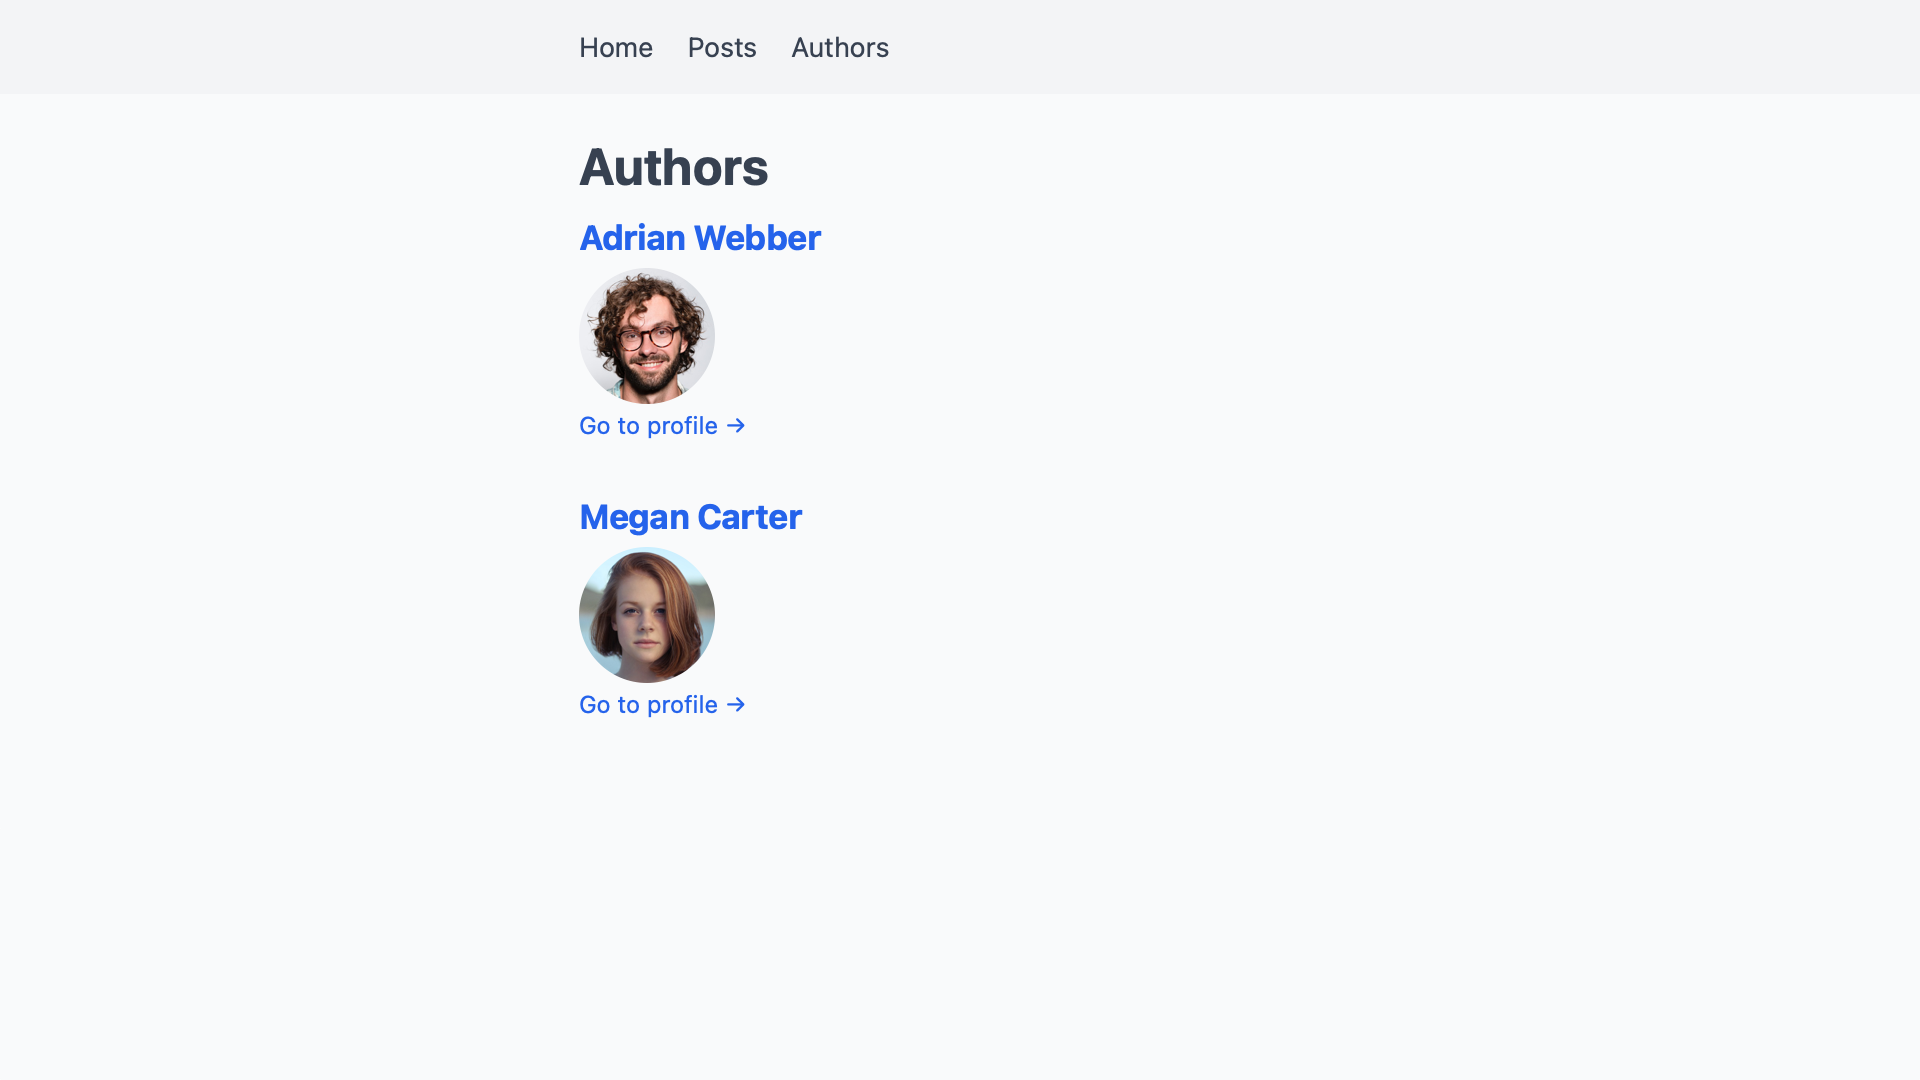
通往作者简介的链接还没有指向任何地方。为了增加简介页,我们在pages/authors/[slug].js 下创建一个文件。因为作者没有任何文字内容,我们现在能添加的只是他们的名字和简介图片。我们还需要另一个getStaticPaths() ,告诉Next.js要为哪些蛞蝓建立页面。
import Image from 'next/image'

import { getAllAuthors, getAuthorBySlug } from '../../lib/api'

export default function Author({ author }) {
  return (
    <div className="author">
      <h1>{author.name}</h1>

      <Image alt={author.name} src={author.profilePictureUrl} height="80" width="80" />
    </div>
  )
}

export function getStaticProps({ params }) {
  return {
    props: {
      author: getAuthorBySlug(params.slug),
    },
  }
}

export function getStaticPaths() {
  return {
    fallback: false,
    paths: getAllAuthors().map(author => ({
      params: {
        slug: author.slug,
      },
    })),
  }
}
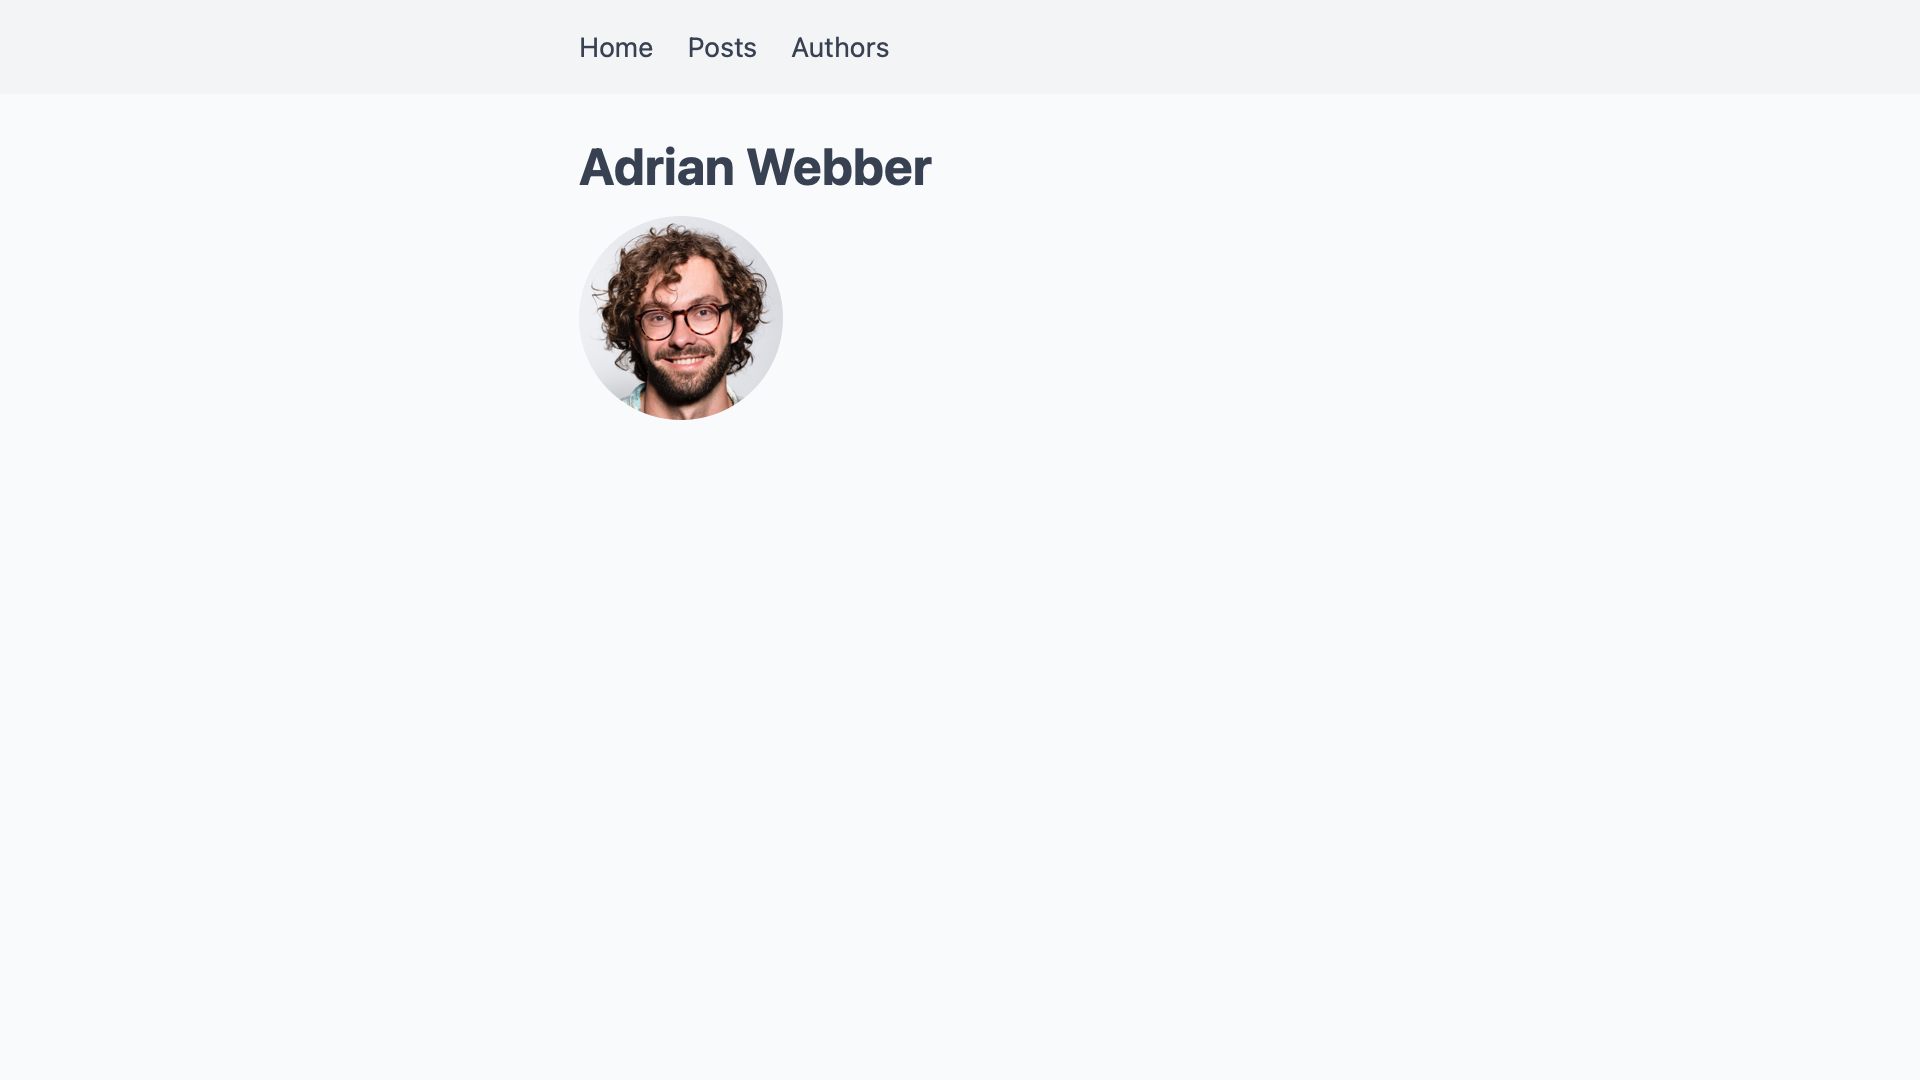
有了这些,我们现在有了一个基本的作者简介页面,信息量非常小。
在这一点上,作者和帖子还没有被连接起来。下一步我们将建立这个桥梁,这样我们就可以把每个作者的帖子列表添加到他们的简介页面。
连接帖子和作者
要连接两块内容,我们需要在另一块内容中引用一个。由于我们已经通过蛞蝓来识别帖子和作者,我们将用它来引用它们。我们可以把作者加到帖子上,把帖子加到作者上,但一个方向就足以连接它们。既然我们想把帖子归于作者,我们就要把作者的蛞蝓添加到每个帖子的前言中。
 ---
 title: "Hello World!"
 excerpt: "This is my first blog post."
 createdAt: "2021-05-03"
+author: adrian-webber
 ---
 Hey, how are you doing? Welcome to my blog. In this post, …
如果我们保持这个状态,通过gray-matter ,将作者字段作为一个字符串添加到帖子中。
const post = getPostBySlug("hello-world")
const author = post.author

console.log(author)
// "adrian-webber"
为了获得代表作者的对象,我们可以使用该lug并调用getAuthorBySlug(slug) 。
 const post = getPostBySlug("hello-world")
-const author = post.author
+const author = getAuthorBySlug(post.author)

 console.log(author)
 // {
 //   name: "Adrian Webber",
 //   slug: "adrian-webber",
 //   profilePictureUrl: "/adrian-webber.jpg",
 //   permalink: "/authors/adrian-webber"
 // }
要将作者添加到单个帖子的页面,我们需要在getStaticProps() 中调用一次getAuthorBySlug(slug) 。
+import Image from 'next/image'
+import Link from 'next/link'

-import { getPostBySlug } from '../../lib/api'
+import { getAuthorBySlug, getPostBySlug } from '../../lib/api'

 export default function Post({ post }) {
   const prettyDate = new Date(post.createdAt).toLocaleString('en-US', {
     month: 'short',
     day: '2-digit',
     year: 'numeric',
   })

   return (
     <div className="post">
       <h1>{post.title}</h1>

       <time dateTime={post.createdAt}>{prettyDate}</time>

+      <div>
+        <Image alt={post.author.name} src={post.author.profilePictureUrl} height="40" width="40" />
+
+        <Link href={post.author.permalink}>
+          <a>
+            {post.author.name}
+          </a>
+        </Link>
+      </div>

       <div dangerouslySetInnerHTML={{ __html: post.body }}>
     </div>
   )
 }

 export function getStaticProps({ params }) {
+  const post = getPostBySlug(params.slug)

   return {
     props: {
-      post: getPostBySlug(params.slug),
+      post: {
+        ...post,
+        author: getAuthorBySlug(post.author),
+      },
     },
   }
 }
请注意我们是如何将...post 扩散到getStaticProps() 中一个也叫post 的对象中的。通过将author 放在这一行之后,我们最终将作者的字符串版本替换为其完整的对象。这让我们可以通过Post 组件中的post.author.name 来访问一个作者的属性。
通过这一改变,我们现在可以在帖子的页面上得到一个指向作者简介页面的链接,其中包括他们的名字和照片。

将作者添加到文章概览页面需要一个类似的改变。我们需要对所有的帖子进行映射,为每一个帖子调用getAuthorBySlug(slug) ,而不是调用一次。
+import Image from 'next/image'
+import Link from 'next/link'

-import { getAllPosts } from '../../lib/api'
+import { getAllPosts, getAuthorBySlug } from '../../lib/api'

 export default function Posts({ posts }) {
   return (
     <div className="posts">
       <h1>Posts</h1>

       {posts.map(post => {
         const prettyDate = new Date(post.createdAt).toLocaleString('en-US', {
           month: 'short',
           day: '2-digit',
           year: 'numeric',
         })

         return (
           <article key={post.slug}>
             <h2>
               <Link href={post.permalink}>
                 <a>{post.title}</a>
               </Link>
             </h2>

             <time dateTime={post.createdAt}>{prettyDate}</time>

+            <div>
+              <Image alt={post.author.name} src={post.author.profilePictureUrl} height="40" width="40" />
+
+              <span>{post.author.name}</span>
+            </div>

             <p>{post.excerpt}</p>

             <Link href={post.permalink}>
               <a>Read more →</a>
             </Link>
           </article>
         )
       })}
     </div>
   )
 }

 export function getStaticProps() {
   return {
     props: {
-      posts: getAllPosts(),
+      posts: getAllPosts().map(post => ({
+        ...post,
+        author: getAuthorBySlug(post.author),
+      })),
    }
  }
}
这样就可以在帖子概览中为每个帖子添加作者。

我们不需要在作者的JSON文件中添加作者的帖子列表。在他们的个人资料页面,我们首先得到所有带有getAllPosts() 的帖子。然后我们可以在完整的列表中过滤出归属于该作者的文章。
import Image from 'next/image'
+import Link from 'next/link'

-import { getAllAuthors, getAuthorBySlug } from '../../lib/api'
+import { getAllAuthors, getAllPosts, getAuthorBySlug } from '../../lib/api'

 export default function Author({ author }) {
   return (
     <div className="author">
       <h1>{author.name}</h1>

       <Image alt={author.name} src={author.profilePictureUrl} height="40" width="40" />

+      <h2>Posts</h2>
+
+      <ul>
+        {author.posts.map(post => (
+          <li>
+            <Link href={post.permalink}>
+              <a>
+                {post.title}
+              </a>
+            </Link>
+          </li>
+        ))}
+      </ul>
     </div>
   )
 }

 export function getStaticProps({ params }) {
   const author = getAuthorBySlug(params.slug)

   return {
     props: {
-      author: getAuthorBySlug(params.slug),
+      author: {
+        ...author,
+        posts: getAllPosts().filter(post => post.author === author.slug),
+      },
     },
   }
 }

 export function getStaticPaths() { … }
这样我们就得到了每个作者的个人资料页上的文章列表。

在作者概览页上,我们只添加他们写了多少文章,以免界面混乱。
import Image from 'next/image'
import Link from 'next/link'

-import { getAllAuthors } from '../../lib/api'
+import { getAllAuthors, getAllPosts } from '../../lib/api'

 export default function Authors({ authors }) {
   return (
     <div className="authors">
       <h1>Authors</h1>

       {authors.map(author => (
         <div key={author.slug}>
           <h2>
             <Link href={author.permalink}>
               <a>
                 {author.name}
               </a>
             </Link>
           </h2>

           <Image alt={author.name} src={author.profilePictureUrl} height="40" width="40" />

+         <p>{author.posts.length} post(s)</p>

           <Link href={author.permalink}>
             <a>Go to profile →</a>
           </Link>
         </div>
       ))}
     </div>
   )
 }

 export function getStaticProps() {
   return {
     props: {
-      authors: getAllAuthors(),
+      authors: getAllAuthors().map(author => ({
+        ...author,
+        posts: getAllPosts().filter(post => post.author === author.slug),
+      })),
     }
   }
 }
有了这个,作者概览页就会显示每个作者贡献了多少文章。

就这样了!现在,帖子和作者已经完全联系起来了。我们可以从一个帖子到一个作者的个人资料页,再从那里到他们的其他帖子。
总结和展望
在这篇文章中,我们通过两个相关类型的内容的独特蛞蝓连接起来。定义了从帖子到作者的关系,实现了各种场景的应用。我们现在可以在每个帖子上显示作者,并在他们的个人资料页面上列出他们的帖子。
通过这种技术,我们可以添加许多其他类型的关系。每个帖子可能在作者之上有一个评论者。我们可以通过在一个帖子的前言中添加一个reviewer 字段来设置这一点。
 ---
 title: "Hello World!"
 excerpt: "This is my first blog post."
 createdAt: "2021-05-03"
 author: adrian-webber
+reviewer: megan-carter
 ---
 Hey, how are you doing? Welcome to my blog. In this post, …
在文件系统中,审稿人是_authors/ 目录中的另一个作者。我们也可以使用getAuthorBySlug(slug) 来获取他们的信息。
 export function getStaticProps({ params }) {
   const post = getPostBySlug(params.slug)

   return {
     props: {
       post: {
         ...post,
         author: getAuthorBySlug(post.author),
+        reviewer: getAuthorBySlug(post.reviewer),
       },
     },
   }
 }
我们甚至可以支持共同作者,在一个帖子上命名两个或多个作者,而不是只命名一个人。
 ---
 title: "Hello World!"
 excerpt: "This is my first blog post."
 createdAt: "2021-05-03"
-author: adrian-webber
+authors:
+  - adrian-webber
+  - megan-carter
 ---
 Hey, how are you doing? Welcome to my blog. In this post, …
在这种情况下,我们不能再在一个帖子的getStaticProps() 中查找单个作者。取而代之的是,我们将映射这个作者数组,以获得他们的全部。
 export function getStaticProps({ params }) {
   const post = getPostBySlug(params.slug)

   return {
     props: {
       post: {
         ...post,
-        author: getAuthorBySlug(post.author),
+        authors: post.authors.map(getAuthorBySlug),
       },
     },
   }
 }
我们还可以用这种技术产生其他类型的场景。它可以实现任何类型的一对一、一对多,甚至多对多的关系。如果你的项目还有新闻简报和案例研究,你也可以给每个作者添加。
在一个关于漫威宇宙的网站上,我们可以把人物和他们出现的电影联系起来。在体育方面,我们可以把球员和他们目前效力的球队联系起来。
由于辅助函数隐藏了数据源,内容可以来自不同的系统。我们可以从文件系统中读取文章,从API中读取评论,并将它们合并到我们的代码中。如果某些内容与另一种类型的内容有关,我们可以用这种模式将它们连接起来。
更多资源
Next.js在其关于数据获取的页面中提供了更多关于我们使用的函数的背景。它包括从不同类型的来源获取数据的示例项目的链接。
如果你想进一步了解这个启动项目,请查看这些文章。
- 用Strapi和Next.js构建一个CSS Tricks网站的克隆
用Strapi驱动的后端替换本地文件系统上的文件。 - 比较Next.js中的样式设计方法
探索编写自定义CSS的不同方法,以改变这个启动器的样式设计。 - Markdown/MDX with Next.js
在你的项目中加入MDX,这样你就可以在Markdown中使用JJSX和React组件。
