开头
UIButton
实际用处
基础用法
//action为按钮的方法和其他的属性,title没有测试出来,image如果设置为按钮样式为custom,则显示到按钮上,identifier为标识符,类似tableviewcell,handler回调函数,对应相应方法
UIAction *action = [UIAction actionWithTitle:@"test" image:[UIImage imageNamed:@"dv_icon1"] identifier:@"mzx" handler:^(__kindof UIAction * _Nonnull action) {
NSLog(@"action")
NSLog(@"%@", action.title)
}]
UIButton *btn = [UIButton buttonWithType:UIButtonTypeCustom primaryAction:action]
btn.frame = CGRectMake(100, 100, 100, 100)
- 第二种方法,自定义设置,常用。
UIButton的特点决定了其拥有多种状态,所以根据点击需求,可以设置不同显示样式,包括文字、图片、颜色等,反馈给用户更好的使用感觉。
UIButton *btn = [UIButton new]
[btn setTitle:@"点我" forState:UIControlStateNormal]
[btn setTitle:@"已经点我了" forState:UIControlStateHighlighted]
[btn setTitleColor:[UIColor greenColor] forState:UIControlStateNormal]
[btn setTitleColor:[UIColor blueColor] forState:UIControlStateHighlighted]
btn.frame = CGRectMake(100, 100, 100, 100)
btn.backgroundColor = [UIColor redColor]
[btn addTarget:self action:@selector(btnClick) forControlEvents:UIControlEventTouchUpInside]
[self.view addSubview:btn]
按钮图片适应UIButton大小
- 在实际开发中,需要让图片以合适的比例显示在Button中,则要设置
UIButton的imageView的contentMode属性
btn.imageView.contentMode = UIViewContentModeScaleAspectFit
- 当然这样设置之后,
Button实际大小会比图片大,就可以按照处理imageView的方式,处理Button
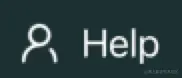
同时设置文字和图片
- 在实际开发中,会需要下面这个形式的按钮,设置好文字图片后,设置内边距即可,系统默认是图片在左,文字在右,通过
imageEdgeInsets或者titleEdgeInsets进行距离的设置
UIButton *btn = [UIButton new]
[btn setImage:[UIImage imageNamed:@"img_help"] forState:UIControlStateNormal]
[btn setTitle:@"Help" forState:UIControlStateNormal]
btn.titleLabel.font = [UIFont systemFontOfSize:20]
btn.titleLabel.textColor = [UIColor whiteColor]
[btn addTarget:self action:@selector(btnClick) forControlEvents:UIControlEventTouchUpInside]
btn.imageView.contentMode = UIViewContentModeScaleAspectFit
btn.backgroundColor = [UIColor redColor]
//上左下右
btn.imageEdgeInsets = UIEdgeInsetsMake(0, 0, 0, 10)
btn.frame = CGRectMake(100, 100, 100, btn.titleLabel.font.lineHeight)
[self.view addSubview:btn]
UIEdgeInsetsMake是处理图片和文字布局的关键。由于默认图片在左,文字在右,在调整布局的时候就需要把图片左推,往右拉;文字往左拉,往右推- inset中的正数代表在某个方向加上一段距离,理解为推;负数代表在某个方向减去一段距离,理解为拉
//img在上,lbl在下
btn.imageEdgeInsets = UIEdgeInsetsMake(0, lblW * 0.5, lblW, -lblW * 0.5)
btn.titleEdgeInsets = UIEdgeInsetsMake(imgH * 0.5 , -lblW * 0.5, -lblH * 0.5, lblW * 0.5)
//img在下,lbl在上
btn.imageEdgeInsets = UIEdgeInsetsMake(lblH, lblW * 0.5, 0, -lblW * 0.5)
btn.titleEdgeInsets = UIEdgeInsetsMake(0, -lblW * 0.5, imgH, lblW * 0.5)
//img在右,lbl在左
btn.imageEdgeInsets = UIEdgeInsetsMake(0, lblW, 0, -lblW)
btn.titleEdgeInsets = UIEdgeInsetsMake(0, -imgW, 0, imgW)
UITextField
实际用处
基本用法
UITextField *accountTextField = [UITextField new]
UITextField *passwordTextField = [UITextField new]
accountTextField.frame = CGRectMake(100, 80, 200, 50)
passwordTextField.frame = CGRectMake(100, 130, 200, 20)
//输入文本框周围样式
accountTextField.borderStyle = UITextBorderStyleRoundedRect
passwordTextField.borderStyle = UITextBorderStyleRoundedRect
//安全输入
passwordTextField.secureTextEntry = YES
//占位符
accountTextField.placeholder = @"Please input your account"
passwordTextField.placeholder = @"Please input your password"
//文本清空
accountTextField.clearButtonMode = UITextFieldViewModeWhileEditing
passwordTextField.clearButtonMode = UITextFieldViewModeWhileEditing
//输入文本字体大小
accountTextField.font = [UIFont systemFontOfSize:10]
//指示符颜色
accountTextField.tintColor = [UIColor redColor]
[self.view addSubview:accountTextField]
[self.view addSubview:passwordTextField]
键盘弹出与收回
[accountTextField resignFirstResponder];
[accountTextField becomeFirstResponder];
- 下面是点击界面时收回键盘,即在需要收回的地方调用
resignFirstResponder,在需要弹出的时候调用becomeFirstResponder,根据用户使用流畅进行调整即可
- (void)touchesBegan:(NSSet<UITouch *> *)touches withEvent:(UIEvent *)event {
    [self.accountTextField resignFirstResponder];
    [self.passwordTextFiled resignFirstResponder];
}
输入框的设计
- 输入框一般都是直接放在
UIView中,通过设计UIView中,来设计界面
- 默认的输入框,指示符与最左边贴的很紧,不是很好看,所以需要修改
leftView
UIView *leftVw = [UIView new]
leftVw.frame = CGRectMake(0, 0, 10, 5)
leftVw.backgroundColor = [UIColor redColor]
accountTextField.leftView = leftVw
accountTextField.leftViewMode = UITextFieldViewModeAlways


