

接入流程
前言
采用TP5.1的框架实现,我知道这里会有很多的坑,在开发这个之前,我就写了两篇前奏,因为这个登录需要一些参数,这个和微信小程序的不太一样
获取code
首先我们需要调用my.getAuthCode接口获取code,然后传给服务端
首先登录一下支付宝开发者工具
首先我们写一个简单的发送code的demo,这个在官网里面有opendocs.alipay.com/mini/api/op…
后面我这里改了一下js里面的
Page({
onLoad() {},
data: {},
getAuthCode: () => {
my.getAuthCode({
scopes: 'auth_user',
success: (res) => {
console.log(res.authCode);
// my.alert({ // content: res.authCode, // }); let code = res.authCode
console.log(res);
my.request({
url: 'http://localhost/ttft\_2/public/api/v1/getcodeali',
data: code,
method: 'POST',
success: (mes) => {
console.log(mes);
}
});
},
});
},
});
但是这里面又发现了一个坑,不能使用http的请求,因此我们需要在服务器上部署才行,这个口面再发一篇,这里先拿到code再说,注释一下代码,换成这样的
Page({
onLoad() {},
data: {},
getAuthCode: () => {
my.getAuthCode({
scopes: 'auth_user',
success: (res) => {
console.log(res.authCode);
my.alert({
content: res.authCode,
});
// let code = res.authCode // console.log(res); // my.request({ // url: 'http://localhost/ttft\_2/public/api/v1/getcodeali', // data: code, // method: 'POST', // success: (mes) => { // console.log(mes); // } // }); },
});
},
});
其他的就按照官网给的就行,然后我们点击获取授权码
会弹出这样的消息,在控制台中打印的可以复制
这样一来,code码到手了
把code码发给服务端
下载支付宝sdk还是给出地址docs.open.alipay.com/54/103419
下载好之后把aop文件放到项目的extend目录下
另外开发这个登录需要的参数我们要准备好,不知道的话,我的前一篇博客里面有
我把它写到配置文件当中,(一些公共的资料注意还是一律填写到配置文件当中,方便日后的维护和管理)
登录需要的就是以上的四个参数
然后开始写我们的方法
gatewayUrl = config('base.ali\_gatewayUrl'); $aop->appId = config('base.ali\_app\_id'); $aop->rsaPrivateKey = config('base.ali\_rsaPrivateKey'); $aop->alipayrsaPublicKey = config('base.ali\_alipayrsaPublicKey'); $aop->apiVersion = '1.0'; $aop->signType = 'RSA2'; $aop->postCharset='utf-8'; $aop->format='json'; $request = new \\AlipaySystemOauthTokenRequest(); $request->setGrantType("authorization\_code"); $request->setCode($param\['code'\]); //$request->setRefreshToken("201208134b203fe6c11548bcabd8da5bb087a83b"); $result = $aop->execute($request); return $result; } } 就这样就可以登录了 这里再贴出支付宝的文档[https://docs.open.alipay.com/api\_9/alipay.system.oauth.token/](https://links.jianshu.com/go?to=https%3A%2F%2Fdocs.open.alipay.com%2Fapi_9%2Falipay.system.oauth.token%2F) 不过有个问题,难道我说登录就登录了吗?程序怎么会这么听话?当然不是,既然支付宝工具调试不了,那就使用api调试工具,我这里使用Postman 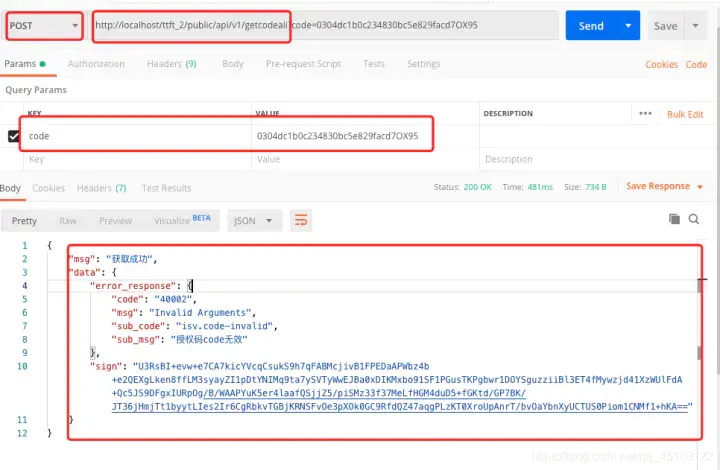 使用的是post请求,把我们的地址放进去,输入code,不过好像有点问题,因为我们的code码已经过期了需要重新获取,来,重新获取一个新的code 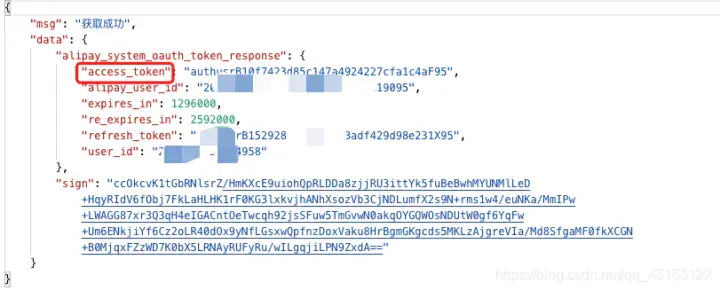 像这个就是正确的啦,现在服务器已经获取到了access\_token这个参数,我们就要进行下一步操作了。 获取用户信息(不能再使用) 通过token接口调用支付宝会员查询接口获取会员信息 来,文档地址[https://docs.open.alipay.com/api\_2/alipay.user.info.share](https://links.jianshu.com/go?to=https%3A%2F%2Fdocs.open.alipay.com%2Fapi_2%2Falipay.user.info.share) 上面我们获取的那个access\_token是有有效期的,建议存到缓存当中 我们把程序改好了在试一次 gatewayUrl = config('base.ali\_gatewayUrl'); $aop->appId = config('base.ali\_app\_id'); $aop->rsaPrivateKey = config('base.ali\_rsaPrivateKey'); $aop->alipayrsaPublicKey = config('base.ali\_alipayrsaPublicKey'); $aop->apiVersion = '1.0'; $aop->signType = 'RSA2'; $aop->postCharset='utf-8'; $aop->format='json'; $request = new \\AlipaySystemOauthTokenRequest(); $request->setGrantType("authorization\_code"); $request->setCode($param\['code'\]); //$request->setRefreshToken("201208134b203fe6c11548bcabd8da5bb087a83b"); $result = $aop->execute($request); //return $result; $responseNode = str\_replace(".", "\_", $request->getApiMethodName()) . "\_response"; $accessToken= $result->$responseNode->access\_token; return self::getUserInfoAli($accessToken); } /\*\* \* 获取支付宝用户信息 \* @param $accessToken \* @return bool|mixed|\\SimpleXMLElement \* @throws \\Exception \*/ public static function getUserInfoAli($accessToken){ $aop = new \\AopClient (); $aop->gatewayUrl = config('base.ali\_gatewayUrl'); $aop->appId = config('base.ali\_app\_id'); $aop->rsaPrivateKey = config('base.ali\_rsaPrivateKey'); $aop->alipayrsaPublicKey = config('base.ali\_alipayrsaPublicKey'); $aop->apiVersion = '1.0'; $aop->signType = 'RSA2'; $aop->postCharset='utf-8'; $aop->format='json'; $request = new \\AlipayUserInfoShareRequest (); $result = $aop->execute ( $request , $accessToken ); return $result; } } 提醒一下,这里code只能使用一次,使用一次之后就会失效 程序写好之后调用发现了一个惊喜,好吧,坑还是有的,按照他的来 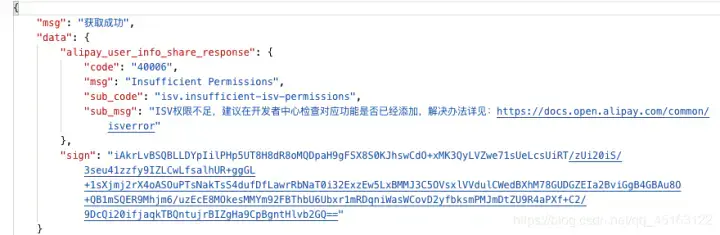 提升开发权限 找到我们的小程序 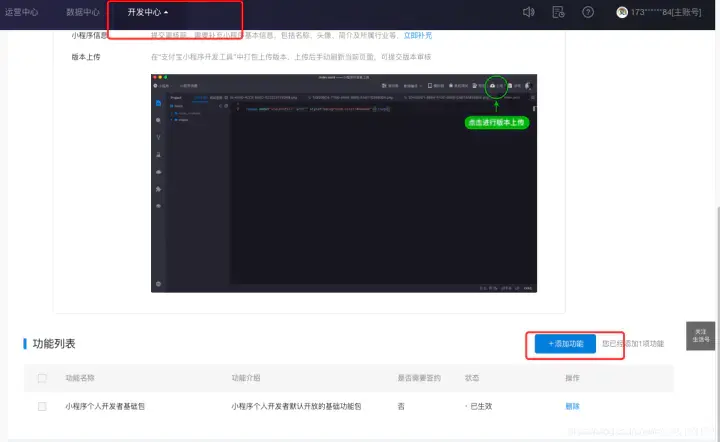 一步一步来 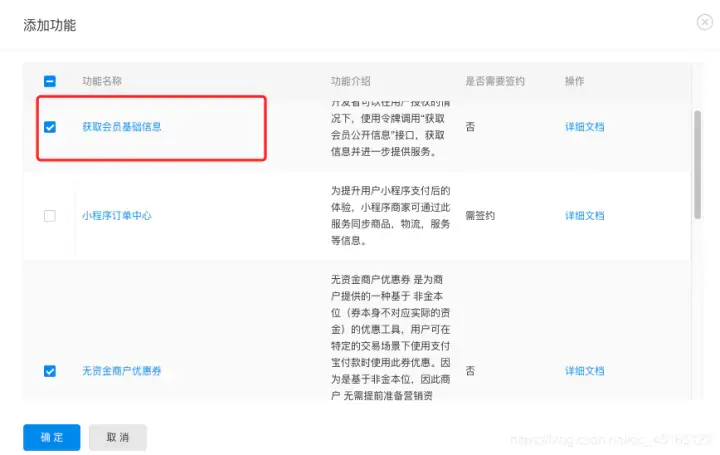 调用,然后再次出错,陷入一阵。。。。。 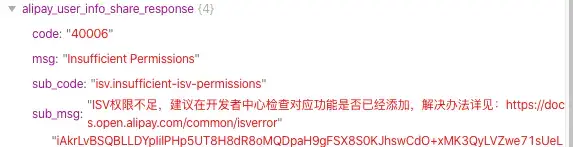 获取用户信息改变 好吧既然如此,就上官网查看 它居然说不能使用了 通过前台调用用户接口 my.getOpenUserInfo[https://opendocs.alipay.com/mini/api/ch8chh](https://links.jianshu.com/go?to=https%3A%2F%2Fopendocs.alipay.com%2Fmini%2Fapi%2Fch8chh) 现在换一种思路,在小程序端查询信息存入到数据库中, 改了一下代码,我在这里贴出来 var app = getApp() Page({ data: { hasUserInfo: false }, getUserInfo() { my.getAuthCode({ scopes: 'auth\_user', fail: (error) => { console.error('getAuthCode', error); }, success: (res) => { let code = res.authCode; my.request({ url: 'https://www.guizimo.top/demo/public/index.php/api/v1/getcodeali', method: 'POST', data:{ code:code }, }); my.getAuthUserInfo({ fail: (error) => { console.error('getAuthUserInfo', error); }, success: (userInfo) => { console.log(\`userInfo:\`, userInfo); this.setData({ userInfo, hasUserInfo: true, }); my.request({ url: 'https://www.guizimo.top/demo/public/index.php/api/v1/setuserinfoali', method: 'POST', data:{ avatar:userInfo.avatar, nickName:userInfo.nickName }, success: (result) => { console.log(result); my.alert({ content: '登录成功', }); } }); } }); } }); }, clear() { this.setData({ hasUserInfo: false, userInfo: {} }) } }) 后台主要是存入信息,用了两个接口我把实现的方法写在下面 gatewayUrl = config('base.ali\_gatewayUrl'); $aop->appId = config('base.ali\_app\_id'); $aop->rsaPrivateKey = config('base.ali\_rsaPrivateKey'); $aop->alipayrsaPublicKey = config('base.ali\_alipayrsaPublicKey'); $aop->apiVersion = '1.0'; $aop->signType = 'RSA2'; $aop->postCharset='utf-8'; $aop->format='json'; $request = new \\AlipaySystemOauthTokenRequest(); $request->setGrantType("authorization\_code"); $request->setCode($param\['code'\]); //$request->setRefreshToken("201208134b203fe6c11548bcabd8da5bb087a83b"); $result = $aop->execute($request); //return $result; $responseNode = str\_replace(".", "\_", $request->getApiMethodName()) . "\_response"; //$accessToken= $result->$responseNode->access\_token; $userid = $result->$responseNode->user\_id; //return $userid; return self::saveUserId($userid); } /\*\* \* 保存UserID到数据库 \* @param $userid \* @return bool \* @throws \\think\\db\\exception\\DataNotFoundException \* @throws \\think\\db\\exception\\ModelNotFoundException \* @throws \\think\\exception\\DbException \*/ public static function saveUserId($userid){ $res = UserAli::where('userid',$userid)->find(); if($res){ $Uid = $res\['id'\]; }else{ $Uid = Db::name('user\_ali')->insertGetId(\['userid'=>$userid\]); } $result = Cache::set('Uid',$Uid); return $result; } /\*\* \* 保存好信息 \* @param $param \* @return int|string \* @throws \\think\\Exception \* @throws \\think\\exception\\PDOException \*/ public static function setUserInfoAli($param){ $Uid = Cache::get('Uid'); //return $Uid; $res = UserAli::where('id',$Uid) \->update(\[ 'avatar' => $param\['avatar'\], 'nickName' => $param\['nickName'\] \]); return $res; } } 演示 最后来演示一波,实在是太烦了,不过到现在又十分的简单了 在开发者工具中调用接口 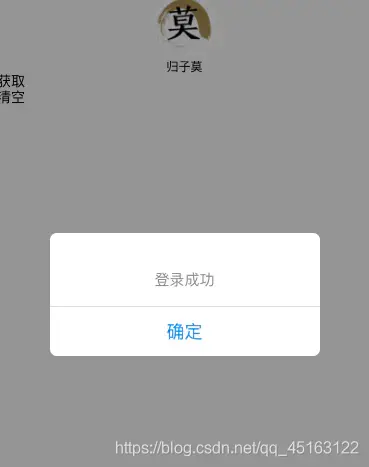 注意这个两个接口的状态 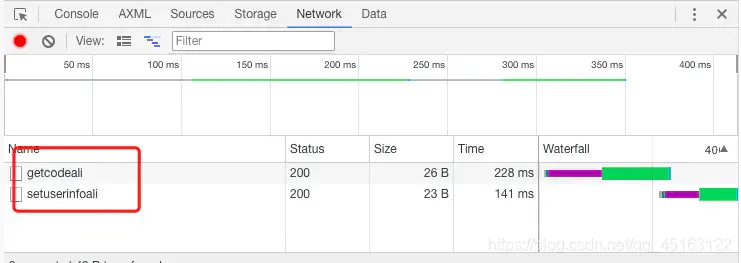 说明调用没有什么大问题,后面还是搭建了一个环境来测试,不然每次登录都要来这里面获取,真的是很烦。 最后查看数据库,看看我们的数据是否存入成功了  现在就大功告成了 不过当然还有很多东西需要优化,支付宝的登录和微信小程序的登录有一些不太一样,后面也会写一篇关于微信小程序登录的。 参考链接:[https://blog.csdn.net/qq\_45163122/article/details/104185435](https://links.jianshu.com/go?to=https%3A%2F%2Fblog.csdn.net%2Fqq_45163122%2Farticle%2Fdetails%2F104185435) 有什么问题或者项目咨询可以来我们[官网](https://links.jianshu.com/go?to=https%3A%2F%2Fwww.liuniukeji.com%2Findex%2Fgaozb)咨询