核心
- 为了让我们随心所欲的制定我们想要的任意状态栏
- 不能独立存在,设计之初就被限定只能作为AppBarLayout的直接子布局来使用
- 而AppBarLayout又之能是CoordinatorLayout的子布局
- 说白了,就一上滑效果,就是一堆谷歌自己封装的控件,我们拿来使用,就实现了酷酷的上滑效果而已
步骤
- CoordinatorLayout嵌套AppBarLayout 说白了就一FrameLaytou视图头部上面放一个导航条而已
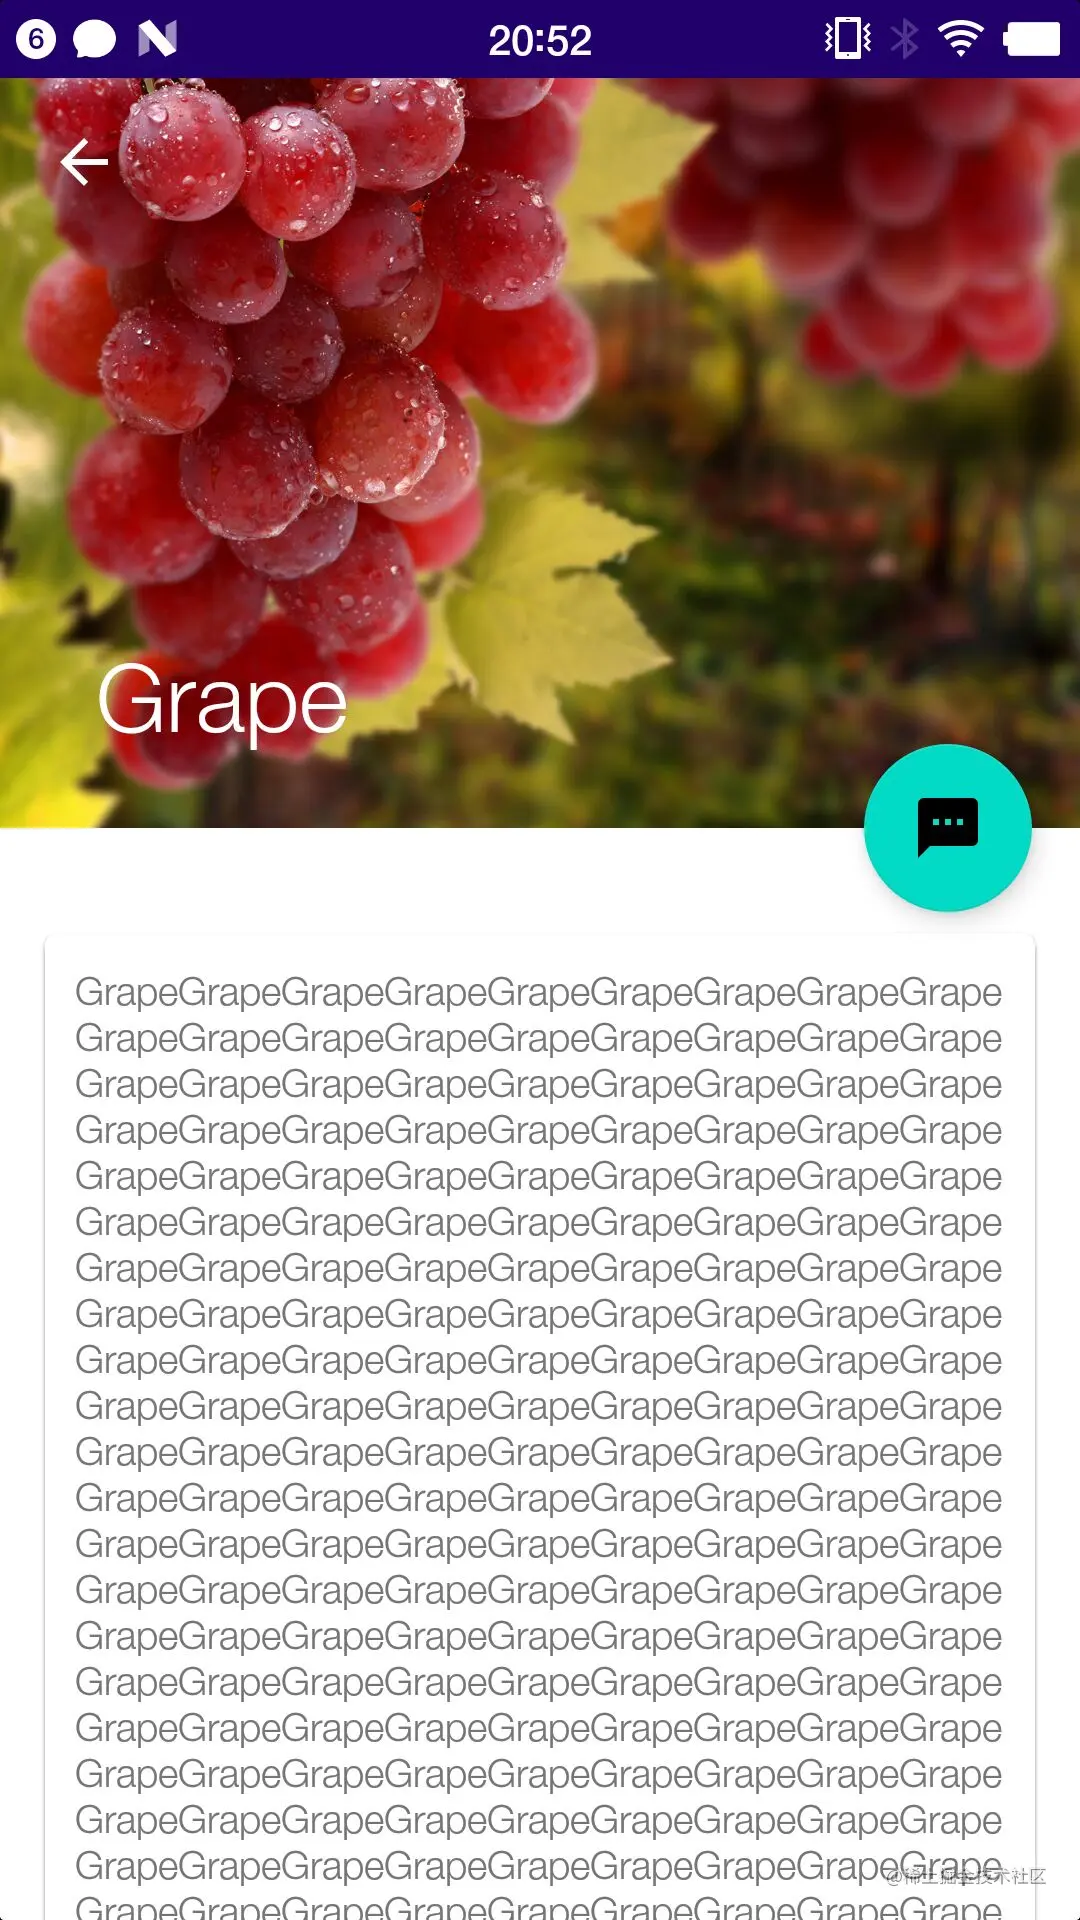
- 在AppBarLayout中嵌套一个CollapsingToolbarLayout 说白了就是为了使得头部的视图触摸内容滚动的时候,头部上移而设计的玩意
- 给CollapsingToolbarLayout制定黑色主题
- 给CollapsingToolbarLayout制定layout_scrollFlags使其内容跟随滑动 scroll
- 给CollapsingToolbarLayout的子控件设置layout_collapseMode,其中pin代表的意思是在折叠的过程中位置始终保持不变,parallax表示在折叠的过程中产生一定的错位偏移,这种模式的视觉效果比较好
- 紧接着在AppBarLayout外面使用NestedScrollView或者其他可滚动的View,并制定其layout_behavior布局行为。说白了,就是只有内容是可滚动的,手指才能上滑,不是么??
- 不过NestedScrollView只允许内部有一个子视图
- 我们可以在内部嵌套一个LinearLayout
- 设置沉浸式状态栏
- 给可滚动的部分设置app:layout_behavior="@string/appbar_scrolling_view_behavior" 属性,这是最关键的一步,说白了就是设置了它,CoordinatorLayout这个最外面的布局,才知道,滑动悬停的玩意从哪里开始。再简单点理解,就是你想让哪一个子View消费你的滑动行为?也就是你手指触摸了哪个可以滚动的子View,但是呢,子View虽然可以滚动,但是先不滚动,让其他的子弹(View)飞一会,等到其他的View不能动了,蹦跶够了,你手指摸的那个View再开始滚动!!!
<?xml version="1.0" encoding="utf-8"?>
<androidx.coordinatorlayout.widget.CoordinatorLayout xmlns:android="http://schemas.android.com/apk/res/android"
    android:layout_width="match_parent"
    android:layout_height="match_parent"
    xmlns:app="http://schemas.android.com/apk/res-auto">
    <com.google.android.material.appbar.AppBarLayout
        android:layout_width="match_parent"
        android:layout_height="250dp">
        <com.google.android.material.appbar.CollapsingToolbarLayout
            android:id="@+id/collapsingToolbar"
            android:layout_width="match_parent"
            android:layout_height="match_parent"
            android:theme="@style/ThemeOverlay.AppCompat.Dark.ActionBar"
            app:contentScrim="@color/design_default_color_primary"
            app:layout_scrollFlags="scroll|exitUntilCollapsed"
            >

        </com.google.android.material.appbar.CollapsingToolbarLayout>
    </com.google.android.material.appbar.AppBarLayout>
</androidx.coordinatorlayout.widget.CoordinatorLayout>
theme、contentScrim、layout_scrollFlags
- 1: Theme指定主题
- 2:contentScrim 用于指定趋于折叠状态以及折叠状态的背景色
- 3:layout_scrollFlags
- scroll 随着内容滚动而滚动
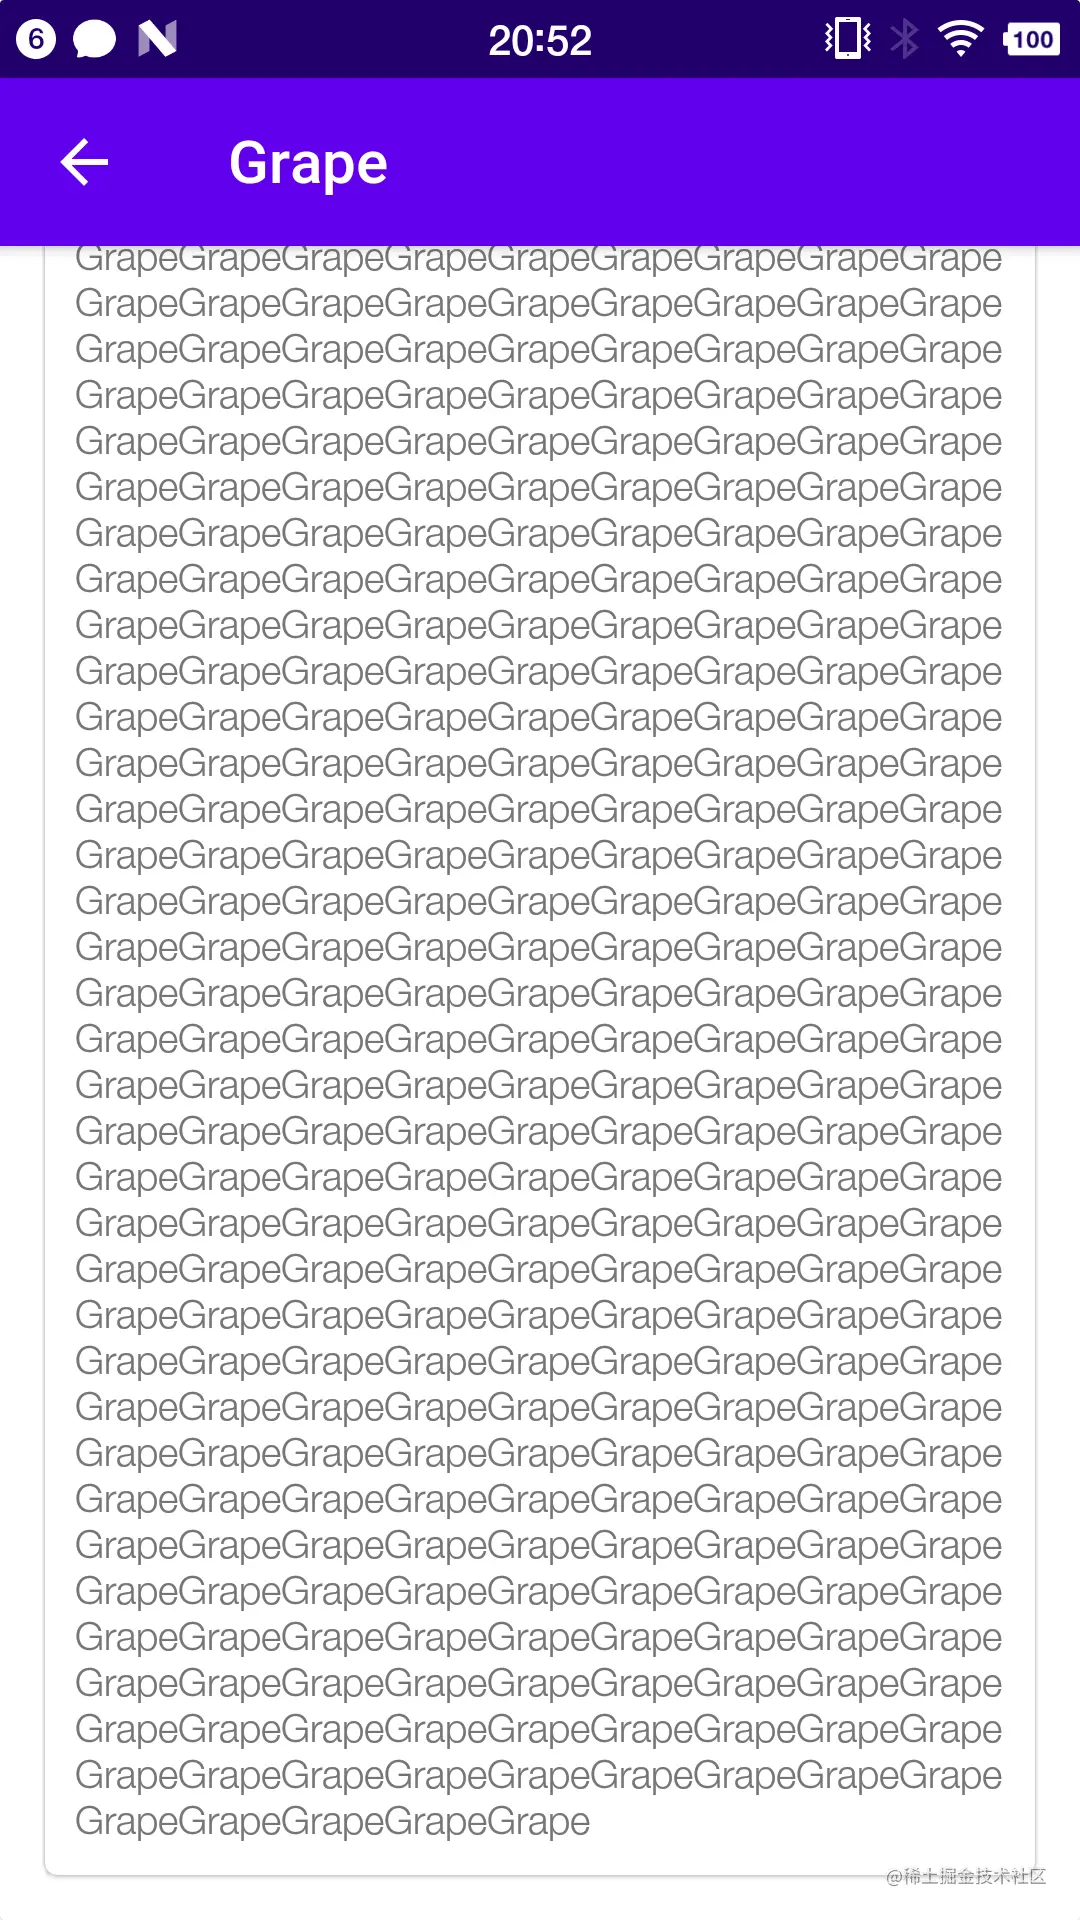
- exitUnitlCollapsed 随着内容滚动完成折叠之后保留在界面上,不再移出屏幕
- enterAlways 导航条随着滚动滑出屏幕
- enterAlwaysCollapsed 也是随着往上滚动滑出屏幕,但是下拉的时候是优先展示下面的内容,下面的内容下拉到不能滚动之后,才展示导航条,而enterAlways则是,下拉就直接先展示导航条,再展示内容,即使是内容被遮挡
视差效果layout_collapseMode
- parallax 折叠过程产生错位偏移
- pin 折叠过程中位置始终保持不变
NestedScrollView
FloatingButton
<com.google.android.material.floatingactionbutton.FloatingActionButton
        android:layout_width="wrap_content"
        android:layout_height="wrap_content"
        android:layout_margin="16dp"
        android:src="@drawable/ic_comment"
        app:layout_anchor="@id/appBar"
        app:layout_anchorGravity="bottom|end"
        />
详情页所有代码
<?xml version="1.0" encoding="utf-8"?>
<androidx.coordinatorlayout.widget.CoordinatorLayout xmlns:android="http://schemas.android.com/apk/res/android"
    android:layout_width="match_parent"
    android:layout_height="match_parent"
    xmlns:app="http://schemas.android.com/apk/res-auto">
    <com.google.android.material.appbar.AppBarLayout
        android:id="@+id/appBar"
        android:layout_width="match_parent"
        android:layout_height="250dp">
        <com.google.android.material.appbar.CollapsingToolbarLayout
            android:id="@+id/collapsingToolbar"
            android:layout_width="match_parent"
            android:layout_height="match_parent"
            android:theme="@style/ThemeOverlay.AppCompat.Dark.ActionBar"
            app:contentScrim="@color/design_default_color_primary"
            app:layout_scrollFlags="scroll|exitUntilCollapsed"
            >
            <ImageView
                android:id="@+id/fruitImageView"
                android:layout_width="match_parent"
                android:layout_height="match_parent"
                android:scaleType="centerCrop"
                app:layout_collapseMode="parallax"
                />
            <androidx.appcompat.widget.Toolbar
                android:id="@+id/toolbar"
                android:layout_width="match_parent"
                android:layout_height="?attr/actionBarSize"
                app:layout_collapseMode="pin"
                />
        </com.google.android.material.appbar.CollapsingToolbarLayout>
    </com.google.android.material.appbar.AppBarLayout>
    <androidx.core.widget.NestedScrollView
        android:layout_width="match_parent"
        android:layout_height="match_parent"
        app:layout_behavior="@string/appbar_scrolling_view_behavior"
        >
        <com.google.android.material.card.MaterialCardView
            android:layout_width="match_parent"
            android:layout_height="wrap_content"
            android:layout_marginBottom="15dp"
            android:layout_marginTop="35dp"
            android:layout_marginEnd="15dp"
            android:layout_marginStart="15dp"
            app:cardCornerRadius="4dp"
            >
            <TextView
                android:id="@+id/fruitContentTv"
                android:layout_width="wrap_content"
                android:layout_height="wrap_content"
                android:layout_margin="10dp"
                />
        </com.google.android.material.card.MaterialCardView>
    </androidx.core.widget.NestedScrollView>

    <com.google.android.material.floatingactionbutton.FloatingActionButton
        android:layout_width="wrap_content"
        android:layout_height="wrap_content"
        android:layout_margin="16dp"
        android:src="@drawable/ic_comment"
        app:layout_anchor="@id/appBar"
        app:layout_anchorGravity="bottom|end"
        />
</androidx.coordinatorlayout.widget.CoordinatorLayout>
package com.example.materialdesigndemo

import android.os.Bundle
import android.view.MenuItem
import androidx.appcompat.app.AppCompatActivity
import com.bumptech.glide.Glide
import kotlinx.android.synthetic.main.activity_fruit.*
import kotlinx.android.synthetic.main.fruit_item.*

class FruitActivity: AppCompatActivity() {

    companion object {
        const val FRUIT_NAME = "fruit_name"
        const val FRUIT_IMAGE_ID = "fruit_image_id"
    }

    override fun onCreate(savedInstanceState: Bundle?) {
        super.onCreate(savedInstanceState)
        setContentView(R.layout.activity_fruit)

        setSupportActionBar(toolbar)
        supportActionBar?.setDisplayHomeAsUpEnabled(true)

        val fruitName = intent.getStringExtra(FRUIT_NAME) ?: ""
        val fruitImageId = intent.getIntExtra(FRUIT_IMAGE_ID, 0)
        collapsingToolbar.title = fruitName
        Glide.with(this)
                .load(fruitImageId)
                .into(fruitImageView)
        fruitContentTv.text = generateFruitContent(fruitName)
    }

    override fun onOptionsItemSelected(item: MenuItem): Boolean {
        when (item.itemId) {
            android.R.id.home -> {
                finish()
                return true
            }
        }
        return super.onOptionsItemSelected(item)
    }

    private fun generateFruitContent(fruitName: String): CharSequence? {
        return fruitName.repeat(500)
    }
}