

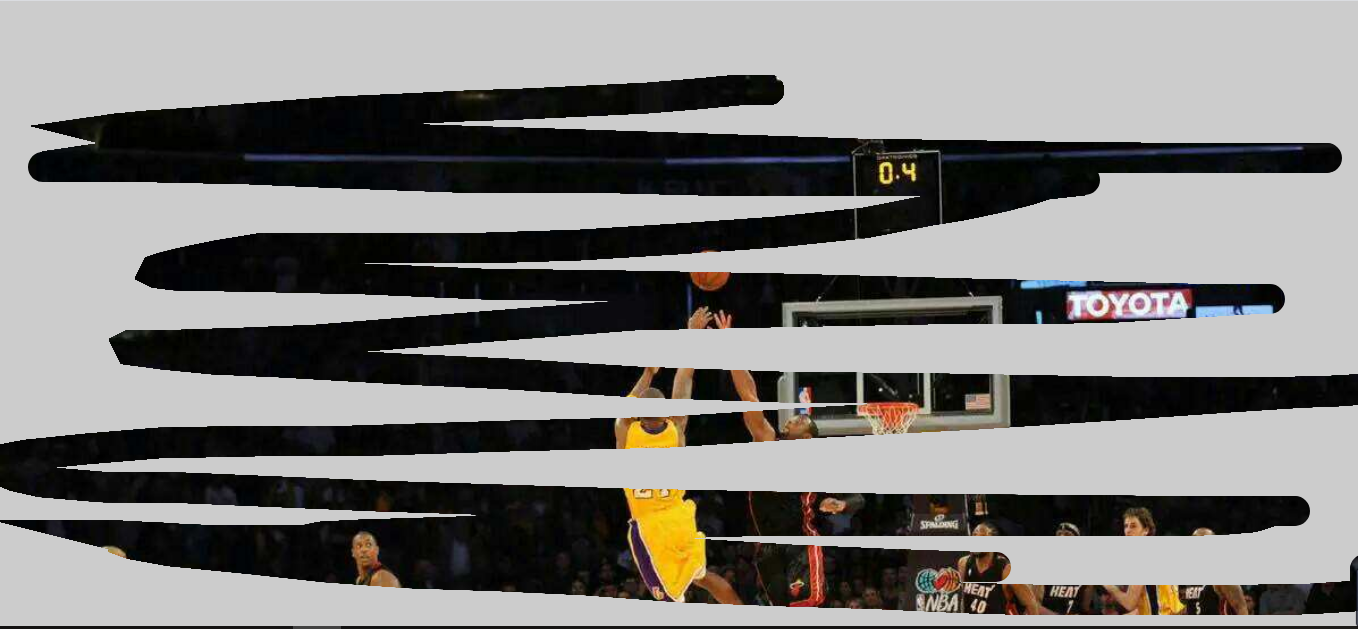
1.效果图
2.html及css
<canvas id="myCanvas"> 您的浏览器不支持canvas,请升级! </canvas> <style> * { margin: 0; padding: 0; } body,html{ width: 100%; height: 100%; } #myCanvas{ background:url("images/banner.jpeg") no-repeat; background-size:cover; } </style>
3.js
<script> (function(){ var canvasNode = document.querySelector("#myCanvas"); canvasNode.width = window.innerWidth; canvasNode.height = window.innerHeight; var ctx = canvasNode.getContext('2d'); // 绘制覆盖层 目标图像 ctx.fillStyle = '#ccc'; ctx.fillRect(0,0,canvasNode.width,canvasNode.height); // 图片合成 ctx.globalCompositeOperation = 'destination-out'; ctx.lineWidth = 30; ctx.lineCap = 'round'; // 签名板 源图像 canvasNode.onmousedown = function(event) { ctx.beginPath(); ctx.moveTo(event.offsetX,event.offsetY); document.onmousemove = function(event) { ctx.lineTo(event.clientX - canvasNode.offsetLeft,event.clientY - canvasNode.offsetTop); ctx.stroke(); }; document.onmouseup = function() { this.onmousemove = null; } } })(); </script>
4..总结
-
这个案例主要是搞清楚这个属性
globalCompositeOperation属性设置或返回如何将一个源(新的)图像绘制到目标(已有)的图像上。注意值是用的 destination-out,在源图像之外显示
目标图像。只有
源图像之外的
目标图像部分会被显示,
源图像是透明的。
-
在设置图片合成方式那里,注意前面是目标图像,后面是源图像。
