文章主要记录如何实现使用express连接数据库,做增删改查,关联数据库,封装路由,jsonwebtoken鉴权,bcrypt登录密码加密,multer文件上传和一些请求数据的处理,开发日志记录。
1 建立user数据模型model
api/models/user.js
const mongoose = require('mongoose');

const userSchema = mongoose.Schema({
  _id: mongoose.Schema.Types.ObjectId,
  email: {
    type: String,
    required: true,
    // 必须匹配独一无二的email
    unique: true,
    //匹配99%的email
    match: /(?:[a-z0-9!#$%&'*+/=?^_`{|}~-]+(?:\.[a-z0-9!#$%&'*+/=?^_`{|}~-]+)*|"(?:[\x01-\x08\x0b\x0c\x0e-\x1f\x21\x23-\x5b\x5d-\x7f]|\\[\x01-\x09\x0b\x0c\x0e-\x7f])*")@(?:(?:[a-z0-9](?:[a-z0-9-]*[a-z0-9])?\.)+[a-z0-9](?:[a-z0-9-]*[a-z0-9])?|\[(?:(?:(2(5[0-5]|[0-4][0-9])|1[0-9][0-9]|[1-9]?[0-9]))\.){3}(?:(2(5[0-5]|[0-4][0-9])|1[0-9][0-9]|[1-9]?[0-9])|[a-z0-9-]*[a-z0-9]:(?:[\x01-\x08\x0b\x0c\x0e-\x1f\x21-\x5a\x53-\x7f]|\\[\x01-\x09\x0b\x0c\x0e-\x7f])+)\])/
  },
  password: { type: String, required: true }
});

module.exports = mongoose.model('User', userSchema);
2 建立user数据的路由逻辑
api/routes/user.js
const express = require('express');
const router = express.Router();
const mongoose = require('mongoose');
// 使用bcrypt加密password
const bcrypt = require('bcrypt');
// 使用jwt生成base64位的转码token
const jwt = require('jsonwebtoken');

const User = require('../models/user');

router.post('/signup', (req, res, next) => {
    User.find({ email: req.body.email }) // find是个数组
      .exec()
      .then(user => {
        console.log(user,'user')
        if (user.length >= 1) {
            return res.status(409).json({
              message: 'Mail exists'
            });
        } else {
            //加密password,加密级别为10
            bcrypt.hash(req.body.password, 10, (err, hash)  => {
              if (err) {
                return res.status(500).json({
                  error: err
                })
              } else {
                const user = new User({
                  _id: new mongoose.Types.ObjectId(),
                  email: req.body.email,
                  password: hash
                });
                user
                  .save()
                  .then(result => {
                    console.log(result);
                    res.status(201).json({
                      message: 'User created',
                      userInfor: result
                    });
                  })
                  .catch(err => {
                    console.log(err);
                    res.status(500).json({
                      error: err
                    })
                  });
              }
            })
        }

      })
      .catch();

})

router.post('/login', (req, res, next) => {
  User.find({ email: req.body.email })
    .exec()
    .then(user => {
      if (user.length < 1) { // 登录时用户不存在
        return res.status(401).json({ //no email or the password is wrong
          message: 'Auth failed '
        })
      }
      // 判断用户登录输入密码和注册密码是否相同
      bcrypt.compare(req.body.password, user[0].password, (err, result) => {
        if(result) {
          // 生成token
          // token仅仅是encoded in a base 64 编码成64位  not encrypted (加密)
          const token = jwt.sign(  //synchronously同步设置token
            {
              email: user[0].email,
              userId: user[0]._id
            },
            'secret',
            // 失效时间
            {
              expiresIn: '1h'
            }
          )
          //鉴权成功并返回token
          return res.status(200).json({
            message: 'Auth successful',
            token: token
          })
        } else {
          return res.status(401).json({
            message: 'Auth failed',
            error: err
          });
        }
      })
    })
    .catch(err => {
      console.log(err);
      res.status(500).json({
        error: err
      })
    })
})

router.delete('/:userId', (req, res, next) => {
  User.remove({ _id: req.params.userId })
    .exec()
    .then(result => {
      res.status(200).json({
        message: 'User deleted'
      })
    })
    .catch(err => {
      console.log(err);
      res.status(500).json({
        error: err
      })
    })
})

module.exports = router;
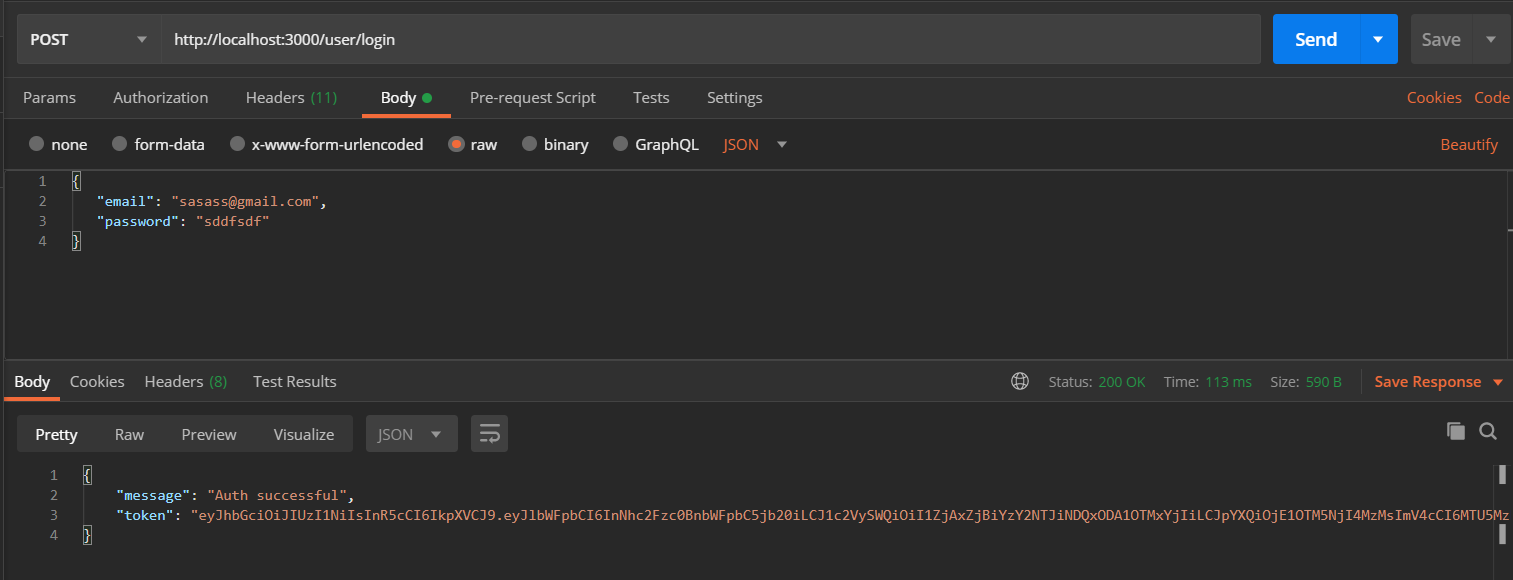
postman 测试
登录
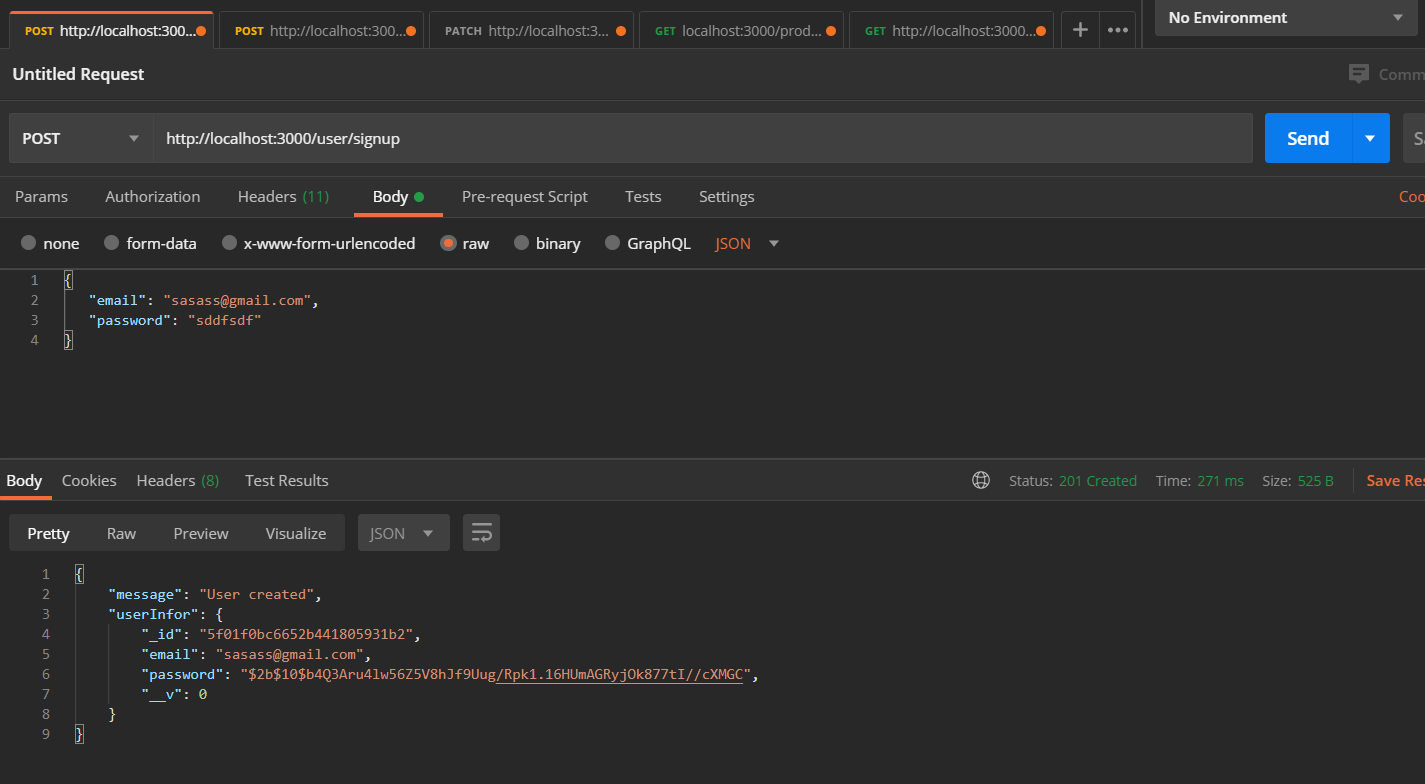
注册
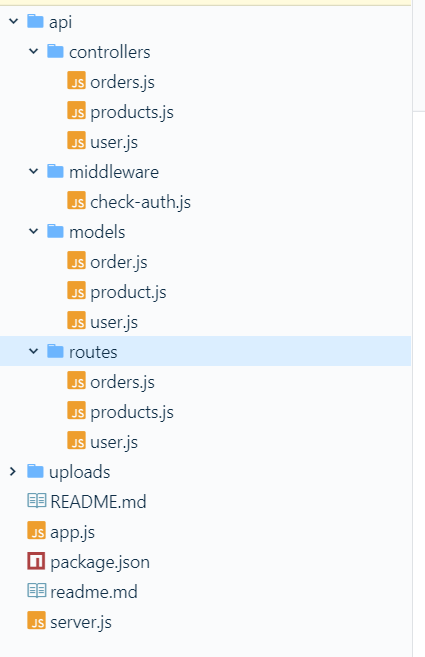
当前项目目录