

前言
想要类似官方的uni.showModal()使用简单不需要在页面中引入组件
官方样式实在是太丑了 特别是在各种安卓机上
基于 uniapp 的 nvue 模式开发
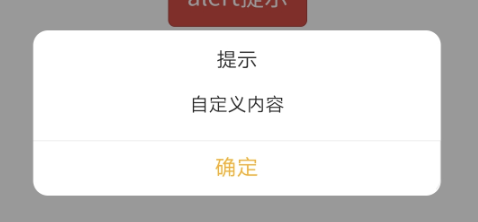
样式如下
开发逻辑
弹窗在很多页面中都会用到 使用组件方式开发需要在每个页面中引入 所以不想通过组件方式实现
使用路由的方式 需要弹窗的时候跳转到路由 在关闭的时候返回到上一路由
插件特点
- 使用nvue编写 性能高
- 使用方式和官方类似
- 支持自定义弹窗内所有文字及样式
实现过程
1. 新建 nvue 页面 popup.nvue
模版部分 这里为了结构清晰 并没有绑定数据以及点击事件
<template>
 <div class="container">
     <div class="popup" ref="popup_main">
  <!--标题部分-->
      <div class="title"><text class="text">标题</text></div>
  <!--内容部分-->
      <div class="content"><text class="text ">内容</text></div>
  <!--按钮部分-->
      <div class="btn"><text class="text">确认</text></div>
     </div>
 </div>
</template>
样式部分 flex布局 背景为rgba(0,0,0,0.3)起到遮罩的效果
<style scoped lang="stylus">
.container
 flex 1
 align-items center
 justify-content center
 background-color rgba(0, 0, 0, 0.3)
.popup
 width 280rpx
 height 170rpx
 border-radius 15rpx
 background-color white
 opacity 0  <!-- 默认隐藏 使用动画控制显示 -->
.text
 font-size 20rpx
.title
 flex 1
 align-items center
 justify-content center
.content
 flex 2
 align-items center
 justify-content center
.button
 flex 1
 align-items center
 justify-content center
 border-top-width 2rpx
 border-top-color #F3F3F3
 border-style solid
</style>
2.注册路由 nvue页面不支持在pages中配置路由动画
{
 "path": "pages/popup/popup",
 "style": {
     "app-plus": {
   "background": "transparent" //这里背景设置成透明才可以覆盖在原页面上
  }
 }
}
3.弹窗动画的实现 简单的渐变放大回弹效果
使用weex的动画方案 BindingX 性能媲美原生
const Binding = uni.requireNativePlugin('bindingx')
//页面渲染后动画开始
mounted() {
 this.expand()
},
methods:{
    //获取节点
    getEl:function(el) {
     if (typeof el === 'string' || typeof el === 'number') return el
     if (WXEnvironment) {
      return el.ref
     } else {
      return el instanceof HTMLElement ? el : el.$el
     }
    },
    //打开弹窗
    expand:function() {
     const popupMain = this.getEl(this.$refs.popup_main)
  const main_binding = Binding.bind(
   {
    eventType: 'timing',
    //300ms后结束
    exitExpression: 't>300',
                         props: [
     {
         element: popupMain,
      property: 'opacity',
      expression: 'linear(t,0,1,300)'
     }, //透明度 0-1
     {
      element: popupMain,
      property: 'transform.scale',
      expression: 'easeOutBack(t,0.2,0.8,300)'
     } //大小0.2-1
    ]
   },
   //300ms后结束执行此方法销毁动画
   res => {
    if (res.state === 'exit') {
     Binding.unbind({
      token: main_binding
     })
    }
   }
  )
 },
 //关闭弹窗
 collapse: function() {
  const popupMain = this.getEl(this.$refs.popup_main)
  const main_binding = Binding.bind(
    {
      eventType: 'timing',
      exitExpression: 't>300',
   props: [
     {
       element: popupMain,
       property: 'opacity',
       expression: 'linear(t,1,-1,300)'
        },
     {
       element: popupMain,
    property: 'transform.scale',
    expression: 'easeInBack(t,1,-1,300)'
     }
   ]
    },
    res => {
      if (res.state === 'exit') {
     Binding.unbind({
                   token: main_binding
     })
     // 监听一个全局事件
     uni.$emit('popupConfirm')
     // 执行完监听事件后回到上一路由
     uni.navigateBack()
   }
   }
  )
 },
}
4. 封装为公共方法全局调用
1. 新建until.js文件
const showPopup = (option) => {
 const resultOption = Object.assign({
  title: '提示',  //标题
  content: '', //内容
  confirmText: '确定' //按钮
 }, option)
 const data = JSON.stringify(resultOption)
 //这里注意将默认的动画设置为 none 防止和自己写的动画冲突
 uni.navigateTo({
  url: "../popup/popup?data=" + data,
  animationType: 'none'
 })
 //返回一个Promise
 return new Promise((resolve, reject) => {
  uni.$once("popupConfirm", () => {
   resolve()
  })
     //如有取消按钮格式保持一致就行
     ...
 })
}
export default showPopup
2. 在main.js引入此文件
import until from './common/js/until.js'
import Vue from 'vue'
//绑定到vue原型链中
Vue.prototype.showPopup = until
3. 在nvue页面中无法访问vue原型链 使用uniapp提供的globalData解决
//app.vue
onLaunch:function(){
    getApp().globalData.showPopup = this.showPopup
}
4. 最后你就可以在任何nvue页面中非常方便的调用了
xxxx: async function(){
    const option={
        //这里写需要自定义的文字啦
    }
    await getApp().globalData.showPopup(option)
    //由于使用了Promise 可以在下面写上你的回调啦
    uni.showToast({
        title: "你点击了确定按钮"
    })
    // 我没有加取消按钮 如果有可以这样子
    try{
        await getApp().globalData.showPopup(option)
        uni.showToast({
            title: "你点击了确定按钮"
        })
    }catch(e){
        uni.showToast({
            title: "你点击了取消按钮"
        })
    }

}
总结
理论上同样支持vue页面 且弹窗可以遮住小程序的导航栏和tabbar 没有试过哈哈哈 美中不足的地方,使用路由来实现有点重可能会有不知名冲突,但实在是没有别的方案可取
nvue中无法使用vue的原型链 就不能通过this的方式调用,不得不用globalData来实现也就多了一句代码~嘿嘿
❝最后 : 萌新第一次写文如有不足之处请多谅解 或者有更好的方案欢迎提出
❞
