

1. 引入资源
1. 引入静态html页面资源

注意资源的添加位置:
ThymeleafProperties有Thymeleaf具体的配置规则:
默认的前后缀:
classpath:/templates/
.html
所以把html页面放到classpath:/templates/,Thymeleaf就会自动帮我们将
字符串返回值。解析成:classpath:/templates/success.html页面。
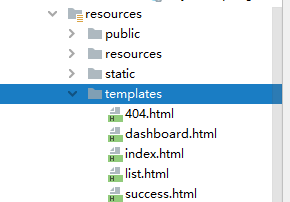
所以将静态html页面放在:
2. 引入实体类和dao层
2. 默认访问首页和国际化功能
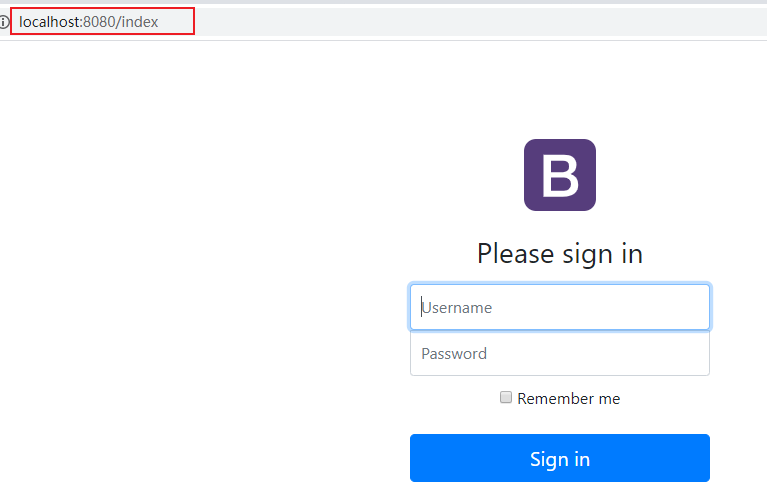
1. 第一个要求:默认访问到首页。
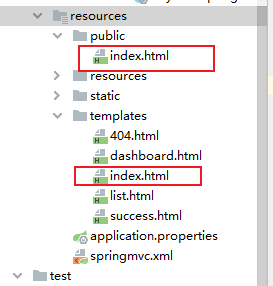
根据SpringBoot对静态资源的映射规则我们可以知道:
/**访问路径下,都会到这些文件夹下找内容:
"classpath:/META-INF/resources/",
"classpath:/resources/",
"classpath:/static/",
"classpath:/public/"
"/":当前项目的根路径
所以我们当前项目的默认访问首页是classpath:/static/index.html,不是
classpath:/templates/index.html。
2.1 实现默认访问classpath:/templates/login.html
1. 在controller中写一个方法,返回值是login
        @RequestMapping("/login")
        public String login(){
            return "login";
        }
        Thymeleaf会根据其具体的配置规则,将返回的字符串解析成:
        classpath:/templates/login.html
    2.  可以通过扩展SpringMVC的自动配置来添加一个视图映射:

        如果仅仅只是访问页面,不传数据的话,就可以配置一个试图映射,
        不用在controller在写空方法了。

        写法1:
        //所以的WebMvcConfigurer组件都会一起起作用
        @Bean //将组件注册到容器中
        public WebMvcConfigurer webMvcConfigurer(){
            WebMvcConfigurer configurer = new WebMvcConfigurer(){
                @Override
                public void addViewControllers(ViewControllerRegistry registry) {
                    registry.addViewController("/").setViewName("login");
                    registry.addViewController("/index.html").setViewName("login");
                }
            };
            return configurer;
        }
写法2:
        @Configuration
        public class MyConfig implements WebMvcConfigurer {
            //注意2.0以上不再实现WebMvcConfigurerAdapter

            //添加一个自定义的视图映射
            @Override
            public void addViewControllers(ViewControllerRegistry registry) {
                //定义规则:哪些请求访问哪些页面。
                registry.addViewController("/login").setViewName("login");
            }
        }
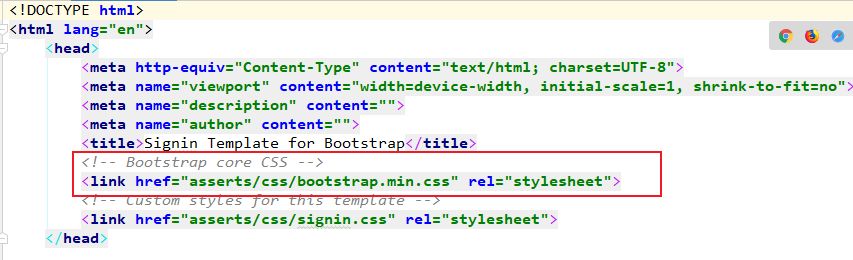
    3.  将静态页面中引入的公共资源,通过webjars引入:

        1.将此处的bootstrap通过webjars引入到项目:
            <dependency>
                <groupId>org.webjars</groupId>
                <artifactId>bootstrap</artifactId>
                <version>4.5.0</version>
            </dependency>
        2.将模版引擎的代码提示引入到资源表头:
        html xmlns:th="http://www.thymeleaf.org

3.用模版引擎的表达式将bootstrap引入到资源中
SpringBoot对webjars静态资源的映射规则:
所有/webjars/**请求, 都去classpath:/META-INF/resources/webjars/找资源.
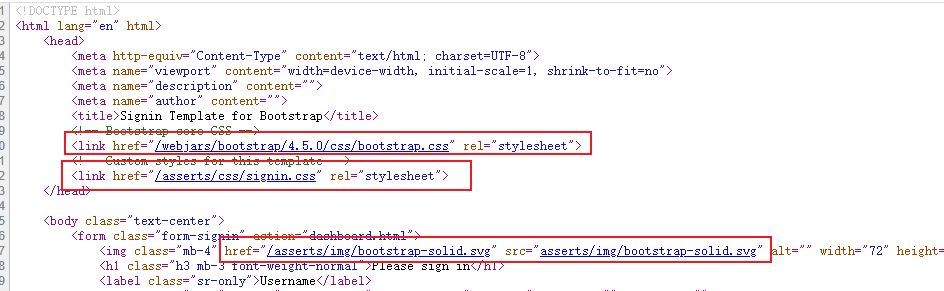
所以我们用Thymleaf语法中的th表达式语法将webjars引入到静态资源中:
th:href@{...} 将原先元素中的href属性替换掉。
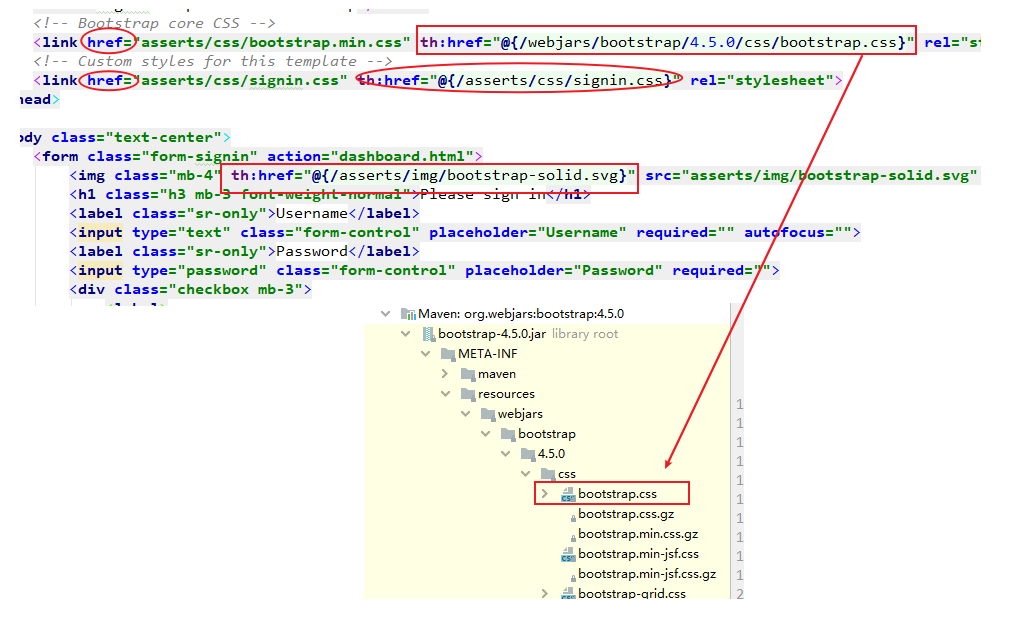
发现原来login.html源码中的href属性被th:href="@{}"给替换了。
        4.  再加一个项目路径

            在主配置文件中加一个项目路径:

            server.servlet.context-path=/crud
2.2 实现登录页面的国际化
即通过浏览器的语言信息来动态显示页面的国际化效果。
1. 以前的SpringMVC实现步骤
1. 编写国际化配置文件
2.使用ResourceBundleMessageSource管理国际化资源文件
3.在页面使用fmt:message取出国际化
2. SpringBoot步骤
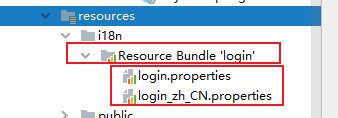
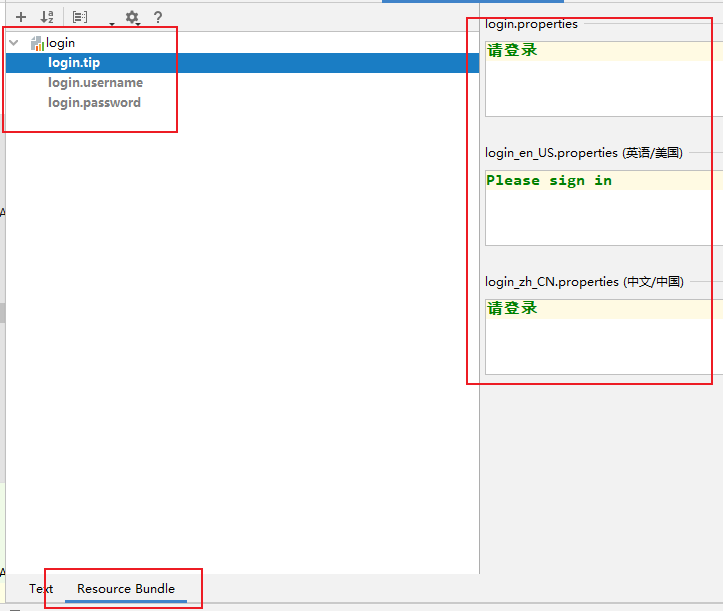
1.编写国际化配置文件,抽取页面需要显示的国际化消息。
login.propertise
login_zh.CN.propertise
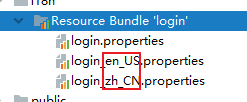
此时SpringBoot会发现我们想要做国际化配置文件,SpringBoot帮我们切换到
国际化视图。会将我们刚才写的两个配置文件加到Resource Bundle 'login'目录下:
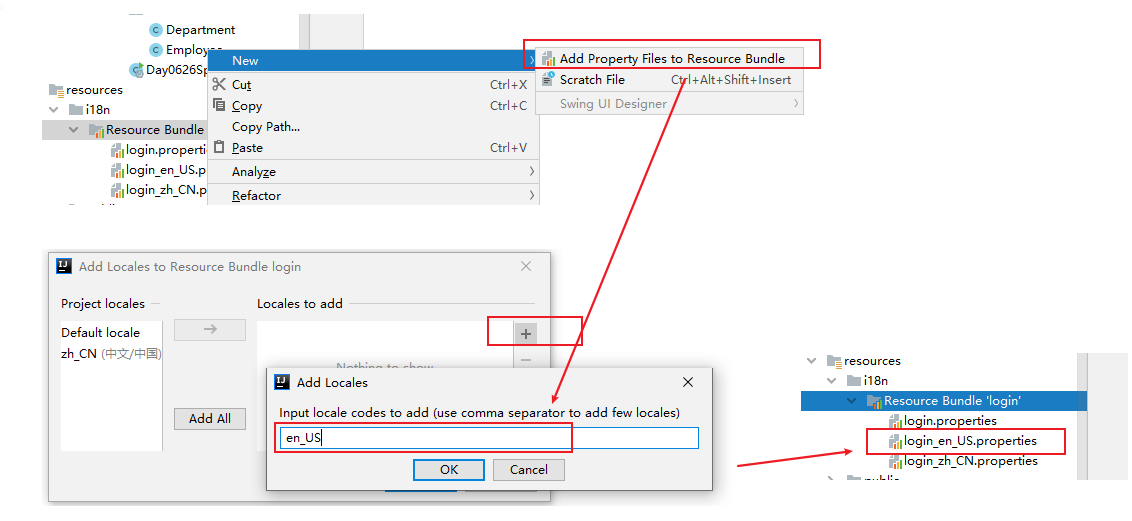
            此时我们在添加一个英文的国际化文件:就会有一个
            Add Properties Files to Resources Bundle选项

            我们按照如下步骤,就会得到一个英文的国际化文件。
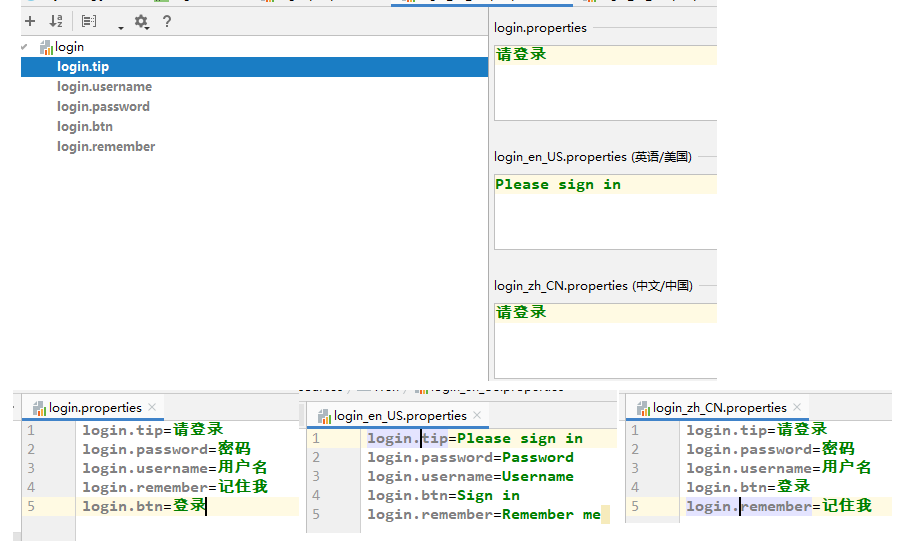
        2. 编写配置

            为相关显示信息配置国际化
SpringBoot提供的了一个国际化的配置视图:
配置文件编写好了:最后得到效果
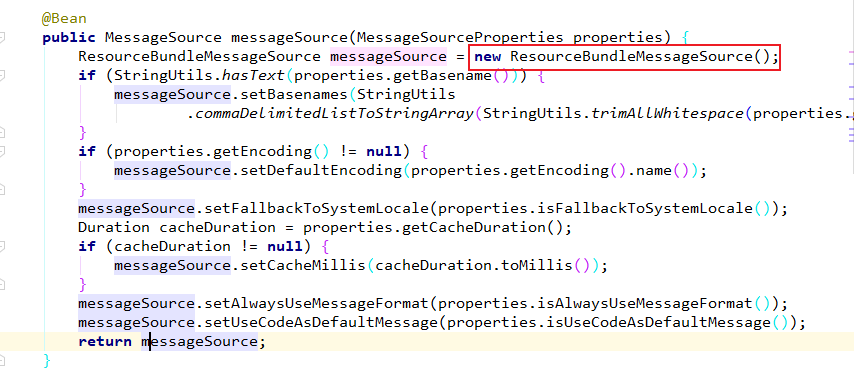
    3.  SpringBoot自动配置好了管理国际化资源文件的组件。

        MVC时还需要使用ResourceBundleMessageSource管理国际化资源文件。SpringBoot
    为我们配置好了相应的这个配置。

        相应的自动配置类是:MessageSourceAutoConfiguration。源码中正好有相关类的
    实例化:new ResourceBundleMessageSource()
    4.  既然自动配置好了,那么我们写的配置文件就要满足自动配置的条件,这样自动配置
        才能生效。

        分析一下源码:
public class MessageSourceAutoConfiguration {

	private static final Resource[] NO_RESOURCES = {};

	@Bean
	@ConfigurationProperties(prefix = "spring.messages")
	public MessageSourceProperties messageSourceProperties() {
		return new MessageSourceProperties();
	}

	@Bean
	public MessageSource messageSource(MessageSourceProperties properties) {
		ResourceBundleMessageSource messageSource = new ResourceBundleMessageSource();
		if (StringUtils.hasText(properties.getBasename())) {
			messageSource.setBasenames(StringUtils
					.commaDelimitedListToStringArray(StringUtils.trimAllWhitespace(properties.getBasename())));
		}
		if (properties.getEncoding() != null) {
			messageSource.setDefaultEncoding(properties.getEncoding().name());
		}
		messageSource.setFallbackToSystemLocale(properties.isFallbackToSystemLocale());
		Duration cacheDuration = properties.getCacheDuration();
		if (cacheDuration != null) {
			messageSource.setCacheMillis(cacheDuration.toMillis());
		}
		messageSource.setAlwaysUseMessageFormat(properties.isAlwaysUseMessageFormat());
		messageSource.setUseCodeAsDefaultMessage(properties.isUseCodeAsDefaultMessage());
		return messageSource;
	}
        1.设置国际化配置文件的基础名:

        国际化配置文件的基础名是:去掉语言和国家
            login.properties

2. 点击properties.getBasename()看一下:
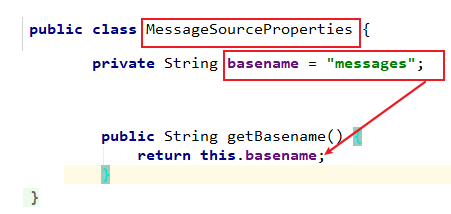
        3. 发现国际化配置文件的基础名被改成了:messgaes

        意味着我们的配置文件应当放在类路径下叫:messages.properties

        这样我们就能满足自动配置类的要求,也即不用再配置其他就能用到国际化自动配置
        类的功能了。

        4. prefix = "spring.messages"
        我们下面就可以用spring.messages.basename来设置基础名:

        因为spring.messages是前缀prefix
        basename是MessageSourceProperties中的属性
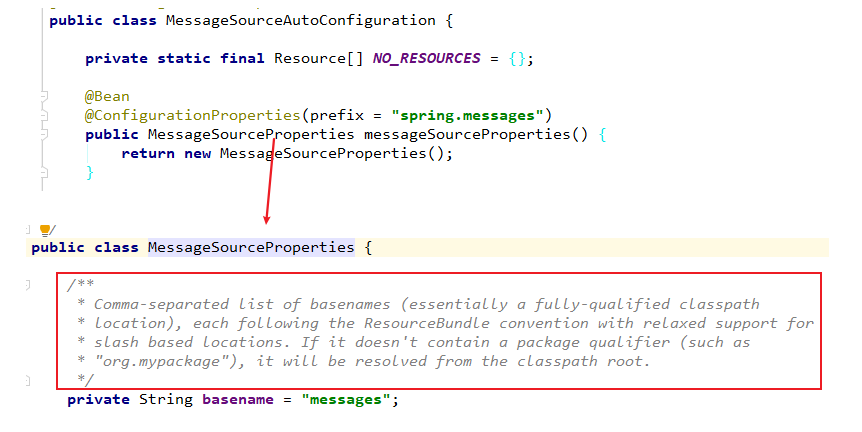
        MessageSourceProperties中basename属性上的注释:
        基础名可以包含一个指定的包名,如果不包含将从类路径的根目录下寻找。

    5. 配置基础名
            #指定期初名
            spring.messages.basename=i18n.login
这样我们就将原来自动配置要求的spring.messages.basename=messages改成了
我们的login.properties。
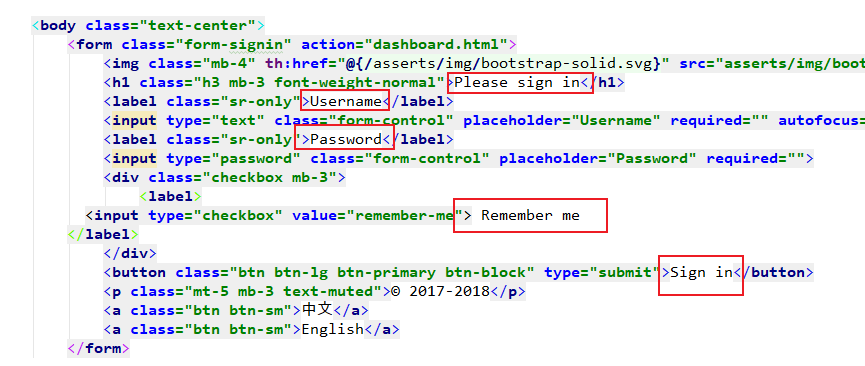
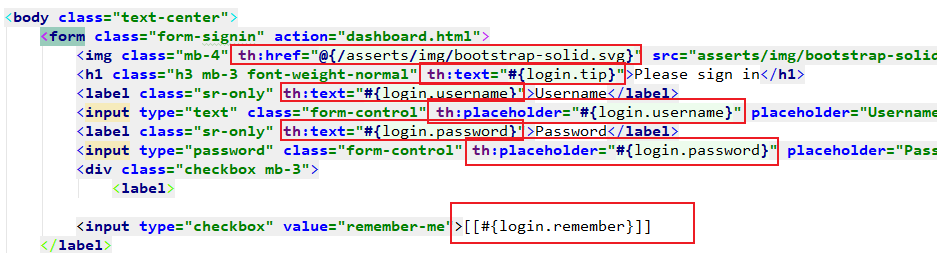
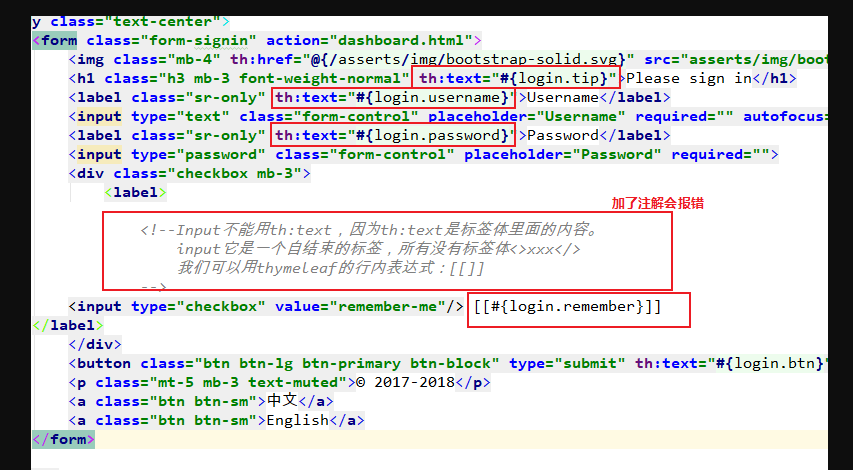
6. login.html页面获取国际化的值
Tymeleaf中的#{} 表达式就是取国际化信息的。
将页面的文本信息用th:text="#{login.xxx}替换掉。
注意:input框中的信息替换:
Input不能用th:text,因为th:text是标签体里面的内容。
input它是一个自结束的标签,所有没有标签体<>xxx</>
我们可以用thymeleaf的行内表达式:[[]]
<input type="checkbox" value="remember-me"/> [[#{login.remember}]]
placeholder="Password"也要被th:placeholder="#{}"替换
7. 测试访问一下
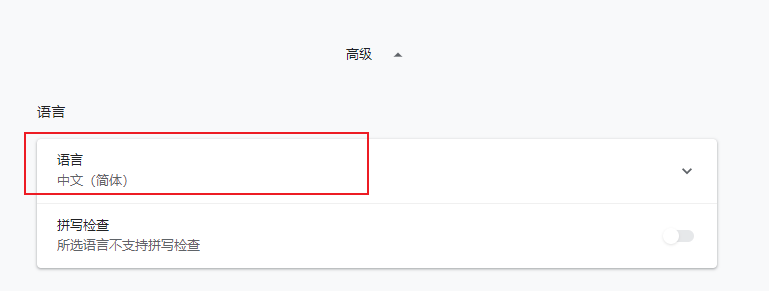
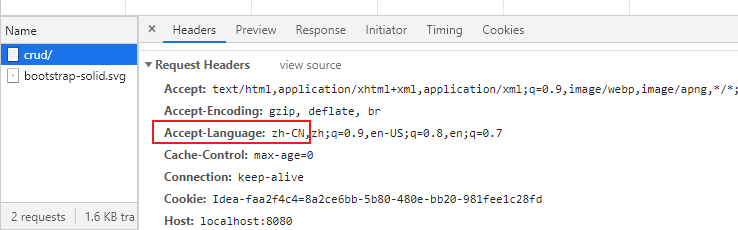
1. 浏览器的语言:
2. 这里有一个很奇怪的报错,原因是我在html页面中加了注解:

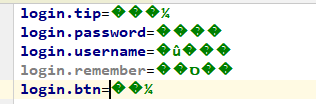
3. 测试一下国际化效果:出现乱码
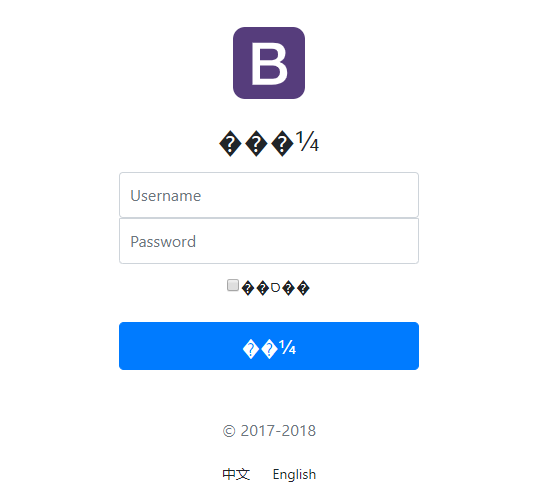
原因是login.properties中写的是中文,而IDEA没有给我们进行编码,那么
login.properties中的中文最终都要转成ASCII码。
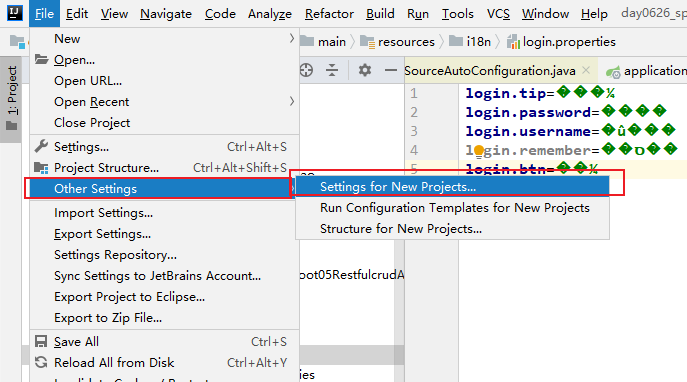
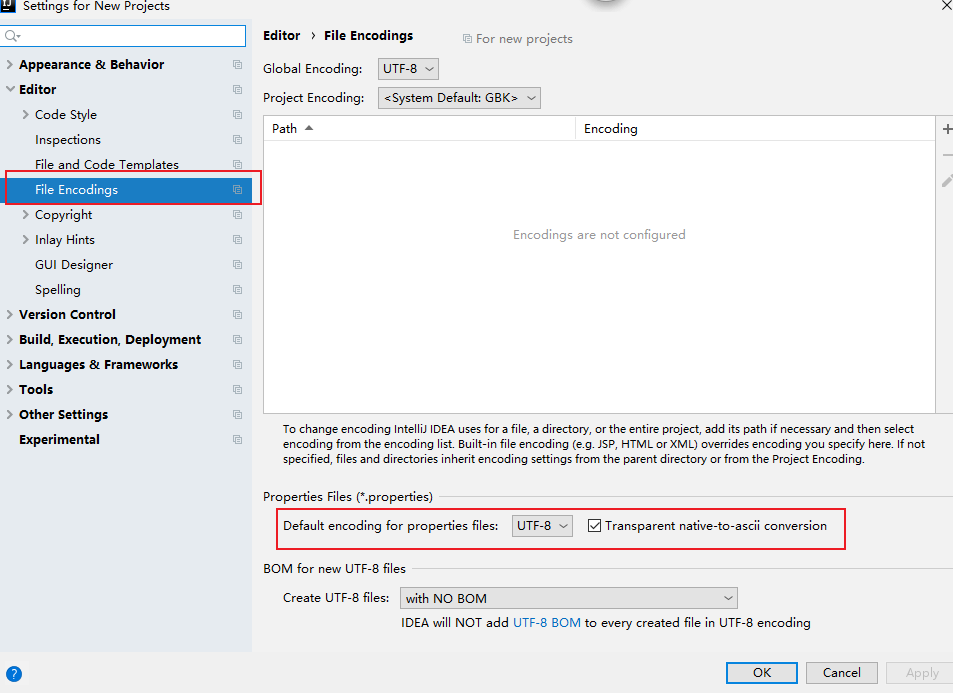
4. 我们需要在IDEA中设置一下编码:
UTF-8,并且自动转ASCII码
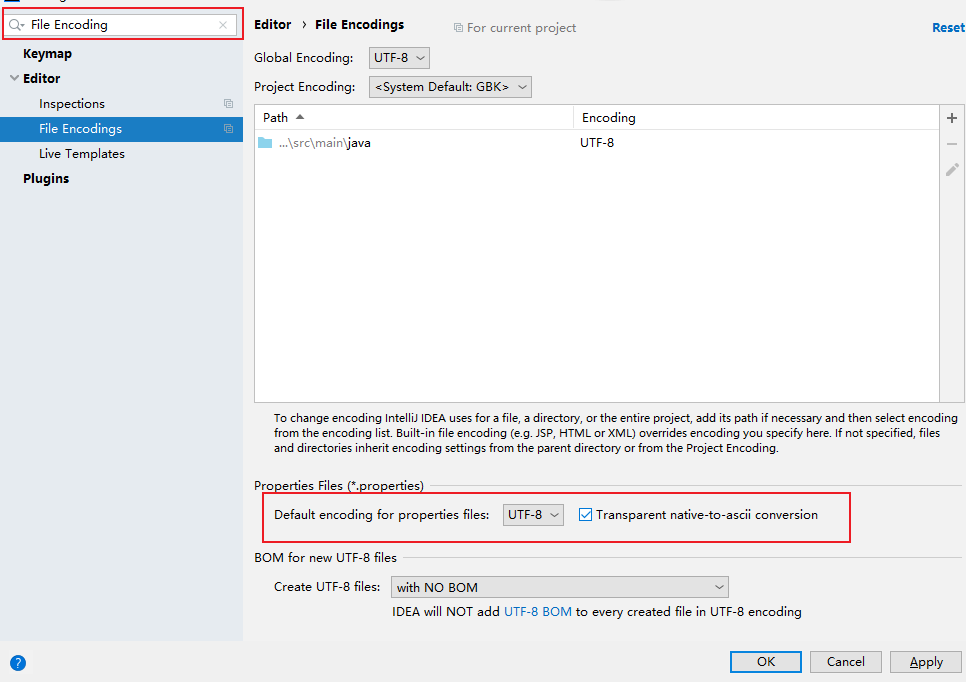
我们之前在其他项目设置过了编码,却发现properties中的文件有乱码了。
因为setting里面的设置只是对当前项目的设置,我们设置一下全局的。
我们在将login.properties中的中文重新编写一下。
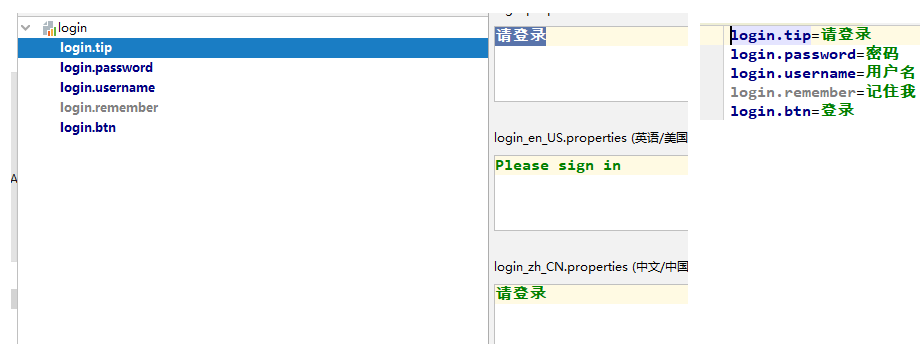
5. 再来测试一下;
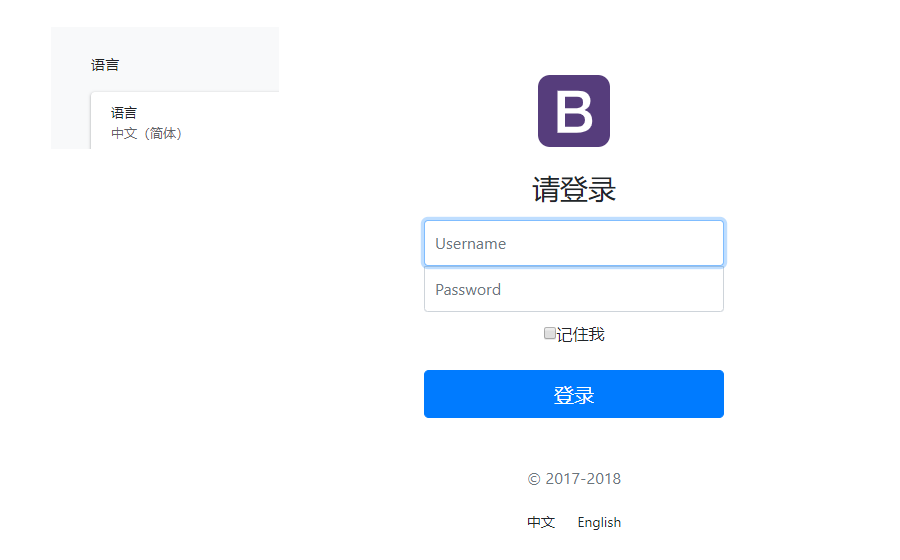
8. 实现的效果:
根据浏览器语言设置的信息切换了国际化。
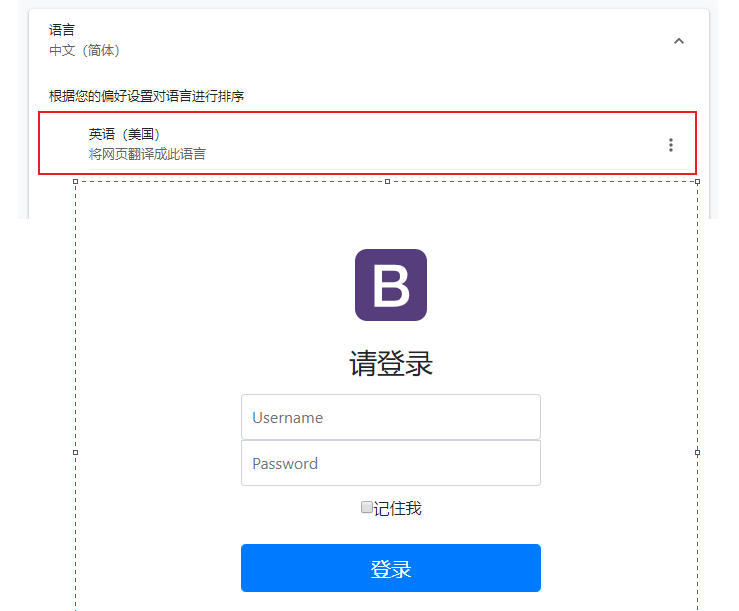
9. 改进
1. 分析
希望点击页面上的中文求切换成中文页面,点击English切换成英文页面。
这根我们SpringMVC中的一个原理有关。
国际化之所以有效果,是因为有一个国际化对象Locale(区域信息对象);获取区
域信息对象时有一个组件LocaleResolver区域信息解析器(获取区域信息对象)
发现WebMvcAutoConfiguraton其中配置的有LocaleResolver
所以SpringBoo也默认配置了区域信息解析器:
		@Bean
		@ConditionalOnMissingBean
		@ConditionalOnProperty(prefix = "spring.mvc", name = "locale")
		public LocaleResolver localeResolver() {
			if (this.mvcProperties.getLocaleResolver() == WebMvcProperties.LocaleResolver.FIXED) {
				return new FixedLocaleResolver(this.mvcProperties.getLocale());
			}
			AcceptHeaderLocaleResolver localeResolver = new AcceptHeaderLocaleResolver();
			localeResolver.setDefaultLocale(this.mvcProperties.getLocale());
			return localeResolver;
		}
        默认的区域信息解析器就是根据请求头带来的区域信息获取Locale(区域信息对象)
        进行国际化。
        2. 改进

        我们在链接上携带区域信息

        我们可以自己来写一个localeResolver,让他来根据我们点击相关按钮来进行语言切换。
    public class MyLocaleResolver implements LocaleResolver {
        @Override
        public Locale resolveLocale(HttpServletRequest httpServletRequest) {
            String l = httpServletRequest.getParameter("l");
            System.out.println(l);

            //如果没有指定语言参数,就用系统默认的从请求头获取区域信息来实例化区域对象
            Locale locale = Locale.getDefault();
            if(!StringUtils.isEmpty(l)){
                String[] split = l.split("-");
                //根据链接上携带的区域信息,实例化区域对象
                locale = new Locale(split[0], split[1]);
            }
            return locale;
        }

        @Override
        public void setLocale(HttpServletRequest httpServletRequest, HttpServletResponse httpServletResponse, Locale locale) {

        }
    }
再将区域对象加到IOC中
        @Configuration
        public class MyConfig implements WebMvcConfigurer {
            //注意2.0以上不再实现WebMvcConfigurerAdapter

            //将我们的区域解析器加到IOC中
            @Bean
            public LocaleResolver localeResolver(){
                return new MyLocaleResolver();
            }
        }
10 实现国际化效果。

3. 登录功能
3.1 登录验证
    简化操作,不查询数据库。用户名不为空,密码为123456即可登录

    1. LoginController
@Controller
public class LoginController {

    //@RequestMapping(value = "/user/login", method = RequestMethod.POST)
    @PostMapping(value = "/user/login")  //代替上面的注解
    public String login(@RequestParam("username") String username,
                        @RequestParam("password") String password,
                        Map<String, Object> map){

        if(!StringUtils.isEmpty(username) && "123456".equals(password)){
            //登陆成功:来到主页
            return "dashboard";
        }else{
            //登录失败:显示错误提示
            map.put("msg", "用户名或密码错误");
            return "login";
        }

        //返回值会被模版引擎解析成:类路径下/templates.dashboard.html

    }
}
    @RequestMapping(value = "/user/login", method = RequestMethod.POST)
    @PostMapping(value = "/user/login")
    这两个注解效果一样。

    返回值会被模版引擎解析成:类路径下/templates.dashboard.html
    return "dashboard";
3.2 开发技巧:实现及时的更新更改的html页面
        1.模版引擎的缓存要关掉
        spring.thymeleaf.cache=false
        2.再在更改的html上:Ctrl+F9重新编译一下。

        实现了实时更新html页面。
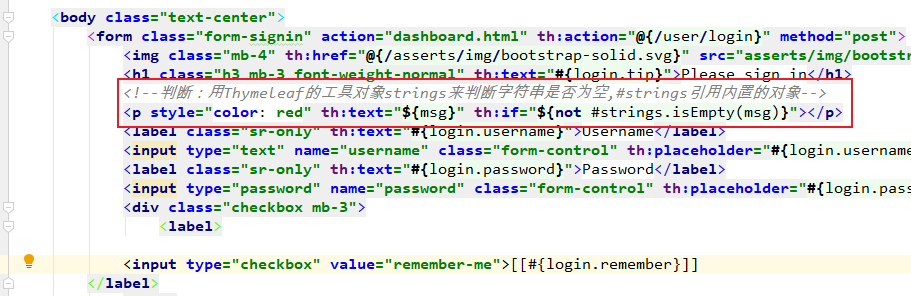
3.3 前台页面显示提示信息
    判断:用Thymeleaf的工具对象strings来判断字符串是否为空,#strings引用内置的对象。
    如果msg不为空,则显示提示信息。
<p style="color: red" th:text="${msg}" th:if="${not #strings.isEmpty(msg)}"></p>
3.4 来到成功页面
3.4.1 解决表单重复提交
    1.  注意一个现象:表单重复提交
        刷新成功页面,会提示重新提交表单:
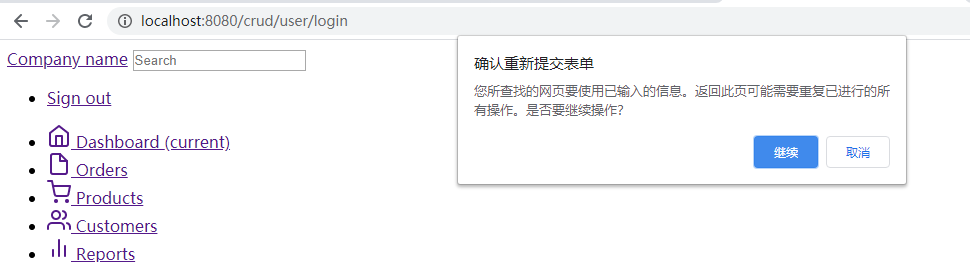
2. 原因
由于我们登录时发送的是user/login,Post请求。验证成功后,转发到了成功页面dashboard.html。
但是地址栏还是user/login
所以我们刷新页面发送的还是上一次的登录请求,表单重复提交又进行了一次登录验证。
防重复提交:
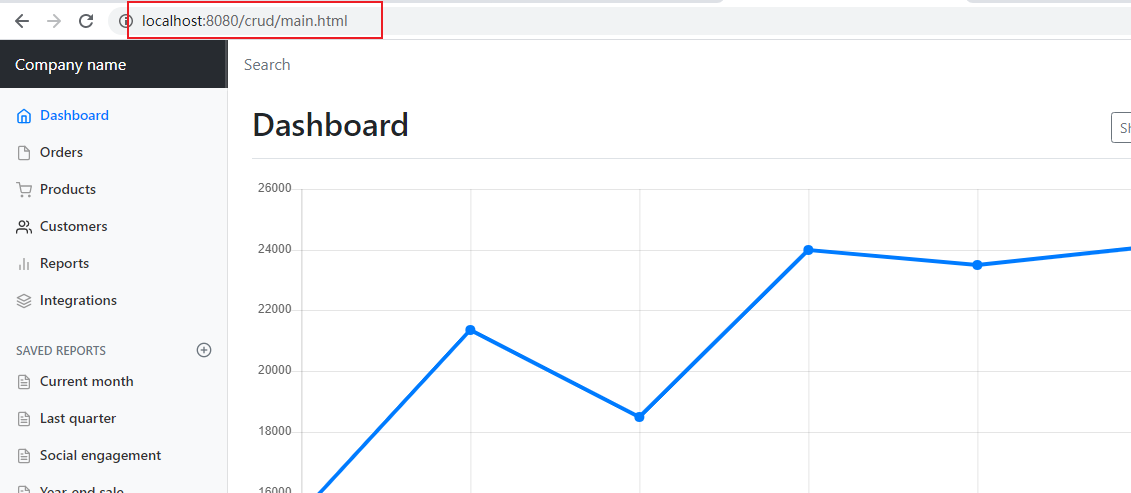
重定向来到我们的成功页面。
3. LoginController
登陆成功:防止表单重复提交,可以重定向到我们的主页
return "redirect:/main.html";
    @PostMapping(value = "/user/login")
    public String login(@RequestParam("username") String username,
                        @RequestParam("password") String password,
                        Map<String, Object> map){

        if(!StringUtils.isEmpty(username) && "123456".equals(password)){
            //登陆成功:防止表单重复提交,可以重定向到我们的主页
            return "redirect:/main.html";
        }else{
            //登录失败:显示错误提示
            map.put("msg", "用户名或密码错误");
            return "login";
        }
    }
        在定义一个视图解析:
        main.html --- > dashboard.html
@Bean
public WebMvcConfigurer webMvcConfigurer(){
    WebMvcConfigurer configurer = new WebMvcConfigurer(){
        @Override
        public void addViewControllers(ViewControllerRegistry registry) {
            registry.addViewController("/main.html").setViewName("dashboard");
        }
    };
    return configurer;
}
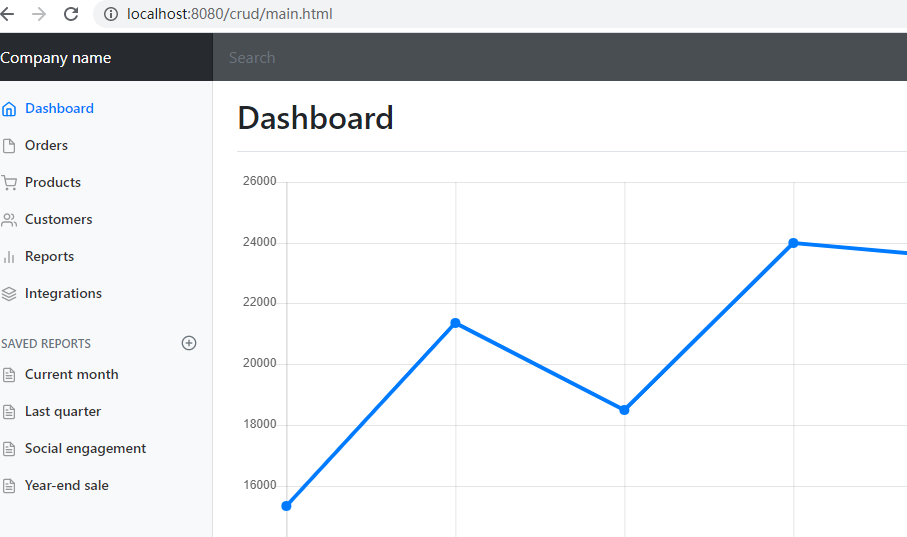
4. 成功页面
3.4.2 拦截器进行登录检查
    1.  我可以直接访问/main.html,就会直接来到成功页面,跳过了登录验证。

    2.  修改LoginController:将登录的用户放到session
@Controller
public class LoginController {

    @PostMapping(value = "/user/login")
    public String login(@RequestParam("username") String username,
                        @RequestParam("password") String password,
                        Map<String, Object> map, HttpSession session){

        if(!StringUtils.isEmpty(username) && "123456".equals(password)){

            //将登录用户放到session中,拦截器获取,来进行拦截。
            session.setAttribute("loginUser", username);

            //登陆成功:防止表单重复提交,可以重定向到我们的主页
            return "redirect:/main.html";
        }else{
            //登录失败:显示错误提示
            map.put("msg", "用户名或密码错误");
            return "login";
        }
    }
}
    3.  我们用拦截器进行登录检查:获取session是否有登录用户
        编写一个拦截器:LoginHandlerInterceptor
public class LoginHandlerInterceptor implements HandlerInterceptor {

    //目标执行之前,执行该方法
    @Override
    public boolean preHandle(HttpServletRequest request, HttpServletResponse response, Object handler) throws Exception {
        Object user = request.getSession().getAttribute("loginUser");
        if(user == null){
            //未登录,返回登录页面
            request.setAttribute("msg", "没有权限请先登录");
            request.getRequestDispatcher("/index.html").forward(request, response);
            return false;
        }else{
            //已登录,放行请求
            return true;
        }

    }

    @Override
    public void postHandle(HttpServletRequest request, HttpServletResponse response, Object handler, ModelAndView modelAndView) throws Exception {

    }

    @Override
    public void afterCompletion(HttpServletRequest request, HttpServletResponse response, Object handler, Exception ex) throws Exception {

    }
}
4. 在自定义配置中:加载该拦截器
@Bean
public WebMvcConfigurer webMvcConfigurer(){
    WebMvcConfigurer configurer = new WebMvcConfigurer(){
        //配置视图解析器
        @Override
        public void addViewControllers(ViewControllerRegistry registry) {
            registry.addViewController("/").setViewName("login");
            registry.addViewController("/index.html").setViewName("login");
            registry.addViewController("/main.html").setViewName("dashboard");
        }

        //配置拦截器
        @Override
        public void addInterceptors(InterceptorRegistry registry) {
            registry.addInterceptor(new LoginHandlerInterceptor()).addPathPatterns("/**")
                    .excludePathPatterns("/index.html","/","/user/login");
        }

        //配置静态资源
        @Override
        public void addResourceHandlers(ResourceHandlerRegistry registry) {
            registry.addResourceHandler("/**").addResourceLocations("classpath:/static/");
        }
    };
    return configurer;
}
    注意:
        1.拦截任意多层路径下的任意请求,排除掉访问登录请求,和验证请求。
registry.addInterceptor(new LoginHandlerInterceptor()).addPathPatterns("/**")
        .excludePathPatterns("/index.html","/","/user/login");
       2.注意静态资源的释放:
       静态资源:以前SpringBoot已经做好了静态资源的映射,new WebMvcConfigurerAdapter()
       时不用我们再来处理了。

       但是WebMvcConfigurerAdapter在SpringBoot2.0就已经被淘汰了,此时我们
       new WebMvcConfigurer()不是new WebMvcConfigurerAdapter(),所以我们
       要重写一个方法来释放静态资源
@Override
public void addResourceHandlers(ResourceHandlerRegistry registry) {
    registry.addResourceHandler("/**").addResourceLocations("classpath:/static/");
}
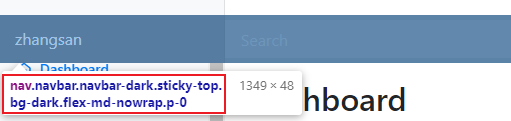
5. 将Company name改成登录用户

6. 测试效果
4. CRUD员工列表
4.1 Restful风格
实验要求:
    1). RestfulCRUD:CRUD要满足Rest风格--请求的URL看起来很清爽
        URL格式:/资源名称/资源标识 HTTP请求方式来区分对资源的CRUD操作
| 普通的CRUD(uri来区分操作) | RestfulCRUD | |
|---|---|---|
| 查询 | getEmp | emp---GET |
| 添加 | addEmp?xxx | emp---POST |
| 修改 | updateEmp?id=xx&xxx=xxx | emp/{id}---PUT |
| 删除 | deleteEmp?id=1 | emp/{id}---DELETE |
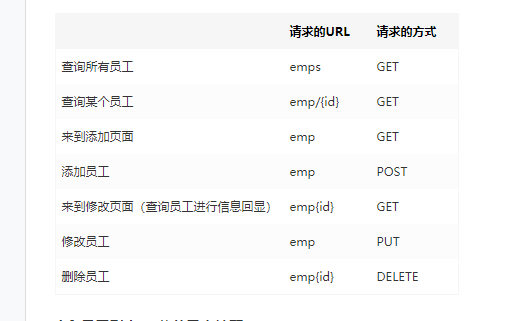
2). 实验的Restful架构
| 请求的URL | 请求的方式 | |
|---|---|---|
| 查询所有员工 | emps | GET |
| 查询某个员工 | emp/{id} | GET |
| 来到添加页面 | emp | GET |
| 添加员工 | emp | POST |
| 来到修改页面(查询员工进行信息回显) | emp{id} | GET |
| 修改员工 | emp | PUT |
| 删除员工 | emp{id} | DELETE |
4.2 员工列表---公共元素抽取
4.2.1 抽取方法一 ~{templatename::selector}
    thymeleaf公共页面元素抽取

1. 抽取公共片段
<div th:fragment="copy">
© 2011 The Good Thymes Virtual Grocery
</div>
2. 引入重用片段
    <div th:insert="~{footer :: copy}"></div>

    ~{templatename::selector}:模板名::选择器
    ~{templatename::fragmentname}:模板名::片段名
3. 默认效果:
    insert的公共片段在div标签中
    如果使用th:insert等属性进行引入,可以不用写~{}:
    行内写法可以加上:[[~{}]];[(~{})];
4.  示例:

    主页的头部栏
查询员工的头部栏

所以我们要将公共代码部分抽取出来
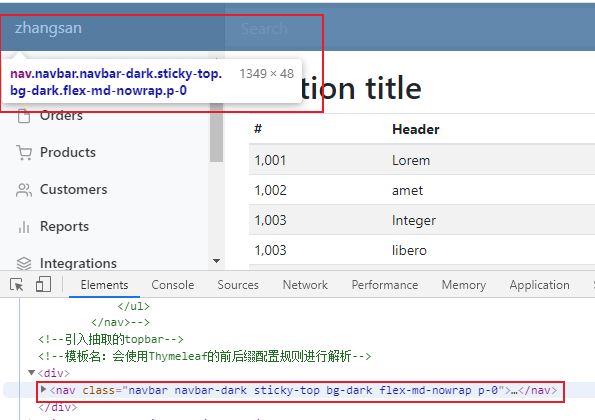
1. 从dashboard.html页面抽取<nav></nav>中的公共代码
th:fragment="topbar"

        2. 将抽取出来的公共部分,在list.html引入
            <div th:insert="~{dashboard::topbar}"></div>
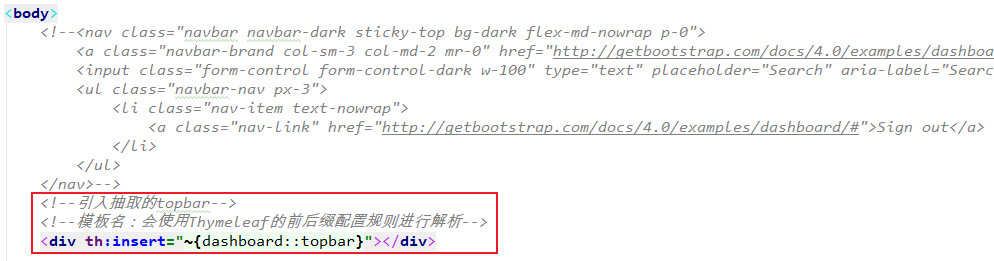
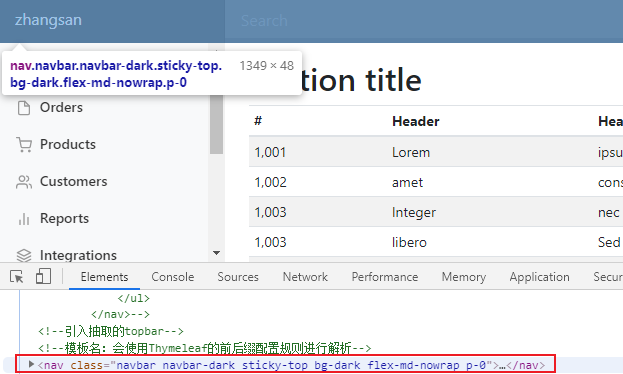
    注意:得到的效果是,抽取出的公共代码片段在引入的页面里被<div/>包了起来。
          结果是要引入这个代码段的页面和原来相比多了一个</div>。

          可能会在将来的对其他元素造成影响。
5.  将其真正抽取出来
    三种引入公共片段的th属性
    1.  th:insert
        将公共片段整个插入到声明引入的元素(<div/>)中
    2.  th:include
        将声明引入的元素<div/>替换为公共片段
    3.  th:replace
        将被引入的片段的内容包含进这个标签中
<footer th:fragment="copy">
© 2011 The Good Thymes Virtual Grocery
</footer>
引入方式
<div th:insert="footer :: copy"></div>
<div th:replace="footer :: copy"></div>
<div th:include="footer :: copy"></div>
效果
<div>
<footer>
© 2011 The Good Thymes Virtual Grocery
</footer>
</div>
<footer>
© 2011 The Good Thymes Virtual Grocery
</footer>
<div>
© 2011 The Good Thymes Virtual Grocery
</div>
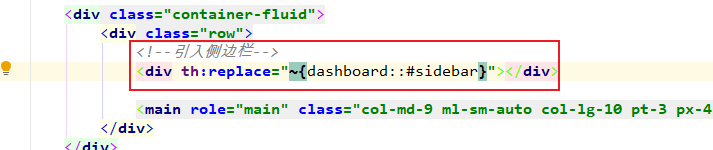
6. 所以我们这里引入公共代码片段应该用replace
这里就不会出现<div/>标签了
4.2.1 抽取方法二 选择器selector
1. dashboard.html

2. list.html
4.2.3 引入代码片段时传入参数
需求效果:动态高亮点击选项
    1.  将可以公共音容的片段都放入commons文件夹中

    将公共代码抽取出来放到commons文件夹bar.html种

2. 引入公共代码部分
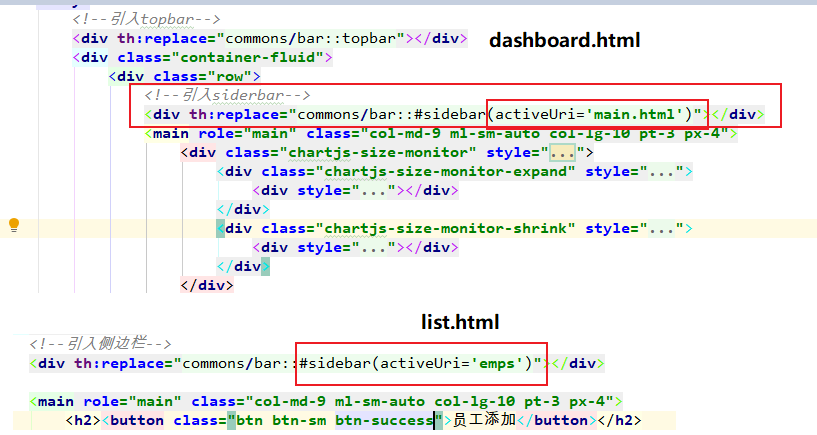
1. dashboard.html
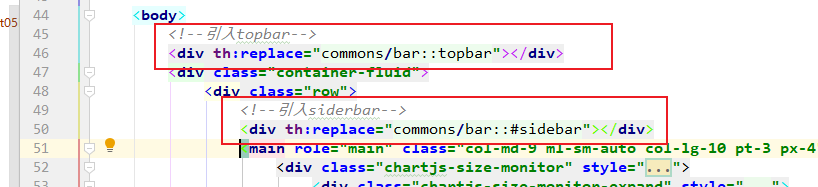
2. list.html
3. 引入代码片段时传入参数
实现动态高亮点击的选项。
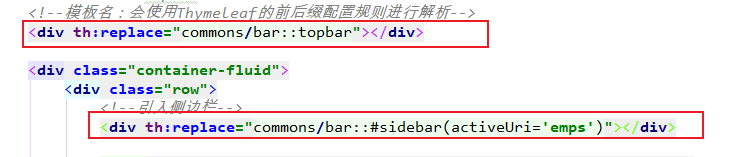
1. 在templates/commons/bar.html 中的公共代码片段定义一个参数
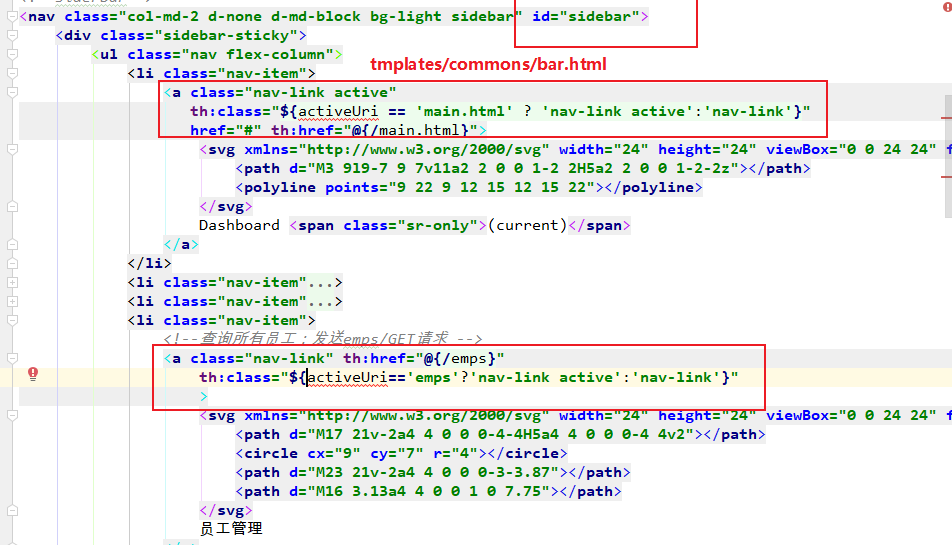
2. 在引入公共代码片段的地方传入这个参数
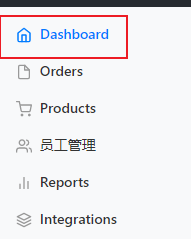
点击Dashboard会跳转到dashboard.html,其中引入了bar中的sider部分,
并传入activerUri参数。参数满足bar.html的条件时,就能激活active样式。
同理点击员工管理时,跳转到list.html时也在引入siderbar时,传入参数。
这样点击谁,就能动态的实现高亮样式。
4.3 实现查询所有
1. EmployeeController
    //查询所有员工返回列表页面
    @GetMapping("/emps")
    public String list(Model model){

        Collection<Employee> employees = employeeDao.getAll();

        //放在请求域中
        model.addAttribute("emps", employees);

        //thymeleaf默认拼串:classpath:/templates/   +  emp/list  + .html
        return "emp/list";

    }
2. list.html
<table class="table table-striped table-sm">
<thead>
	<tr>
		<th>#</th>
		<th>lastName</th>
		<th>email</th>
		<th>gender</th>
		<th>department</th>
		<th>birth</th>
		<th>操作</th>
	</tr>
</thead>
<tbody>
	<tr th:each="emp:${emps}">
		<td th:text="${emp.id}"></td>
		<td th>[[${emp.lastName}]]</td>
		<td th:text="${emp.email}"></td>
		<td th:text="${emp.gender}==0?'女':'男'"></td>
		<td th:text="${emp.department.departmentName}"></td>
		<td th:text="${#dates.format(emp.birth, 'yyyy-MM-dd HH:mm')}"></td>
		<td>
			<button class="btn btn-sm btn-primary">编辑</button>
			<button class="btn btn-sm btn-danger">删除</button>
		</td>
	</tr>
</tbody>
</table>
4.4 员工添加 -- 配置日期格式转换
注意:提交生日日期时,提交的数据格式不对

    2017-12-12; 2016/12/12; 2020.12.12

    日期格式的转换:
        SpringMVC将页面提交的值需要转换为指定的类型。
        默认的日期转换格式时:
        2016/12/12  --- Date


    查看WebMvcProperties中的属性配置
	public static class Format {

		/**
		 * Date format to use, for example `dd/MM/yyyy`.
		 */
		private String date;

		/**
		 * Time format to use, for example `HH:mm:ss`.
		 */
		private String time;

		/**
		 * Date-time format to use, for example `yyyy-MM-dd HH:mm:ss`.
		 */
		private String dateTime;

	}
    所以SpringBoot中默认的日期格式转换是:
        yyyy/MM/dd ---> Date
        yyyy-MM-dd HH:mm:ss ----> dateTime

配置成我们需要的日期格式转换:

4.5 员工修改
    注意:此案例中员工修改也在add.html页面

    1.点击编辑按钮,发送带id参数的请求:
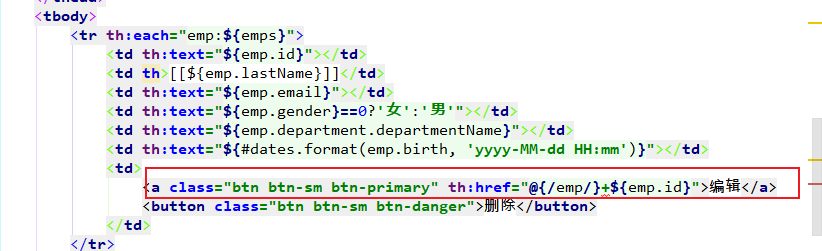
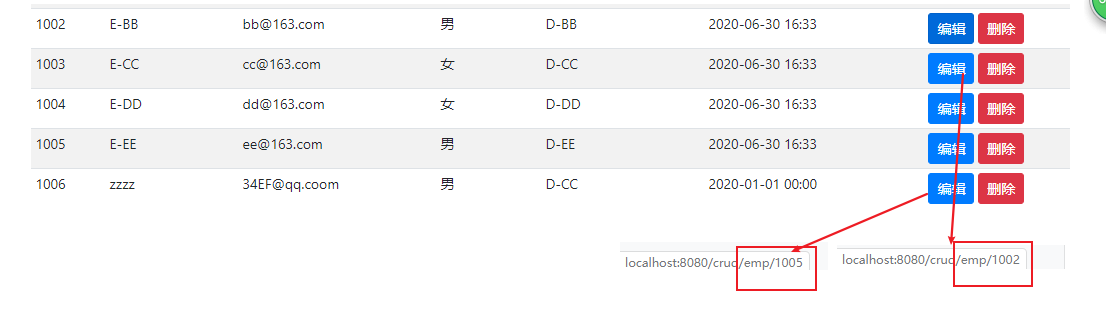
2.在controller取出该id参数,并根据参数查询出employee
public String toEditPage(@PathVariable("id") Integer id, Model model)
        //来到修改页面,查出当前员工,在页面显示
        @GetMapping("/emp/{id}")
        public String toEditPage(@PathVariable("id") Integer id, Model model){
            Employee employee = employeeDao.get(id);

            model.addAttribute("emp", employee);

            //回到编辑页面
            return "emp/edit";
        }
3. 在编辑页面显示该员工原本的信息。

页面效果:
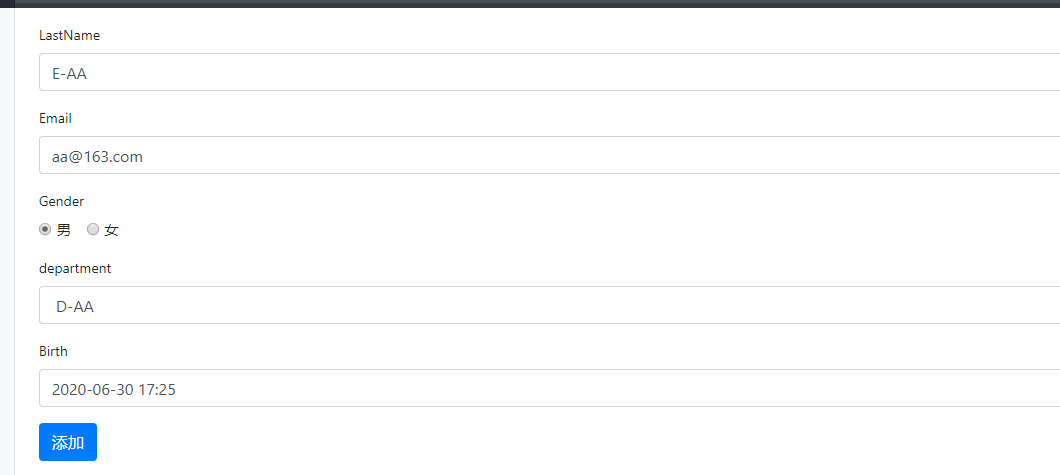
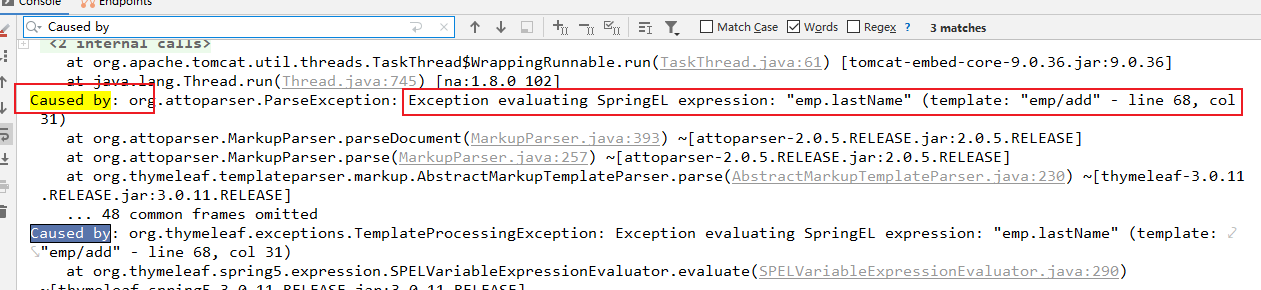
    4. 由于添加和修改操作都在add.html页面。

    所以此时我们再点击添加操作时,add.html也会执行我们刚才在编辑操作中加入的操作:
    显示各种属性。
    但是此时各奔就没有传过来emp对象,所以报错。
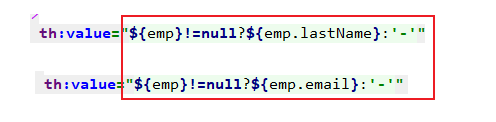
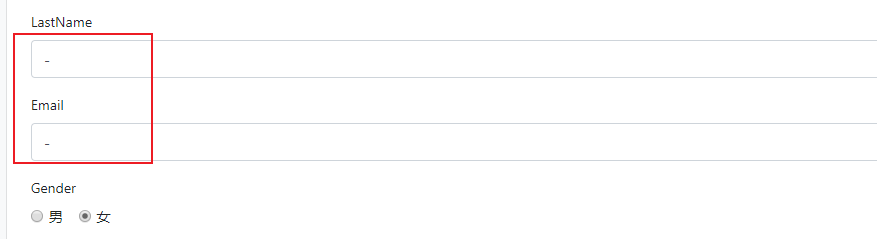
    5.  判断是添加操作还是修改操作:
        判断依据:
            添加操作:没有传过来emp对象
            修改操作:传过来emp对象
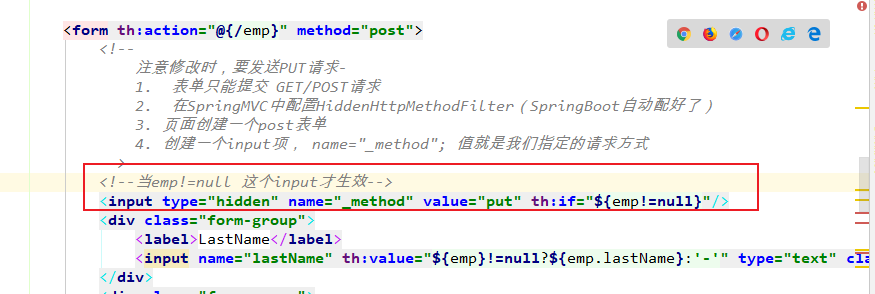
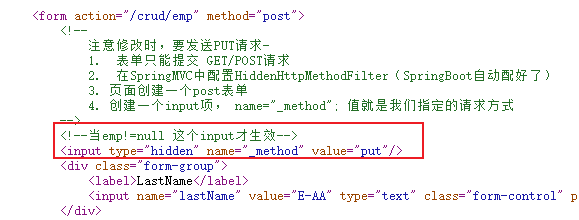
4.6 员工修改---PUT请求
    1.  表单只能提交 GET/POST请求

    2.  在SpringMVC中配置HiddenHttpMethodFilter()

        SpringBoot自动配配置的是关闭:
        spring.mvc.hiddenmethod.filter.enabled=false

        所以要在主配置文件中开启:
        spring.mvc.hiddenmethod.filter.enabled=true

    3. 页面创建一个post表单

    4. 在提交的表单中创建一个input项, name="_method" value="put"; 值就是我们指定的请求方式

    5.  写一个hidden input
查看修改时的源码了。
        发现页面修改生效了。

    6.  提交员工的id保存修改操作
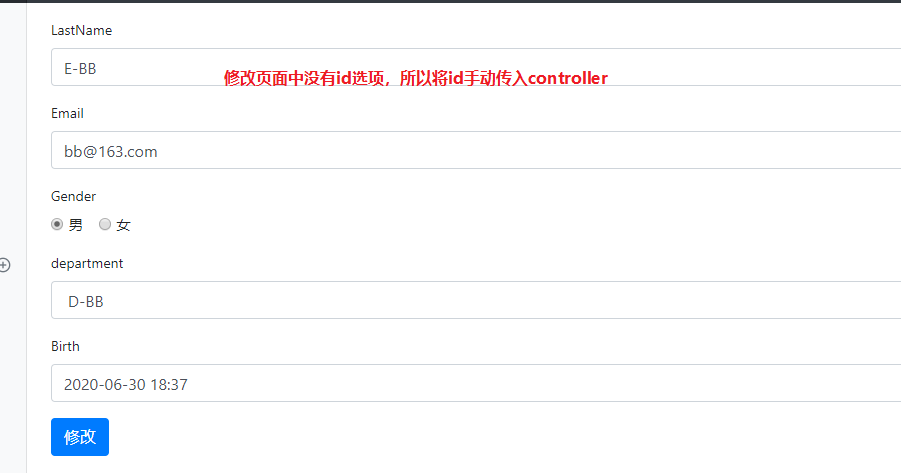
在add.html页面中将id传过去。

7. controller中的相关方法
        //来到修改页面,查出当前员工,在页面显示
        @GetMapping("/emp/{id}")
        public String toEditPage(@PathVariable("id") Integer id, Model model){
            Employee employee = employeeDao.get(id);
            model.addAttribute("emp", employee);

            //页面要显示所有的部门列表
            Collection<Department> departments = departmentDao.getDepartments();
            model.addAttribute("departs",departments);

            //回到编辑页面(add是一个修改添加二合一的页面)
            return "emp/add";
        }

        //员工修改:PUT
        @PutMapping("/emp")
        public String updateEmployee(Employee employee){

            System.out.println("修改的员工数据:" +employee);

            employeeDao.save(employee);

            return "redirect:/emps";
        }
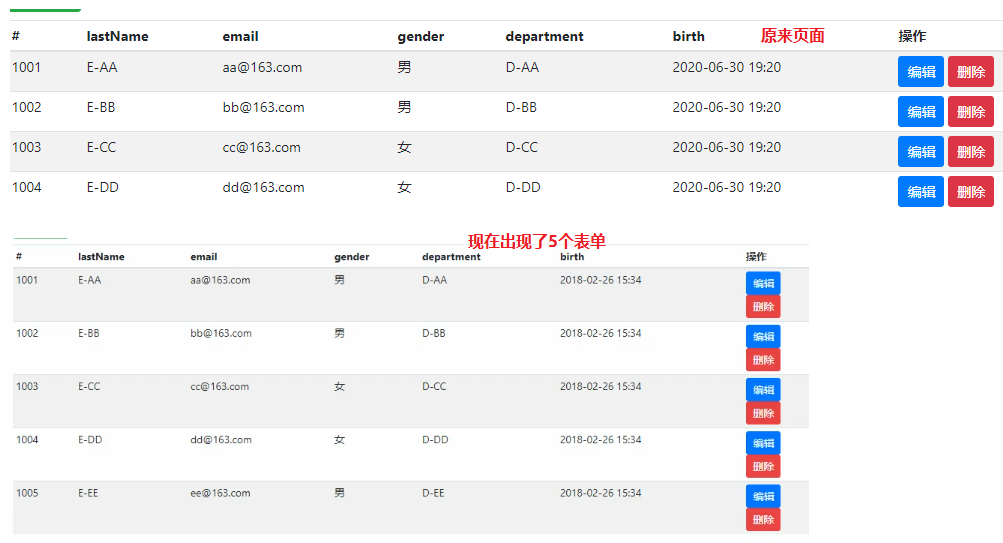
4.7 员工删除
    1. 删除操作是 DELETE请求

    2. 在提交的表单中创建一个input项, name="_method" value="put"; 值就是我们指定的请求方式

        这样会有个问题是:
            因为<form/>在<tr th:each="emp:${emps}"/>中,所以每遍历一个就会生成一个表单。
            会导致页面改变。
3. 解决
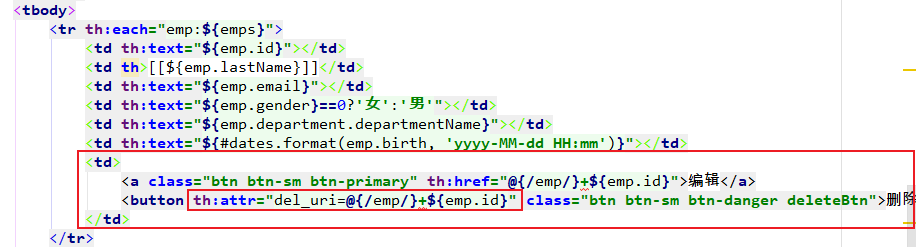
1. 自定义th属性
th:attr="key=value, key=value"
<button th:attr="del_uri=@{/emp/}+${emp.id}" class="btn btn-sm btn-danger deleteBtn">删除</button>
<button class="btn btn-sm btn-danger deleteBtn" del_uri="/crud/emp/1005">删除</button>
定义一个属性:del_uri="/crud/emp/id"
2. 将deleteForm表单拿出来
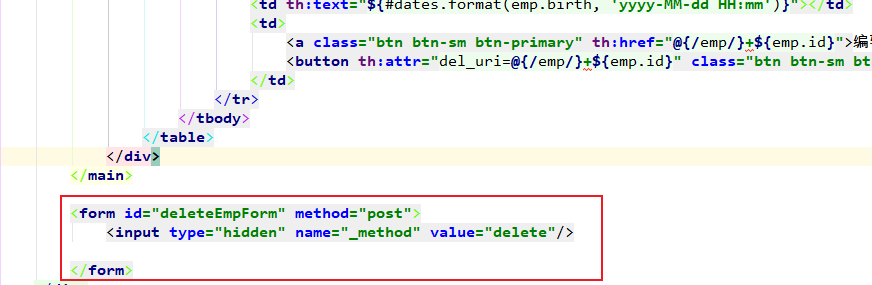
        3.  为deleteBtn设置一个点击事件。

            当点击删除按钮时,触发事件,获取deleteForm表单,设置属性action为自定义的属性
            del_uri="/crud/emp/id",然后在提交表单。

