

Koa 是我在Node学习中接触的第一个Web开发框架,刚开始使用时,只知道跟着这么用,却不明白为什么这样用,又是怎么实现的。最近跟着大佬学习了 Koa 的源码,写篇笔记记录下学习过程。
HTTP 服务器
Koa 是基于 Node 提供的 HTTP 模块的一个Web框架,将一个或多个Koa应用程序安装在一起以形成具有单个 HTTP 服务器的更大应用程序。
const http = require("http");
http.createServer((req, res) => {
    // 处理请求
    res.status = 200;
    res.setHeader("Content-Type", "text/html;charset=utf-8");
    // 结束请求并响应
    res.end("你好,世界!");
}).listen(3000, () => {
    console.log("服务器启动成功!");
});
运行以上代码,一个简单的 HTTP 服务器就搭建成功了,当有请求访问3000端口时,就会触发http.createServer内的请求处理函数,我们可以在该函数内针对不同请求,返回不同的响应结果。
了解 HTTP 服务器的初步搭建后,我们来开始阅读 Koa 的源码吧~
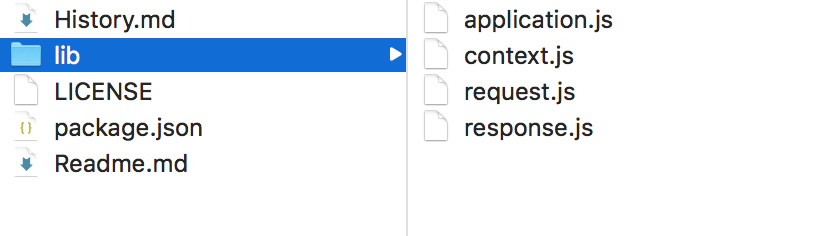
可以看到,Koa 的核心文件只有4个--application.js、context.js、request.js、response.js,其中application.js是 Koa 的主文件,其他几个js都集成在application.js,进行相应处理后,将 Koa 实例导出。
在正式学习 Koa 前,先确定一下学习的流程。就像要开发页面前得先给设计稿一样,得先知道想要实现的效果再去进行开发,我们开始了解 Koa 源码前,先设想我们想要的效果,再去思考源码实现。
完整的 Koa 应用示例:
const Koa = require("koa");
const app = new Koa();
app.use(async (ctx, next) => {
    ctx.status = 200;
    ctx.body = "你好,世界!";
});
app.listen(3000, () => {
    console.log("服务启动成功");
});
以上代码是 Koa 的简单应用,可以看到,此处没有引用 HTTP 模块,说明 HTTP 模块是在 Koa 内部引用、创建的,并且将处理方法进行了封装,只暴露了一个use方法挂载在 Koa 实例上;提供的中间件函数是一个异步方法,提供的参数ctx/next也不是createServer方法提供的req/res,而是Koa重新定义的。
那我们将这几个不同分步来进行学习:
- HTTP 模块、
use方法的封装 ctx对象的封装next方法的封装
HTTP 模块、use方法的封装
demo1.js
const Koa = require("koa");
const app = new Koa();
app.use((req, res) => {
    res.status = 200;
    res.end("你好,世界!");
});
app.listen(3000, () => {
    console.log("服务启动成功");
});
application.js
const http = require("http");
module.exports = class Application {
    constructor() {
        this.callbackFunc;
    }
    listen(...args) {
        // 将server封装在listen方法中,
        const server = http.createServer(this.callback());
        server.listen(...args);
    }
    callback() {
        return (req, res) => {
            // 实际的请求处理函数
            this.callbackFunc(req, res);
        }
    }
    use(fn) {
        // 将传入use方法的中间件函数先存储起来
        this.callbackFunc = fn;
    }
}
node demo1.js
ctx对象的封装
demo2.js
...
app.use((ctx) => {
    ctx.status = 200;
    ctx.res.setHeader("Content-Type", "text/html;charset=utf-8");
    ctx.body = ("你好,世界!");
});
...
我们先来稍微分析一下ctx对象,它是一个上下文对象,这里的上下文是 Koa,那么这个对象指向的this就是当前使用的 Koa 实例。通过该对象可以访问req/res,那么这两个参数也都挂载到了ctx上,并且还能将其他方法、属性挂载上去。在中间件函数中,不会有res.end()方法,说明在 Koa 里面封装了请求结束的方法。
context.js
阅读context.js,其中有一段代码是关键:
// 设置代理库 委托代理
const delegate = require('delegates');
const proto = module.exports = {
    ...
}
/**
 * Response delegation.
 */
delegate(proto, 'response')
  .method('attachment')
  .method('redirect')
  .method('remove')
  .method('vary')
  .method('has')
  .method('set')
  .method('append')
  .method('flushHeaders')
  .access('status')
  .access('message')
  .access('body')
  .access('length')
  .access('type')
  .access('lastModified')
  .access('etag')
  .getter('headerSent')
  .getter('writable');

/**
 * Request delegation.
 */

delegate(proto, 'request')
  .method('acceptsLanguages')
  .method('acceptsEncodings')
  .method('acceptsCharsets')
  .method('accepts')
  .method('get')
  .method('is')
  .access('querystring')
  .access('idempotent')
  .access('socket')
  .access('search')
  .access('method')
  .access('query')
  .access('path')
  .access('url')
  .access('accept')
  .getter('origin')
  .getter('href')
  .getter('subdomains')
  .getter('protocol')
  .getter('host')
  .getter('hostname')
  .getter('URL')
  .getter('header')
  .getter('headers')
  .getter('secure')
  .getter('stale')
  .getter('fresh')
  .getter('ips')
  .getter('ip');
其中proto对象就是ctx对象,里面使用了delegate方法将其他对象的一些属性挂载到ctx对象上,从而ctx也能访问到这些属性。这里的delegate是一个代理库,如果不依赖这个库,写一段简单的代码实现对象间的属性复制:
let proto = {};
function delegateSet(property, name) {
    proto.__defineSetter__(name, function (val) {
        this[property][name] = val;
    });
}
function delegateGet(property, name) {
    proto.__defineGetter__(name, function () {
        return this[property][name];
    })
}
request.js
request.js主要是定义一些Request对象的属性和方法,以供使用:
const url = require('url');
module.exports = {
    get query() {
        return url.parse(this.req.url).query;
    }
};
response.js
response.js主要是定义一些Response对象的属性和方法,以供使用:
module.exports = {
    get body() {
        return this._body;
    },

    set body(data) {
        this._body = data;
    },

    get status() {
        return this.res.statusCode;
    },

    set status(statusCode) {
        if (typeof statusCode !== 'number'){
            throw new Error('Something is wrong!');
        }

        this.res.statusCode = statusCode;
    }
};
context.js
let proto = {};
// __defineSetter__/__defineGetter__ 是新出的方法,代替了Object.defineProperty方法
function delegateSet(property, name) {
    proto.__defineSetter__(name, function (val) {
        this[property][name] = val;
    });
}
function delegateGet(property, name) {
    proto.__defineGetter__(name, function () {
        return this[property][name];
    })
}

let requestSet = [];
let requestGet = ['query'];

let responseSet = ['body', 'status'];
let responseGet = responseSet;

requestGet.forEach(ele => delegateGet('request', ele));
requestSet.forEach(ele => delegateSet('request', ele));
responseSet.forEach(ele => delegateSet('response', ele));
responseGet.forEach(ele => delegateGet('response', ele));
module.exports = proto;
application.js
const http = require("http");
const response = require("./response");
const request = require("./request");
const context = require("./context");

class Application {
    constructor() {
        this.callbackFunc;
        // Object.create 在现有对象的__proto__基础上创建新对象
        this.context = Object.create(context);
        this.request = Object.create(request);
        this.response = Object.create(response);
    }
    listen(...args) {
        // 将server封装在listen方法中,
        const server = http.createServer(this.callback());
        server.listen(...args);
    }
    callback() {
        let fn = this.callbackFunc;
        return (req, res) => {
            // 实际的请求处理函数
            let ctx = this.createContext(req, res);
            this.callbackFunc(ctx);
            this.responseBody(ctx);
        }
    }
    use(fn) {
        // 将传入use方法的中间件函数先存储起来
        this.callbackFunc = fn;
    }
    // 创建ctx上下文对象
    createContext(req, res) {
        let ctx = Object.create(this.context);
        ctx.request = Object.create(this.request);
        ctx.response = Object.create(this.response);

        ctx.req = ctx.request.req = req;
        ctx.res = ctx.response.res = res;
        return ctx;
    }
    // 处理请求结果
    responseBody(ctx) {
        let content = ctx.body;
        if (typeof content === 'string') {
            ctx.res.end(content);
        } else if (typeof content === 'object') {
            ctx.res.end(JSON.stringify(content));
        }
    }
}
module.exports = Application;
node demo2.js

next方法的封装
emm...还没写完,写完即刻更~~~
本文旨在记录和分享学习心得,如若有更好的见解,欢迎留言讨论,谢谢~~~
